Half-Life 2 Vehicle Chapters Guide: Airboat, Buggy, and Every Fight in Between
Water Hazard and Highway 17 are the chapters most people say they skip on replays. Almost all of that is because players drive them like a shooter. Here is how the airboat gun, the Tau Cannon, and the vehicles themselves actually work.
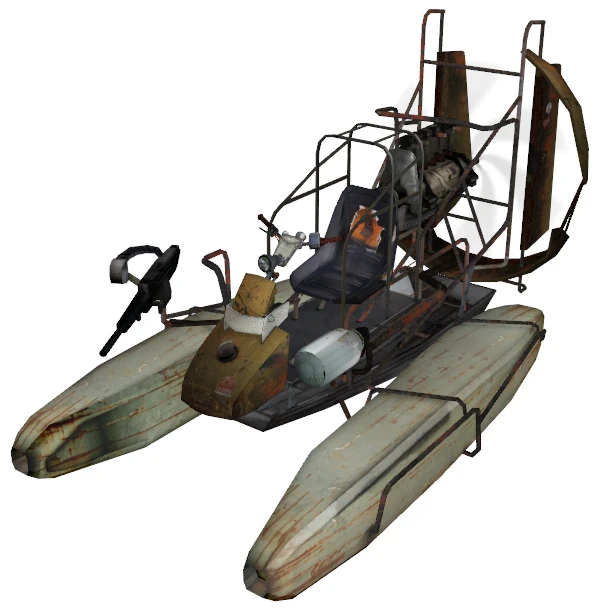
Ask a room full of Half-Life 2 players which chapters they skip on a replay and you get the same two answers: Water Hazard and Highway 17. Too long, combat too loose, handling like a shopping cart. It has been repeated so often that people arrive at Chapter 4 already annoyed.
It is also mostly a skill issue, and a specific one. Both vehicle stretches are built around an idea the game never states out loud: the vehicle is the weapon, and the gun bolted to it is a burst weapon. Players who treat the airboat as a taxi with a machine gun spend twenty minutes holding the trigger down on an empty ammo gauge and conclude the chapter is padding.
Here is what is actually going on across Route Kanal, Water Hazard, Highway 17 and Sandtraps.
Why the vehicle chapters get a bad rap
Valve is partly to blame. Both vehicles are handed over with zero tutorial, both mounted guns behave nothing like your handheld weapons, and both chapters open with minutes of pure traversal before the first real fight. That opening stretch is what people remember.
The bigger problem is that these are the only chapters where the correct answer to an enemy is often "drive past it." Half-Life 2 spends three chapters teaching you to clear a room, then asks you to stop. Stop the boat to fight every Metrocop on every catwalk and you are a stationary target in front of a firing line.
The airboat: Route Kanal into Water Hazard
You get the airboat at the end of Chapter 3, Route Kanal, at Station 6, from a resistance member named Arlene. Water Hazard, Chapter 4, is the whole ride.
Two mechanical facts that change how you should drive it:
- The airboat cannot be destroyed. Its health is not a large number, it is nothing. You can slam it into concrete at full speed all day.
- It is close to impossible to flip. Roll it 180 degrees and it will almost always right itself. That is deliberate, and the reason is elegant: you do not have the gravity gun yet, so an upside-down airboat would be an unrecoverable dead end.
Together they make the boat a battering ram you cannot break. Before you have the gun, ramming a Civil Protection officer standing in a channel is a completely legitimate answer.
The unarmed run, and what to do with it
The first stretch of Water Hazard is unarmed, and it is not a stealth section. Speed is the defence. The one setpiece worth slowing for is Gate 5, where two manned pulse turrets sit in a control tower and you use them to drive the Hunter-Chopper off. The Civil Protection units guarding that tower never man them themselves, which is the most on-brand piece of Combine incompetence in the game.
You will also hit two resistance springboard puzzles that gate progress. Both are counterweights: one wants heavy props piled on the low end, the other specifically wants blue barrels. If you are stuck on the water with nowhere to go, you are parked in front of one of these and have not looked up.
The mounted gun is a burst weapon
After the chopper loses you in a tunnel, you reach a hidden resistance station where a vortigaunt bolts a cannon to the bow. It is not resistance tech. It is the gauss cannon stripped off a downed Hunter-Chopper, which is why it hits like a Combine weapon rather than a scrap gun.
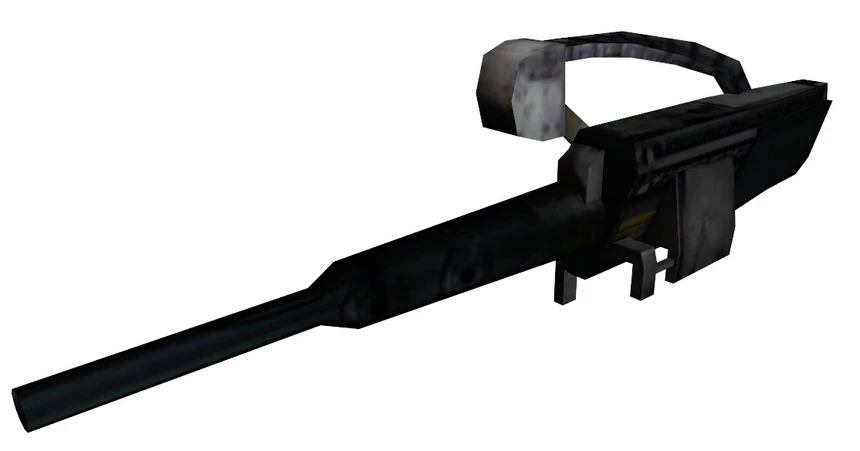
The ammo recharges as you use it, so there is no pickup and no reload. That sounds like infinite ammo and is not. Held down continuously, the gun runs dry in roughly two seconds. Fire in short taps, let the meter climb, tap again. Players who never work this out spend the back half of the chapter clicking an empty gun at a helicopter.
What it can do once you are firing it properly:
- Punch through APC armour. The Combine APC has 750 health per the Prima guide and is otherwise an explosives problem. The airboat gun just deletes it.
- Shoot down APC missiles. Their guided rockets are objects with hitboxes, and your gun kills them in flight, exactly like a gunship swatting your RPG.
- Kill everything organic in the canals without you leaving the seat.
Getting it also pops Heavy Weapons, worth 5G, sibling to the 5G Anchor's Aweigh! for the boat itself.
Killing the Hunter-Chopper
The chopper chases you for miles and then commits to a straight fight in a dam basin. It is the first genuinely tanky enemy in the game: 5,600 health, a crew of two, and a pulse turret with at least three firing modes, one of which charges up and fires for six or seven straight seconds.
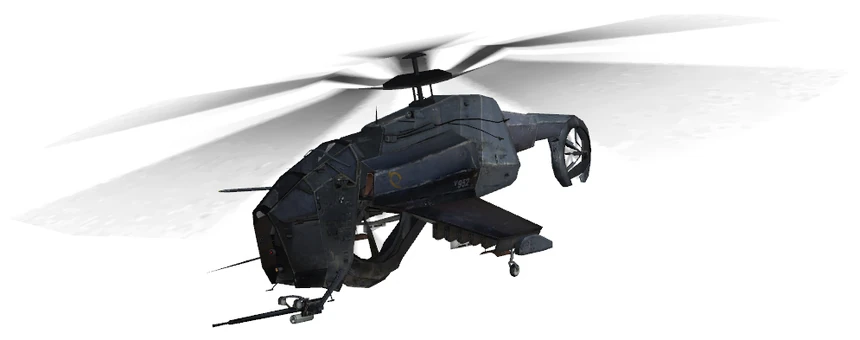
Three things decide this fight:
- Listen for the wind-up. The turret makes a distinct charging sound before it fires. That sound is your cue to be moving between cover, not your cue to start shooting.
- Fire in bursts while circling. Pieces physically break off as you damage it, and a crew member's body eventually falls out of the cockpit. That last part is the trap: it is purely cosmetic. The gun keeps firing and the aircraft does not fall.
- Survive the death throes. When it is nearly dead the chopper sounds a siren and carpet-bombs the area as a last act. The mines it drops are buoyant, which makes them nasty against a boat. Sit in the gaps between the falling waves rather than trying to outrun them.
Kill it and you get Revenge!, worth 10G, a properly petty name for a chapter-long chase.
One number proves the airboat gun is the intended answer: cheat an RPG into your inventory early and it takes 55 rocket hits to bring the chopper down. Outside of Lost Coast, no Hunter-Chopper in the series is meant to be fought with rockets.
The water is not a shortcut
Swimming out into the open ocean kills you in seconds, and the reason is leeches. In Half-Life 1 they were a minor nuisance you could shoot. In Half-Life 2 they cannot be killed at all, and the Prima guide puts their bite at 10 damage against roughly 1 per second in the original.
They are not really an enemy. The entity behind them is named trigger_waterydeath, which tells you the design purpose outright: they are the map boundary wearing a costume. On the coast, water is a wall. If a route looks like it goes out to sea, it does not.
The buggy: Highway 17 into Sandtraps
After Ravenholm you arrive at Shorepoint Base on Pier 87, where Leon hands over the resistance Scout Car. Alyx names it herself: the one her dad rigged with the Tau Cannon.
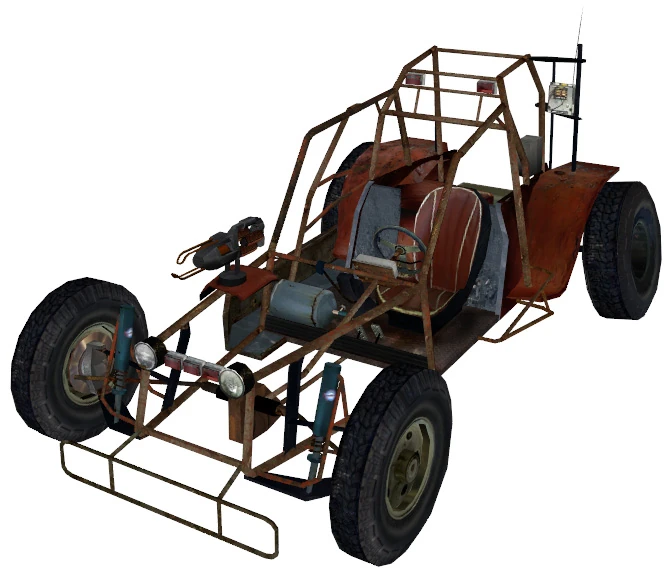
The spec sheet matters more than it sounds. One seat, dune buggy frame, rear-wheel drive, a small V8 fed by a propane tank welded next to your leg, and a top speed of 35 mph, or 50 with turbo. That is slow, and Highway 17 is several in-game miles of coast road. The chapter is long by design.
The most under-used feature on it: shortly before you arrive, a rebel named Noriko bolted an SMG ammo crate to the back. It is a free, infinite SMG refill that travels with you for two chapters. Top off every time you get in.
Two quirks that catch people out. Driving into deep water floods the engine and it will not restart, so you get to drag it out with the gravity gun. And the headlights do not work, nor can you use your flashlight while seated — the night stretches are meant to be driven half-blind.
The Tau Cannon has two modes and you need both
The Tau Cannon is Black Mesa hardware, an experimental particle weapon that predates the Combine entirely, and this mounted version is a better model than the one Gordon carried in Half-Life 1.
Primary fire is semi-automatic yellow beams: moderate damage, high rate, ideal for Combine soldiers, zombies and clearing debris off the road.
Secondary fire charges into a white-hot beam that penetrates multiple targets and shoots through walls, detonating on the far side. The mounted version holds a full charge indefinitely and never runs out of ammo, which removes both things that made the original dangerous to its owner. In Half-Life 1, a fully charged gun not fired within about ten seconds discharged catastrophically and took 50 points off you. Here you can sit on a charge as long as you like.
The limitation that gets people killed: the Tau Cannon is useless against Combine APCs. Their armour is built to reflect energy weapons. If an APC is in your way, the answer is grenades, SMG grenades or rockets, never the car gun.
Turbo is a trap, with two exceptions
Turbo gives a big burst of speed and makes steering nearly impossible while it lasts. Use it in open straights and on steep climbs, nowhere else.
The exception is close to mandatory. Holding the turbo key while turbo is on cooldown still gives a weaker boost, visible on the speedometer and in the FOV shift. After the May 26, 2010 update reworked the buggy's physics, stacking that weaker boost on top of turbo is near-required to outrun the Razor Train on the rail bridge driving forward. If that sequence feels impossible on a modern install, this is why.
The buggy can actually fail your run
Unlike the airboat, the Scout Car can be lost, and losing it is a hard failure. Drive it off a cliff or let the Razor Train hit it during Highway 17 or Sandtraps and the game throws a failure message and sends you back to your last save. There is no on-foot fallback.
You eventually park it in a garage near Lighthouse Point once the resistance tells you the Combine are hunting the vehicle specifically, then watch a dropship carry it away.
Sandtraps: the ground is the enemy
Chapter 8 takes the car away and replaces it with the best traversal puzzle in the game. Antlions burrow in the sand along the coast, and they are blind. They hunt by vibration. Walking on rock, concrete, wreckage or planks does not call them. Walking on open sand does.
That is the whole chapter. Every debris trail and every plank someone left across the dunes is a route, and the game is watching whether you noticed.
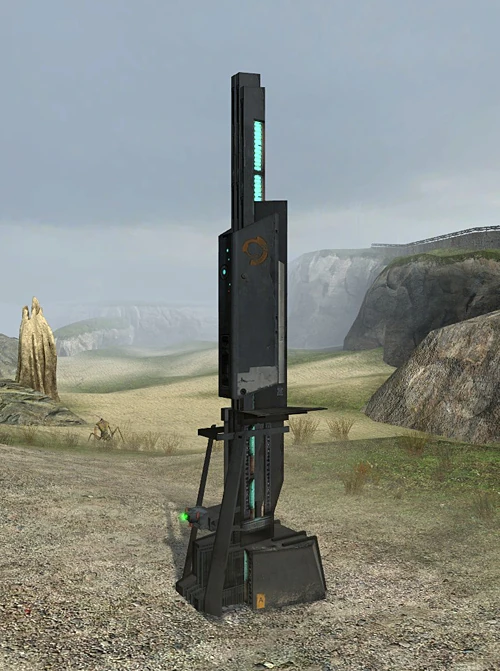
Thumpers are the other half of the system. These are Combine perimeter restrictors that slam a heavy piston into the ground, and the vibration drives antlions back out of the radius. The Combine strung a network of them along Highway 17 and around Nova Prospekt. On the Sandtraps beach you find one that is dead, and getting it running means locating a generator trailer some distance away and starting that instead. It is one of only two indirectly powered devices in the game, the other being the force field at the Petroleum Station.
The chapter ends by handing you the antlions themselves. You beat an antlion guard, a vortigaunt cuts a pheropod out of the corpse, and from that point on you are throwing bug bait instead of avoiding sand.
The two fights people reload the most
The gunship at New Little Odessa
Highway 17 is where you meet Colonel Odessa Cubbage, get the RPG, and fight your first Combine gunship. It is a wall for a lot of players because the obvious tactic is the wrong one.
Gunships prioritise incoming missiles over everything else, including you. Fire a rocket in a straight line and the gunship shoots it out of the sky, every time. The RPG's laser designator exists specifically for this: steer the missile in loops and rolls, keep it alive, then bring it around and hit the gunship from behind. If one is directly overhead, a straight shot up at its belly sometimes lands before it registers the threat.
The numbers, from the Prima guide: a gunship dies in 3 hits on Easy, 5 on Medium, 7 on Hard. Other explosives work too, and they take fixed percentage chunks by difficulty: 34% on Easy, 21% on Normal, 15% on Hard. So an SMG grenade is worth roughly a seventh of a gunship on Hard. Not nothing, when the rocket crate is on the far side of the yard.
The APC force field at the Petroleum Station
A little further along, the road is blocked by a force field and the buggy cannot pass. There is no switch, no fuse box, no shootable generator.
The APC parked nearby is the generator. It is powering the field through a cable, and the solution is physical: pull out the parking wedges under its wheels so it rolls off the cliff, which yanks the cable free and drops the field. Shooting the APC accomplishes nothing useful, and your Tau Cannon in particular bounces straight off it.
What Valve cut from these chapters
The design history explains a couple of things that feel odd in the shipped game.
The airboat started life as a jet ski that playtested badly. Its replacement made testers physically sick, because the camera was rigidly attached to the hull and every bump was magnified; programmer Adrian Finol reportedly threw up after a long session. Handlebars, pontoons and roll cage were redesigned to fix it.
The airboat was also originally destroyed in the jump over the dam. Black Mesa East would have opened with you standing in the wreckage. Playtesters hated losing it, the team argued about whether that sense of loss was worth keeping, and Valve left the boat intact. David Speyrer's line about it in the developer commentary is the best sentence on that track: some say that airboat is still out there waiting for you.
The buggy had a cut too. A vortigaunt was going to detach the Tau Cannon at Lighthouse Point so you could carry it on foot, and the files still hold the unused animations, the removal script entity and four unused closed captions for it.
And the chopper's signature move was a bug. Brian Jacobson was writing a strafing gun attack and accidentally set the aircraft to drop bombs instead, which destabilised the game. He liked it enough to keep it, tuned down to fewer bombs in a tidier pattern. The most memorable thing the Hunter-Chopper does is a mistake nobody fixed.
Quick Action Checklist
- Stop trying to preserve the airboat; it cannot be destroyed or flipped, so ram Civil Protection units with it during the unarmed stretch.
- At Gate 5, use the two tower pulse turrets to drive the Hunter-Chopper off, and solve the springboard puzzles with counterweights (heavy props for one, blue barrels for the other).
- Once the gun is mounted, fire in short bursts; continuous fire empties it in about two seconds.
- Use that gun to shoot down incoming APC missiles, not just the APCs.
- In the dam fight, move on the turret wind-up sound, ignore the crew corpse falling out, and weave between the bomb waves when the siren starts.
- Never swim out to sea; leech water is an instant-death boundary, not a route.
- Refill SMG ammo from the crate bolted to the back of the buggy every time you get in.
- Charge Tau Cannon secondary fire for grouped enemies and targets behind walls, and never aim it at an APC.
- Save turbo for straights and hills, and stack the cooldown boost to beat the Razor Train on the rail bridge.
- Treat the buggy as mission-critical; losing it to a cliff or the train is a hard fail and a reload.
- On the Sandtraps beach, stay on rock, planks and debris, and power the dead thumper via the generator trailer.
- Against the New Little Odessa gunship, steer RPG rockets in loops and strike from behind; it dies in 3, 5 or 7 hits depending on difficulty.
- At the Petroleum Station, pull the APC's parking wedges and let it roll off the cliff to drop the force field.
Frequently Asked Questions
Where do you get the airboat in Half-Life 2?
How do you get the gun on the airboat in Half-Life 2?
Why does the airboat gun keep running out of ammo?
How do you beat the Hunter-Chopper in Half-Life 2?
Can you destroy the buggy in Half-Life 2?
How do you get past the force field on Highway 17?
How do you avoid antlions in Sandtraps?
Keep Reading
- Half-Life Wiki — Airboat acquisition, mounted gun and handling
- Half-Life Wiki — Scout Car specifications, turbo behaviour and failure states
- Half-Life Wiki — Hunter-Chopper health, weapons and attack patterns
- Half-Life Wiki — Combine Gunship RPG hit counts and explosive damage by difficulty
- Half-Life Wiki — Thumper antlion deterrence and the Sandtraps generator trailer
Related Guides
Half-Life 2 Difficulty: What Easy, Normal and Hard Change
The menu says Hard makes enemies very tough. The code says the Combine soldier has the same 50 health on every setting, and the thing that got weaker is you. Here is exactly what each Half-Life 2 difficulty changes, and the handful of things it cannot touch.
Half-Life 2 Ravenholm Guide: Survive the Trap Town Without a Shotgun
Ravenholm is where first playthroughs die. You walk into Chapter 6 with a crowbar, a pistol, an SMG that sprays, and no shotgun, into a town packed with zombies. The game is not being unfair. It is telling you to stop shooting and start using the town against itself.
Half-Life 2 Enemies Guide: How to Kill Everything in City 17
Half-Life 2 barely names its monsters, let alone tells you how to fight them. Here is the full bestiary, from the pumpkin-sized headcrab to the walking artillery of a strider, and the single fastest way to put each one down.
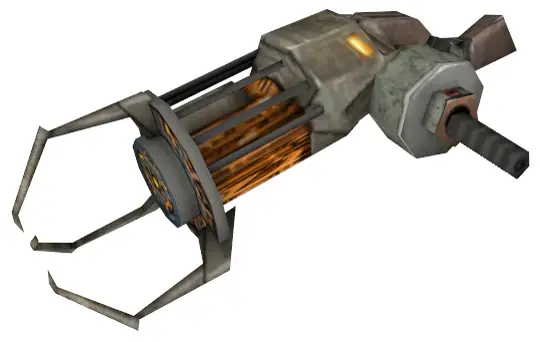
Half-Life 2 Gravity Gun Guide: Every Trick It Can Do
Most players finish Half-Life 2 using the gravity gun to stack crates and clear debris. It also one-shots Combine soldiers, disarms hopper mines, turns manhacks into a chainsaw, and flips antlion guards onto their weak side. Here is the full toolkit.
Half-Life 2 Beginner's Guide: Start Strong in City 17
Half-Life 2 never stops to explain itself, which is why new players stall in Ravenholm with no shotgun ammo and no idea the gravity gun was the answer. Here is the chapter map, the systems the game hides, and the mistakes that waste your first playthrough.
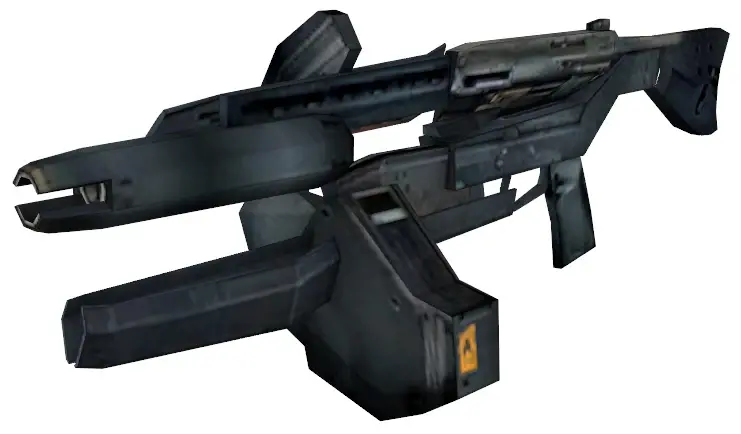
Half-Life 2 Weapons Guide: Damage Numbers That Matter
The Half-Life 2 SMG does four damage a bullet. The crossbow does one hundred. That gap explains almost everything about how the game wants you to fight, and most players never see the numbers.