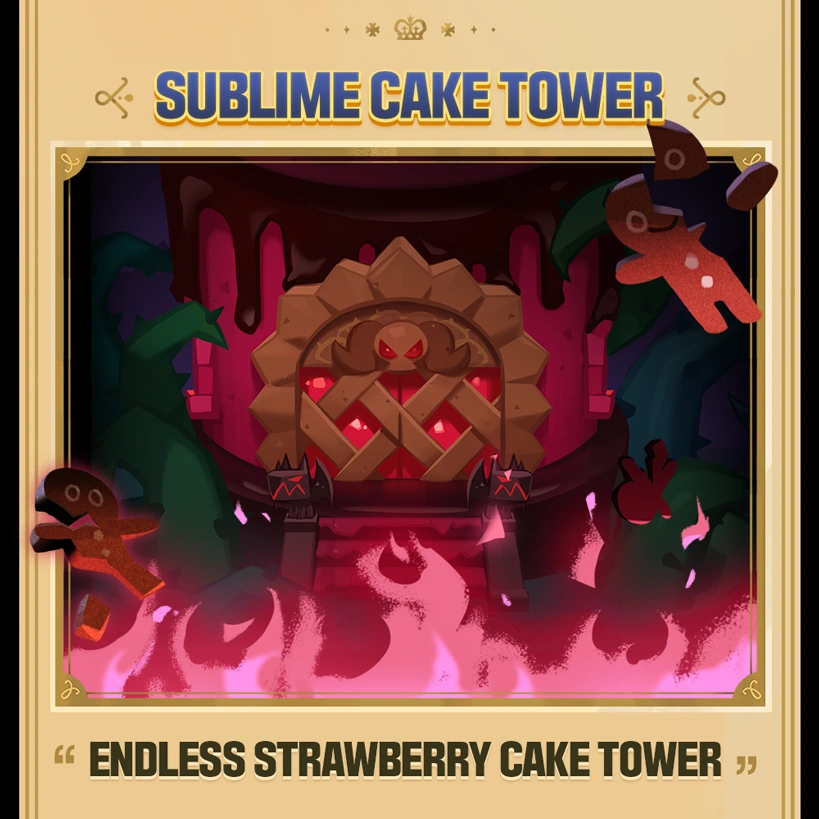
Endless Strawberry Cake Tower Walkthrough (2026) — Tray Strategy & Comps
Endless Strawberry is the Cake Tower that ignores your toppings entirely — every cookie gets normalized to 4-star level 70 and your gear, bonds, and landmarks switch off. That flips the whole strategy from "who is built" to "whose kit is good." Here is the full Endless Strawberry walkthrough for 2026.
Most CRK guides tell you to grind toppings before you tackle a hard mode. Endless Strawberry Cake Tower laughs at that advice, because it switches your toppings off the moment you step in. This is the tower where your spreadsheet of perfect substats means nothing and the only thing that matters is whose kit is actually good. Here's how to climb it.
Why Endless Strawberry is not just another tower
Endless Strawberry is one of the trays under the Sublime Cake Tower umbrella — the mode CRK built as the successor to the old, retired Tower of Sweet Chaos. Its theme is Heaven-Splitting Lightning, all pink glaze and crackling storm, and like the rest of Cake Tower it costs you nothing to attempt: no stamina, no entry currency, no items burned per run. You can throw yourself at a tray as many times as it takes.
The hook that makes it worth your time is the reward model, and it's the opposite of a grind mode. Beating a tray unlocks the next one and pays out a significant one-time reward — and that's it. Unlike a refreshing daily or weekly mode, the rewards in Sublime Cake Tower do not reset. Clear a tray once and you've banked its payout permanently; there's nothing to re-farm. That makes Endless Strawberry a pure progression climb: every tray you can reach is free account power you didn't have before.
But the thing that actually defines how you play it isn't the rewards. It's a single rule that throws out most of the advice you've internalized from every other mode.
The rule that changes everything: no gear

Here's the rule: when you add a cookie to your Endless Strawberry team, the game automatically upgrades it to at least 4-star and level 70 for the run. Your level-18, 1-star bench cookie fights at the same baseline as your maxed main. That sounds generous, and it is — but it cuts both ways, because the normalization is the ceiling, not a floor on top of your investment.
The mode strips your account advantages to put everyone on the same footing. So the question stops being "which of my cookies is built?" and becomes "which of my cookies has the best kit at a flat baseline?" If you've been carrying a mediocre cookie through other content on the strength of god-tier toppings, that crutch is gone here. And if you own a cookie with a fantastic kit that you never bothered to gear, this is the one mode where it performs at full strength for free.
What is disabled and what still works
The full list of what Endless Strawberry switches off is longer than people expect, and missing it is why players bring the wrong team. Disabled inside the tower:
| Disabled | Still active |
|---|---|
| Toppings and topping bonus effects | Cookie skills and skill levels |
| Bonds | Cookie position (front/mid/rear) |
| Sugar Gnome Laboratory upgrades | Treasures |
| Costume Sets | Team synergy from skill kits |
| Guild Level and Guild Relics | The 4-star / level 70 normalization |
| Landmarks and the Statue of Heroic Radiance |
Read that table twice before you build. Toppings are off. Every "best toppings for X" sheet — including the ones on this very site — is irrelevant the moment you enter. The same goes for Bonds, the Sugar Gnome Lab, costume bonuses, and your guild investment. What you keep is the part that's actually a kit: each cookie's skill, their position, and your treasures, which remain one of your only real levers in the mode.
How the tower is structured
The trays are not balanced linearly. They sit in clean difficulty bands, and the comp you bring should shift as you climb. Auto-running across a difficulty break is the single biggest reason a climb stalls.
| Band | Trays | Difficulty | What changes | Realistic clear |
|---|---|---|---|---|
| Early | first stretch | Warm-up | Light waves, forgiving timings | Any strong-kit team |
| Mid | through the 30s | First wall | Enemy HP and damage spike, boss trays appear | Strong-kit comp, treasures tuned |
| Boss gate | Tray 40 area | Hard checkpoint | Shielded boss, ranged-buff requirement | Specialist comp, manual play |
| Deep | beyond 40, 50+ | Endgame wall | Top-end enemy kits, tight timings | Best-kit comp, manual cycling |
The early band is your warm-up — bring strong kits and brute-force it. The mid band is where most accounts learn that "my best-geared team" and "my best-kit team" aren't the same roster. The Tray 40 boss gate is a hard checkpoint with its own rules. And the deep trays beyond it are kit-and-execution checks, not gear checks, because there's no gear to check.
Reward cadence and the one-time payout
Because the payouts are one-time, the math is simple: every tray you clear is permanent account progress, and there's no reason to ever re-run a tray you've already beaten. Spend your attempts pushing the highest tray you can almost clear, not farming completed ones — there's nothing left in them. If you stall, the answer is a comp or treasure change, not "run it again for more drops."
The trap is treating Endless Strawberry like a farm. It isn't one. Every tray pays out exactly once. Re-clearing a tray you've already banked is pure wasted time — push the next one instead.
Comp priorities when gear does not count
You don't need a wall of maxed cookies for this tower. You need cookies whose kits carry at a flat 4-star, level-70 baseline. Here's how to think about who to bring.
The pattern that wins: a durable anchor whose survival comes from their kit rather than from stacked DMG Resist toppings, a strong skill-based damage dealer, and utility cookies whose value is in what their ability does, not in how their substats are tuned. Sustain and crowd control matter more than they do in geared modes, because you can't paper over a fragile team with a perfect topping sheet — the team either survives on kit or it doesn't.
This is exactly why some cookies that sit mid-pack on the geared tier list overperform here, and why a couple of topping-dependent damage carries quietly underperform. If a cookie's whole identity is "scales hard with the right toppings," they lose that edge in a mode with no toppings. Lean on cookies with self-sufficient kits: built-in shields, reliable heals, hard crowd control, and skill-based damage that doesn't need an ATK substat sheet to hurt. The best Ancient cookies ranked list is a good shortlist, since most Ancients carry strong baseline kits.
Per-tier strategy: the early trays
Run the early band on auto with your strongest-kit team and don't overthink it. The opening trays can't threaten a comp built around a durable anchor and a healer, and the normalization means even your lightly-used cookies pull their weight. Use this stretch to learn which of your cookies feel good without their toppings — you'll be surprised which ones still hit hard and which ones suddenly feel hollow.
The common early mistake is bringing your geared Arena team on muscle memory. Some of those picks are topping-carried, and you'll feel them sag the moment the difficulty ticks up. Note which ones, and start planning the swap before you hit the wall rather than after it costs you a dozen attempts.
Per-tier strategy: the mid trays
This is where the climb stops being free. Enemy HP and damage spike, and boss trays start showing up with their own mechanics. Two sustain pieces becomes the comfortable baseline here, same as it is in Decadent Choco Tower — but for a different reason. In Decadent Choco you stack cooldown toppings to keep heals flowing; here you can't, so you lean on cookies whose heals and shields are simply strong at baseline and on treasures to shave cooldowns instead.
Watch the screen from the first boss tray onward. Auto-AI fires kits in a fixed pattern and will waste a key cooldown — a cleanse, a shield, a lockdown — on the wrong wave. Manual the boss trays so you control when your big skills land.
The Tray 40 boss and the ranged buff

Tray 40 is one of the tower's nastiest checkpoints, and it has a specific gimmick worth knowing before you waste attempts. The main boss is the Doom Star X-1 Protection Unit, and it sits behind a shield bar that takes about 30 seconds to expire on its own — unless you attack it down faster. So this is a tray that rewards sustained damage onto the shield, not a single burst that whiffs while the shield is still up.
The bigger thing players miss: Tray 40 has a buff you only get by fielding three Ranged cookies on your team. That's a hard team-composition requirement, not a suggestion — stack ranged damage and you unlock the edge that makes the tray (and the similarly-structured Tray 50) clearable. Cookies like Silverbell, Wind Archer, and other strong ranged kits earn their slots here specifically because of that buff plus their reach onto the shielded boss. The best PvE teams guide has the wider ranged-comp options if you're short on bodies.
Per-tier strategy: the deep trays

Past the Tray 40 gate, the deep trays are pure kit-and-execution checks. The enemies bring top-end kits of their own, the timing windows tighten, and there's no gear lever left to pull — you've already got everything the mode will give you at 4-star, level 70. What separates a clear from a wipe up here is comp selection and manual play, full stop.
The throughline from the boss gate holds: ranged damage and self-sufficient sustain carry the deep trays. Keep the three-ranged core that beat Tray 40, slot the durable anchor that survives on kit rather than toppings, and round it out with whatever utility the specific tray punishes you for lacking — a cleanse against debuff-heavy trays, a hard lockdown against a single dangerous enemy skill. White Lily, for instance, brings a baseline cleanse-and-root package that lands at full strength here precisely because none of it depends on her toppings.
Manual cycling on boss trays
Auto-play does not clear the deep boss trays. The AI mis-times your key cooldowns often enough that one bad cast is the run, and on a shielded boss like the Tray 40 unit a wasted burst while the shield is still up is exactly the kind of mistake auto makes. Manual every boss tray. Watch for the wind-up animation on the dangerous wave, hold your control skill for it, and pour sustained damage onto shields rather than dumping your whole kit at once.
Manual play is the single biggest skill gap between players who stall at a boss tray and players who push past it. The comps are the same. The execution is not.
Expect the hardest trays to take a stack of attempts even with the right comp. Since the rewards are one-time and there's nothing to re-farm, that's fine — burn attempts freely on the tray you're trying to crack, because failing costs you nothing but time.
Treasures for tower runs
Treasures are one of the only investment levers Endless Strawberry leaves you, which makes them disproportionately important. With toppings off, the cooldown reduction and sustain you'd normally pull from a topping sheet has to come from somewhere — and treasures are where.
Lean on the same support-treasure logic that carries Decadent Choco Tower: party-wide cooldown reduction so your strong kits cycle faster, healing amplification to stretch the sustain you do have, and damage support for your ranged core on the shielded boss trays. A battle-start cooldown treasure is especially good here because it gets your control and sustain online during the opening exchange, before the tray's burst lands. The treasures guide covers the current best-in-slot options and how they stack — and since treasures are one of your few real choices in this mode, it's worth getting them right rather than running your Arena loadout on autopilot.
Common mistakes that wall your climb
The mistakes I see most often from players stuck on a tray:
- Building around toppings that don't exist here. Bringing a topping-carried damage carry and wondering why they feel weak. Their toppings are off. Bring strong kits, not strong gear.
- Auto-running boss trays. Auto is fine on the early band. From the first boss tray up, manual play or accept the wall — the AI wastes your key cooldowns.
- Ignoring the Tray 40 ranged requirement. Three Ranged cookies unlock the buff that makes Tray 40 and Tray 50 realistic. Skip it and you're fighting the tray with one hand tied.
- Bursting a shielded boss too early. The Doom Star X-1 Protection Unit's shield takes about 30 seconds to expire on its own. Dump your whole kit while it's up and you have nothing left when it drops. Sustained damage onto the shield, then burst.
- Re-farming cleared trays. Rewards are one-time. There is nothing in a tray you've already beaten. Push the next one instead.
The other one worth flagging: people pick who to bring off the geared tier list, but the cookies that top a geared ranking aren't always the cookies that carry a no-gear tower. A self-sufficient kit beats a topping-dependent one here every time.
The fastest upgrade you can make for Endless Strawberry isn't rerolling anything — there's nothing to reroll. It's swapping one topping-dependent carry for a cookie whose kit is strong at a flat baseline.
Quick Action Checklist
Before your next run, walk through this list:
- You understand toppings, Bonds, Sugar Gnome Lab, costumes, guild buffs, and landmarks are all disabled.
- Your comp is built around strong kits, not strong gear — sustain and crowd control that work at a flat 4-star, level 70.
- Two sustain pieces minimum once you hit the first boss tray.
- Three Ranged cookies in the comp for the Tray 40 (and Tray 50) buff.
- Treasures tuned for party cooldown reduction and sustain, not your Arena damage-amp loadout.
- You're manual-playing every boss tray, holding control skills for the dangerous wave.
- On shielded bosses, you pour sustained damage onto the shield before committing burst.
- You're pushing the highest tray you can almost clear, never re-running a banked one.
- You've checked the best Ancient cookies ranked list for self-sufficient kits to field.
If five of those aren't true on your current run, fix those first. You'll likely jump several trays before you ever blame the comp.
FAQ
Frequently Asked Questions
Keep Reading
Related Guides

Decadent Choco Tower Walkthrough (2026) — Floor Strategy & Comp Picks
Cake Tower expanded to 55 trays in v7.4 and most players stall at floor 30. The fix is not more damage. It is sustain, cooldown toppings, and a comp swap. Here is the full Decadent Choco walkthrough for 2026.
CRK Stat Caps Explained — Every Ceiling and the Buffs You Are Wasting
Cookie Run: Kingdom quietly enforces a ceiling on almost every defensive stat, and most teams smash through at least one of them without noticing. Here is every documented cap, the exact topping and treasure math that gets you there, and the one cap where overshooting still pays.

CRK Skill Powder Guide — The Level 41 Wall Nobody Warns You About
Skill levels are the cheapest raw power in Cookie Run: Kingdom right up until Level 41, where the cost multiplies by roughly seven. Here is the whole powder economy in actual numbers.

CRK Hall of Ancient Heroes Guide: 30 Free Levels You Skipped
The Hall of Ancient Heroes hands you thirty cookies at max-roster level for free, forever, and most players are running four or five slots because they set it up once in 2022 and never opened it again. It is the highest-value building in your kingdom and it costs nothing.

CRK Tier List May 2026 — PvE & PvP Rankings (Post-Timeline of Fate)
Timekeeper rewrote the Arena rulebook, Ash Salt is bullying World Exploration, and Eternal Sugar finally dropped a tier. Here is the May 2026 CRK tier list, sorted for PvE, PvP, and Guild Battle, with the F2P investment picks that actually matter.

CRK Toppings Guide (2026) — Every Set + Reroll Strategy
Most players lose more power to bad sub-stats than to missing the right Cookies. Here is every topping type, the sub-stat thresholds that matter, the best set for each role, and the reroll math that tells you when "good enough" actually wins.