Genshin Energy Recharge Guide — How Much ER You Actually Need
Xingqiu drops exactly five Hydro particles per skill cast. Standing on him when they land is worth 15 Energy. Swapping away first is worth 9. Same cooldown, same rotation, six Energy gone — and that is before you touch the Energy Recharge stat at all.

Your Burst Is Late and That Is a Build Problem
Xingqiu's Elemental Skill drops exactly five Hydro particles. If Xingqiu is the character standing on the field when those particles reach him, he pockets 15 Energy. If you have already swapped away and he is sitting off-field in a four-character party, he gets 9.
Same skill. Same 21-second cooldown. Six Energy gone because you pressed a swap button half a second early — and his burst costs 80, so you just threw away seven and a half percent of a rotation for free.
Nobody screenshots their Energy Recharge number. It has no colour on the character screen, it does not make a big number pop, and every build guide treats it as the boring line you fill in after CRIT. But a support who bursts every rotation and a support who bursts every other rotation are two entirely different characters, and the gap between them is almost always a stat you could have farmed in an afternoon.
This is how energy actually works in Teyvat, with the real conversion numbers rather than vibes.
What Energy Recharge Actually Multiplies
Energy Recharge is a percentage increase to the Energy you regenerate from each elemental particle and elemental orb you absorb. That is the entire stat. It does not do anything else.
Which means there is a whole category of energy in this game that Energy Recharge does not touch at all:
- Flat energy handed out by artifact sets like The Exile
- The energy your Normal and Charged Attacks occasionally generate on hit
- Flat energy restoration from talents, such as the Raiden Shogun's Musou Isshin ticks
If a source gives you energy directly, stacking Energy Recharge does nothing for it. If a source spawns a particle or an orb, Energy Recharge is a straight multiplier on what that pickup is worth. Every decision below flows from that split.
The Particle Conversion Table Nobody Memorizes
Here is the part most players never look up. The energy a pickup is worth depends on four things: whether it is a particle or an orb, whether its element matches the receiving character, whether that character is on the field, and how many characters are in your party.
These are the base values at 100% Energy Recharge.
| Character | Particle: Same Element | Particle: Different | Particle: Non-Elemental | Orb: Same Element | Orb: Different | Orb: Non-Elemental |
|---|---|---|---|---|---|---|
| Active | 3 | 1 | 2 | 9 | 3 | 6 |
| Inactive (4-character party) | 1.8 | 0.6 | 1.2 | 5.4 | 1.8 | 3.6 |
| Inactive (3-character party) | 2.1 | 0.7 | 1.4 | 6.3 | 2.1 | 4.2 |
| Inactive (2-character party) | 2.4 | 0.8 | 1.6 | 7.2 | 2.4 | 4.8 |
Read the top-left and bottom-middle of that table and the spread hits you: a same-element particle collected by the active character is worth 3 Energy. That same particle, wrong element, off-field, in a four-stack, is worth 0.6. That is a five-fold difference on an identical pickup.
Particles vs Orbs
Orbs are worth exactly three times a particle in every single cell. They are the big glowing ones, and they mostly come from enemies rather than from your own skills.
Elemental Skills generate particles, up to six at once, and some spit them out in smaller batches at intervals as they hit. Enemies drop particles or orbs when their HP crosses certain thresholds, with bigger enemies carrying more thresholds — up to four on a single enemy. Two useful details: enemy drops are elementally typed by enemy family, so Slimes always drop their own element while automatons always drop non-elemental, and if you heal an enemy back above a threshold it has already crossed, it will not drop that energy again.
Non-elemental pickups are the quiet middle option. They are worth 2 to an active character regardless of element, which is better than a mismatched elemental particle at 1. Ruin machines are not the worst energy farm in the game.
Party Size Quietly Changes the Math
Off-field characters do not receive the full active-character rate, and how much they lose depends on how many characters you have.
For 2, 3, and 4 characters in the party, an inactive character converts at 80%, 70%, and 60% of the active rate respectively. That is why the four-character rows above are the harshest — and a full four-stack is what you run in every serious Spiral Abyss chamber.
In Co-Op the count is based on characters you personally control, so in a two-player lobby the host is treated as having a two-character party and their bench converts at 80%. Your supports genuinely charge faster in Co-Op. That is not placebo.
Particle Funneling Is Free Energy
Here is the mechanic that turns the table above into a technique.
Particles and orbs only grant energy when they reach a character, not when they are generated. There is a travel window, and during it you can swap. So the character standing on the field at pickup time — not the character who cast the skill — is the one collecting at the fat 3-per-particle active rate.
That is particle funneling, and it is the single largest free damage upgrade available to a player who has already farmed their artifacts.
The classic case is the National team. Bennett's Pyro particles are worth 3 Energy each to Xiangling if she is the one on the field when they land, and 1.8 if she is not. Bennett does not need the energy nearly as badly as she does — his burst costs 60, hers costs 80. Cast, swap, collect. You are moving energy from the character who does not need it to the one who does, and it costs you nothing but timing.
Two caveats worth knowing before you build a rotation on it. Some Elemental Skills spawn their particles at the enemy's position and others at your character's position, which changes how far they have to travel and how much swap window you get. And some skills carry a particle-generation cooldown that is entirely separate from the skill's own cooldown, so mashing a low-cooldown skill does not always produce more particles.
One more that catches people out: particles generate even when no damage lands. An enemy immune to your element, or fully shielded, still coughs up particles when your skill connects. Elemental immunity is not an energy problem.
How Much Energy Recharge Do You Actually Need
The honest answer is that there is no universal number, and any guide handing you one without asking what team you run is guessing.
The real formula is boring: take your character's burst cost, then work out how much energy they actually collect over one rotation at 100% Energy Recharge, then divide. If a character needs 80 and collects 45 per rotation unbuffed, they need roughly 180% Energy Recharge. That is it. Everything else is estimating the second number.
The Xingqiu Worked Example
Xingqiu is the cleanest case in the game because his numbers are unambiguous.
- Elemental Skill: 5 Hydro particles, 21-second cooldown
- Elemental Burst: 80 Energy, 20-second cooldown
At 100% Energy Recharge, if he is on the field when his own particles land, that skill cast is worth 5 x 3 = 15 Energy. He needs 80. One cast gets him under a fifth of the way there.
Push him to 200% Energy Recharge and the same pickup becomes 30 Energy. Two skill casts is 60, and enemy drops across a mob wave comfortably close the rest. Now he bursts every rotation.
Leave him at 100% and let the particles land while someone else is on the field, and he is collecting 5 x 1.8 = 9 Energy per cast. That is the Xingqiu who bursts on every third rotation, on an account where everything else looks fine on paper. It is also why "just build him CRIT, he is a damage dealer" is one of the worst pieces of advice in this game.
Why Every Team Lands on a Different Number
The second half of the formula — energy collected per rotation — swings wildly based on things that have nothing to do with your build.
Enemy count. Enemies drop energy at HP thresholds. A mob wave is an energy fountain. A single-boss chamber is a desert. Build your Energy Recharge for the worst chamber you plan to clear, not the one where you feel good.
Element doubling. Run two characters of the same element and every particle of that element is a "same element" pickup for both of them at once. This is the actual mechanical reason double-Hydro and double-Electro cores feel so smooth to play — it is not a resonance buff, it is the conversion table.
Who else is in the team. A Favonius holder, an Exile four-piece, or a Raiden Shogun in the lineup all reduce how much Energy Recharge everyone else needs.
Where you test. The training dummy in Mondstadt drops nothing. If you are timing rotations against a dummy and concluding your energy is fine, you are testing the one scenario that never happens in the Abyss.
Where to Find Energy Recharge Without Wrecking Your Build
Sands, Sets, and Substats
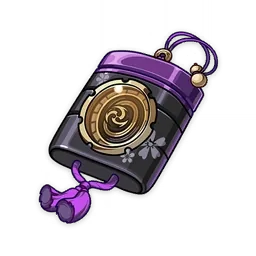
Your Sands of Eon slot is the biggest single lever. A five-star Sands with Energy Recharge as its main stat reaches 51.8% at +20. Nothing else in the game hands you that much in one slot.
Substats are the fine tuning. On a five-star artifact, a single Energy Recharge roll lands on one of four values: 4.53%, 5.18%, 5.83%, or 6.48%. So a piece that rolls Energy Recharge on all four upgrades is contributing somewhere in the low twenties percent — meaningful, but not something you can plan around, which is exactly why the Sands main stat is the reliable answer.
Then there are the two-piece bonuses. Three different sets give +20% Energy Recharge for two pieces: Emblem of Severed Fate, The Exile, and Scholar. That two-piece plus a damage two-piece is a perfectly respectable build for a support who is 20% short, and it is far cheaper than re-farming a full four-piece. Our Genshin artifact guide covers the full slot-by-slot breakdown if you are still deciding what to farm.
Weapons That Solve Energy Problems
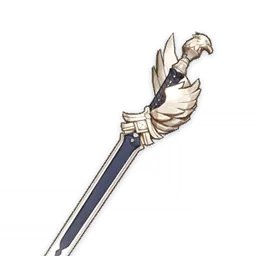
The Favonius series is the answer to more energy problems than any artifact set. Every weapon in it carries Energy Recharge as its secondary stat — the Favonius Sword sits at 13.3% at base — and they all share the Windfall passive: CRIT hits have a chance to generate elemental particles worth 6 Energy for the character, once per cooldown. At refinement 1 that is a 60% chance on a 12-second cooldown. At refinement 5 it is a 100% chance every 6 seconds.
Three gotchas that make Favonius weapons underperform on people's accounts:
- It needs CRIT Rate. A support sitting at base 5% CRIT will barely ever proc it. If you are putting a Favonius weapon on someone, give them enough CRIT Rate to actually trigger the thing.
- The wielder must be on the field. If a Favonius holder lands a critical hit while off-field, the passive does not activate at all. Off-field appliers get value from it only during their own on-field window.
- It cannot proc on hits that deal no damage, even if those hits crit.
The flip side: the chance is rolled per damaging hit and per enemy hit. Multi-hit skills and wide AoE skills proc Windfall dramatically more often than a single-target nuke does.
Emblem of Severed Fate Turns Overcapping Into Damage
Emblem of Severed Fate is the set that changed how the community thinks about this stat. Two pieces give +20% Energy Recharge. Four pieces increase Elemental Burst DMG by 25% of your Energy Recharge, to a maximum of 75% bonus damage.
Do the division: 75 divided by 0.25 is 300. You would need 300% Energy Recharge to cap that bonus, and essentially nobody gets there outside of Raiden Shogun memes.
Which means that on an Emblem four-piece burst character, the usual complaint about "overcapping Energy Recharge" is basically wrong. Every 4 percentage points of Energy Recharge above your energy requirement is still converting into 1% Elemental Burst damage. Extra Energy Recharge on that character is never truly dead — it just becomes a slightly worse damage substat instead of a wasted one.
The Raiden Shogun Exception

Every rule above bends around one character, and it is worth understanding why she is built the way she is even if you do not own her.
Her burst, Secret Art: Musou Shinsetsu, costs 90 Energy — one of the heaviest costs in the game. Her fourth ascension passive, Enlightened One, then does something no other character's does: for each 1% of Energy Recharge above 100%, she gains 0.4% Electro DMG Bonus and 0.6% greater energy restoration from Musou Isshin.
That turns Energy Recharge into a genuine offensive stat on exactly one character. At 300% Energy Recharge she is carrying 200 points above the baseline, which is 80% Electro DMG Bonus from a stat everyone else treats as a tax.
The rest of her kit is an energy engine for the team:
- Her Elemental Skill grants the Eye of Stormy Judgment for 25 seconds on a 10-second cooldown, increasing party Elemental Burst DMG based on each burst's Energy Cost — between 0.22% and 0.3% per point of Energy depending on talent level. Expensive bursts benefit most, which is a neat inversion of the usual penalty for a high burst cost.
- While Musou Isshin is active, her attacks regenerate Energy for all nearby party members, once every second, up to five times per burst.
- Her first ascension passive, Wishes Unnumbered, feeds Chakra Desiderata 2 Resolve stacks whenever nearby party members pick up orbs or particles, once every 3 seconds, up to a maximum of 60 stacks.
One important detail: the energy Musou Isshin hands out is a flat amount. It scales off her Energy Recharge through Enlightened One, not off the recipients'. Your other three characters can be at wildly different Energy Recharge values and they all receive exactly the same number.
Energy Sources Energy Recharge Cannot Touch
Four systems that quietly feed your team and completely ignore the stat you have been farming.
Normal and Charged Attacks. Every Normal or Charged Attack that hits an enemy has a chance to generate 1 Energy, and that chance climbs each time it fails, resetting on success. Swords start at a 10% base chance and gain 5% per miss, averaging 4.52 hits per proc. Claymores and catalysts start at 0% but gain 10% per miss, also averaging 4.66. Bows gain 5% per miss for an average of 6.29 hits, and polearms are the worst at 4% per miss and 6.95 hits. This energy is not affected by Energy Recharge at all — it is just a slow trickle that rewards actually attacking instead of skill-burst-swapping in silence.
The Exile (4-piece). Using an Elemental Burst regenerates 2 Energy for all party members except the wearer, every 2 seconds for 6 seconds. It does not stack, it is not affected by Energy Recharge, and the first tick only lands 2 seconds in — so a character with a long burst animation can miss it entirely. Six Energy for three teammates per burst is genuinely strong on an early account, and it is a 3 to 4 star set you probably already have.
Scholar (4-piece). Whenever elemental particles or orbs are gained, all party members holding a bow or a catalyst get 3 Energy, once every 3 seconds. Extremely narrow, and completely free if your team happens to fit it.
Electro resonance. Running two Electro characters generates an Electro particle on a 5-second cooldown whenever an Electro-related reaction triggers. That one is a particle, so Energy Recharge does scale it — and it is a large part of why Electro cores feel energy-positive. Our elemental reactions guide covers which reactions count.
Mistakes That Keep Your Burst on Cooldown
Swapping before the particles land. The most common and most expensive mistake in the game. Watch the pickup, not the animation.
Bursting last instead of first. A character cannot hold more Energy than their base burst requires. If your carry is sitting at 78 out of 80 and inhales a big orb, the surplus evaporates. Burst first, then collect.
Running four different elements. Every particle in a rainbow team is a "different element" pickup for three of your four characters — 0.6 Energy off-field instead of 1.8. Rainbow teams are an energy problem before they are ever a reaction problem.
Testing on the training dummy. It drops nothing. Your rotation timings from a dummy are fiction.
Favonius on a 5% CRIT support. Windfall cannot proc if you never crit. Either give them CRIT Rate or give the weapon to someone who has it.
Hitting scenery. Inanimate objects and non-hostile wildlife do not generate particles, with a couple of documented exceptions in Razor's and Wriothesley's kits. Whacking crates is not a warm-up.
Falling off the map. A knocked-out character loses all their Energy. If your active character drowns or falls out of bounds, the entire team loses all Energy. That is a full-rotation reset in the middle of an Abyss timer, and it has ended more runs than any enemy.
If you are still assembling teams around what you own rather than what you pulled for, our best free-to-play teams guide picks the lineups whose energy requirements are the most forgiving.
Quick Action Checklist
- Energy Recharge multiplies particles and orbs only. Flat energy from talents and artifact sets ignores it entirely.
- Memorize two numbers: a same-element particle is worth 3 Energy on-field and 1.8 off-field in a four-stack.
- Swap to the character who needs the energy before the particles reach you, not after.
- Compute your requirement as burst cost divided by energy collected per rotation at 100% Energy Recharge, then build to that.
- Build for your worst Abyss chamber — a single-boss room drops a fraction of the particles a mob wave does.
- The Sands of Eon main stat is your biggest lever at 51.8% on a maxed five-star.
- Emblem of Severed Fate four-piece caps at 300% Energy Recharge, so extra Energy Recharge on a burst character is never truly wasted.
- Favonius weapons need CRIT Rate and need the wielder on the field when the crit lands.
- Doubling up on an element makes every particle of that element count as "same element" for two characters at once.
- Burst before you collect. Energy cannot overcap.
Frequently Asked Questions
How much Energy Recharge do I need in Genshin Impact?
How much Energy is an elemental particle worth?
What is particle funneling and does it actually work?
Does Energy Recharge affect The Exile or Scholar artifact sets?
Can you have too much Energy Recharge on Emblem of Severed Fate?
Keep Reading
Related Guides

Genshin Lunar Reactions Guide — Moonsign, Triggers, Scaling
Genshin has quietly added five reactions since Version 5.8, and they break the oldest rules in the combat system: they CRIT, they ignore DMG Bonus and enemy DEF, and they refuse to fire at all unless the right character is standing in your party.

Genshin Damage Formula Guide — Which Multiplier Your Build Is Missing
A level 90 character hitting a level 90 enemy loses exactly half its damage before resistance, before crits, before anything you can see. That 0.5 is not difficulty tuning — it falls straight out of one line of arithmetic, and it is the reason your next upgrade probably is not another CRIT DMG roll.

Genshin Elemental Reactions Guide — Every Multiplier Explained
Most players know Hydro plus Pyro equals Vaporize. Far fewer know that swapping which element lands first is the difference between a 2x multiplier and a 1.5x one — the same rotation, a third of the damage gone.
Genshin Stygian Onslaught Guide — The Primogems Stop at Difficulty Three
Genshin has three permanent endgames. The third one hands you its entire Primogem payout at difficulty three of six, then spends the top half of the ladder paying you in artifact currency and weapon skins instead. The reward table is the whole strategy.
Genshin Artifact Guide — Stats, Rolls and Resin Math
A five-star artifact can roll the exact same substat four times and give you anywhere from 10.88 percent to 15.54 percent CRIT DMG. Understanding that spread is the difference between a functional account and a museum of half-built characters.
Genshin Spiral Abyss Guide — 800 Primogems a Month
A full 36-star Spiral Abyss clear pays 800 Primogems, once a month, for the cost of zero resin. What stands between you and that payout usually is not skill — it is the two-team tax.