Genshin Damage Formula Guide — Which Multiplier Your Build Is Missing
A level 90 character hitting a level 90 enemy loses exactly half its damage before resistance, before crits, before anything you can see. That 0.5 is not difficulty tuning — it falls straight out of one line of arithmetic, and it is the reason your next upgrade probably is not another CRIT DMG roll.

Half Your Damage Number Never Existed
A level 90 character hitting a level 90 enemy loses exactly half of its damage before resistance, before crits, before anything you can see on screen.
That is not difficulty tuning. It falls out of one line of arithmetic. The enemy DEF Multiplier is (character level + 100) divided by (character level + enemy level + 200). Put 90 and 90 into that and you get 190/380 — 0.5, dead on.
Most build advice never mentions this, which is a problem, because the reason "should I farm CRIT DMG or a better goblet" has an actual answer is that damage in this game is a product of separate multiplier brackets. Every bracket you are already fat in pays you less than the one you have been ignoring.
You do not need to memorise the formula. You need to know which bracket your build is thin in. Here is the whole thing, and then what each piece is genuinely worth on a real build.
The Damage Formula Written Like a Human Wrote It
For damage dealt by talents, constellations, weapon passives, and enemy attacks alike:
DMG = (Base DMG × Base DMG Multiplier + Additive Base DMG Bonus) × DMG Bonus Multiplier × Elevation × Enemy DEF Multiplier × Enemy RES Multiplier × Amplifying Multiplier × CRIT Multiplier
Almost all of those are multiplied together, and that word is the entire game. Doubling any one bracket doubles your damage regardless of what the other brackets are doing — and adding to a bracket that is already large gives you a smaller percentage than adding to one sitting at 1.
Notice what is not in there: enemy level. It appears exactly once, buried inside the DEF multiplier, and nowhere else. There is no hidden level-based resistance scaling against you. Notice also the hard ceiling — a single instance of damage cannot exceed 20,000,000, which you will hit approximately never, but it is in the code.
Bucket One Base DMG and the ATK Trap
Base DMG is the ability's scaling percentage multiplied by whichever stat it reads: ATK, DEF, max HP, or Elemental Mastery. Abilities scale with ATK unless the skill attributes say otherwise.
The trap is in how ATK is built:
ATK = (character base ATK + weapon base ATK) × (1 + total ATK% bonus) + flat ATK
ATK% multiplies only the white number on your character screen — your character's own base ATK plus the weapon's base ATK. It does nothing to the green number underneath it. So every ATK% source in your build, artifacts and weapon passives and Pyro resonance's 25% and Bennett's burst, is all fighting over the same small white base.
Why an ATK Percent Roll Is Worth Less Than You Think
Say your white ATK is 800 and your final ATK reads 2,000. The maximum ATK% substat roll on a 5-star artifact is 5.83%. That is 5.83% of 800, which is 46.6 ATK, which is 2.3% more total ATK, which is 2.3% more damage.
Hold that number. Everything below gets compared to it.
Bucket Two DMG Bonus and Its Shrinking Returns
DMG Bonus Multiplier = 1 + all your DMG bonuses − the target's DMG reduction. Every percentage-based damage bonus lands in this one additive bracket: the elemental goblet, "increases Elemental Skill DMG by X%", "all DMG +X%", the lot.
Additive is the operative word. A maxed 5-star Elemental DMG Bonus goblet is 46.6%, taking the bracket from 1.0 to 1.466. That first goblet is worth its full 46.6%.
Stack another 46% on top from a set bonus and a buffer and you go from 1.466 to 1.926 — 27.3% more damage, not 46%. The third source is worth less again. This is exactly why a team already running three DMG% buffers gets more out of literally anything else.
One footnote: Elevation, currently granted only by certain 5-star constellations, is a genuinely separate multiplier and does not share this bracket. If you have it, it is real.
Bucket Three Enemy DEF

We already did the headline number: 0.5 at equal levels. To move it you either reduce enemy DEF or ignore it, and the distinction matters. DEF reduction changes the enemy's actual attribute, so it boosts every damage source on the team. DEF ignore only applies to the specific ability carrying it.
Concrete case, straight from the wiki's own worked example: Klee's second constellation, Explosive Frags, drops enemy DEF by 23%. Against a same-level enemy the multiplier becomes 190 ÷ (0.77 × 190 + 190) = 190/336.3 = 0.565.
Compared to 0.5, that is 13% more damage — for every element, on every character in the party, from a debuff that nobody lists as a damage stat.
Thirteen percent. Versus a maxed ATK% roll's 2.3%.
Being Underleveled Costs Less Than You Have Been Told
A level 70 character hitting a level 90 enemy: 170 ÷ (70 + 90 + 200) = 0.472. Against 0.5 at parity, a twenty-level deficit costs you 5.6%.
That is not the wall people describe. Being underleveled genuinely hurts, but it hurts through your character's base ATK, your talent levels, and your artifact levels — all of which live in bucket one — not through some scaling penalty attached to the level gap itself. If you are stuck on a boss at level 70, your problem is a level 6 talent, not the number over the enemy's head.
Bucket Four Enemy RES and the Best Lever in the Game

RES is where the formula stops being linear. The multiplier is piecewise:
| Enemy total RES | RES Multiplier |
|---|---|
| Below 0 | 1 − (RES ÷ 2) |
| 0 up to 75% | 1 − RES |
| 75% and above | 1 ÷ (4 × RES + 1) |
Read the top row twice. Once you push an enemy's resistance below zero, further shred only counts at half rate — but the multiplier goes above 1, which means you have stopped reducing damage and started amplifying it.
Most enemies sit at 10% elemental RES, so your default multiplier is 0.9. Trigger a Swirl while wearing four-piece Viridescent Venerer and that element's RES drops by 40% for 10 seconds: 10% − 40% = −30%, and the multiplier becomes 1 − (−0.3 ÷ 2) = 1.15.
Going from 0.9 to 1.15 is 27.8% more damage. On every hit of that element. From every character on the field.
That artifact set, worn by a support who is not trying to deal damage at all, beats a full circlet's worth of CRIT DMG. It is the most under-farmed set in the game and it drops at 4-star rarity.
The Physical Damage Problem
Physical resistance is where that piecewise curve gets vicious, and it is most of the reason physical carries fell out of favour.
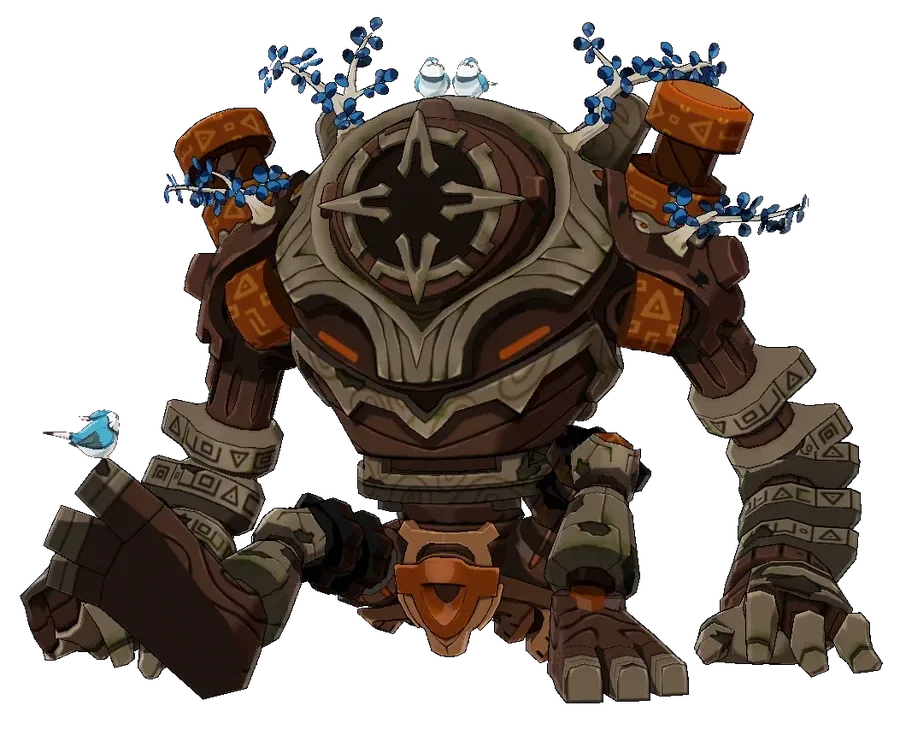
Ruin Guards and Ruin Graders carry 70% Physical RES. Multiplier: 0.3. Your beautifully built physical carry does 30% of its damage.
Now Superconduct that Ruin Guard. Superconduct decreases Physical RES by 40% for 12 seconds: 70% − 40% = 30%, multiplier 0.7.
0.7 divided by 0.3 is 2.33. Superconduct more than doubles your damage against that enemy — 133% more — from a Cryo-plus-Electro reaction whose own damage output is negligible. Superconduct's damage is not the point. The debuff is the entire payload, and people skip it because the number that pops on screen is small.
Meanwhile Fatui humanoids sit at −20% Physical RES, giving you a 1.1 multiplier before you shred anything at all. Physical builds are not weak. They are violently enemy-dependent, and the elite roster that shows up in Spiral Abyss chambers is stacked against them.
Bucket Five CRIT and Why the 1 to 2 Ratio Exists
Every character in the game, 4-star and 5-star alike, starts at 5% CRIT Rate and 50% CRIT DMG. On a crit the multiplier is 1 + CRIT DMG. On a non-crit it is 1. That is the whole mechanic.
Across many hits your expected CRIT multiplier is 1 + (CRIT Rate × CRIT DMG). That product is what you are maximising, and it is maximised when the marginal roll in each stat is worth the same.
Watch it happen. Take a build at 60% CRIT Rate and 120% CRIT DMG, expected multiplier 1.72.
- One maximum CRIT DMG substat roll (+7.77%): 1 + 0.60 × 1.2777 = 1.7666
- One maximum CRIT Rate substat roll (+3.89%): 1 + 0.6389 × 1.20 = 1.7667
Both worth 2.71%. Identical to four decimal places. That is all the famous 1:2 ratio means — not a magic number, just the point where you stop caring which one drops.
Now break it. At 80% CRIT Rate and 100% CRIT DMG, expected 1.80: the CRIT DMG roll adds 3.45%, the CRIT Rate roll adds 2.16%. CRIT DMG is worth 1.6 times as much.
Go the other way to 40% CRIT Rate and 180% CRIT DMG, and the expected multiplier is 1.72 — identical to the 60/120 build. But now the CRIT DMG roll adds 1.81% and the CRIT Rate roll adds 4.07%. Same average damage, completely opposite shopping list.
Average Damage Lies to You in Short Windows
Those two builds average the same. They do not play the same.
At 60% CRIT Rate, the chance of whiffing every crit across a four-hit burst is 0.4 to the fourth power — 2.6%. At 40% CRIT Rate it is 0.6 to the fourth — 13%.
One Abyss run in eight where your entire burst window lands as non-crits is not a rounding error on a timer. If a character dumps their damage into a short window instead of spreading it across a rotation, weight CRIT Rate above what the pure averages suggest.
Bucket Six Reactions Where the Real Numbers Live
Amplifying reactions — Vaporize and Melt — bolt an extra multiplier onto the hit that triggered them:
Amplifying Multiplier = base coefficient × (1 + EM bonus + reaction bonus)
The base coefficient is 2.0 when Hydro triggers Vaporize or Pyro triggers Melt, and 1.5 when it runs the other direction.
At zero Elemental Mastery, a Hydro-triggered Vaporize is a flat ×2. With nothing invested, no artifacts changed, that is a 100% damage increase — larger than every artifact upgrade discussed above put together. It is why reaction teams dominate the meta and why a single-element carry with no reaction has to be enormously better built just to keep pace. Our elemental reactions guide covers which pairings your roster can actually run.
Elemental Mastery Is a Hyperbola Not a Line
The three EM curves share a shape and all diminish hard:
- Amplifying (Vaporize, Melt): 2.78 × EM ÷ (EM + 1400)
- Transformative (Overloaded, Hyperbloom, Swirl and friends): 16 × EM ÷ (EM + 2000)
- Catalyze (Spread, Aggravate): 5 × EM ÷ (EM + 1200)
On a Vaporize trigger: 200 EM turns the ×2.0 into ×2.695. The next 200 gets you to ×3.236. Going from 600 to 800 EM only moves ×3.668 to ×4.022 — under 10% more damage for 200 points that were worth 35% at the start.
Transformative reactions are the opposite case, because they have no ATK term at all, no DMG Bonus, no meaningful DEF interaction, and no CRIT by default. Elemental Mastery is very nearly the only stat they own. At level 90 the character Level Multiplier is 1,446.85, so a Hyperbloom (coefficient 3.0) with zero EM deals 3.0 × 1,446.85 = 4,341 before resistance. At 1,000 EM the bonus is 16 × 1000 ÷ 3000 = 533%, so the same reaction deals 4,341 × 6.333 = 27,490, landing at 24,741 after a standard 10% RES. That is the whole reason a Hyperbloom Kuki sheet looks like a typo.
One detail worth carrying: Viridescent Venerer's 60% Swirl DMG bonus is additive with the EM bonus, not multiplicative. At 800 EM your Swirl bracket is (1 + 4.571 + 0.60), not (1 + 4.571) × 1.6.
A Full Worked Calculation
Level 90 character, level 90 enemy at the standard 10% elemental RES.
- ATK 2,000, talent scaling 200% → Base DMG 4,000
- Elemental DMG Bonus goblet at 46.6% → DMG Bonus Multiplier 1.466
- Enemy DEF Multiplier 0.5
- Enemy RES Multiplier 0.9
- 60% CRIT Rate, 120% CRIT DMG → expected CRIT Multiplier 1.72
4,000 × 1.466 × 0.5 × 0.9 × 1.72 = 4,539 average damage. Non-crits land at 2,639, crits at 5,805.
Now give that identical character a Swirl-shredded target (RES multiplier 1.15 instead of 0.9) and a Hydro-triggered Vaporize at 200 EM (×2.695):
4,000 × 1.466 × 0.5 × 1.15 × 2.695 × 1.72 = 31,290.
Same artifacts. Same weapon. Same talent level. Just under seven times the damage, all of it coming from brackets that most build guides treat as flavour text.
What Your Next Upgrade Is Actually Worth
Every row below is a single change applied to that baseline build:
| Change | Damage gain |
|---|---|
| One max ATK% substat roll (800 white ATK, 2,000 total) | +2.3% |
| One max CRIT Rate or CRIT DMG roll at 60/120 | +2.7% |
| A 23% enemy DEF reduction | +13.0% |
| A second 46% DMG Bonus source on top of the goblet | +27.3% |
| Four-piece Viridescent Venerer shred on a 10% RES target | +27.8% |
| Superconduct against 70% Physical RES | +133% |
| Hydro-triggered Vaporize at 200 EM | +169% |
Read that column top to bottom and the advice writes itself. Nobody's account is losing to a missing CRIT DMG roll. Accounts lose because there is no shred on the field, no DEF reduction anywhere in the party, and nothing reacting.
If you are still working out what to farm, the artifact guide covers slots and set priorities, and the best free-to-play teams guide picks lineups that already carry shred and reactions by default.
Five Things That Break the Model
True DMG. Ignores the target's DEF, RES, and damage reduction entirely — but not shields. Certain Ley Line Disorders, Electrogranum coordinated attacks, and Thunderstones all deal it.
Snapshotting. Some abilities lock in their buffs at cast time. Xiangling's Pyronado keeps a Bennett buff for its entire duration even after you walk out of the field. For those abilities, buff order matters more than buff quantity.
Bow damage dropoff. Aimed shots lose damage based on how long the arrow spends in the air, and that multiplier is applied on top of the whole formula. Your long-range charged shot is not doing the number your calculator says.
Transformative reactions skipping most of the formula. No ATK scaling, no DMG Bonus, no real DEF interaction, and no CRIT unless a specific kit grants it — Nahida's second constellation, for instance, hands the Bloom family 20% CRIT Rate and 100% CRIT DMG.
Enemy state. RES is not a fixed number. Whopperflowers shed 25% of all RES when stunned, the Perpetual Mechanical Array sheds 50%, and plenty of bosses gain +100% or more while shielded or mid-animation. Swinging at a boss during its protected window is not merely wasted time, it is actively worse than waiting.
Quick Action Checklist
- At equal levels enemy DEF halves your damage. Only DEF reduction or DEF ignore moves that 0.5.
- Enemy level enters the formula in exactly one place. A twenty-level deficit costs about 5.6%, not the wall it is made out to be.
- Every percentage DMG bonus shares one additive bracket, so your second and third sources are worth far less than the first.
- ATK% multiplies only your white ATK. On an 800 white / 2,000 total build, a max roll is 2.3% damage.
- Push enemy RES below zero and the multiplier climbs above 1. Four-piece Viridescent Venerer is worth roughly 27.8% party-wide against a standard target.
- Superconduct against 70% Physical RES more than doubles your damage. Its own damage number is irrelevant.
- Expected CRIT multiplier is 1 + Rate × DMG. At 60/120 a max roll of either is worth the same 2.7%; skew the ratio and one becomes worth twice the other.
- Favour CRIT Rate on burst-window characters. A 40% Rate build whiffs an entire four-hit burst 13% of the time.
- Elemental Mastery diminishes hyperbolically. The first 200 points are worth roughly four times the eighth hundred on an amplifying trigger.
- A Hydro-triggered Vaporize at 200 EM is a ×2.695 multiplier. Nothing you farm this week competes with that.
Frequently Asked Questions
What is the damage formula in Genshin Impact?
Why does my damage get halved against same-level enemies?
Is a 1:2 CRIT Rate to CRIT DMG ratio actually optimal?
How much damage does Viridescent Venerer actually add?
Does Elemental Mastery have diminishing returns in Genshin?
Keep Reading
- Genshin Impact Wiki — Damage formula components and worked example
- Genshin Impact Wiki — DEF multiplier and enemy defense formula
- Genshin Impact Wiki — RES multiplier intervals and enemy resistance table
- Genshin Impact Wiki — Artifact main and minor affix values
- Genshin Impact Wiki — Reaction Level Multiplier table
- HoYoverse — official Genshin Impact site
Related Guides

Genshin Lunar Reactions Guide — Moonsign, Triggers, Scaling
Genshin has quietly added five reactions since Version 5.8, and they break the oldest rules in the combat system: they CRIT, they ignore DMG Bonus and enemy DEF, and they refuse to fire at all unless the right character is standing in your party.

Genshin Energy Recharge Guide — How Much ER You Actually Need
Xingqiu drops exactly five Hydro particles per skill cast. Standing on him when they land is worth 15 Energy. Swapping away first is worth 9. Same cooldown, same rotation, six Energy gone — and that is before you touch the Energy Recharge stat at all.

Genshin Elemental Reactions Guide — Every Multiplier Explained
Most players know Hydro plus Pyro equals Vaporize. Far fewer know that swapping which element lands first is the difference between a 2x multiplier and a 1.5x one — the same rotation, a third of the damage gone.
Genshin Stygian Onslaught Guide — The Primogems Stop at Difficulty Three
Genshin has three permanent endgames. The third one hands you its entire Primogem payout at difficulty three of six, then spends the top half of the ladder paying you in artifact currency and weapon skins instead. The reward table is the whole strategy.

Genshin Artifact Guide — Stats, Rolls and Resin Math
A five-star artifact can roll the exact same substat four times and give you anywhere from 10.88 percent to 15.54 percent CRIT DMG. Understanding that spread is the difference between a functional account and a museum of half-built characters.

Genshin Imaginarium Theater Guide — The Endgame That Out-Pays the Abyss
The Spiral Abyss pays 800 Primogems a month. A full Imaginarium Theater season pays 1,000. One of them asks for eight built characters and one asks for twenty-eight, and most accounts are still only collecting the smaller cheque.