Genshin Artifact Guide — Stats, Rolls and Resin Math
A five-star artifact can roll the exact same substat four times and give you anywhere from 10.88 percent to 15.54 percent CRIT DMG. Understanding that spread is the difference between a functional account and a museum of half-built characters.

Your Artifacts Are Worth More Than Your Constellations
Two players own the same character at the same level with the same weapon. One does roughly double the damage of the other. Neither of them spent a single extra primogem.
That is not an exaggeration used to sell a guide. It falls straight out of the numbers. A five-star artifact can gain up to five substat upgrades over its life, and each individual CRIT DMG roll lands somewhere between 5.44 and 7.77 percent. Get lucky across a full five-piece set and you are looking at a stack of high rolls. Get unlucky, spend the same resin, and you finish with the same set at the same level doing meaningfully less.
Artifacts are where Genshin actually hides its progression, and they are the one system the game refuses to explain properly. So here are the real numbers.

The Five Slots and What They Can Roll
Every character equips exactly five artifacts, one of each type: Flower of Life, Plume of Death, Sands of Eon, Goblet of Eonothem, and Circlet of Logos. Each carries one main stat and up to four substats.
The critical split: two of those slots have a fixed main stat and three do not.
Flower and Plume — The Slots You Never Think About
The Flower of Life always rolls flat HP. The Plume of Death always rolls flat ATK. There is no variation, no rolling for a better main stat, no decision to make.
At five-star and fully levelled, a Flower gives 4,780 HP and a Plume gives 311 ATK. At four-star those cap out at 3,571 HP and 232 ATK.
Because the main stat is fixed, these two slots are judged purely on substats. That makes them the easiest pieces to upgrade — you are never waiting on a main stat lottery, only a substat one.
Sands, Goblet and Circlet — Where Builds Are Decided
These three roll a variable main stat, and this is where most accounts stall. You can farm a domain for weeks and never see the goblet you need, because the goblet has the widest pool of any slot.
Five-star maximum main stat values, all at level 20:
- Sands of Eon: ATK 46.6%, HP 46.6%, DEF 58.3%, Elemental Mastery 186.5, or Energy Recharge 51.8%
- Goblet of Eonothem: ATK 46.6%, HP 46.6%, DEF 58.3%, Elemental Mastery 186.5, Elemental DMG Bonus 46.6%, or Physical DMG Bonus 58.3%
- Circlet of Logos: ATK 46.6%, HP 46.6%, DEF 58.3%, Elemental Mastery 186.5, CRIT Rate 31.1%, CRIT DMG 62.2%, or Healing Bonus 35.9%
A few things fall out of that table immediately. A CRIT DMG circlet gives exactly double what a CRIT Rate circlet gives, which is why circlet choice depends entirely on what your weapon and substats already supply. And the elemental damage bonus goblet is almost always the single hardest piece to farm on any account, because it competes with five other main stats in the same slot.
Substats Are the Real Source of Power
Main stats are a lottery you eventually win. Substats are where the actual variance lives, and where the difference between accounts is decided.
How Rolls Actually Work
A five-star artifact starts with either three or four substats and ends up with four or five total upgrades by level 20. Every four enhancement levels — at +4, +8, +12, +16 and +20 — one substat is either added or increased.
The mechanic is straightforward once stated plainly:
- If the artifact has fewer than four substats, it gains a brand new random substat.
- If it already has four substats, one existing substat is randomly picked and increased.
That is why a four-substat artifact is generally the better starting point for a specific build: all four upgrades land on stats you can already see, rather than one being spent generating a fourth line you might not want.
Two hard rules that constrain the pool: an artifact can never have duplicate substats, and a substat can never match the main stat. An ATK% sands cannot roll ATK% as a substat — though it absolutely can roll flat ATK, which is the trap that makes so many otherwise-promising pieces worthless.
The Four-Tier Roll System
This is the part almost nobody internalises. Every substat roll on a five-star artifact lands on one of four discrete values, not a continuous range. If the highest possible roll is X, the other three are X times 0.9, X times 0.8, and X times 0.7.
The five-star values in practice:
- CRIT Rate: 2.72 / 3.11 / 3.50 / 3.89 percent
- CRIT DMG: 5.44 / 6.22 / 6.99 / 7.77 percent
- ATK%: 4.08 / 4.66 / 5.25 / 5.83 percent
- Energy Recharge: 4.53 / 5.18 / 5.83 / 6.48 percent
- Elemental Mastery: 16.32 / 18.65 / 20.98 / 23.31
Now the falsifiable claim from the intro. Two CRIT DMG rolls at the lowest tier give 10.88 percent. Two at the highest give 15.54 percent. Same stat, same number of rolls, same resin spent — a 43 percent difference in what that stat contributes.
Across a full five-piece set with roughly 25 total upgrade events, that variance compounds enormously. This is the real reason to be ruthless about which artifacts you feed resin to.
Crit Ratio and the Stat Priority Everyone Gets Backwards
The community shorthand is that you want a 1:2 ratio of CRIT Rate to CRIT DMG. That is a decent heuristic and it is also frequently misapplied.
The reason the ratio exists: expected damage scales with (1 + CRIT Rate multiplied by CRIT DMG), so pushing one stat far ahead of the other wastes budget. Since a CRIT DMG substat roll is worth roughly double a CRIT Rate roll numerically, keeping them at roughly 1:2 keeps the product near its maximum for a given number of rolls.
Where players go wrong:
Ignoring what the weapon already gives. If your weapon has a CRIT Rate substat, you are already partway to a healthy ratio and should lean CRIT DMG on the circlet. If it has CRIT DMG, flip it.
Chasing the ratio past usefulness. Damage you never deal is worth nothing. CRIT Rate meaningfully above 80 percent on a character with a short damage window is often worse than converting that budget into ATK or Elemental Mastery.
Applying it to characters who should not crit at all. Hyperbloom and Burgeon triggers deal transformative reaction damage, which cannot CRIT under any circumstance. Building CRIT on them is a strictly wasted stat. They want Elemental Mastery and nothing else. Our Genshin elemental reactions guide breaks down exactly which reaction types respond to which stat.
Forgetting Energy Recharge is a damage stat. A burst character who cannot use their burst every rotation is doing zero damage with it. Hitting the Energy Recharge threshold your rotation needs comes before optimising CRIT.
A practical priority order for most damage dealers: hit your Energy Recharge requirement first, get the correct main stats second, build crit ratio third, and dump anything left into ATK or Elemental Mastery depending on whether you are running an amplifying reaction.
Farming Domains Without Burning Your Account Out
Artifact farming is the longest grind in the game and the one most likely to make people quit. Doing the arithmetic first genuinely helps.
The Resin Math Nobody Does
Original Resin regenerates at one unit every eight minutes and caps at 200. That is 180 resin per day if you never let it sit at the cap, and 1,260 per week. A full refill from zero to 200 takes 26 hours and 40 minutes — which is precisely why capping is a real loss, since the moment you hit 200 the regeneration stops.
An artifact domain run costs 20 resin. At 180 resin per day, that is nine runs daily if you spend every point on artifacts and nothing else — no talent books, no weapon materials, no boss drops.
At the highest domain difficulty, a run averages one five-star featured artifact and 1.5 four-star featured artifacts, with each featured artifact having a 50 percent chance of being either of the domain's two sets.
Do that multiplication and the picture is grim in a useful way: you get roughly nine five-star pieces per day if you spend everything, of which about half belong to the set you actually want, of which perhaps one in five has a usable main stat, of which a fraction have workable substats. Weeks, not days. Plan accordingly and stop feeling bad about it.

Condensed Resin and the Strongbox
Two systems soften the grind considerably and both are underused.
Condensed Resin is crafted from 60 Original Resin plus one Crystal Core and 100 Mora. Using one on a domain gives three sets of rewards at once, along with triple Adventure EXP and Companionship EXP. Note the numbers carefully — this is not a resin discount, it is a time discount. You spend the same 60 resin either way, but you do it in one loading screen instead of three. On a farming session that is an enormous quality-of-life difference. You can hold a maximum of five at a time, and the recipe unlocks at Liyue Reputation Level 3 or by buying the instructions from the Mondstadt or Liyue blacksmith for 50,000 Mora.
Artifact Strongboxes come from Mystic Offering. Five-star artifacts cannot be destroyed for Mora, but they can be fed into a Mystic Offering to produce a Strongbox, which you then redeem for a piece from a set of your choosing. Every off-set five-star you pull out of a domain is therefore not garbage — it is currency toward the set you are actually farming.
Also worth knowing: any Original Resin you spend awards Adventure EXP at a 1:5 ratio, so a 20-resin domain run gives 100 Adventure EXP. Crafting Condensed Resin does not award it.
When to Level an Artifact and When to Stop
The most expensive mistake newer players make is levelling everything to 20. Upgrading a full five-piece set of five-star artifacts to level 20 costs 1,352,375 Artifact EXP and the same amount in Mora. That is not a small number, and Mora is a genuine bottleneck on most accounts.
The discipline that saves resources:
Level to +4 and reassess. At +4 you get your first upgrade. If the artifact started with three substats it now has four and you can see the full picture. If it started with four, one of them just improved. Either way, +4 is the cheapest decision point in the system.
Level to +8 and reassess again. By +8 you have had two upgrade events. A piece that has put both of them into flat DEF and flat HP is telling you something. Stop.
Only go to +20 on pieces that hit at least two of your desired substats by +8. Anything less and you are gambling three more upgrades on a bad foundation.
Never level a four-star artifact to +16 unless you are extremely early. It is a stopgap. The Mora is better saved.
The corollary: keep a low bar for equipping and a high bar for levelling. An unlevelled artifact with the right main stat is still better than an empty slot. Equip freely, upgrade selectively.

Set Bonuses Versus Stats — The Two-Piece Compromise
Artifact sets grant a two-piece bonus and a four-piece bonus. The four-piece is usually the flashy conditional effect. The two-piece is usually a flat stat increase.
The mistake is treating the four-piece bonus as mandatory. It frequently is not, and forcing it can cost you more than it gives.
Run the comparison honestly. A four-piece bonus that gives a conditional 20 percent damage increase is competing against the possibility of running two separate two-piece bonuses — say, 18 percent ATK from one set and an 18 percent elemental damage bonus from another — using whichever pieces have the best substats out of everything you own. If your four-piece candidates have poor substats and your mixed two-piece options are excellent, the mixed build wins.
Two practical rules:
Two-piece plus two-piece is a legitimate build, not a placeholder. Especially for supports, where the four-piece effect is often narrow, and especially early on when your artifact pool is shallow.
Check the four-piece condition actually fires in your rotation. A four-piece effect that requires a condition your team never meets is worth zero. Read the wording before committing a month of resin to farming it.

If you are still deciding which characters deserve this investment in the first place, the Genshin wish and gacha guide covers pity, the fifty-fifty, and what a five-star actually costs before you commit resin to building one. More Genshin coverage lands on the Genshin Impact coverage hub, and the rest of our game guides live on the Mythras blog.
Quick Action Checklist
- Flower always rolls flat HP, Plume always rolls flat ATK. Judge both purely on substats.
- Five-star maximums to memorise: 4,780 HP flower, 311 ATK plume, 46.6% ATK sands, 46.6% elemental DMG goblet, 62.2% CRIT DMG circlet.
- Prefer four-substat artifacts for targeted builds — all upgrades land on visible stats.
- Every substat roll is one of four tiers at X, 0.9X, 0.8X and 0.7X. Two low CRIT DMG rolls give 10.88%; two high give 15.54%.
- Aim for roughly 1:2 CRIT Rate to CRIT DMG, but count your weapon's substat first.
- Never build CRIT on a Hyperbloom or Burgeon trigger. Transformative reactions cannot CRIT.
- Hit your Energy Recharge threshold before optimising crit. A burst you cannot cast deals nothing.
- Spend resin daily. At one unit per eight minutes and a 200 cap, sitting at cap stops regeneration entirely.
- Use Condensed Resin for the time saving, not a resin saving — 60 resin, three reward sets, one loading screen.
- Feed unwanted five-star pieces into Mystic Offering for Strongboxes rather than letting them rot in your inventory.
- Level to +4, reassess. Level to +8, reassess. Only push to +20 on pieces hitting two desired substats by +8.
- Two-piece plus two-piece is a real build. Verify a four-piece condition fires in your rotation before farming for it.
Frequently Asked Questions
What are the maximum main stat values on a five-star Genshin artifact?
How do artifact substat rolls actually work?
Is Condensed Resin worth crafting in Genshin Impact?
When should I stop levelling an artifact?
Should I always run a four-piece artifact set?
Keep Reading
Related Guides
Genshin Weapon Guide — Base ATK, Secondary Stats and When to Pull
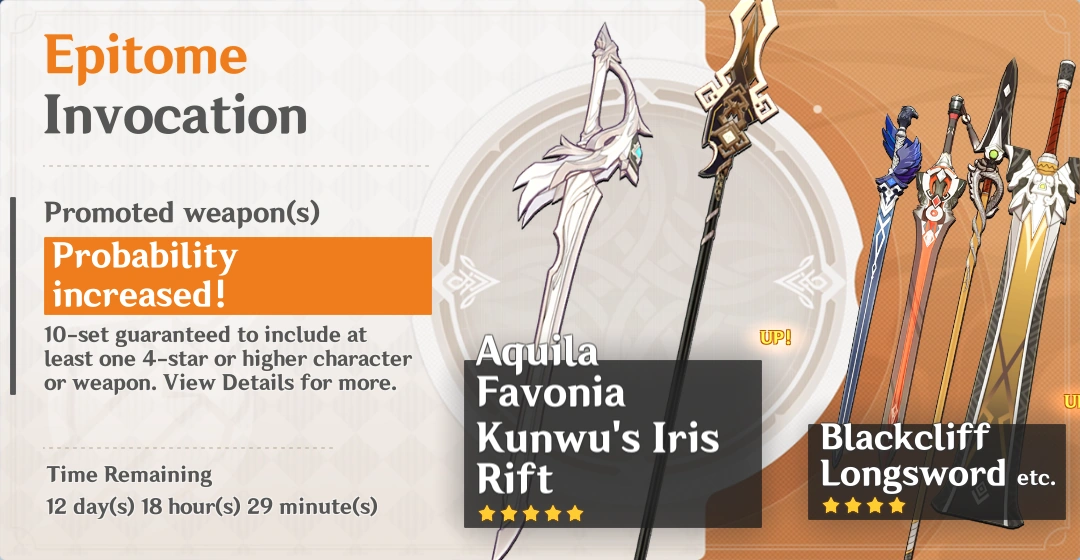
The 5-star weapon with the highest base ATK in the game and the 5-star with the highest secondary stat are 200 base ATK apart, and picking the wrong one for your character quietly costs you more damage than a constellation would give you.

Genshin Skirk Build Guide — Talents, Weapon, Artifacts
Two effects in Skirk's kit and one in Escoffier's only reach their ceiling when all four party slots are Hydro or Cryo. In an Escoffier team, swap one teammate for any other element and her Seven-Phase Flash hits land at roughly 55% of what they were.

Genshin Vesna Build Guide — Talents, Weapon, Artifacts
Vesna's biggest hits change damage formulas depending on whether a Stellar Swirl went off in the last eight seconds. Build her like an ordinary Anemo carry and you are optimising the half of her kit that does the least.

Genshin Vodyanitsa Build Guide — Talents, Weapon, Artifacts
Vodyanitsa's signature ascension passive does precisely nothing below 40,000 Max HP, and both halves of its bonus cap out at exactly 65,000 — a target most support builds never plan a single roll around.

Genshin Flins Build Guide — Talents, Weapon, Artifacts
Flins does not poke a shield and walk away. His whole kit is a two-stage transformation that turns his own Elemental Skill and Burst into direct Lunar-Charged hits, which means the stat priorities and artifact math for a normal Electro DPS do not apply to him. Here is what actually moves his damage, talent by talent.

Best F2P Teams in Genshin Impact — Four-Star Squads That Clear
Xiangling costs one Spiral Abyss clear. Xingqiu costs nothing but a Beginners' Wish. Bennett is on the standard banner forever. Put those three together and you have a team that has been clearing endgame content since 2020 and still does.