Resident Evil 4 Remake Boss Guide: Every Fight, In Order
Almost every boss in the remake funnels down to one idea: find the eye or the parasite, expose it, and be holding the right gun when it opens. Here is every major fight in order, what it is weak to, and the mistake that gets you killed.
Learn to read one pattern and the entire boss roster stops being scary. Nearly every major fight in the Resident Evil 4 remake (2023) is built around the same sentence: something is protecting a weak point, you make it stop protecting it, and then you dump your heaviest damage into the window before it closes. An eye opens. A parasite bursts. Armor cracks. The bosses that kill first-timers are the ones where the window is short and the player is holding the wrong gun.
This guide walks every major boss in the remake in the order you meet them, with the chapter, the weak point, and the specific mistake that ends the run. It covers the 2023 remake only — the 2005 original arranges some of these fights very differently, and I flag the big changes at the end.
How the remake fights back
Two rules cover most of what follows.
First, come to boss fights over-equipped. Bosses are where your magnum earns its inventory footprint. A Broken Butterfly or Killer7 turns Salazar and the armored Gigantes from endurance tests into short fights, and this is exactly the moment the ammo you hoarded is supposed to leave your case. If you are not sure which guns are worth the pesetas, the weapon upgrade guide lays out which ones actually scale into the late game.
Second, the parry is a boss tool, not just a crowd tool. Chainsaws, Krauser's blade, thrown axes, even certain lunges can be blocked with the Combat Knife. If you never got comfortable with the timing in the village, the beginner guide breaks down why the parry is the single skill that unlocks the back half of the game. Bring a repaired knife into every fight below.
One more thing worth saying plainly: shotguns stagger, magnums delete, and grenades open windows. Handgun DPS is not a boss answer.
Del Lago: the lake, the harpoons, the panic
Chapter 3. Your first real boss is a giant lake creature, and it is the one fight in the game where your entire arsenal is replaced by a pile of harpoons on a tiny boat. Del Lago drags you across the water; you steer, it charges, and you throw harpoons into it when it surfaces and opens its mouth.
The mistakes here are movement mistakes, not aiming mistakes. Steer around the rocks and wooden debris — clipping an obstacle staggers the boat and eats a free hit. When Del Lago rushes the boat head-on, swerve hard perpendicular to its charge rather than trying to out-run it in a straight line. Throw harpoons only when its head is up and facing you; chucking them at a submerged body wastes them.
The fight ends with Leon tangled in the harpoon line and dragged under. Mash the prompt to cut free. There is no gun that helps here, so there is nothing to buy for it — just don't panic-throw your harpoons into the water.
The Gigante problem never really goes away
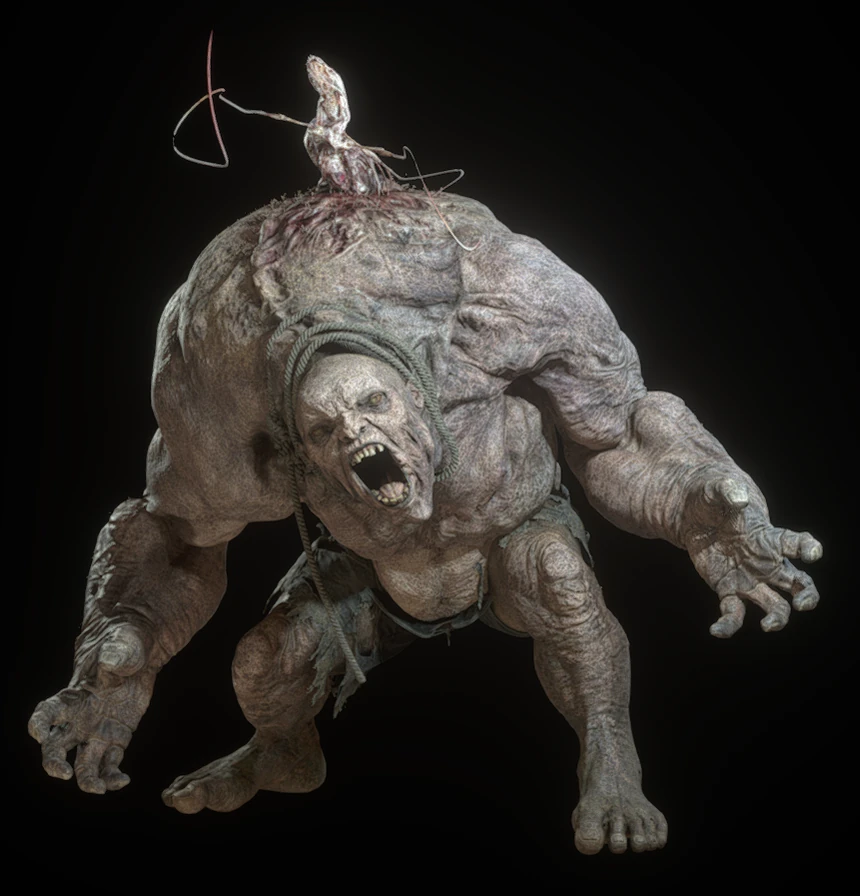
You do not fight one El Gigante. You fight the idea of El Gigante four separate times, and the solution barely changes, so learning it once pays off across half the game.
The first El Gigante (Chapter 4) sets the template. Pour damage into it — legs and head both work to stagger — until a Plaga parasite bursts out of its back. That is your cue: run up behind it, climb onto its back, and knife the exposed parasite. A couple of mounted knife sequences will drop it. Everything about every later Gigante is a variation on getting to that back parasite.
The Armored El Gigante (Chapter 8) wears plating that shrugs off small arms, and the arena hands you the answer — a mounted cannon. Use the environment to strip or stun it, then work the same exposed weak point. The Dos Gigantes (Chapter 11) throws two at once, one of them armored, in a room with a lava pit. Kill the ordinary one first so you are not being flanked, then use the hazard: luring the armored Gigante into the lava is far cheaper than grinding it down with ammo.
The through-line: never fight a Gigante toe to toe. Make it turn, expose the back, and be ready to climb.
Bitores Mendez: split the body, then hit the eye
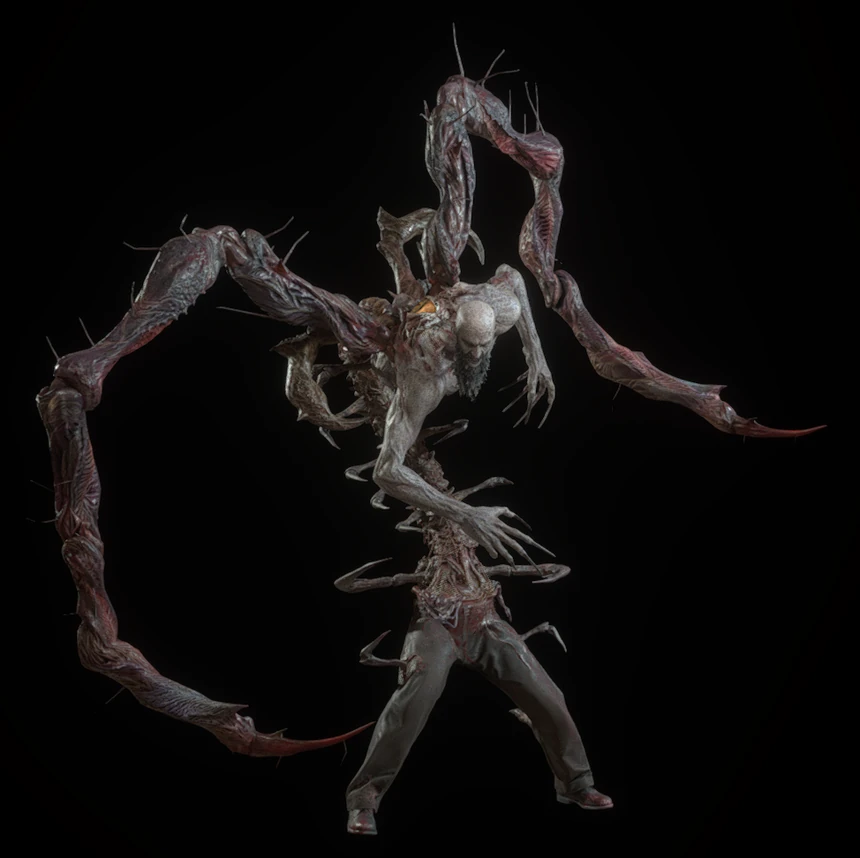
Chapter 6, in a burning barn. The village chief mutates into a tall, segmented horror, and he has two phases with two different weak points.
In phase one, his weak point is the exposed, centipede-like segment between his torso and his legs. Concentrate fire there — shotgun blasts and explosives stagger him and rip through it fastest. Enough damage makes him curl up and expose an eye; when he hunches, close in and knife it for a big chunk. The barn has a second floor, and staying on the upper platform gives you angles on that mid-body segment while keeping you out of reach of his lunges. A flash grenade at the opening buys time to reposition and grab resources.
Deplete the first bar and he sheds his legs for phase two, now scrambling around the walls and hurling flaming beams and explosive barrels. Crouch or sprint to dodge the beams; shoot the barrels while he is still holding them for free damage. The fire keeps shrinking your usable floor space, so this is a race — aim for the eye and finish him before the arena closes in.
Verdugo: freeze it or die trying
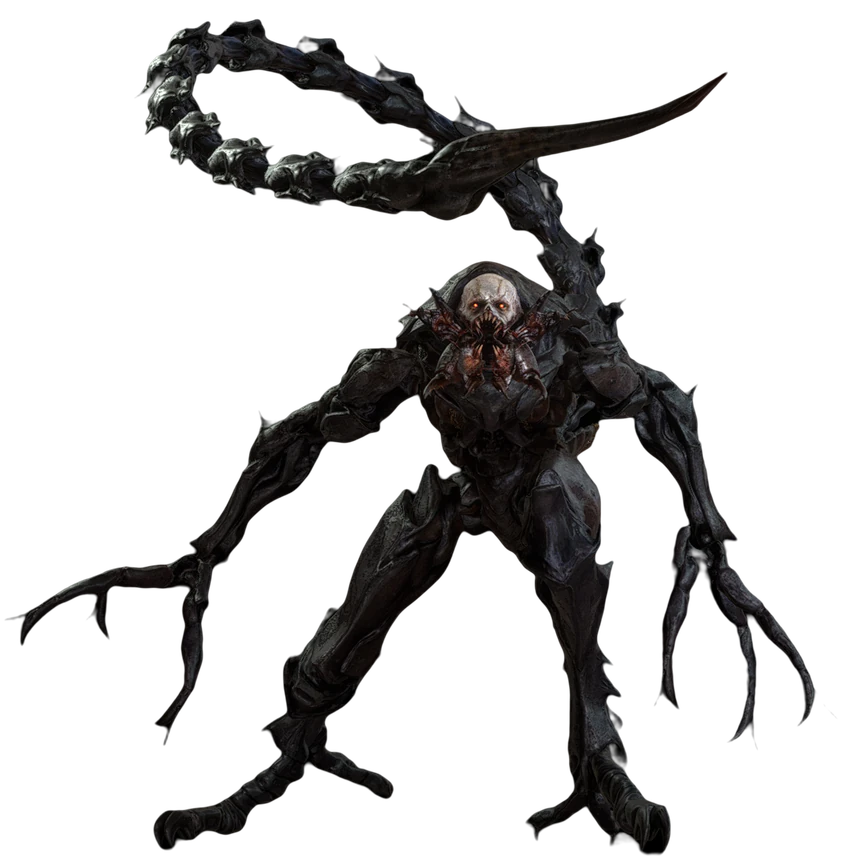
Chapter 10. This is the fight people remember, and the one where brute force flatly does not work. The Verdugo is an armored, insectile horror that barely flinches at gunfire — until you make it cold.
The lab is scattered with red liquid-nitrogen canisters. Shoot or knock one over as the Verdugo closes on you and the burst freezes it solid for a few seconds. That frozen window is the only time it takes real damage, so this is when your magnum, shotgun, and grenades come out — not before. The clean method is to keep moving in a loop around the room, let it chase, trigger a canister into its path, then unload everything you have while it is iced.
Two things to know. The Verdugo fight is technically optional — you can sprint for the elevator and skip it if you are low on resources — but killing it is very doable with the nitrogen and pays out. And do not waste ammo while it is thawed and skittering; you are just repairing your knife for nothing. Freeze, dump, repeat.
Ramon Salazar: the flying eyeball
Chapter 12. Salazar fuses with a giant Plaga organism into a floating mass of tentacles, and the fight's whole difficulty is that it will not sit still. It flies around the room, tucks its weak point away, and lashes out with grabs.
The weak point is a large eye that opens on the central mass. Wait for it to expose, then hit it hard — an SMG for chip damage between openings, a magnum when the eye is wide open. It also sprouts a mouth and reaching tendrils; keep your distance and prioritize not getting grabbed over greedy damage. If you have been feeding the Merchant, this is a good fight to have spent spinel on an Exclusive Upgrade Ticket beforehand — the Merchant and spinel guide covers why that ticket is the biggest power spike money can buy.
Cheese note: if you are still carrying a Golden Egg, throwing it at the exposed eye does absurd damage — two clean hits can nearly end the fight even on higher difficulties. It is the single best use of that egg in the game.
Jack Krauser: the knife duel bullets cannot solve
Chapter 14. For one fight, the remake takes away your comfortable gunplay and hands the game back to your knife. Krauser opens with a scripted knife duel, and it is the one place in the campaign where the blade is your primary weapon, not a backup.
Watch for the flash on his blade — that is your parry cue. Parry on the flash, then answer with a counter-slash when the prompt appears; mistime it and you eat the hit. Because this leans entirely on the knife, a worn-down blade is a genuine liability here: the durability and repair economy from the beginner guide matters more in this fight than anywhere else, so walk in with a freshly repaired Combat Knife.
Later in the encounter he backs off and switches to his bow and SMG, peppering you from range across a ruined arena full of traps he has set. Push forward using cover, and when his mutated blade-arm Plaga is exposed, that is your opening for firearms. Patience beats aggression — Krauser punishes players who rush him.
Osmund Saddler: the final eyes
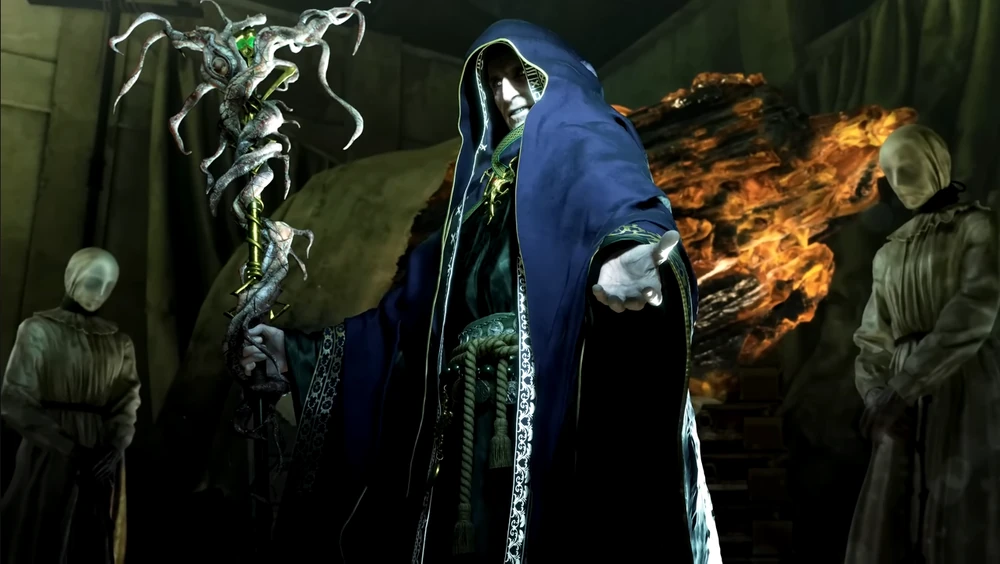
Chapter 16. The final boss is a towering mutation covered in eyeballs, and it is more about managing an arena than out-DPSing a health bar.
Phase one: burst the smaller eyes scattered across his body and his spider-like legs. Pop enough of them and Saddler reels and collapses, exposing his large central eye and prompting a knife finisher — run in and take it. Repeat that loop, using the explosive barrels around the arena to blow open multiple eyes at once, until you push him to the second phase.
Phase two is scripted in your favor. Ada throws Leon a Rocket Launcher (Special) — pick it up, aim at the giant central eye, and fire. That shot ends the game. You cannot swap off it once it is in your hands, and you do not want to; that special rocket is the intended kill. All the eye-bursting before it is just getting him into position for Ada's delivery.
The enemies that fight like bosses
Two regular enemies hit hard enough and demand enough specific tech that they belong in a boss guide even though the game never frames them that way.
Garrador
The Garrador is a blind, blade-armed brute with hearing sharp enough to track your every footstep. Its weak point is the Plaga on its back, and the trick is exposing it without getting shredded. Move slowly, walk instead of sprinting, and use the environment: bait it into charging so it rams a wall and stuns itself, then shoot the exposed back parasite. Silent weapons are gold here — the Bolt Thrower's bolts make no sound, so you can chip the parasite without giving away your position. A later fight throws two Garradors at once in a tight room, which is exactly as unpleasant as it sounds.
Regeneradores and the Biosensor Scope
Regeneradores are the breathing, stretching nightmares that will not die no matter how much you shoot them — because their real weak points are the Plaga parasites buried inside their bodies, and you cannot see them with the naked eye. You need the Biosensor Scope, a rifle attachment that works like a thermal camera and reveals the parasites as glowing masses. It is the remake's version of the original's Infrared Scope. Mount it on a rifle, spot every parasite embedded in the Regenerador, and destroy all of them to finally put it down. Skip the scope and you are wasting ammo on a health bar that regenerates faster than you drain it. The spiked Iron Maiden variant works the same way and is worth avoiding entirely when you can.
What the remake changed about its bosses
If you played the 2005 original, the boss design philosophy shifted in a few ways that matter.
The biggest is that the parry restructures the defensive game. The original leaned on button-mashing quick-time events to survive chainsaws and Krauser; the remake replaces most of that with a real, skill-based parry you can practice. Several fights were reworked around it, Krauser's duel and the chainsaw encounters most of all.
The remake also standardizes the weak-point language. Almost every boss now funnels to an eye or a back parasite, which makes the roster feel consistent once you learn to look for the glowing target. Del Lago's harpoons, the Gigante back-mount, Mendez's eye, Saddler's eyes — same grammar, different sentences.
And a few things carried over untouched because they were already perfect. Ada still hands you the special Rocket Launcher for Saddler, exactly like 2005. Some traditions survive a remake. If you are just getting started and want the fundamentals before any of these fights, the beginner guide is the place to start, and the weapon upgrade guide tells you what to be carrying by the time you reach the castle.
Quick Action Checklist
- Bring a magnum and a repaired knife to every boss. Bosses are what your hoarded magnum ammo is for.
- Del Lago (Ch. 3): steer around debris, throw harpoons only when its head surfaces, mash to cut the line.
- El Gigante (Ch. 4, 8, 11): stagger it, wait for the back Plaga, climb on and knife it. Lure the armored one into lava in the Dos Gigantes fight.
- Mendez (Ch. 6): shoot the mid-body segment, use the upper floor, then hit the exposed eye before the fire closes the arena.
- Verdugo (Ch. 10): shoot the red nitrogen canisters to freeze it, then dump heavy damage. It is optional, but very killable.
- Salazar (Ch. 12): hit the large eye when it opens; a Golden Egg nearly one-shots the fight.
- Krauser (Ch. 14): parry on the blade flash, counter-slash on the prompt, walk in with a fresh knife.
- Saddler (Ch. 16): burst the small eyes, knife the central eye, then use Ada's special Rocket Launcher to finish.
- Garrador: stay quiet, bait wall-charges, shoot the back Plaga with silent bolts.
- Regenerador: equip the Biosensor Scope and destroy every internal parasite — nothing else kills it.
Frequently Asked Questions
How many bosses are in the Resident Evil 4 remake?
How do you beat the Verdugo in Resident Evil 4 remake?
What is El Gigante weak to in Resident Evil 4 remake?
How do you beat Bitores Mendez in Chapter 6?
Do you need the rocket launcher to beat Saddler?
How do you kill Regeneradores in Resident Evil 4 remake?
What is the hardest boss in the Resident Evil 4 remake?
Keep Reading
Related Guides

RE4 Gold Edition on Switch 2: What Hands-On Previews Show
Capcom's September 9 announcement gave Resident Evil 4 Gold Edition a release date and a price on Switch 2, but said nothing about how it would actually run. Tokyo Game Show 2026 is where that got answered — by the press who played it, not by Capcom.
RE4 Remake Switch 2 Release Date and Gold Edition Price
Capcom confirmed Resident Evil 4 Gold Edition for Switch 2 at the September 9 Nintendo Direct — the remake's first native, installed release on Nintendo hardware after three years as a cloud-only stream. Here is the launch date, the price, exactly what the bundle includes, and what it quietly leaves out.
RE4 Remake Costumes and Accessories: Every Perk
Capcom's own manual calls costumes and accessories a Perk system, not a wardrobe. Most of the 39 options in the Resident Evil 4 remake do nothing mechanically — but six of them, one costume and five accessories, genuinely change how the game plays, and four of those five accessory perks are locked behind an S+ run on a specific difficulty.
RE4 Remake Difficulty Guide: What Each Mode Changes
The Resident Evil 4 remake asks you to pick a game mode before it has taught you anything, then refuses to let you change your mind. Here is what each of the four actually modifies, straight off Capcom's own manual, and the two narrow exceptions to the lock-in.
Resident Evil 4 Remake Beginner Guide: Survive the Village
The 2023 remake gives Leon a parry and takes away his indestructible knife. That single trade is the whole learning curve. Here is how to stop dying in the village and start playing the game the way it wants to be played.
RE4 Remake Attaché Case Guide: All 7 Cases and Effects
The case you equip in the Resident Evil 4 remake is a drop-rate modifier wearing a skin. Here are all seven, what each one boosts, the 20 spinel Leon pays for the two buyable ones, and why the Gold and Classic cases you thought you missed are still on sale.