Elden Ring Wondrous Physick Guide: Every Crystal Tear, Ranked by Its Real Numbers
Most Tarnished mix one Crimson Crystal Tear into the Flask of Wondrous Physick and never open the menu again. Here are the real percentages behind all 32 tears, the combos actually worth running, and why the Cerulean Hidden Tear and Deflecting Hardtear break the game open.
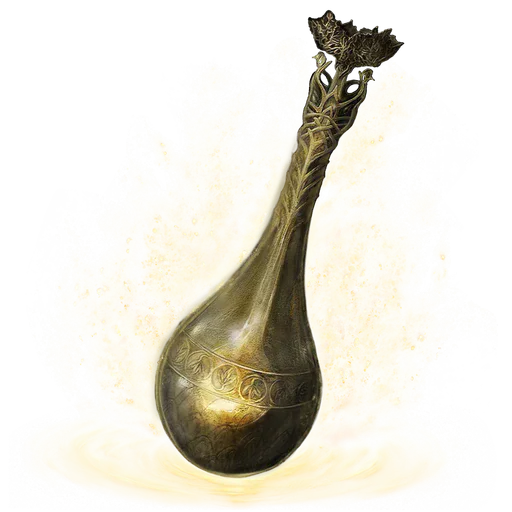
Most Tarnished pick up the Flask of Wondrous Physick at the Third Church of Marika, drop in the single Crimson Crystal Tear sitting in the same stone bowl, and then never open that menu again for the next eighty hours. That's a free 50% heal on a button you already own, which is fine — and it's also the most wasted item in the game, because by the time you reach the Mountaintops you are carrying tears worth two or three times that heal in actual output.
The physick has two slots and one charge per grace. That constraint is the entire design. You are not picking favourites, you are picking the two numbers that matter most in the ninety seconds after you walk through a fog wall. So here are the numbers.
Two slots, one charge, and the mistake almost everyone makes
Rules first, because they shape everything after:
- Two tears maximum. You mix at any Site of Grace, for free, as many times as you like.
- One charge, refilled by resting — and it does not eat into your Crimson or Cerulean flask allocation. It's a third bar you get for nothing.
- 32 crystal tears exist, three of which are duplicates of tears you already have: two Crimson, two Cerulean, two Ruptured.
- Duplicates stack in the same flask. Two Crimson Crystal Tears heal 100% of max HP instead of 50%. Two Cerulean tears restore all your FP.
That last rule is the one people miss. Players find the second Crimson Crystal Tear in the basin under the Minor Erdtree in the Capital Outskirts, shrug, and leave it rotting in Key Items. Doubling up turns the physick into a full-bar panic heal, which is genuinely the right answer for exactly one kind of boss: the kind that can delete you from full. Every other fight, you should be running a buff.
Where the flask comes from
The flask sits in a basin at the Third Church of Marika in eastern Limgrave — ride north-east along the river from the Mistwood, or up the road past Fort Haight. The left-hand Crimson Crystal Tear is in the same bowl. That's the whole acquisition. No quest, no boss, no gate.
Everything after that comes from three places:
- Minibosses at Minor Erdtrees — Erdtree Avatars, their rotted Putrid Avatar cousins, Ulcerated Tree Spirits, and one very unpleasant Wormface.
- Sap collection basins scattered across the map, usually guarded by something you did not want to fight today.
- Furnace Golems, and only in Shadow of the Erdtree.

The tears with real numbers attached
In-game descriptions say "temporarily boosts" and then stop talking. Here are the figures the wikis actually document.
Damage boosters
| Tear | Effect | Duration |
|---|---|---|
| Magic / Flame / Lightning / Holy-Shrouding Cracked Tear | +20% damage of that element (12.5% in PvP since patch 1.09) | 3 min |
| Thorny Cracked Tear | Consecutive attacks ramp through three tiers: +9%, +13%, +20% attack power | 3 min |
| Spiked Cracked Tear | +15% charged attack damage — not skills, not spells | 3 min |
| Strength / Dexterity / Intelligence / Faith-knot Crystal Tear | +10 to that attribute | 3 min |
| Stonebarb Cracked Tear | +30% stance damage, +30% stamina damage to blocking enemies | 30 sec |
Two things jump out of that table.
First, the Shrouding tears are element-locked, not weapon-locked. A Flame-Shrouding tear boosts the fire portion of a Flame Art greatsword and the fire portion of Giantsflame Take Thee, and does exactly nothing for the physical half of the swing. On a split-damage weapon you're buffing maybe half your output. On a pure caster committed to one element, it's a clean 20%.
Second, the knot tears are a requirement cheat, not a damage buff. +10 Strength when you're already sitting at 60 is a rounding error — scaling has long since flattened out by then. At level 40 on a fresh character it's the difference between meeting a weapon's requirement and being locked out. And because two-handing already multiplies Strength by 1.5, a Strength-knot tear effectively reads as +15 when you grip with both hands. Use it to unlock gear early, not to hit harder late.
Thorny Cracked Tear is the quiet star here. It ramps through three tiers as you keep swinging, topping out at +20% attack power, and the ramp decays if you stop attacking for about a second and a half. It rewards exactly the aggressive, don't-back-off playstyle this game keeps trying to teach you.
Survival and defense
| Tear | Effect | Duration |
|---|---|---|
| Opaline Hardtear | +15% to all damage negation (10% in PvP) | 3 min |
| Opaline Bubbletear | +90% to all damage negation — pops on the first hit | 3 min or until hit |
| Crimson Bubbletear | Auto-heals 30% of max HP when you drop below 21% | 3 min or until it fires |
| Crimsonspill Crystal Tear | +10% max HP | 3 min |
| Speckled Hardtear | Raises all resistances and cures every active status ailment | 3 min |
| Leaden Hardtear | Poise boost that works as pseudo-hyperarmour | ~10 sec |
| Crimsonwhorl Bubbletear | Converts incoming non-physical damage into healing | ~15 sec |
| Windy Crystal Tear | +5-6 i-frames on dodge rolls, but -10% defence | 3 min |
Opaline Hardtear is the most quietly correct pick in the game. Fifteen percent off every damage type, for three minutes, with no trigger condition and no change to how you play. Most boss attempts don't last three minutes. It's the closest thing the physick has to a default.
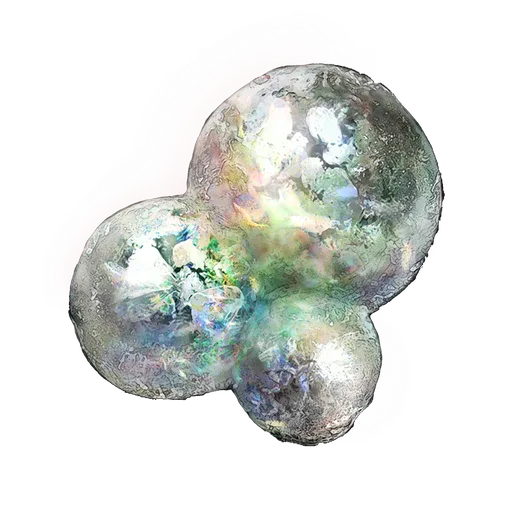
Opaline Bubbletear is the opposite animal: 90% negation on exactly one hit, then it's gone. That's a parachute for a specific scripted one-shot, not a fight-long buff. Worth knowing the edge case — if you're holding a 100% physical negation shield when the hit lands, the bubble doesn't pop at all.
Windy Crystal Tear is the one I'd argue about. Five or six extra i-frames is a huge amount — roughly the gap between a medium and a light roll — but the -10% defence tax means every hit you don't dodge lands harder. It's a skill-expression item. If you're already rolling cleanly through combos, it's arguably the best defensive tear in the game. If you're eating two hits per string, it's actively making your life worse.
Crimsonwhorl Bubbletear deserves a specific callout: it converts incoming elemental damage into healing, and it's one of the very few clean answers to the Elden Beast's homing star barrage.
Speckled Hardtear is the one to remember before walking into a swamp. Raising all resistances and clearing whatever is already ticking on you makes it the correct pick for rot and bleed zones rather than boss rooms.
HP, FP and stamina
| Tear | Effect | Duration |
|---|---|---|
| Crimson Crystal Tear (two exist) | Restores 50% max HP each — both slots means 100% | Instant |
| Cerulean Crystal Tear (two exist) | Restores 50% max FP each — both slots means 100% | Instant |
| Crimsonburst Crystal Tear | 7 HP per second, roughly 1,260 HP total | 3 min |
| Cerulean Hidden Tear | Zero FP cost on everything | 15 sec |
| Greenspill Crystal Tear | +15% max stamina | 3 min |
| Greenburst Crystal Tear | +30% stamina regeneration | 3 min |
The Cerulean Hidden Tear is the most build-defining item on this entire list and it isn't close. Fifteen seconds where every spell, incantation and Ash of War costs nothing at all. Comet Azur, Ranni's Dark Moon, an uninterrupted Blasphemous Blade L2 chain — entire boss-melting strategies exist purely because this tear exists. FromSoftware knew: patch 1.04 cut it from 15 seconds to 7, and patch 1.04.1 quietly put it back. It drops from the Ulcerated Tree Spirit at the Minor Erdtree on Mt. Gelmir, and it is worth a detour.
Crimsonburst's 1,260 HP over three minutes is more total healing than a doubled Crimson mix on most characters — but it arrives 7 HP at a time, which is useless against burst and excellent against chip. Read the boss before you pick.
And between the two green tears, take Greenburst. A 30% faster regeneration rate gives you more total stamina across a long fight than a 15% bigger bar does.
Utility and the genuinely strange
| Tear | Effect |
|---|---|
| Winged Crystal Tear | Raises max equip load by 450% for 3 minutes |
| Twiggy Cracked Tear | No rune loss on death for 3 minutes (Death Blight excepted) |
| Purifying Crystal Tear | Neutralises the damage from Mohg's Bloodboon Ritual |
| Ruptured Crystal Tear | Makes the concoction explode, costing you 300 HP (700 for the second copy) |
The Winged Crystal Tear carries the funniest number in the game and almost nobody uses it properly. A 450% increase is a 5.5x multiplier on maximum equip load. A Prophet with 8 Endurance goes from 45 equip load to 247.5 — enough to wear the full Bull-Goat Set at 63 weight, carry your heaviest armament, and still roll light.

The catch is brutal and worth spelling out, because the wiki does the maths and most guides don't: when it expires, you snap back. Unless your equipped weight stays under about 15.6% of the boosted maximum you land straight into heavy load, and above roughly 22.2% you go fully overloaded. Three minutes goes fast in a boss fight. Set a mental timer or leave it alone.
Twiggy Cracked Tear is what you mix before a jumping puzzle or a rune-heavy run-back. Three minutes of dying without dropping a bloodstain turns the Frenzied Flame Proscription descent or the Raya Lucaria Crystal Tunnel side path from a rune-anxiety exercise into a normal platforming section. It also means a fall death can't overwrite the bloodstain you're already trying to recover.
Purifying Crystal Tear — dropped by Eleonora, Violet Bloody Finger during Yura's questline — is the counter to Mohg's count-to-three Bloodboon Ritual. It doesn't stop him healing off it, but it turns a death sentence into a survivable hit, and it works even if you drink before the countdown starts.
The Ruptured Crystal Tear does nothing useful. It exists to blow you up for 300 HP. It is a joke item and I respect it.
What Shadow of the Erdtree adds
The DLC hides eight more tears, all of them inside Furnace Golems — the walking kilns you kill by lobbing a pot into the top. Everything in this section is DLC-only.
| Tear | Effect | Duration | Golem location |
|---|---|---|---|
| Deflecting Hardtear | Enables deflects: a perfectly timed guard negates 100% physical / 75% elemental and stacks guard-counter damage up to +80% | 5 min | Gravesite Plain |
| Viridian Hidden Tear | Zero stamina consumption | 15 sec | Gravesite Plain, on the path to Cerulean Coast |
| Crimsonburst Dried Tear | Heals nearby allies over time — no effect on you | 3 min | Scadu Altus |
| Cerulean-Sapping Cracked Tear | Restores FP when you land attacks | 45 sec | Scadu Altus |
| Crimson-Sapping Cracked Tear | Restores HP when you land attacks | 45 sec | Ancient Ruins of Rauh |
| Glovewort Crystal Tear | Boosts Spirit Ash attack power | 3 min | Charo's Hidden Grave |
| Bloodsucking Cracked Tear | +20% damage, drains 0.2% max HP + 20 HP per second | 3 min | Ruins of Unte |
| Oil-Soaked Tear | Coats nearby enemies in oil, making them far more vulnerable to fire | 60 sec | Ruins of Unte |
The Deflecting Hardtear is the most significant thing Shadow of the Erdtree shipped, and it isn't a weapon. It bolts a Sekiro-style deflect onto Elden Ring: guard inside a six-frame window of an attack connecting and you take essentially no physical damage, ignore the status buildup that came with it, and each consecutive deflect pumps your follow-up guard counter by 20% up to a +80% ceiling. Five minutes of duration covers a full boss attempt with room to spare.
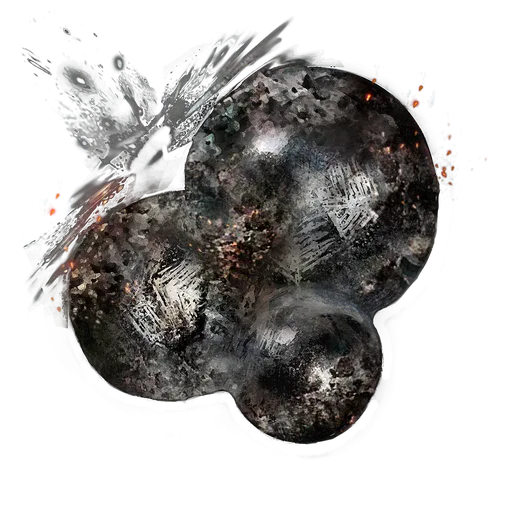
If you have ever wanted to play this game aggressively with a shield up, that one item is the reason.
Viridian Hidden Tear is the stamina counterpart to the Cerulean Hidden Tear, and it enables the same category of nonsense — fifteen seconds of uninterrupted colossal weapon swings, or fifteen seconds of rolling through a phase transition without ever running dry.
Oil-Soaked Tear is the sleeper pick. Oil-soaked enemies take dramatically more fire damage, and it coats everything near you for a full minute. On a fire build that's a debuff you apply to the whole arena instead of a buff you apply to yourself.
And note Crimsonburst Dried Tear is explicitly useless solo. The description says it flatly: it heals your allies and has no effect on the imbiber. It's a co-op item.
The combos worth actually mixing
Two slots. Here's what I'd actually run and why:
- Caster burst (Comet Azur, big incantations): Cerulean Hidden Tear + the matching Shrouding tear. Fifteen seconds of free FP at +20% element damage is exactly how a Comet Azur one-shot happens.
- General-purpose melee boss: Opaline Hardtear + Thorny Cracked Tear. 15% less damage coming in, ramping to +20% going out if you keep the pressure on. Nothing conditional, nothing to time.
- Colossal weapon / charged R2 build: Spiked Cracked Tear + Stonebarb Cracked Tear. +15% on charged hits and +30% stance damage stack into faster critical windows. Stonebarb only lasts 30 seconds, so this is an opening burst, not a fight-long plan.
- Shield and guard-counter build (DLC): Deflecting Hardtear + Opaline Hardtear. Deflect for the offence, flat negation for the deflects you mistime.
- Underlevelled and just trying to survive: two Crimson Crystal Tears for a full-bar heal, or Opaline Hardtear + Crimsonburst if the boss chips rather than bursts.
- Spirit Ash carry (DLC): Glovewort Crystal Tear + Opaline Hardtear. If the Mimic Tear is doing the damage, buff the Mimic Tear.
- Swamp crossing, not a boss: Speckled Hardtear + Crimsonburst. Resistances up, status cleared, HP trickling back while you wade.
Tears people overrate
- Knot tears at high level. +10 to an attribute you already have 60 points in is close to nothing. Mid-game requirement hack, not a damage buff.
- Opaline Bubbletear as a default. 90% off one hit is superb against a scripted one-shot and mediocre against a boss that hits you eight times.
- Greenspill. +15% max stamina reads well until you put it next to Greenburst's +30% regeneration, which wins over any fight longer than a few seconds.
- Bloodsucking Cracked Tear on a low-Vigor build. 20% more damage is real, but 20 HP per second plus 0.2% of your max HP per second for three minutes is a lot of health to hand back if you can't out-heal it.
- Windy Crystal Tear while you're still learning a boss. The -10% defence punishes exactly the players who are still getting hit.
- Crimsonburst Dried Tear in single-player. It does nothing for you. At all.
Quick Action Checklist
- Grab the flask and the first Crimson Crystal Tear at the Third Church of Marika in eastern Limgrave. It costs you nothing but the ride.
- Re-mix at every grace. It's free and unlimited, and the correct pair genuinely changes per fight.
- Prioritise three tears above all others: Cerulean Hidden Tear (Ulcerated Tree Spirit, Mt. Gelmir), Opaline Hardtear (Putrid Avatar, Dragonbarrow), Thorny Cracked Tear (Putrid Avatar, Consecrated Snowfield).
- Match Shrouding tears to your damage type, and remember they only buff that element — split-damage weapons collect half the value.
- Double up Crimson or Cerulean for a full 100% restore when a boss can burst you from full health.
- In the DLC, kill every Furnace Golem you ride past. Deflecting Hardtear in particular changes what builds are viable.
- Set a mental timer on Winged Crystal Tear — the equip-load crash when it expires will dump you into heavy load mid-combo.
Frequently Asked Questions
Where do you get the Flask of Wondrous Physick in Elden Ring?
How many crystal tears are there in Elden Ring?
What is the best crystal tear combo in Elden Ring?
Can you put two of the same crystal tear in the Flask of Wondrous Physick?
What does the Cerulean Hidden Tear do and where is it?
What does the Deflecting Hardtear do in Shadow of the Erdtree?
How much does the Winged Crystal Tear increase equip load?
Do the Shrouding Cracked Tears boost physical damage?
Keep Reading
Related Guides

Elden Ring Respec Guide: All 27 Larval Tear Locations
Every Rebirth at Rennala costs one Larval Tear, and a Journey only holds 27 of them. Here is where all 18 base-game tears and all nine Shadow of the Erdtree tears are, what the Rebirth menu will and will not let you change, and why eight of the eighteen wait behind Starscourge Radahn.
Elden Ring Remembrance Rewards: What Each One Unlocks
Trade a Remembrance to Finger Reader Enia and she offers exactly one item, not two — pick wrong and the other is gone unless you find a Wandering Mausoleum or Duplication Coffin first. Here is every Remembrance, both of its rewards with stat requirements, the one that is secretly a three-way choice, and the item that behaves like a Remembrance but is not one.
Elden Ring Great Runes Guide: What Each One Actually Does (and When to Burn a Rune Arc)
Morgott's Great Rune raises your maximum HP by 25% until you die, and most players never switch it on. Here is how the three-step Great Rune system actually works, the verified numbers behind all seven runes, and why hoarding Rune Arcs is the real mistake.
Elden Ring Talismans Guide: Which Ones Actually Deserve a Slot
Four slots, four Talisman Pouches you cannot miss, and about a hundred candidates. This is the honest read on which Elden Ring talismans move real numbers, which ones are traps, and how the Soreseal math actually breaks down at level 40 versus level 120.
Best Elden Ring Starting Class: All 10 Origins Ranked
Every Elden Ring origin has exactly the same number of attribute points for its level — the only thing you are really choosing is where those points sit and what gear you get for free. Here is what that actually means for your first twenty hours.

Elden Ring Buff Stacking: Which Buffs Cancel Each Other
Two +20% buffs should give you +44%. If both are Body buffs, the second one deletes the first and you get +20%. Elden Ring sorts temporary buffs into four exclusive categories, tells you nothing about it, and the difference between a routine that works and one that does not is invisible.