Minecraft Anvil & Repairing Guide: Beat "Too Expensive!"
The anvil is the most misunderstood block in Minecraft. Half of players burn levels in the wrong order and then watch their netherite sword hit "Too Expensive!" forever. Here is exactly how repairing, combining, and the prior-work penalty work — and the order of operations that keeps your gear fixable.
Here's the scenario every Minecraft player eventually hits: you've got a perfect netherite pickaxe — Efficiency V, Fortune III, Unbreaking III, Mending — and one day you go to top off its durability or add a fresh enchant, and the anvil throws up the dreaded red text: "Too Expensive!" Now the tool you spent hours building can never touch an anvil again. That's not a bug. That's the prior-work penalty doing exactly what it's designed to do, and almost nobody understands it until it bites them.
The anvil isn't complicated once you see the rules. It does three jobs — repair, combine, and rename — each costs experience levels, and every operation quietly stacks a penalty that doubles. Master the order you do things in and you'll keep gear repairable far longer. This guide breaks down every mechanic, verified against the Minecraft Wiki.
What the anvil actually does
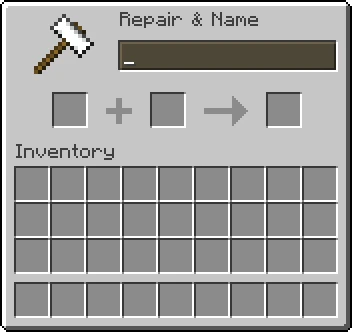
An anvil has three core functions, all done in its two-slot interface. The item on the left is the "target," the item on the right is the "sacrifice" (it gets consumed), and the result appears in the output slot with an XP cost shown below it:
- Repair a damaged tool, weapon, or armor piece — either with raw material or with another copy of the item.
- Combine two items of the same type, merging their durability and their enchantments.
- Rename any item (even non-tools, even blocks and stacks).
The anvil's superpower over an enchanting table is that it preserves enchantments while it works, and it can apply treasure enchantments (like Mending and Frost Walker) that a table can never roll. You craft an anvil from 3 blocks of iron plus 4 iron ingots (31 ingots total). That's expensive, but you only need one.
Repairing with materials vs combining
There are two distinct ways to repair durability, and they cost differently.
Unit repair (with raw material). Some tiered items can be fixed using their base material — iron tools with iron ingots, diamond gear with diamonds, netherite with netherite ingots, and so on. Each unit of material restores up to 25% of the item's max durability and costs 1 level per unit (plus any prior-work penalty). Because the penalty climbs fast, the wiki-backed best practice is to run the item nearly to breaking, then repair with up to four units at once for a near-full fix in a single operation.
Combine repair (with a second copy). Put two of the same item in the anvil and the target absorbs the sacrifice's remaining durability plus a 12% bonus of max durability. That repair portion costs 2 levels. This is how you fix items that have no material repair — like a bow, fishing rod, or elytra (an elytra is repaired with phantom membrane as its "material," but many items rely on combining a second copy).
The key difference: unit repair is cheap per fix but adds a prior-work penalty each time. Combining two enchanted copies also merges their enchantments, which is powerful — but it stacks penalties from both items. Choose based on whether you also want to move enchantments around.
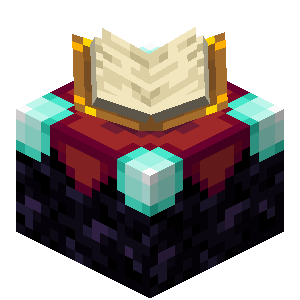
Combining enchanted books
The cleanest way to enchant gear is to combine an enchanted book onto it. Put your tool in the target slot, the enchanted book in the sacrifice slot, and the book's enchantments transfer to the tool.

The rules for stacking enchantments:
- If the target doesn't have that enchantment, it gains all of the book's levels — unless the enchantment is incompatible with one the item already carries (you can't put Sharpness and Smite on the same sword, or Silk Touch and Fortune on the same tool).
- If the target already has the same enchantment at a lower level, it's raised to the book's level.
- If both are the same level and not at max, the result goes up one level (two Sharpness IV books make Sharpness V).
- If the book's level is lower, nothing changes — but you still pay.
You can also combine two enchanted books together to build a single super-book before ever touching your gear. This is the pro move: merge all your books first, then apply one finished book to the tool in a single anvil operation. Fewer operations on the actual tool means a lower prior-work penalty on the thing you care about. For which enchantments are worth chasing in the first place, see our best Minecraft enchantments guide.
The prior-work penalty
Here's the mechanic that ruins gear if you ignore it. Every time an item goes through the anvil (except a pure rename), it accumulates a prior-work penalty that's added to the XP cost of its next anvil operation. And it roughly doubles each time.
The penalty follows the formula 2^c − 1, where c is the number of times that item has been worked. So the penalty progression is:
- 0 prior uses → 0 extra levels
- 1 prior use → 1
- 2 → 3
- 3 → 7
- 4 → 15
- 5 → 31
- 6 → 63
That sixth use alone would add 63 levels of cost before you've paid for the repair or enchant itself. When two items are combined, the new penalty is based on the larger of the two items' penalties, then bumped up — so combining a heavily-worked item into a fresh one poisons the fresh one too. This exponential climb is why an over-worked tool eventually becomes untouchable.
The "Too Expensive!" wall
In Survival and Adventure mode, an anvil refuses any operation that would cost 40 levels or more — once the total hits 40+, it shows "Too Expensive!" in red and won't proceed. The maximum allowed operation is 39 levels.
Combine that cap with the doubling penalty and the math is brutal: after just a handful of operations, the prior-work penalty alone clears 40, and the item is permanently locked out of anvils in survival (only Creative mode can work past the cap). There is no way to lower an item's prior-work penalty on an anvil — once it's high, it's high. The only escapes reset it entirely (crafting-table repair or a grindstone), and both of those strip your enchantments. So the real defense isn't fixing a maxed-out item — it's never letting the penalty climb that far in the first place.
The right order of operations
This is the whole point of the guide. To keep an item repairable as long as possible, minimize the number of anvil operations on the final item, because each one doubles its penalty.
The optimal build order for a piece of gear:
- Combine all your enchanted books into one master book first. Merge book + book repeatedly until you have a single book holding every enchantment you want. The penalties stack on the books, not your tool.
- Apply that one finished book to your tool in a single operation. Your tool now has every enchant for the price of one anvil use (penalty: 1).
- Rename the tool in that same operation if you want a custom name — renaming alongside an enchant is free of an extra operation.
- Repair only when nearly broken, using up to four units of material at once, so you do it as rarely as possible.
Run Mending on your gear (it's a treasure enchant only the anvil can apply) and most tools self-repair from XP, meaning you rarely need to anvil-repair at all — which sidesteps the penalty problem entirely. Mending is the single best answer to "Too Expensive!" For the bigger leveling picture, see the Minecraft XP guide.
Renaming items
Renaming is the anvil's quietest feature and the one with the friendliest rules. Drop any item — even non-tools, even a stack — into the target slot, type a name, and it costs a flat 1 level (plus any existing prior-work penalty). Custom names render in italics.
The good news: renaming alone does NOT add to the prior-work penalty. You can rename an item over and over without making it more expensive to enchant later. (The existing penalty is still charged on each rename, so renaming a heavily-worked tool is pricey — but it doesn't make things worse.) Because of that, the economical move is to rename a tool at the same time you repair or enchant it, folding the rename into an operation you were doing anyway. In Java Edition, a pure rename is also capped at 39 levels max. Renamed name tags, by the way, are how you label mobs.
Grindstone vs anvil
The grindstone is the anvil's opposite number, and people confuse them constantly. A grindstone does two things:
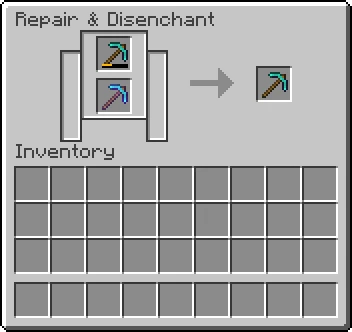
- Repairs two of the same item together (combining durability) without any enchantments or XP cost — purely mechanical.
- Strips all enchantments off an item and refunds a little XP for them.
The crucial detail for our topic: putting an item through a grindstone wipes its prior-work penalty back to zero — but it also removes every enchantment (it keeps the custom name). So a grindstone is the nuclear reset for a "Too Expensive!" tool: you lose the enchants but get a clean, fixable base item back, plus some XP. Crafting-table repair (combining two of the same item in the crafting grid) does the same penalty reset, but strips the name too.
Rule of thumb: anvil to build and preserve, grindstone to disenchant and reset. Use the grindstone to recover XP from junk enchanted loot, or to salvage a tool you've over-worked.
Anvil durability and degrading
Anvils don't last forever. Each time you repair, enchant, or rename, there's a 12% chance the anvil degrades by one stage. It steps through three visual states — Anvil → Chipped Anvil → Damaged Anvil — and a fourth degrade destroys it entirely. So expect to replace an anvil roughly every couple dozen uses on average.
You cannot repair an anvil with iron — there's no anvil-repair mechanic — so just keep a spare stack of iron for crafting new ones, or stockpile a couple of anvils. A damaged anvil still works exactly the same; it's only cosmetic until it breaks. (As a bonus, anvils are gravity blocks and deal damage if dropped on a mob, but that's a different trick.)
Quick Action Checklist
- Craft an anvil from 3 iron blocks + 4 iron ingots (31 ingots)
- Combine all enchanted books into ONE master book before touching your tool
- Apply the finished book (and any rename) to the tool in a single operation
- Repair with material only when nearly broken — up to 4 units at once (25% each)
- Remember the prior-work penalty doubles each use: 0, 1, 3, 7, 15, 31, 63...
- Stop before any operation hits 40 levels or you'll get "Too Expensive!" forever
- Put Mending on gear so it self-repairs and you rarely anvil-repair at all
- Rename freely — it never raises the prior-work penalty (but is still charged)
- Use a grindstone to disenchant + reset penalty (loses enchants, refunds XP)
- Keep spare iron — anvils have a 12% degrade chance per use and can't be repaired
Frequently Asked Questions
Keep Reading
Related Guides
Minecraft XP Guide: Fastest Ways to Level Up
XP is not points — it is the currency that runs your whole late game: enchanting, anvils, and Mending gear that repairs itself. Here are the fastest XP sources actually worth your time, ranked, with the real values.

Minecraft Armor Guide: Netherite, Trims & Best Setups
Armor in Minecraft isn't just 'more points = better.' Netherite adds toughness and knockback resistance that diamond doesn't, trims are pure cosmetics people treat like loot, and the enchant setup matters more than the material. Here's the whole stack, sorted.
Best Minecraft Farms to Build First
A farm is the difference between grinding and playing. The right first build hands you free iron, free XP, and free food while you do literally anything else. Here are the highest-value early and mid-game farms, ranked by what they actually unlock.
Minecraft Beacon Guide: How to Build and Power One
A beacon is the closest Minecraft gets to a permanent buff station — stand near one and you get Haste, Speed, or Resistance for free, forever. The catch is everything in front of it: kill the Wither for a nether star, then stack up to 164 mineral blocks into a pyramid. Here is the whole build, tier by tier.
Minecraft Survival Guide for Beginners — Surviving Your First Days
You have about ten minutes of daylight before the sun sets and the world tries to kill you. Here is exactly what to do with them — punch a tree, build a tool chain, and get a roof over your head before the zombies arrive.
Best Minecraft Enchantments, Ranked — The Ones Worth Your XP
Mending is the enchantment that ends the grind — gear that repairs itself forever. Everything else is a fight over your XP and anvil uses. Here is what actually earns a slot, ranked, with the real max levels.