PUBG Deston Map Guide: Drops, Recall & Endgame
Deston is the 8x8 that broke PUBG's rulebook — Ascenders up skyscrapers, gliders off rooftops, a Blue Chip recall system that brings dead teammates back, and swamps that aren't quite land or water. Here's where to drop, how to use the gadgets, and how to read the endgame.

Deston is the map where PUBG stopped pretending it was a milsim. It's the 9th Battleground — codename Kiki, a near-future North American city bankrupted and drowned by a hurricane — and it shipped with more new toys than any map before it: Ascenders that zip you up the side of a skyscraper, gliders stashed on rooftops, a Blue Chip recall system that yanks dead teammates back into the match, and swamps that are neither solid ground nor deep water. If you queue into it expecting Erangel-with-skyscrapers, the map will eat you. The gadgets aren't gimmicks; they're the whole point, and the players who ignore them lose to the players who don't.
This is one of PUBG's biggest maps — officially an 8x8, the developers actually called it the largest they'd ever built and hinted it runs "a little over" 8x8. That size, plus the verticality and the recall mechanic, makes Deston a fundamentally different read from the classic maps. Here's the real guide: the layout, how to actually use the recall and the Ascenders, where to drop, how to survive the swamps, and how the endgame plays out on the most three-dimensional map in the game.
The map that rewrote the rules
Most PUBG maps ask one question: where's the cover between me and the circle? Deston asks three. Where's my cover, sure — but also, which way is up, and can I get my dead teammate back before the next fight? The map is built around verticality and second chances, and that changes how aggressive you can afford to be.
The honest take: Deston is divisive for a reason. The recall system rewards teams that play to revive, which can drag out games and reward sloppy pushes that "should" have been punished. The flooded terrain slows rotations. And not every building is fully enterable — taking a lesson from Haven, the developers left many structures with only single floors or single rooms open, with the playable sniper perches highlighted so ground players can learn where shots come from. Once you internalize that the city is a designed shooting gallery rather than a free-roam sandbox, it clicks. Fight it, and you'll spend every match confused about where you just got shot from.
How Deston is laid out
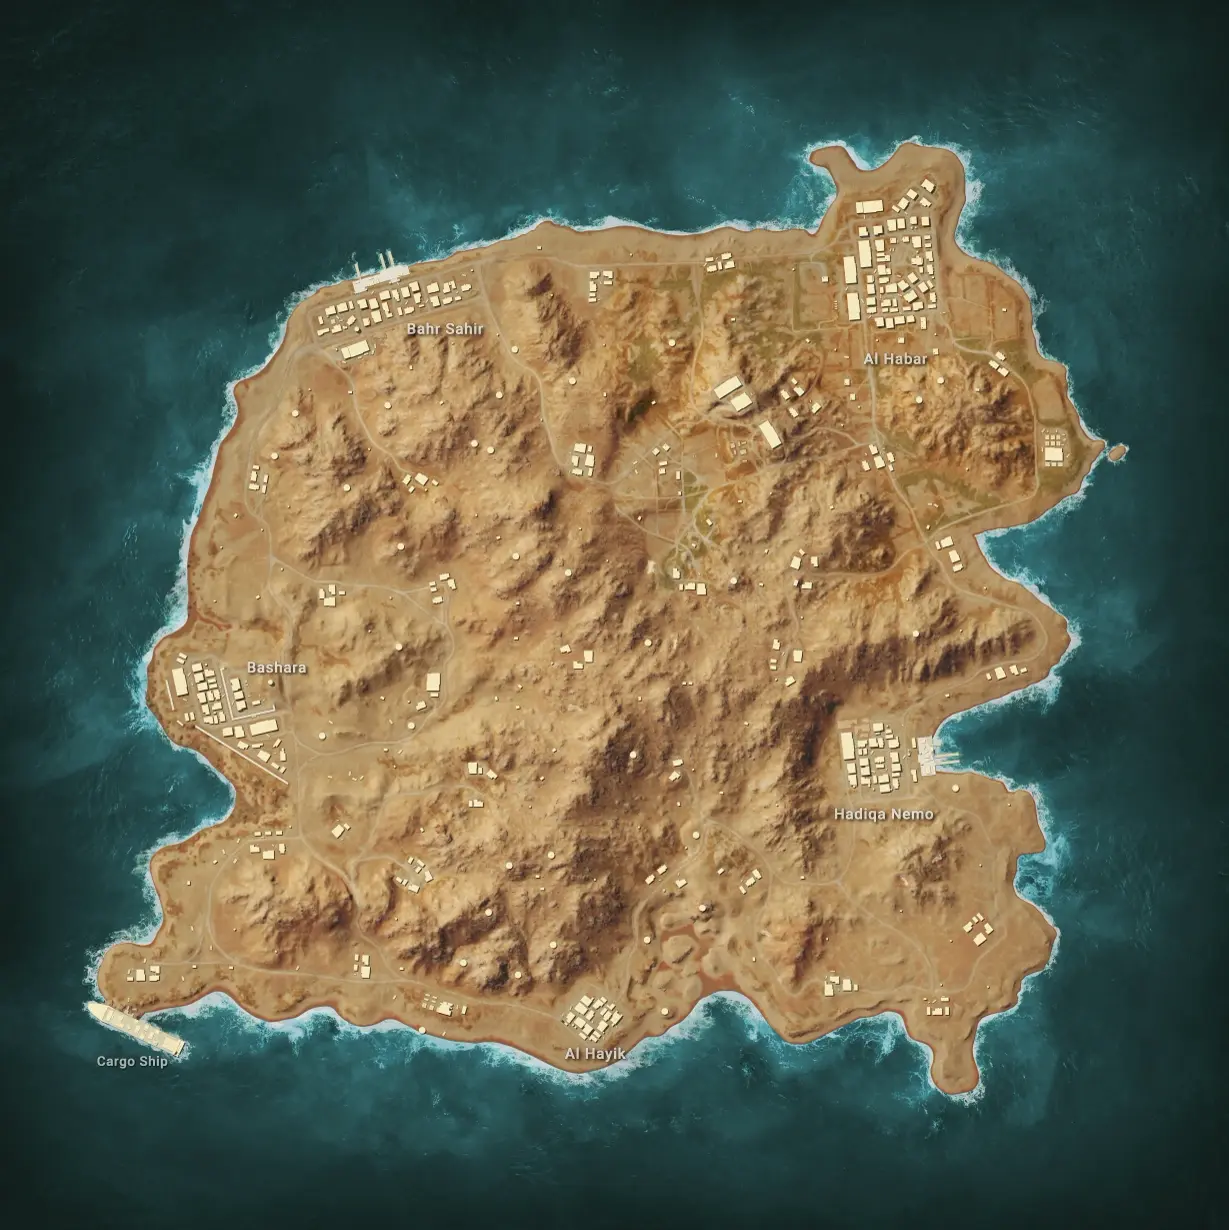
Picture an 8x8 island with a drowned city core and nature reclaiming everything around it: rocky highlands, flat floral plains, and dense swampland, with bits of 21st-century civilization dotted throughout. The named cities you actually need to know:
| POI | Type | What it is |
|---|---|---|
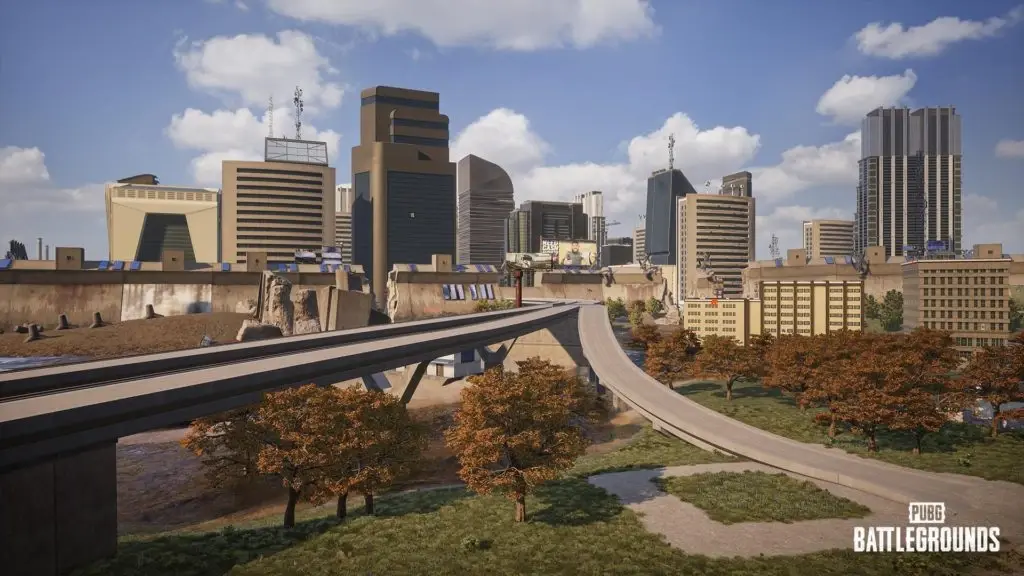
| Ripton | City | A major urban hub with real verticality and dense loot |
| Buxley | City | Large town, strong loot, room to fight |
| Cavala | City | Sprawling urban cluster |
| El Koro | City | Coastal/urban POI |
| Los Arcos | City | Town-tier loot, mid-map presence |
| Sancarna | City | Urban cluster with multi-level fights |
And the landmarks — the named non-city spots that anchor rotations and loot:
| Landmark | What it is |
|---|---|
| Hydroelectric Dam | Big industrial structure, strong loot, chokepoint terrain |
| Ten Forts | Compound cluster |
| Wind Farms | Open turbine field, exposed but distinct |
| Arena | Stadium-style structure |
| Assembly | Civic interior, layered fights |
| Concert | Event-venue POI |
| Construction Site | Vertical, half-built structures |
| Lodge | A high-end estate landmark |
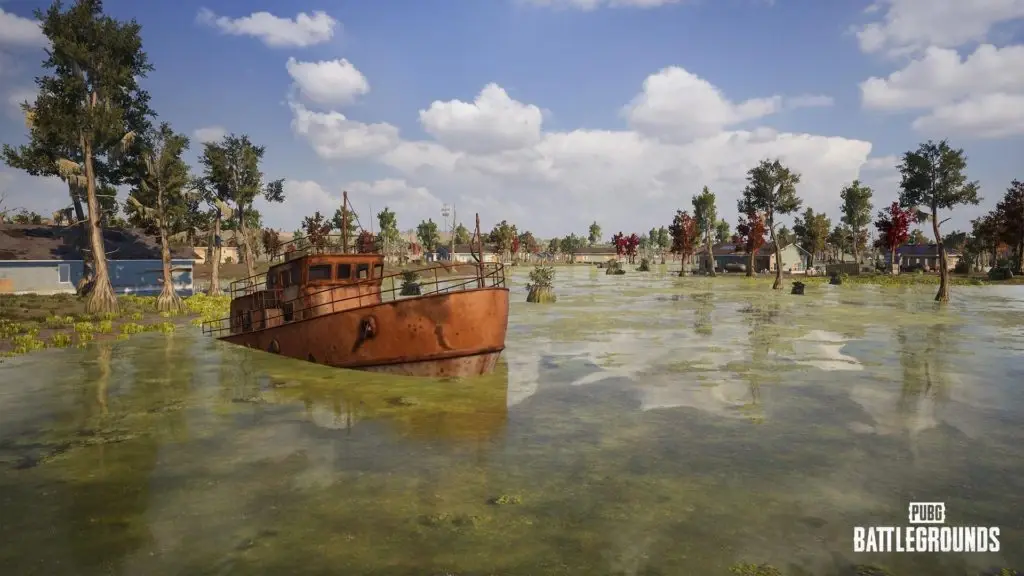
| Swamp | The signature flooded-nature zone |
The mental model: dense, vertical cities scattered across an 8x8, big industrial landmarks as the loot anchors, and swamp/grassland filling the gaps. Unlike Erangel's single defining river, Deston's defining feature is everywhere at once — the water and the verticality.
The Blue Chip recall system
This is the mechanic that defines squad play on Deston, so learn it cold. When a teammate is fully eliminated, they drop a Blue Chip — a chip carrying their biometric signature — in their deathbox. Pick it up, and you have two ways to bring them back:
- Blue Chip Tower (Recall). Towers spawn randomly each match with their locations marked on your map. Register the chip at a tower to recall your teammate. Activation takes around 10 seconds, makes a loud noise, and is canceled if you move, get knocked, get killed, or hit cancel. Your recalled teammate boards a recall plane and re-enters in the next Blue Zone phase — which means they parachute back in, exposed, just like a fresh drop.
- Blue Chip Transmitter. A lootable item that lets you recall on the fly instead of trekking to a tower. Pop it from your inventory, eat the ~10-second activation animation, and the same recall-plane process kicks off.
The Deston-specific wrinkle: the Blue Chip Detector (a piece of Tactical Gear) doesn't just ping nearby players within a radius — on Deston it also detects Blue Chips, flagging them in deathboxes, on the ground, or stashed in vehicle trunks. So a smart enemy can grab your dead teammate's chip to deny your recall, and a Detector helps you find chips to deny theirs.
How to actually play it:
- Loot the chip first, fight later. If a teammate dies, securing their Blue Chip is often worth more than the immediate trade. No chip, no recall.
- Recall on your terms. A recalled teammate drops from the sky into the live circle — don't recall mid-fight when they'll land into crossfire. Recall when you control the area or right after you've won a fight.
- Deny enemy recalls. If you wipe most of a squad, grab the chip off the body. It costs them the recall and tells you exactly how aggressive you can be.
Ascenders, gliders, and vertical play
Deston's verticality is a toolset, not just scenery.
Ascenders are zip-up devices at special points on the map that let you ascend or descend great distances quickly — the fast way onto a rooftop sniper perch or down off one without taking fall damage. Use them to take the high ground in a city fight, but know that an Ascender is loud and predictable; an enemy watching the building knows exactly where you'll pop out.
Gliders (motor gliders) spawn at airstrips, and Deston rooftops are loaded with emergency/utility parachutes specifically so you can redeploy off a tall building. The combination is the Deston rotation cheat code: get high, glide or parachute toward the next circle, and skip the slow ground crossing entirely. It's also the cleanest way to beat the swamp — fly over the slow terrain instead of slogging through it.
The Airboat is the map's signature vehicle, built for both land and sea traversal — genuinely useful on a map this wet. The trade-off is real: it offers poor cover for passengers, so it's a transport tool, not a fighting platform. Take it across water and swamp; bail before the shooting starts.
The verticality also reshapes gunfights. Because many buildings are only partially enterable with highlighted sniper perches, the question in every city fight is "which windows can actually shoot me?" Learn the playable perches and you'll stop dying to angles you didn't know existed.
The best drops
Ripton is the marquee city drop — a dense, vertical urban core with strong loot and the kind of multi-level fights Deston was built for. It's hot and it's committal: great gear if you win the building, a death sentence if you land roofless into a third party. Take it if you trust your CQC and want to be fully kitted fast.
Buxley and the other cities (Cavala, Sancarna, Los Arcos, El Koro) give you city-tier loot with varying heat depending on the flight path. Buxley in particular is a large, fight-friendly town. Land on an edge building, gun up, then decide whether to hold or rotate.
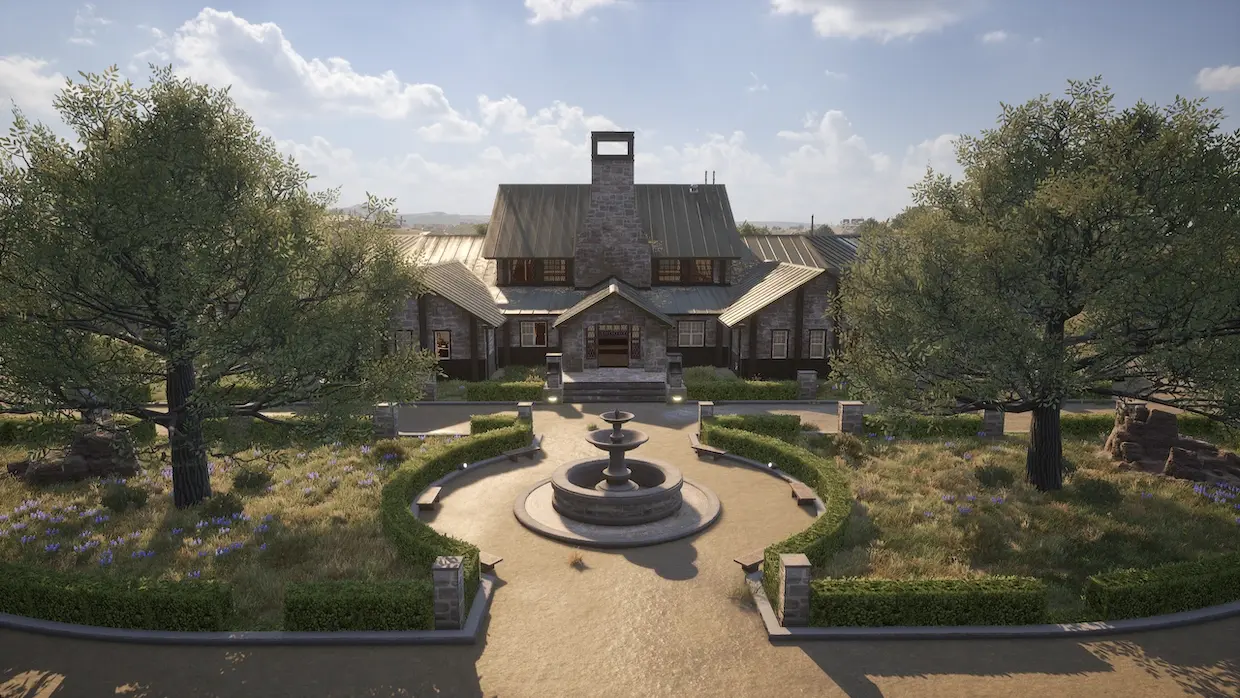
The Lodge, Ten Forts, and the Hydroelectric Dam are the landmark drops — concentrated loot at named compounds, often with less lobby pressure than the marquee cities. The Dam doubles as a rotation chokepoint, so it's loot-and-position in one. For a safer gear-up, the Lodge and the smaller landmarks let you kit a squad without the full city lobby on top of you.
Wind Farms and the open grassland POIs are the quiet drops: distinct, low-traffic, and fine for a methodical squad with a vehicle or a glider plan — but exposed, with longer rotations. Don't take them as a solo who might draw a bad circle and have to cross open ground on foot.
The swamp and flood terrain
The swamplands are unique to Deston, and they're a genuine tactical environment, not just a texture. The water is ankle-to-shin deep — you wade through it rather than swimming, so you keep your gun up and your speed mostly intact — and the dense trees and reeds give real cover. That combination makes the swamp a cat-and-mouse zone: you can fight in it without the "I'm swimming and defenseless" death that deep water forces.
How to play it:
- Use the cover, respect the slowdown. The swamp's dense foliage hides you, but the water still drags your movement. Don't get caught crossing an open stretch of flooded ground with an enemy on a ridge above you.
- Sound and ripples give you away. Moving through water is audible and visible. Pick your line through the dense cover, not the open shallows.
- Flooded urban sprawl is the same idea, scaled up. The drowned city blocks combine swamp slowdown with building cover — strong to hold, slow to leave.
The broader point: Deston's water everywhere is why the glider/parachute redeploy is so strong. Anything that lets you fly over the slow terrain instead of wading through it is worth real value.
Rotations on Deston
Rotations here are a three-way negotiation between distance, water, and verticality.
- Plan to fly when you can. The single best Deston rotation is "get high, glide toward the circle." Rooftop parachutes and gliders turn a slow, exposed ground crossing into a fast aerial one. If you're in a tall city and the circle is far, look up before you look for a car.
- Airboat the wet stretches. When the route crosses swamp or open water, the Airboat is faster and safer than wading. Just remember it's a transport, not cover — park and finish on foot.
- Don't ground-slog the swamp under pressure. Wading across flooded ground while a team holds high ground is the classic Deston death. Route around it, fly over it, or push through dense cover — never the open shallows.
- Cities are vertical chokepoints. Rotating through a city means clearing levels, not just streets. If you don't need the fight, route around the urban core rather than through it.
Because the map is so large, a vehicle or glider is close to mandatory on edge drops — the same big-map rule as Erangel, just with more interesting ways to cover the distance.
Reading the Deston endgame
Deston endgames reward the team that controls verticality and still has its full squad — which is exactly what the recall system is designed to encourage. A few map-specific tells:
- High ground means literal buildings here. Unlike the classic maps where late circles pull off towns into fields, a Deston final circle in or near a city makes rooftops and upper floors the premium real estate. Hold a playable perch with a covered approach and you watch everyone below get funneled.
- Know which windows can shoot back. Because many buildings are only partially enterable, the defensible perches are limited and known. Take one of the real ones; don't assume every window is a threat or a refuge.
- Bank your recalls before the final circles. A full four-stack beats a recovering one. If you're going to recall, do it earlier when there's time to reposition, not in the last circle when your teammate parachutes into crossfire.
- Respect the Red Zone and open flooded ground. Late zones that pull onto swamp or grassland turn the slow terrain into a kill box — get to cover or elevation before the circle forces you across it.
- Verticality cuts both ways. Holding a roof is strong, but an enemy with an Ascender or a glider can contest your height. Watch the access points to your perch as carefully as the streets below.
If you want the zone-reading framework that applies to every map, our PUBG endgame circle strategy goes deeper on circle prediction and final-circle positioning. Deston just adds a vertical axis and a reset button to the usual math.
Note: PUBG's ranked and normal map pools rotate by patch, so which maps are queueable on a given day changes. Check the in-game map selection before you assume Deston is available.
Quick Action Checklist
- Treat Deston as a vertical, watery 8x8 — use the gadgets, don't fight the map
- Secure a fallen teammate's Blue Chip before anything else, then recall at a tower or with a transmitter when you control the area
- Use a Blue Chip Detector to find or deny chips; grab enemy chips to kill their recall
- Drop Ripton or Buxley for fights; the Lodge, Ten Forts, or the Dam to gear up with less heat
- Get high and glide/parachute toward the circle instead of slow ground crossings
- Airboat the swamp and open water, but bail before the fight — it's transport, not cover
- In the swamp, use the dense cover and avoid the open shallows; the water slows you and gives you away
- In the endgame, hold a real playable rooftop perch, bank your recalls early, and watch your Ascender access points
- Check the in-game map rotation before you assume Deston is queueable
Frequently Asked Questions
Keep Reading
Related Guides
PUBG Haven Map Guide: The Pillar, Caches & CQC Chaos
Haven is the one PUBG map where the AI shoots back. A 1x1 industrial island, 32 players, an armed faction called the Pillar guarding the loot, and a helicopter with a spotlight hunting you. Here's how to survive it.
PUBG Karakin Map Guide: Black Zone, Breaches & Drops
Karakin is PUBG's 2x2 desert pressure cooker — 64 players, no vehicles, and a Black Zone that deletes whole compounds mid-match. Here's where to drop, how to breach, and how to not get blown up by your own map.
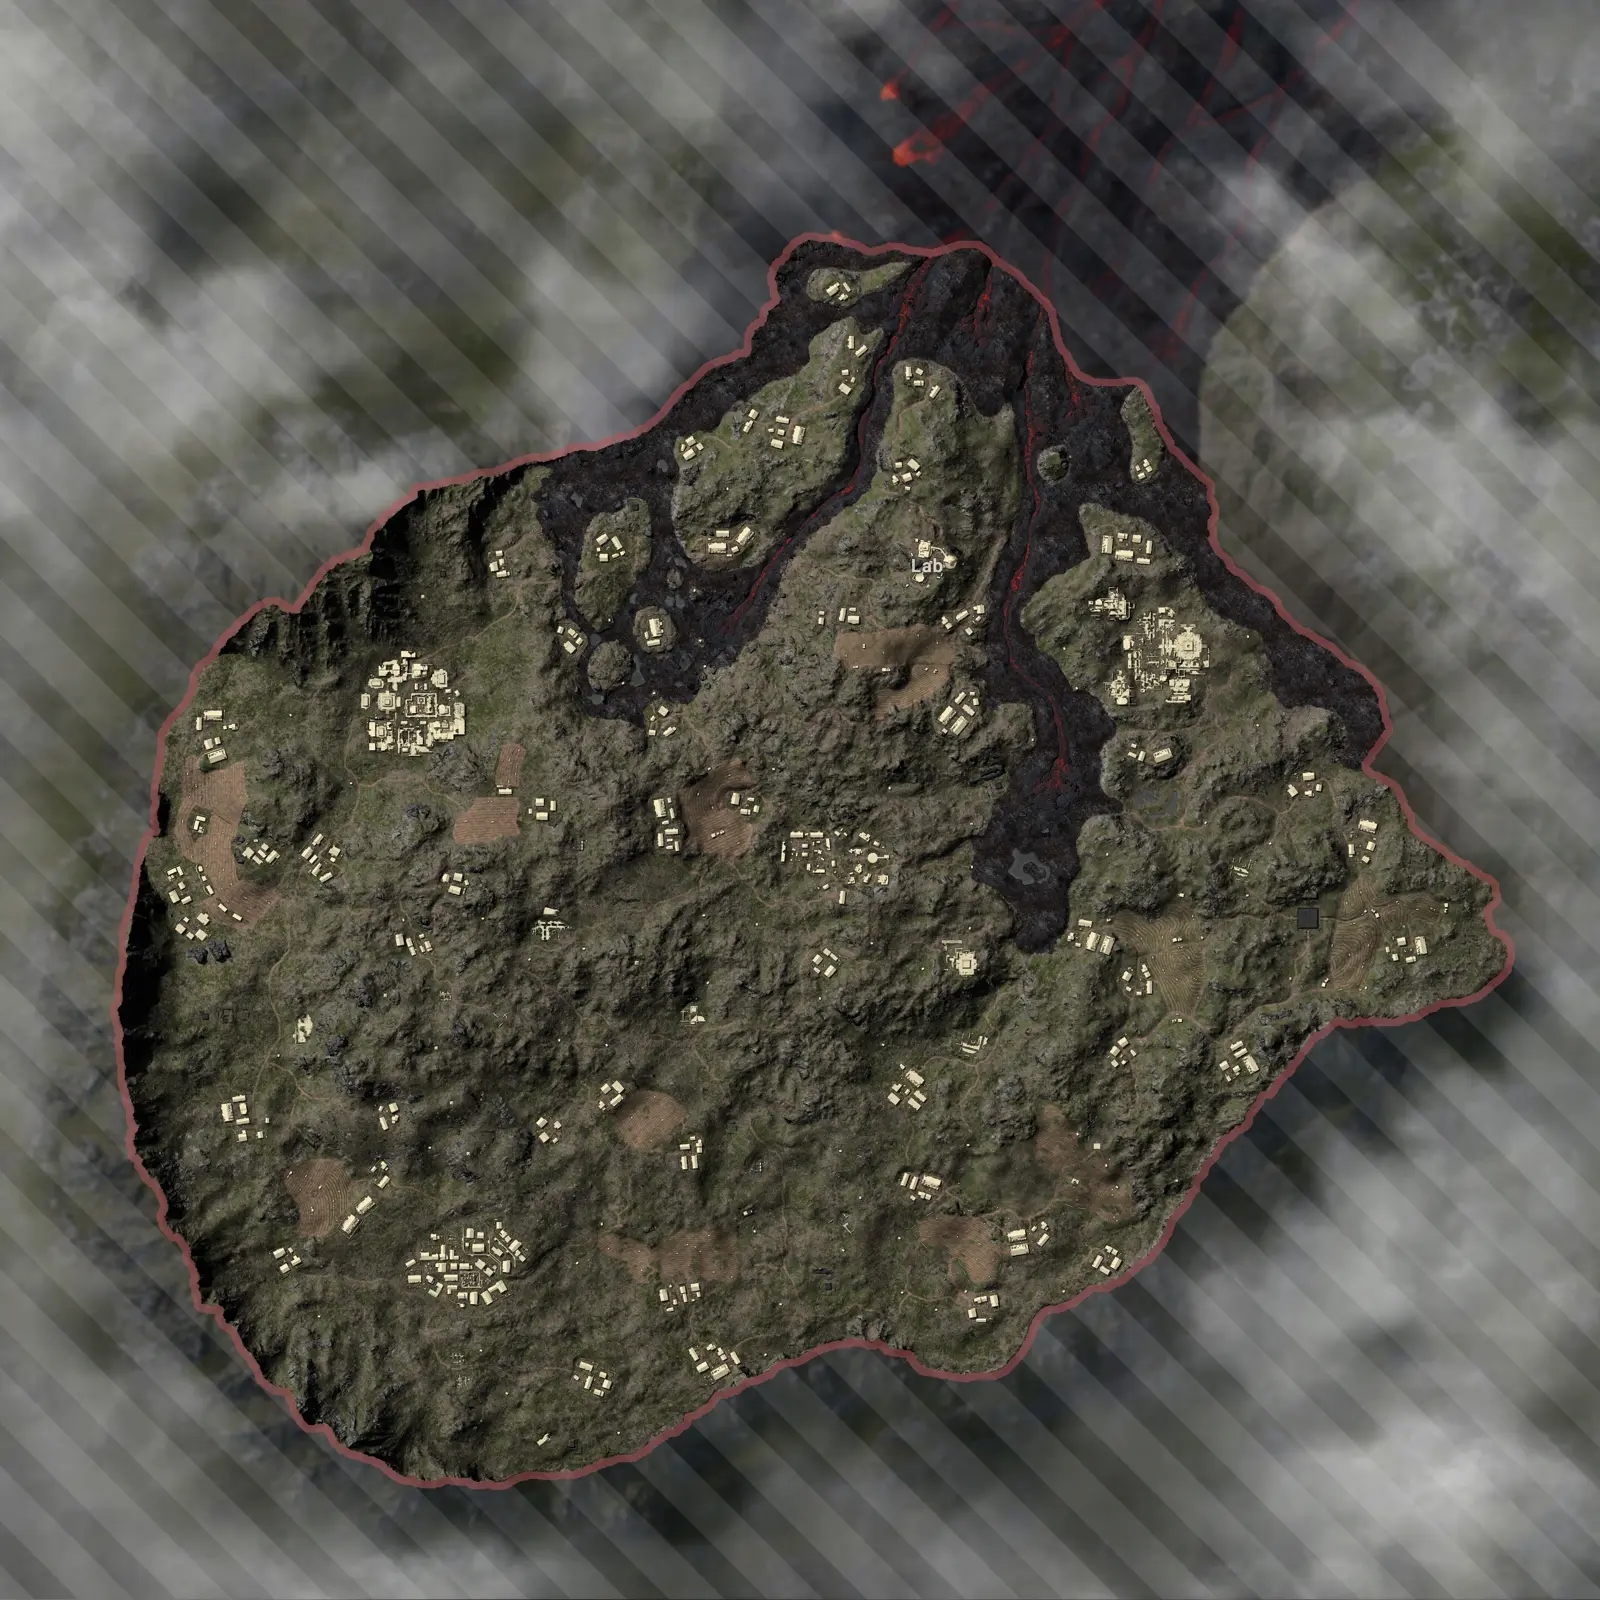
PUBG Paramo Map Guide: Volcano, Lava & Heli Drops
Paramo is the PUBG map where the landmarks move between matches, the lava actually kills you, and you ride a helicopter in instead of jumping from a plane. Here's how to read a map that refuses to stay still.
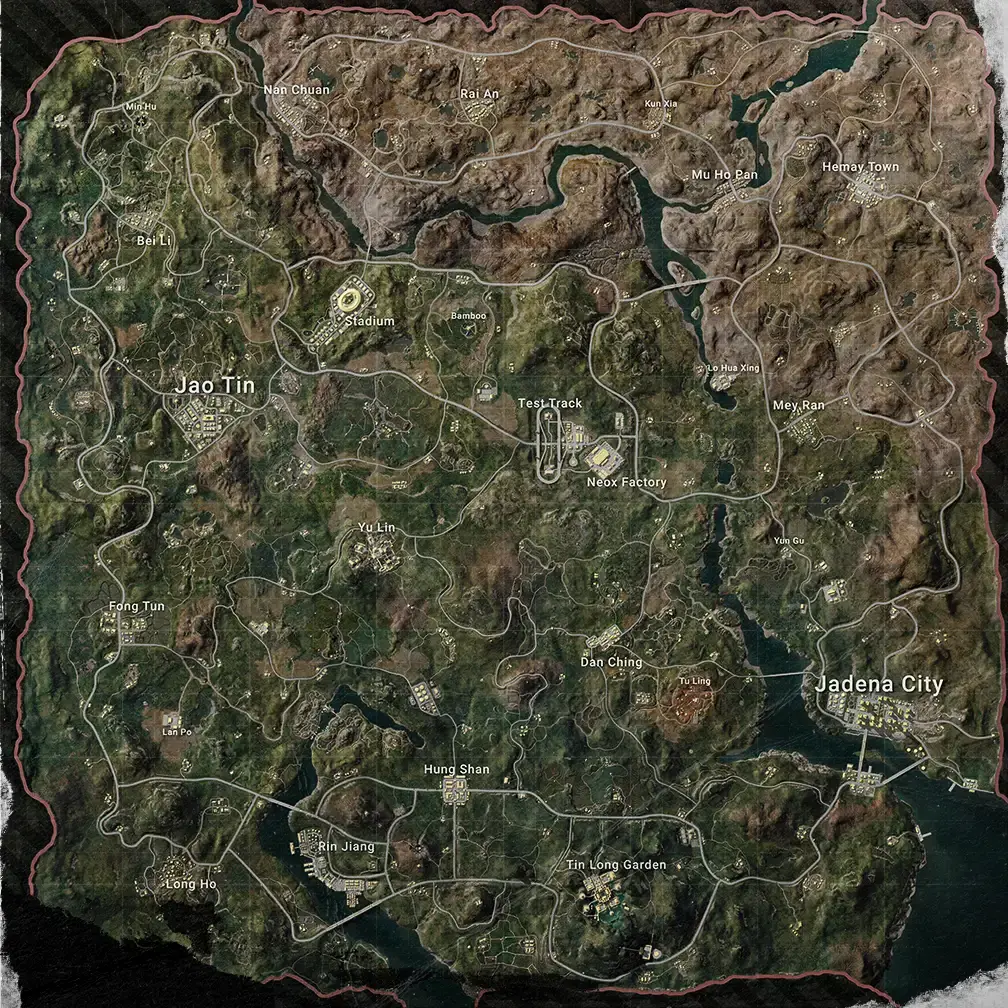
PUBG Rondo Map Guide: Drops, Rotations & Endgame
Rondo is PUBG's 8x8 love letter to Chinese landscape — bamboo groves and karst mountains in one corner, a neon skyscraper city in the other. It looks unlike anything else in the game, and it plays like it too. Here's where to drop, how to rotate, and how to win the endgame.

Best Weapons in PUBG: Tier List
Every PUBG tier list is out of date the moment a balance patch drops. So here's the list, ranked by role, plus the durable logic to re-tier any gun yourself when the next patch shakes things up.
Best PUBG Loadouts & Attachments
A naked M416 and a fully kitted M416 are basically two different guns. Here's how to build the strongest two-gun loadouts in PUBG and the attachment priority that turns loot into recoil control.