PUBG Erangel Map Guide: Drops, Rotations & Endgame
Erangel is the map every PUBG player thinks they know and most players play badly. Here's a real guide to the original 8x8 — where to drop, which compounds matter, how to beat the river, and how to read the endgame on the map that defines ranked.

Everyone "knows" Erangel. It's the first map you ever loaded into, the one in every highlight reel, the green island that is PUBG to most people. And most players still play it like it's 2017 — drop Pochinki, win or die in the first ninety seconds, then complain about the map being boring when they survive. Erangel isn't boring. It's the most read-and-react map in the game, and it punishes lazy habits harder than any flashy newcomer.
This is the 8x8 that defines ranked PUBG: open fields, dense towns, a river that splits the island in two, and a southern military-base island that's both the best loot and the best way to get yourself killed. If you want to climb on it — and you should, it's one of the most reliable RP maps — you need more than "drop hot and pray." Here's the actual guide: the layout, the drops worth taking, the rotation traps, and how to read the endgame on the map that rewards game knowledge more than reflexes.
The map everyone knows and plays wrong
The biggest Erangel mistake isn't a bad drop — it's treating an 8x8 map like a 2x2. Erangel is one of the largest maps in PUBG, an abandoned Russian-themed military island, and its whole design rewards patience: you're meant to loot up, move with purpose, and let the circle funnel fights to you. Players who sprint into the nearest town, third-party the first gunshot they hear, and ignore the zone are throwing away the exact discipline Erangel pays out for.
The second mistake is ignoring terrain. Erangel's mix of wide-open fields and clustered towns means cover is feast-or-famine. Cross a field at the wrong time and you're a target on a flat green table for anyone with a 4x; hug the right ridgelines and tree lines and you're invisible. The map is constantly asking, "do you know where the cover is between here and the circle?" That single question — what's my next piece of cover — is most of high-level Erangel.
How Erangel is laid out
Picture the island as a rough diamond, roughly 8 km on a side, with one defining feature: a river that runs across the map, splitting it into a larger northern/western landmass and a smaller southern section, with the Sosnovka military-base island in the far south connected by bridges. That river and those bridges create the single most important rotation chokepoint in the game — more on that below.
The named locations you actually need to know:
| POI | Where | What it is |
|---|---|---|
| Pochinki | Dead center | The iconic hot-drop town, fields all around |
| School / Rozhok | North-center | Tight CQC cluster, the classic early bloodbath |
| Georgopol | West coast | Huge dual-town + the container/crate yard, big loot |
| Yasnaya Polyana | Northeast | Large town, strong loot, room to fight |
| Mylta + Mylta Power | East | A town plus the power-plant industrial complex |
| Severny | North | Sprawly low-density town, easy safe drop |
| Primorsk | Southwest | Coastal town, often out of the way |
| Novorepnoye | Southeast | Town near the military-base bridges |
| Sosnovka Military Base | Far south island | The best loot, the riskiest drop |
| Quarry / Stalber / Kameshki | North + east edges | Smaller spots, quieter loot |
Everything between those is fields, forests, hills, and the occasional lonely cluster of houses (Gatka, Zharki, Lipovka, Ferry Pier) that make perfectly good quiet loot stops. The mental model: dense fight-towns in the middle and west, open ground and edge towns around them, and the high-tier island hanging off the bottom.
The hot drops
Want fights immediately? These are where the plane vomits half the lobby and the early game is a knife fight.
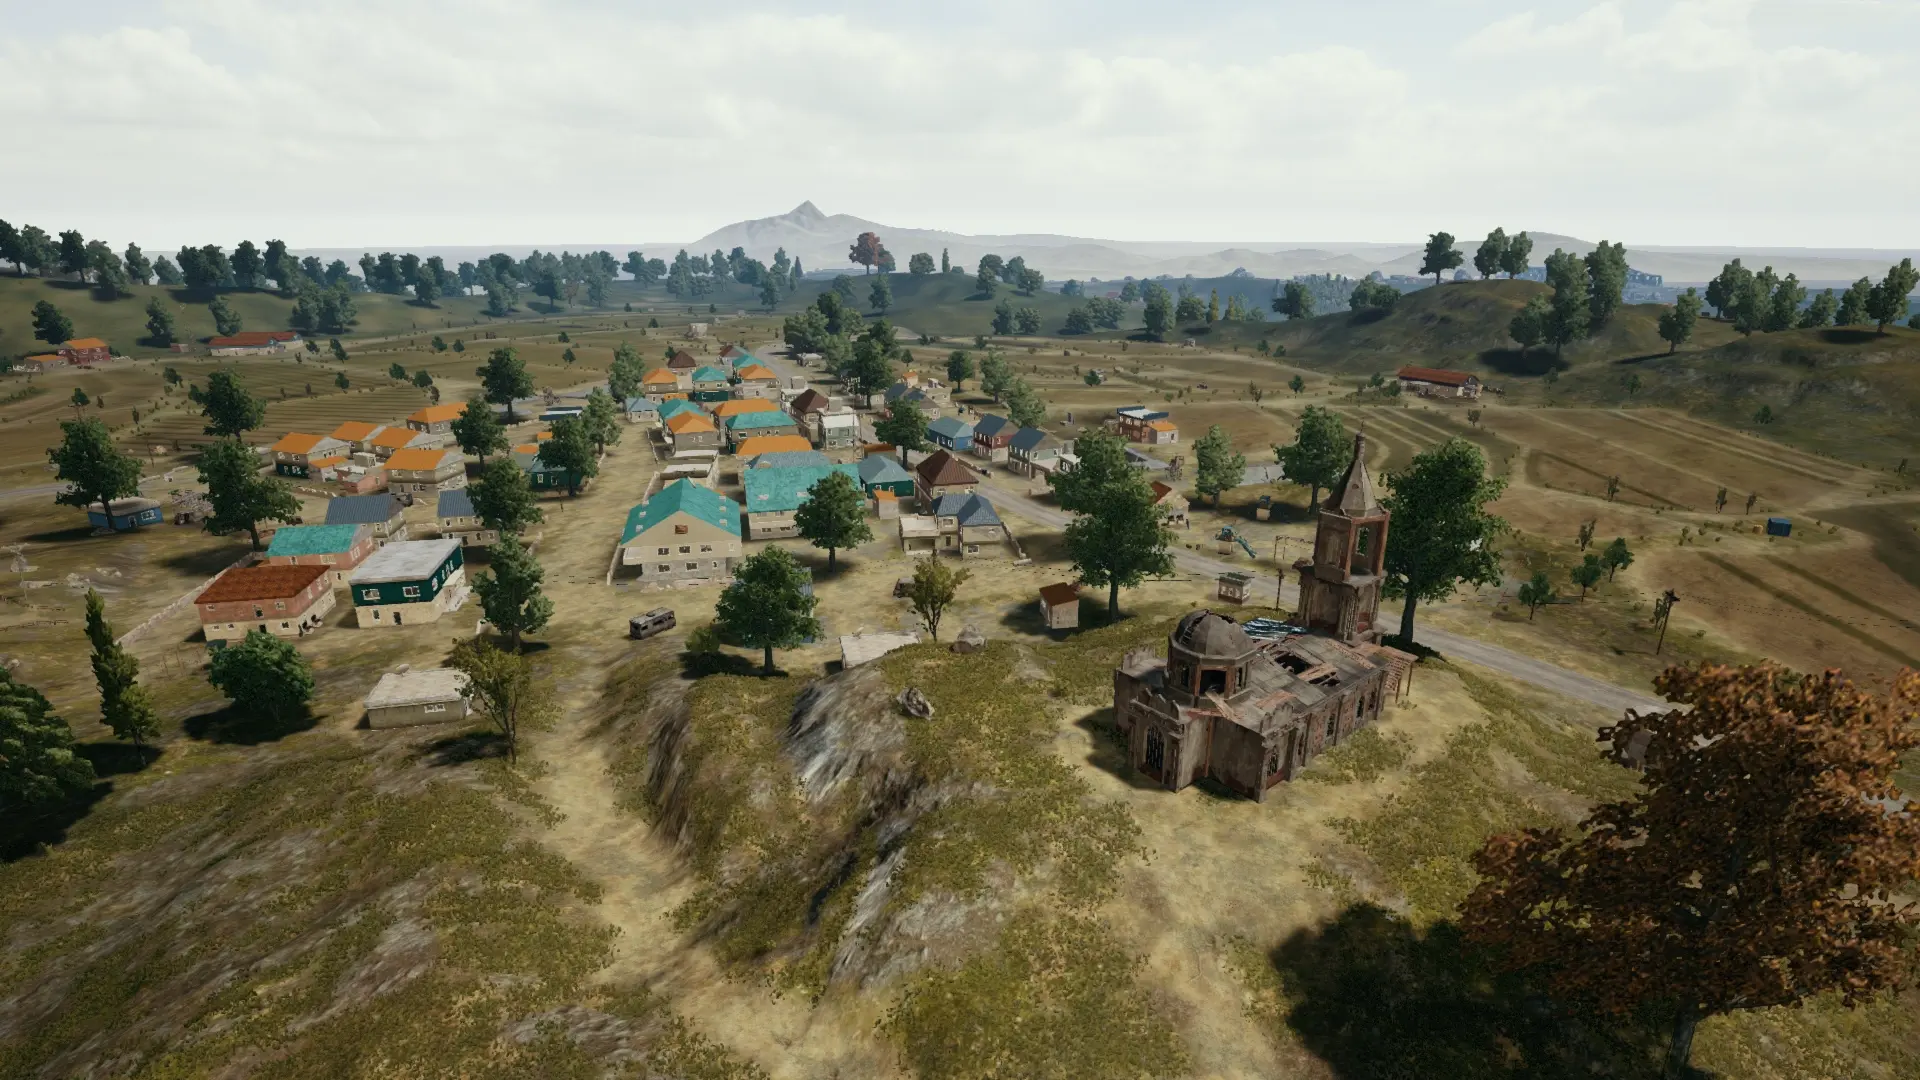
Pochinki is the hottest drop on the map and has been forever. It sits dead center, so it's near almost every flight path, the loot is solid, and the church plus the dense two-story houses make for relentless close-range fights. Drop here to practice your aim and your nerves; it's the best CQC gym on Erangel and the worst place to land if you want to actually survive to the endgame consistently. If you take it, land on a roof or an edge building, get a gun before anything else, and clear methodically — don't sprint into the middle and get sandwiched.
School and Rozhok are the other classic hot zone. School is a single tight building stuffed with players who all want the same loot, and Rozhok next door is a compact town with great loot density. The School-Rozhok pocket is the early-game blender — high kills, high deaths, and a great spot if you trust your gunfighting and want to be fully kitted in two minutes or dead trying.
Georgopol straddles the line between hot and rich. The crate/container yard is one of the most recognizable loot spots in the game, and the two town halves hold a ton of gear, but it's big enough that you can sometimes land on an edge and loot in relative peace before the fights find you. Land hot side for action, far side to gear up.
The safe loot drops
If your goal is RP, not a clip, you want to land alive, gear up, and be in position before the first circle. These spots get you geared without the lobby on top of you.
Severny in the north is a big, spread-out town with enough buildings to fully kit a squad and low enough traffic that you're often uncontested or fighting just one other team. It's a textbook safe-but-useful drop.
Yasnaya Polyana in the northeast is one of the most underrated drops — it's a large town with strong loot, so you get city-tier gear with far less competition than Pochinki because it's off most direct flight lines. Land here, gear up fully, and you're set with room to rotate either south toward center or hold the northeast.
Mylta and Mylta Power on the east side give you a town plus an industrial complex with good loot, again away from the central crush. The edge towns — Primorsk in the southwest, Gatka, Zharki, Lipovka, Kameshki scattered around — are the quietest loot of all: you'll rarely be contested, but you pay for it with a longer, more exposed rotation to the center. Great for a methodical squad with a vehicle, risky for a solo who draws a bad circle.
The military base question

Sosnovka Military Base is the loot jackpot of Erangel — the most concentrated high-tier gear on the map, packed into the warehouses and barracks on the southern island. It's also the single most committal decision you can make. Here's the honest math:
- The good: if you win the base, you walk out with multiple kitted players, top-tier attachments, throwables, and meds. It's a genuine power spike.
- The bad: it's on an island. To get anywhere else, you cross a bridge or the water, and bridges are the most camped chokepoints in the game. A single team holding the bridge with a DMR can lock the entire base island in.
- The ugly: if the circle pulls north (which it often does), you're staring at a long, exposed rotation off the island while better-positioned teams sit in cover waiting for the bridge to deliver them targets.
The play: take the base only if you're confident in your gunfighting and you have a plan to leave — ideally a boat to skip the bridge entirely, or an early read on the circle so you're not the last team trying to cross. If you just want loot without the death sentence, Georgopol or Yasnaya Polyana give you most of the gear with none of the island trap.
Rotations and the river problem
The river is Erangel's defining tactical feature, and the bridges are where games are won and lost. Because the central river splits the island, north–south rotations funnel through a handful of crossings, and smart teams hold those crossings. If your circle is on the far side of the river from you, you have three options, in order of preference:
- Beat the rush. Cross early, before teams set up on the bridges. The first squad across owns the crossing; the last squad across dies on it.
- Take a boat. Boats (and on the south island, your exit) let you skip the bridge chokepoint entirely. They're loud and expose you on open water, so use them when the bridges are clearly camped and you have smoke to cover the landing.
- Swim, last resort. Slow, defenseless, and you can't shoot — only do it across a short, unwatched stretch with cover on the far bank.
Away from the river, Erangel rotations are all about field discipline. The open fields between towns are death traps mid-to-late game. Plan your route ridge to ridge, tree line to tree line, and town to town — never straight-line across an open field unless you've cleared the high ground around it or you're inside smoke. The classic Erangel death is the player who sees the circle, panics, and sprints across a green field while three teams watch from the surrounding hills.
Vehicle paths that actually matter
On an 8x8 this size, a vehicle isn't a luxury — it's often the difference between making the circle and dying in the blue. Erangel spawns the usual roster (the four-seat UAZ, the Dacia sedan on roads, motorcycles, and boats on the water), and they cluster along the road network and near towns.
The vehicle rules for Erangel specifically:
- Grab one early if you dropped on the edge. Primorsk, the far north, and the military base all have brutal foot rotations. A vehicle turns a death march into a thirty-second drive.
- Park before the fight, not in it. Vehicles are loud bullet magnets — a parked car with the engine running is a beacon. Drive to cover near the circle, kill the engine, and finish on foot.
- Use them to beat the river, not to cross it loudly. A vehicle gets you to a bridge fast, but you still have to cross. Boats are the real river-skip; cars cover the open ground on either side.
Reading the endgame terrain
Erangel endgames come down to terrain reading, and the map gives you clear tells. Late circles on Erangel tend to land on the rolling hills and field-edges between towns rather than inside dense urban cores, which means the winning position is usually a piece of high ground with cover and a view of the open approaches.
What to look for as the circle closes:
- Hold high ground with a back to the edge. A ridge or hill where the next circle can only pull "toward you or past you" lets you watch the open approaches while teams below you get funneled across exposed ground.
- Respect the Red Zone. Erangel's Red Zone drops offshore artillery on a marked area — get under a roof or out of the zone, don't tank it in the open.
- Use natural cover, not buildings, in the final circles. Late zones often pull off the towns into fields, so the rocks, ridges, and tree clusters become your cover. The team still thinking "I need to be in a house" gets caught in the open when the circle leaves the town behind.
- Let the open fields work for you. If you've got the elevated, covered position and the circle forces other teams across a field to reach you, you're holding the best hand on the map. Patience plus high ground plus the field-as-a-kill-box is the Erangel endgame in one sentence.
If you want the broader zone-reading framework that applies to every map, our PUBG endgame circle strategy goes deeper on circle prediction and final-circle positioning. Erangel just happens to be the map where doing it well pays the most.
Quick Action Checklist
- Treat Erangel like the 8x8 it is — loot up, move with purpose, play the circle, don't sprint at every gunshot
- Drop Pochinki or School/Rozhok for fights; Severny, Yasnaya Polyana, or Mylta to gear up safely
- Only take Sosnovka Military Base if you can fight and have a way off the island (boat or early circle read)
- Cross the river early or by boat — never be the last squad trying a camped bridge
- Plan field crossings ridge-to-ridge and tree-line-to-tree-line; smoke open ground if you must cross it
- Grab a vehicle early on edge drops, park it in cover before the fight, kill the engine
- In the endgame, hold covered high ground and let the open fields funnel enemies into your sights
- Get under cover for the Red Zone and check the live map rotation in-game before you assume Erangel is queueable
Frequently Asked Questions
Keep Reading
Related Guides
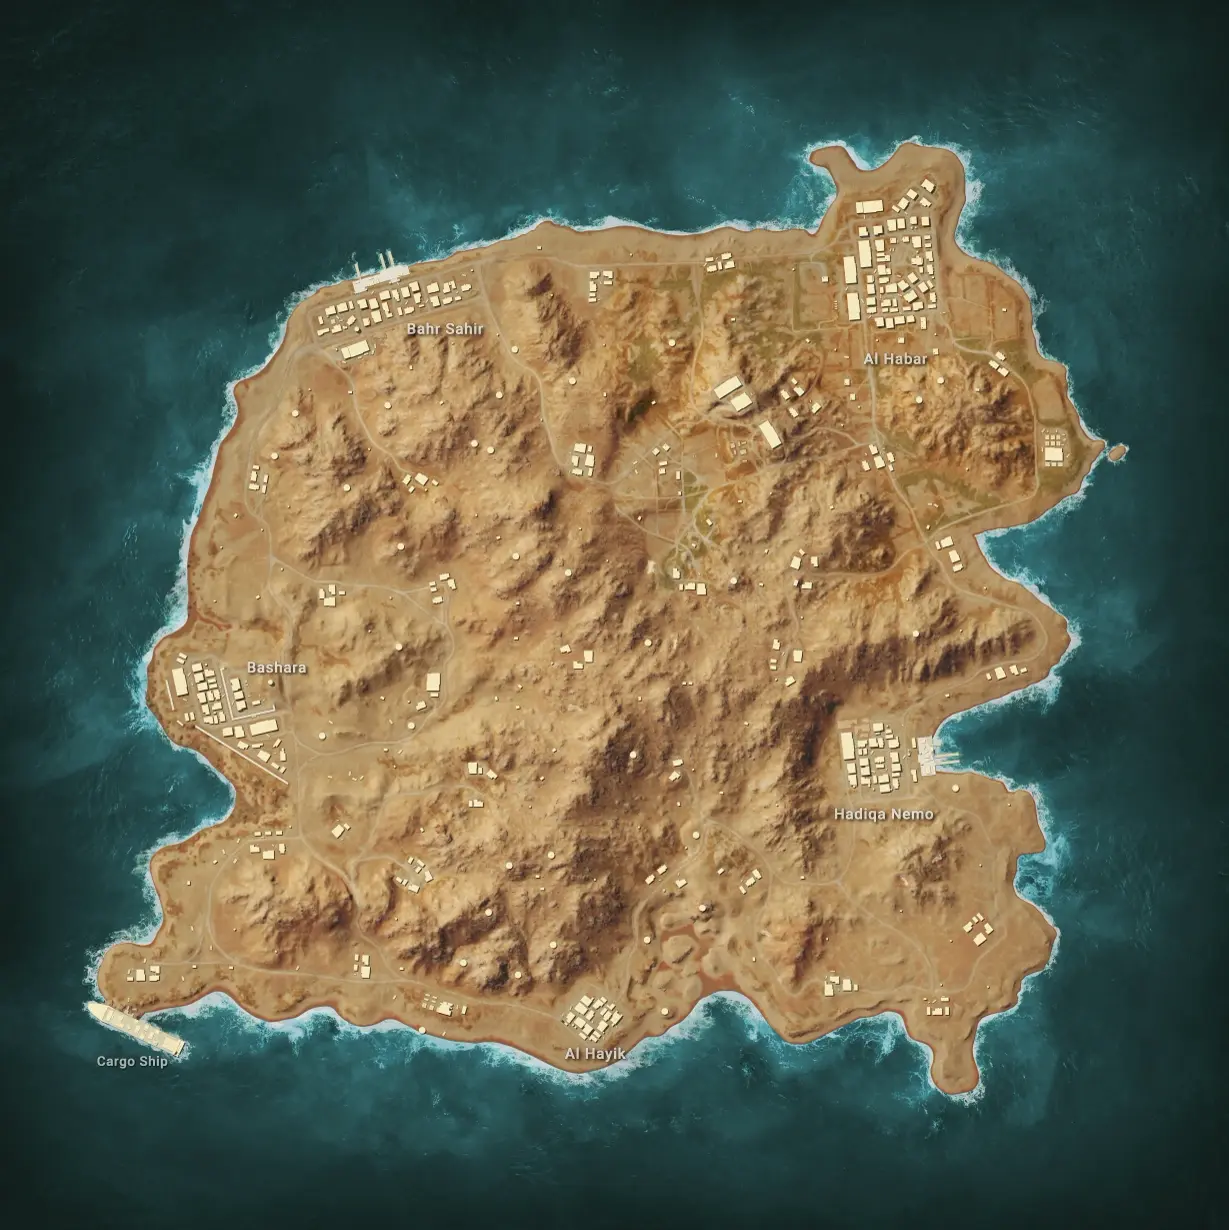
PUBG Haven Map Guide: The Pillar, Caches & CQC Chaos
Haven is the one PUBG map where the AI shoots back. A 1x1 industrial island, 32 players, an armed faction called the Pillar guarding the loot, and a helicopter with a spotlight hunting you. Here's how to survive it.
PUBG Karakin Map Guide: Black Zone, Breaches & Drops
Karakin is PUBG's 2x2 desert pressure cooker — 64 players, no vehicles, and a Black Zone that deletes whole compounds mid-match. Here's where to drop, how to breach, and how to not get blown up by your own map.
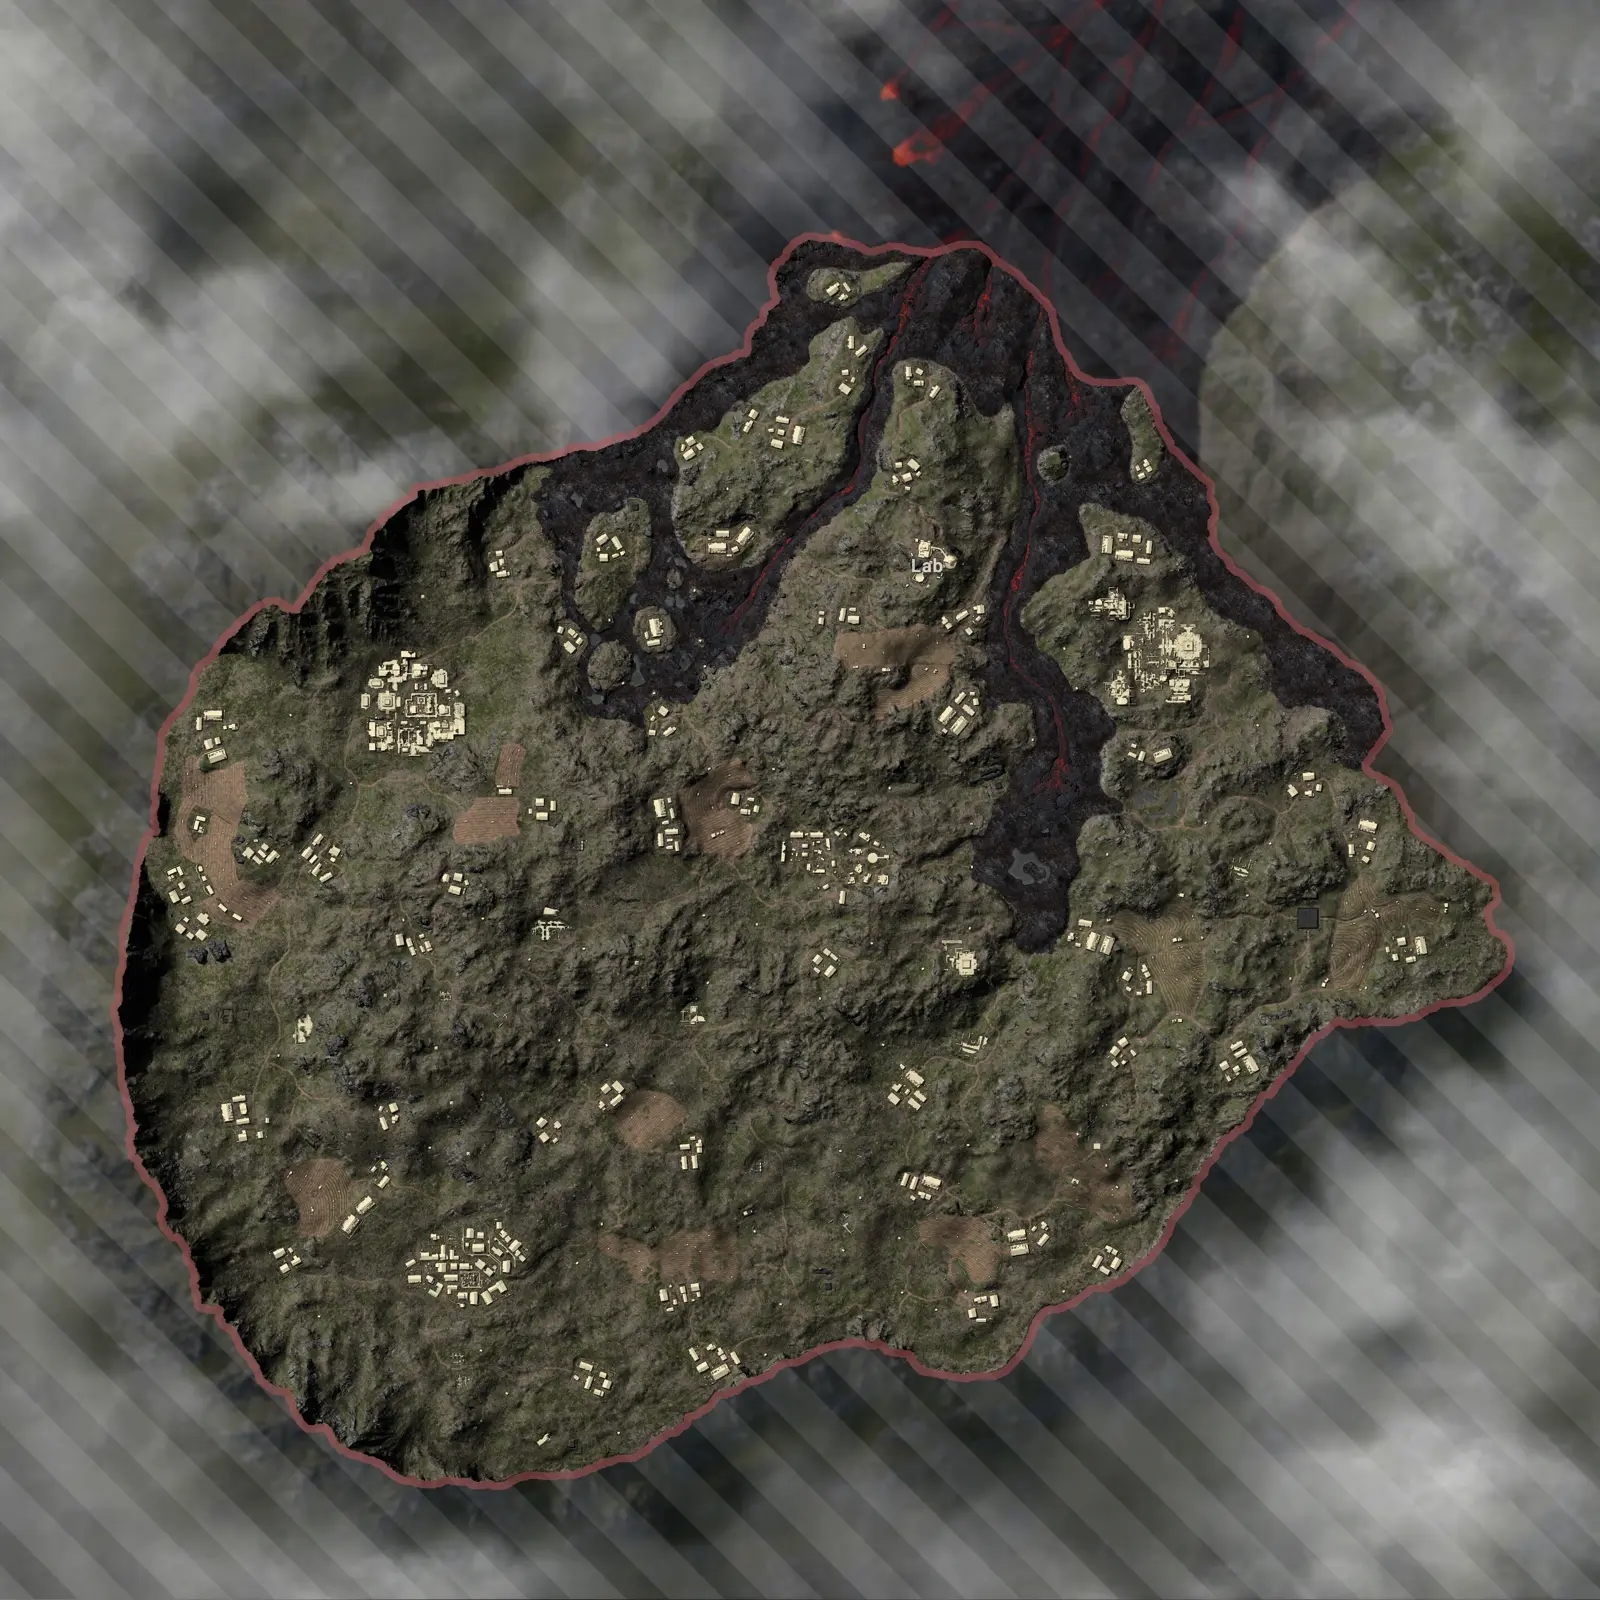
PUBG Paramo Map Guide: Volcano, Lava & Heli Drops
Paramo is the PUBG map where the landmarks move between matches, the lava actually kills you, and you ride a helicopter in instead of jumping from a plane. Here's how to read a map that refuses to stay still.

PUBG Deston Map Guide: Drops, Recall & Endgame
Deston is the 8x8 that broke PUBG's rulebook — Ascenders up skyscrapers, gliders off rooftops, a Blue Chip recall system that brings dead teammates back, and swamps that aren't quite land or water. Here's where to drop, how to use the gadgets, and how to read the endgame.

Best Weapons in PUBG: Tier List
Every PUBG tier list is out of date the moment a balance patch drops. So here's the list, ranked by role, plus the durable logic to re-tier any gun yourself when the next patch shakes things up.
Best PUBG Loadouts & Attachments
A naked M416 and a fully kitted M416 are basically two different guns. Here's how to build the strongest two-gun loadouts in PUBG and the attachment priority that turns loot into recoil control.