RE4 Remake Puzzle Solutions: Codes That Change on Hardcore
The RE4 remake has a habit the 2005 game never had: some of its puzzle answers change with the difficulty setting. The grandfather clock, the lake pedestal and the island power consoles all have separate Hardcore and Professional solutions — so half the guides you half-remember are right for a run you are not playing.
The 2023 remake did something to its puzzles that the 2005 game never bothered with: it made some of the answers depend on your difficulty setting. Set the grandfather clock to 11:04 on a Hardcore run and nothing happens, because on Hardcore the answer is 7:00. Spin the lake pedestal the way a Standard walkthrough tells you and you are three rotations short.
That is the actual reason a puzzle roundup is worth having open on a replay. Most of these you solve once and remember forever. The difficulty-dependent ones — the clock, the stone pedestal, the three island power consoles — are the ones that burn minutes on the Professional runs where minutes are the whole game, and they are exactly the ones your first-playthrough memory gets wrong.
Everything below is the main campaign, in chapter order, with solutions cross-checked across PowerPyx, Game8 and Vandal walkthroughs plus the Resident Evil Wiki's item pages. Separate Ways runs its own variants of several of these — including its own lithographic stones — and those belong to the Separate Ways guide, not this page.
The puzzle list in one table
| Puzzle | Chapter | Solution in short | Changes on Hardcore/Pro? |
|---|---|---|---|
| Factory gate emblem | 2 | Rotate the eagle to mirror the one on the door | No |
| Village Chief's Manor cabinet | 2 | Crop, pig, baby | No |
| Crystal Marble door | 2 | Rotate the marble until the dots form the insignia | No |
| Small Cave Shrine | 4 | Press left, bottom-left, bottom-right | No |
| Large Cave Shrine | 4 | Press top-left, top-right, bottom | No |
| Stone Pedestal (optional) | 4 | Two spins on Standard, five on Hardcore/Pro | Yes |
| Church stained glass | 4 | Rotate blue, red and green dials to complete the insignia | No |
| Treasury swords | 7 | Left to right: Iron, Golden, Bloodied, Rusted | No |
| Bindery lithographic stones | 8 | Shield top, helmet left, sword right, armor bottom | No |
| Dining hall bell | 9 | Seat Ashley and Leon to match the two paintings, then ring | No |
| Grandfather clock | 9 | 11:04 on Assisted/Standard | Yes — 7:00 |
| Mausoleum lamps | 9 | Crescent left, full moon top, star right | No |
| Dissection power console | 13 | Route power to every lightning icon | Yes |
| Freezer power console (optional) | 13 | Route power to every lightning icon | Yes |
| Waste disposal power console | 14 | Route power to every lightning icon | Yes |
Five entries change with difficulty, and three of those are the island consoles.
Chapter 2: the gate, the cabinet and the marble
The remake's first real puzzle is barely one: the Hexagonal Emblem, taken off a podium on a Valley rooftop, slots into the hexagonal slot on the Abandoned Factory door, and the trick is that the emblem has to mirror the eagle relief on the door — wing tips pointing up, beak facing right, per Vandal's walkthrough. If the gate does not open, you have matched it instead of mirroring it.
The Village Chief's Manor holds the two better ones. The ground-floor cabinet takes a three-symbol combination — crop, pig, baby, in that order — and the game files the clue away in the Iluminados 4:3 document in the manor's upstairs hallway. You can skip the reading and just enter the code; the lock does not care how you know.
Behind it sits the Crystal Marble, which slots into the round recess in the upstairs door. There is no fixed input sequence here: you rotate and tilt the marble until the white dots suspended in the glass line up into the Los Iluminados insignia shown on the door itself. The game remembers whatever orientation you left it in, which is why no walkthrough can hand you an exact sequence of moves.
Chapter 4: the lake shrines and the church
Chapter 4 is the puzzle-densest stretch of the village, and all of it hangs off the boat.
The two cave shrines
Both shrines on the lake's edge lock their key item behind a wall of symbol buttons, and the answers are painted around you: the correct symbols appear as yellow markings on the cave walls on the way in.
- Small Cave Shrine (northeast of the lake): press the left, bottom-left and bottom-right buttons. It yields the Blasphemer's Head.
- Large Cave Shrine: press the top-left, top-right and bottom buttons. It yields the Apostate's Head.
Both heads then socket into the pedestal in the Mural Cave, which surrenders the Church Insignia — the key item the whole lake detour is after.
The stone pedestal changes with difficulty
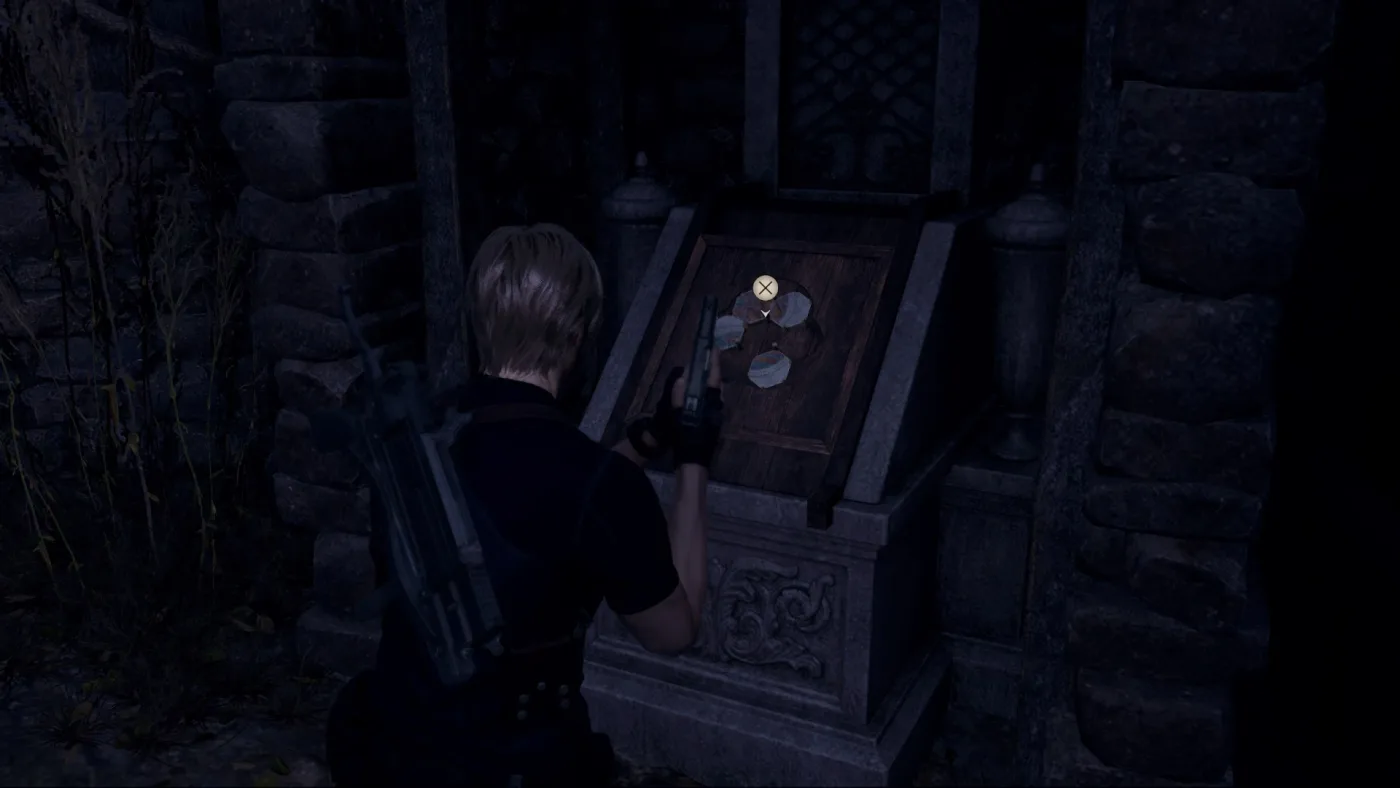
The Stone Pedestal between the Merchant's spot and the Fish Farm is optional, and it is the first place the remake quietly forks its answers by difficulty. You need all three Hexagon Pieces first — one from a treasure chest near the quarry-side Merchant, one from the Fish Farm, one from the Small Cave Shrine. Slot them in, then rotate:
| Difficulty | Rotation sequence |
|---|---|
| Assisted / Standard | Spin the left section once, then the top section once |
| Hardcore / Professional | Spin the right section twice, the left section twice, then the top once |
The prize is the Depraved Idol treasure. If you would rather have money now than a puzzle later, all three pieces sell to the Merchant — Hexagon Piece A alone fetches 2,000 pesetas — but the assembled reward is worth more than the parts.
The church stained-glass window
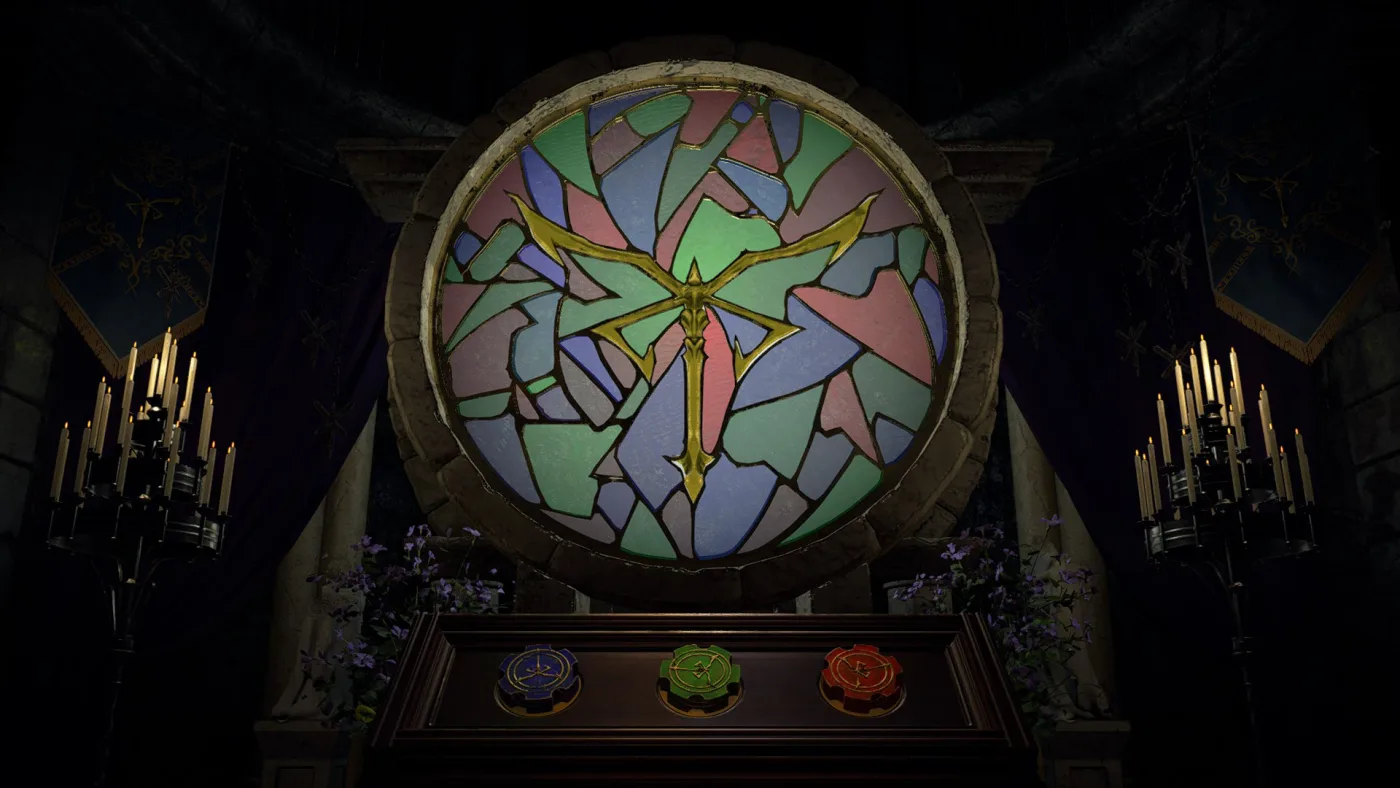
The church puzzle is missing a piece when you arrive. The Blue Dial sits in a small cabinet on the ground floor — enter the church, turn right, and it is in the corner cabinet. Slot it into the console alongside the red and green dials already there.
Each dial rotates its colour's pane of glass. The target is the Los Iluminados insignia in the window's centre: turn the blue, red and green layers until the coloured sections fill the pattern with no white gaps. Vandal's advice is the useful part — focus on the centre while you turn them, because each colour fits along one edge of the symbol. Solving it unlocks the mechanism that opens the way up through the church to Ashley.
Chapter 7: four swords in the Treasury
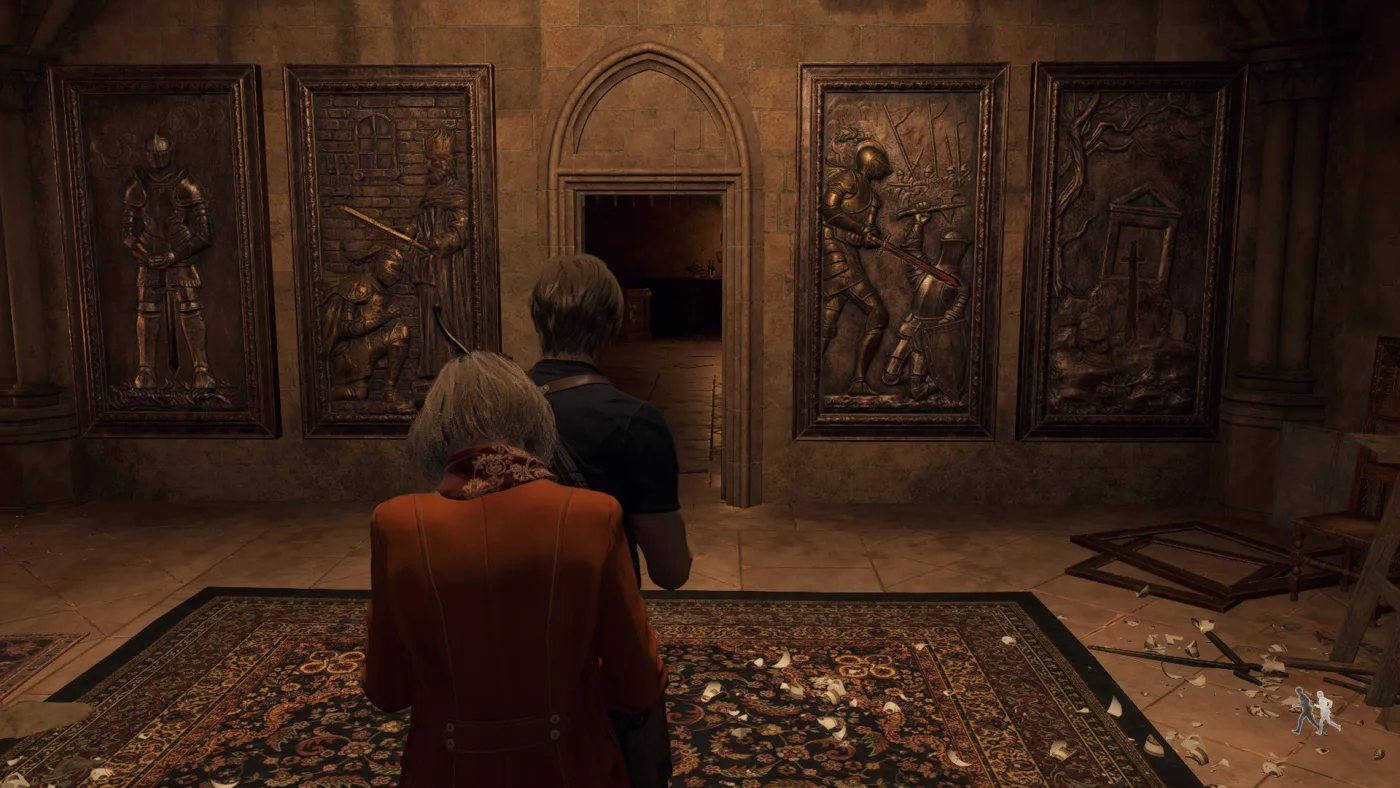
The castle Treasury is a two-stage room. First, gong ropes: the sealed doors around the room each display a set of symbols, and ringing the gongs that match a door's symbols opens it — that hunt is how you come by the Bloodied Sword.
With all four blades in hand, the wall panel wants them left to right: Iron Sword, Golden Sword, Bloodied Sword, Rusted Sword. Placing all four opens the passage connecting the Treasury to the Audience Chamber balcony.
Chapter 8: the Bindery stones
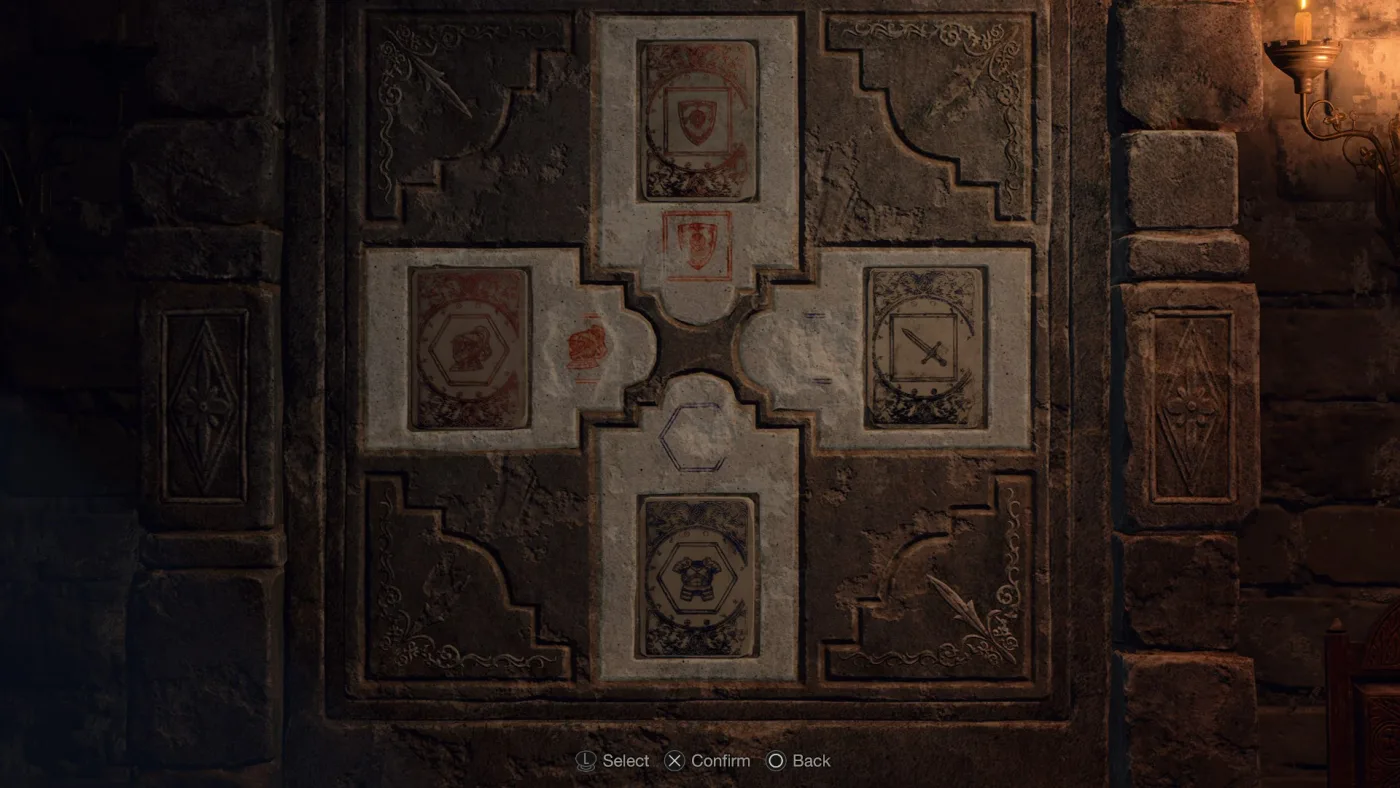
The Bindery's four-slot frame takes the Lithographic Stones — Stone B sits on the Bindery's own bookshelf, and Stones C and D are collected nearby, per the Resident Evil Wiki's item pages. Each slot is shaped square or hexagonal, and each stone must land in the position matching both its symbol's colour and its outline:
| Slot | Stone |
|---|---|
| Top (square) | Orange shield |
| Left (hexagon) | Orange helmet |
| Right (square) | Blue sword |
| Bottom (hexagon) | Blue armor |
The solved frame opens a secret passage out of the room, and this one does not vary by difficulty — Vandal's walkthrough confirms the layout is identical on Hardcore and Professional.
Chapter 9: the castle puzzle gauntlet
Chapter 9 stacks a chimera statue missing three heads, each head behind its own lock, on top of Ashley's solo stretch.
The headless chimera statue needs the Serpent Head, Lion Head and Goat Head. The Lion Head is in the Armory, the Goat Head is in the Gallery — through the upper door on the south side of the Grand Hall — and the Serpent Head comes from the dining hall.
The dining hall bell
The dining hall's clue is the pair of paintings at the end of the room: a queen seated before an empty plate, an empty glass and two sets of silverware, and a king with bread, a glass, a jug of wine and three sets of silverware. Find the two places at the tables whose settings match the paintings — per the Resident Evil Wiki, that is the northeast chair of the lower table for Ashley and the northeast corner seat of the upper table for Leon, and it does not matter which character takes which seat. Once both are seated, ring the bell. The Serpent Head is your reward.
The grandfather clock
Ashley's solo section runs through the library and mausoleum, and the grandfather clock is the gate between them. The code is difficulty-split:
| Difficulty | Set the clock to |
|---|---|
| Assisted / Standard | 11:04 |
| Hardcore / Professional | 7:00 |
This is the highest-value memorisation in the post for repeat runs, because the right answer skips the library fight entirely — a routing trick the Ashley guide covers in the context of her whole section.
The mausoleum lamps
At the mausoleum, three lamps want three symbols, and the arrangement documented by both PowerPyx and Game8 is: crescent moon on the left (west), full moon at the top (north), star on the right (east). The Salazar Family Insignia is the prize at the end of this stretch, and taking it puts the lantern out for good — the Ashley guide covers why you plan your exit route before touching it.
Chapters 13 and 14: the island power consoles
The island swaps stone and stained glass for wiring. Three rooms carry the same puzzle type: a grid of rotatable line segments, a Power icon on one side, lightning-bolt icons scattered across the board. Rotate segments until an unbroken line connects the power source to every lightning icon, then confirm.
- Dissection room (Chapter 13) — mandatory, on the keycard route.
- Freezer (Chapter 13) — optional, guarding the keycard upgrade.
- Waste disposal (Chapter 14) — mandatory, worked with Ashley's help.
All three have different node layouts on Hardcore and Professional than on Assisted and Standard, per both PowerPyx and Vandal — which is why a memorised Standard solution stops working the moment you start the Professional run. The mechanic itself never changes: trace from the power source outward, fix the segments nearest the source first, and treat dead-end branches as decoys.
The locks that only look like puzzles
The castle's Square Lock Boxes get mistaken for a puzzle and are actually a key check. They all open with the Cubic Device, found in a treasure chest in the corner of the corridor connecting the Armory to the Grand Hall. There is nothing to solve once you own it — and if you would rather have cash than curiosity, the Resident Evil Wiki notes the device itself sells to the Merchant for 4,000 pesetas, though opening the boxes is the better trade.
The lock boxes hold sellable treasure that funds the upgrade economy in the weapon upgrade guide — and treasure is worth far more combined with gems than raw, as the treasure guide breaks down.
Quick Action Checklist
- Cabinet code, Village Chief's Manor: crop, pig, baby. Fixed on all difficulties.
- Cave shrines: small = left, bottom-left, bottom-right; large = top-left, top-right, bottom.
- Stone Pedestal: Standard = left once, top once. Hardcore/Pro = right twice, left twice, top once.
- Church window: grab the Blue Dial from the ground-floor cabinet first, then fill the insignia with no white gaps.
- Treasury swords, left to right: Iron, Golden, Bloodied, Rusted.
- Bindery stones: shield top, helmet left, sword right, armor bottom — flip a stone to swap its colour.
- Grandfather clock: 11:04 on Assisted/Standard, 7:00 on Hardcore/Professional.
- Mausoleum lamps: crescent left, full moon top, star right.
- Island power consoles: all three differ by difficulty — solve them fresh on Hardcore and Professional rather than from memory.
Frequently Asked Questions
Which puzzles in Resident Evil 4 remake have different solutions on Hardcore and Professional?
What is the cabinet code in the Village Chief's Manor in RE4 remake?
What order do the four swords go in the RE4 remake Treasury puzzle?
How do you solve the lithographic stone puzzle in the RE4 remake Bindery?
How do you solve the church stained-glass puzzle in RE4 remake?
Keep Reading
- PowerPyx — RE4 remake all puzzles and solutions, including difficulty variants
- Game8 — RE4 remake all puzzle solutions by chapter
- Vandal — RE4 remake all puzzles and solutions with difficulty notes
- Resident Evil Wiki — Blue Dial location and church puzzle
- Resident Evil Wiki — Iron Sword and the Treasury four-sword passage
- Resident Evil Wiki — Serpent Head and the dining hall painting clue
- Resident Evil Wiki — Lithographic Stone B and the Bindery passage
- Resident Evil Wiki — Hexagon Piece A location and sell value
- Resident Evil Wiki — Cubic Device location and Square Lock Boxes
- Resident Evil Wiki — Apostate's Head, Large Cave Shrine and the Church Insignia
Related Guides

Resident Evil 4 Switch 2 Reviews: Scores, Gyro, Frame Rate
The Switch 2 reviews for Resident Evil 4 Gold Edition landed on October 13, three days before launch. Here is what six scored reviews and four more write-ups found: the scores, the gyro aiming a September hands-on said not to expect, and the resolution and frame rate behind the praise.
RE4 Remake Platforms: Every Version and What It Needs
The Resident Evil 4 remake is sold on PlayStation, Xbox, Steam, Apple's App Store and, from October 16, the Switch 2 eShop, and the versions are not the same deal. Here is what each one needs to run, what it costs at list, and what it adds or leaves out.
RE4 Remake Small Key Locations: All 8 Locked Drawers
The Resident Evil 4 remake has eight Small Keys for eight locked drawers, with no spare. Here is where every key is, what every drawer holds, the order that never strands a key, and the five drawers Ada opens in Separate Ways with keys she has to buy.

RE4 Gold Edition on Switch 2: What Hands-On Previews Show
Capcom's September 9 announcement gave Resident Evil 4 Gold Edition a release date and a price on Switch 2, but said nothing about how it would actually run. Tokyo Game Show 2026 is where that got answered — by the press who played it, not by Capcom.

Resident Evil 4 Remake Beginner Guide: Survive the Village
The 2023 remake gives Leon a parry and takes away his indestructible knife. That single trade is the whole learning curve. Here is how to stop dying in the village and start playing the game the way it wants to be played.
RE4 Remake Switch 2 Release Date and Gold Edition Price
Capcom confirmed Resident Evil 4 Gold Edition for Switch 2 at the September 9 Nintendo Direct — the remake's first native, installed release on Nintendo hardware after three years as a cloud-only stream. Here is the launch date, the price, exactly what the bundle includes, and what it quietly leaves out.