Super Mario 64 Tick Tock Clock Guide: All 7 Stars and the Time Trick
Tick Tock Clock is the course that punishes you for not reading the painting. The minute hand you jump through decides whether the whole level is frozen solid or spinning like a blender. Here is how to set the speed you want and clear all seven stars.
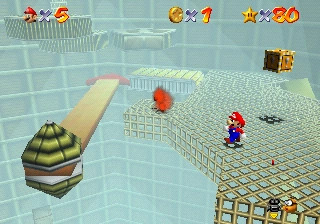
Most Super Mario 64 courses ask you to be good at the game. Tick Tock Clock asks you to be good at the game while the floor is trying to buck you off. It is the 14th course, a single vertical shaft of gears, sliding platforms, swinging pendulums and Thwomps that you climb from the bottom to the top — and the entire clockwork can be running at four different speeds depending on one decision you make before you even walk in.
That decision is the whole guide. The position of the minute hand on the clock painting at the moment you jump through it sets the speed of every moving part inside. Read the hand, jump on the right beat, and half of Tick Tock Clock's difficulty evaporates. Ignore it, jump on a random frame, and you are climbing a level that reshuffles itself every few seconds. Here is how to control it, and how to clear all seven stars.
The clock face is a difficulty dial
Look at the painting before you enter. It is a clock, and the minute hand is sweeping around the face. Where that hand sits when Mario disappears into the canvas decides the tempo for your entire run:
| Minute hand at | What happens inside |
|---|---|
| 12 | Everything freezes. Platforms, gears, pendulums, conveyor belts — all dead still |
| 3 | Everything moves slowly |
| 6 | Everything moves erratically, changing speed at random |
| 9 | Everything moves quickly |
Anywhere between those marks gives you an intermediate speed. The one you want for most of this course is 12 o'clock — frozen. A dead-still Tick Tock Clock turns a nightmare of moving platforms into a static jungle gym you can climb at your own pace, which is exactly what you want for platforming stars and, above all, for the red coins.
The catch: freezing the level also freezes the things you sometimes need to ride. One star flat-out requires the hands to be turning. And the erratic "6 o'clock" setting is a trap — never pick it on purpose. If you fumble the timing and enter on a random frame, back out of the painting and try again. It costs you five seconds and saves you a life.
Getting in: the third floor and the 50-star door
You cannot even attempt this course early. Tick Tock Clock lives on the third floor of the castle, behind the Big Star Door that requires 50 Power Stars. If the endless-stairs math from the beginner guide is still fresh: 50 stars is well past the 30-star basement gate and the two Bowser keys, so by the time you get here you have a full moveset and plenty of practice.
The painting itself is unusual. Instead of diving into a still image, you jump into a working clock — and because the hand is always moving, you have to actively time your entry rather than just walk in. Stand in front of it, watch the sweep, and jump so Mario passes through the canvas as the hand crosses the 12. Practice this a couple of times before you care about a specific star; getting the freeze reliably is the single most valuable skill in the level.
The six stars, mission by mission
Six named missions plus the 100-coin star, same as every main course. Five of the six want the clock frozen or slow. Only "Get a Hand" needs it running.
Roll into the Cage
The classic first star. You climb all the way to the top of the tower, where a Power Star sits inside a wire cage on a rotating platform. Enter at 12 to freeze everything, make the long climb without platforms shifting under you, and at the summit the cage's own platform is what you deal with. Reach the top, get onto the platform holding the star, and grab it. Freezing the level makes the ascent trivial; the only real work is not falling off a static ledge, which is a much better problem than not falling off a moving one.
The Pit and the Pendulums
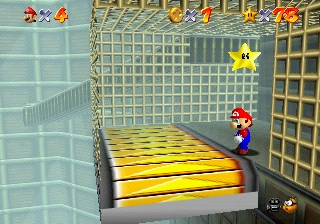
This one is low in the tower, near the bottom-left as you enter, guarded by a pair of swinging pendulums. Freezing the clock at 12 stops the pendulums mid-swing so you can simply walk past them to the ledge holding the star — no timing the arcs, no getting swatted into the pit. If you enter slow (3 o'clock) instead, the pendulums crawl and you can still weave through, but there is no reason to make it harder than a frozen walk-up.
Get a Hand
The exception. This star is out on a ledge you reach by riding one of the giant clock hands that juts from the central pillar and rotates around it. If you freeze the level, the hand never moves and you are stuck — so for this one, enter at 3 o'clock for a slow, predictable rotation. Ride the hand around until it carries you level with the target ledge, then hop off. Slow speed matters here because a fast-spinning hand (9 o'clock) flings you off before you can react, and the erratic setting is a coin flip. This is the only star in the course where "stop time" is the wrong answer.
Stomp on the Thwomp
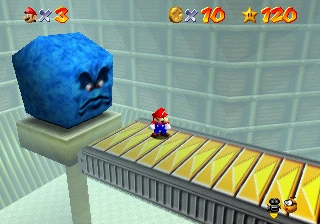
High up the tower sits a Thwomp, and the star is on a ledge above it. The intended route uses the Thwomp itself as a platform — you climb the moving pieces to reach it. Enter at 12 to freeze the Thwomp in place so it becomes a reliable stepping stone instead of a slam that resets your run, then use it to reach the final ledge. A backflip or wall kick off the surrounding structure closes the last gap.
Timed Jumps on Moving Bars
The name is a bluff. These are the horizontal pillars that slide in and out of the tower walls, and the "timing" the mission wants is only hard if the bars are moving. Enter at 12, and the bars stop half-extended, giving you a stack of stationary platforms to jump across to the star. What was designed as a rhythm test becomes a series of standing long jumps. If you insist on the honest version, enter slow and jump onto each bar as it reaches full extension — but frozen is faster and safer.
Stop Time for Red Coins
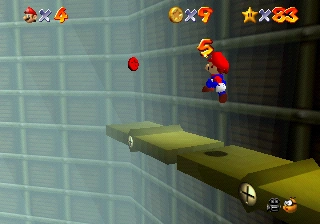
The mission name is telling you how to beat it. There are eight red coins scattered up the tower, and the correct play is exactly what the title says: enter at 12 to stop time, then climb the entire dead-still course at your leisure, sweeping up all eight without a single moving hazard. The star appears once you have all eight. Doing this with the clock running is genuinely brutal — coins tucked between shifting gears, on pendulum ledges, near live Thwomps — so freezing is not optional here, it is the intended solution. It doubles as a coin-farming lap; see below.
The 100-coin run
Tick Tock Clock is one of the tougher 100-coin stars in the game because the level's verticality means a single bad fall drops you past coins you already skipped, and you have to climb back up. Pair it with the red coins: the eight red coins are worth two coins each, so a frozen "Stop Time for Red Coins" run already hands you 16 coins toward the total on a lap where nothing can hit you.
Fill in the rest with the coin rings and the blue-coin blocks scattered up the tower. Some coins sit on moving parts, so a fully frozen run can leave a few unreachable — a slow (3 o'clock) entry is the compromise that keeps the gears turning gently enough to expose those coins without turning the climb into a blender. Grab the red coins on the same trip and you often clear both stars back to back.
Movement that makes the climb bearable
Tick Tock Clock is a vertical course, so the moves that matter most are the ones that gain or recover height. If your movement fundamentals are shaky, this is the course that exposes it:
- Wall kick — the whole tower is narrow shafts and close walls. A clean wall kick recovers a botched jump instead of sending you back to the bottom. Press A the instant Mario touches the wall, not after he starts sliding.
- Backflip — straight-up height with no runway, perfect for the tight ledges where you cannot get a running start.
- Long jump — for the horizontal gaps, especially across the frozen moving bars.
- The dive-recover — if you are going to eat a long fall anyway, dive so you can roll out of the landing and keep control instead of bouncing helplessly.
One quiet mercy: because you can grab any star regardless of the mission you selected, you can knock out several of these on a single frozen entry if you spot them on the way up. Freeze the clock, climb once, and opportunistically bank whatever is in reach.
Mistakes that get you killed here
- Jumping into the painting on a random frame. If you did not watch the hand, you do not know your speed. Back out and re-enter rather than committing blind.
- Choosing the 6 o'clock (erratic) speed. There is no situation where random speed changes help you. If you land on it by accident, leave and retry.
- Freezing the clock for Get a Hand. That is the one star that needs the hands turning. Enter slow, not stopped.
- Chasing the 100-coin star fully frozen. A frozen level hides coins that ride on moving parts. Use a gentle slow entry for the coin lap.
- Fighting the camera in the shaft. The tight interior swings Lakitu around constantly. Tap R for the fixed Mario cam on the narrow ledges, and rotate with the C-buttons before a jump, not during it.
Clear all seven and you are one course from the top of the castle. Tick Tock Clock and Rainbow Ride are the third floor's whole roster, and both are pure platforming with no boss — which, once you have mastered the freeze trick, makes this one of the more satisfying courses in the game rather than one of the most feared. Speedrunners have their own reasons to love the tower, too; the speedrun route treats the entry timing as a tool rather than an obstacle.
Quick Action Checklist
- Reach the third floor via the 50-star Big Star Door before attempting the course.
- Watch the minute hand on the painting and jump so you enter at 12 o'clock to freeze the clockwork for almost everything.
- Never enter at 6 o'clock — the erratic setting only hurts you.
- Roll into the Cage, Pit and the Pendulums, Stomp on the Thwomp, Timed Jumps on Moving Bars, and Stop Time for Red Coins: all easiest with a frozen level.
- Get a Hand is the exception — enter at 3 o'clock so the clock hand rotates slowly enough to ride.
- Collect the eight red coins on a frozen lap; they hand you 16 coins toward the 100-coin star for free.
- Run the 100-coin star at a gentle slow speed so coins on moving parts stay reachable.
- Lean on wall kicks and backflips for the tight vertical recovery this course demands.
Frequently Asked Questions
How does the time trick work in Tick Tock Clock?
How many stars do you need to reach Tick Tock Clock?
What are all the stars in Tick Tock Clock?
How do you get the red coins in Tick Tock Clock?
Which Tick Tock Clock star cannot be done with time frozen?
Is the 100-coin star in Tick Tock Clock hard?
Keep Reading
Related Guides

Super Mario 64 Swimming Guide: Tap A, Don't Hold It
Holding A is the slow way to swim in Super Mario 64. Here is the stroke rhythm the code rewards, how the stick steers, how to jump out of the water, what each current does, and the eight seconds of free speed hiding in two clams.
Super Mario 64 Lives and Game Over: What You Actually Lose
A Game Over in Super Mario 64 is a file reload: you keep everything you saved and lose everything you did not. Here is when the game actually writes your file, exactly what a Game Over rolls back, the five courses where a fall is free, and every way to earn a life, from the coin tally to the Monty Mole streak that never runs dry.
Super Mario 64 Music: Every Track and Where It Plays
Super Mario 64 scores 15 courses with seven songs, and only one of them belongs to a single course. Here is which track plays in every course and secret level, the five levels whose music rearranges itself as Mario moves, what triggers the boss music and the jingles, all 36 soundtrack tracks under their 1996 and current names, and where to listen today.
Super Mario 64 Bowser Levels Guide: All 24 Red Coins
Bowser in the Dark World, the Fire Sea and the Sky each hide one Power Star behind eight red coins on the obstacle course in front of the fight. Here is the route through all three, where every red coin sits, and what else the level data holds.
Super Mario 64 Beginner Guide: Your First 30 Power Stars
Super Mario 64 does not gate you on difficulty, it gates you on Power Stars. Here is exactly which doors need what, which stars are fastest to grab, and the route that gets a first-timer from one star to thirty without wandering the castle in circles.
Super Mario 64 120-Star Reward: Yoshi and the Castle Roof
Super Mario 64 does not announce your 120th Power Star. The reward is outside: a cannon grate that stops loading, Yoshi on the castle roof, and a gift that quietly resets the next time you load your file. Here is what 120 stars changes, checked against the wikis and the decompiled code.