Super Mario 64 Bowser Levels Guide: All 24 Red Coins
Bowser in the Dark World, the Fire Sea and the Sky each hide one Power Star behind eight red coins on the obstacle course in front of the fight. Here is the route through all three, where every red coin sits, and what else the level data holds.
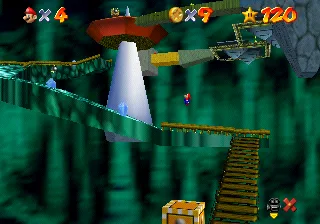
Super Mario 64's Bowser levels break the rules the paintings taught you. There is no star select screen and no mission list, and each level holds exactly one Power Star, which is not the fight. It sits behind eight red coins spread along an obstacle course you are mostly trying to survive on the way to a pipe. Beat Bowser and the game hands you a key, or in the last level the ending. Skip the coins and that star stays outstanding until you walk back in.
The boss guide covers how to throw him. This is the part in front of him: the route through Bowser in the Dark World, Bowser in the Fire Sea and Bowser in the Sky, where all 24 red coins are, and what else each level is holding. The secret stars guide counts these three stars among the castle's 15 secrets; this is where the coins actually sit. Red coin locations follow the Super Mario Wiki's course pages, and the counts of coins, 1-Ups and Bowser's health come from Ukikipedia and the decompiled source. It covers the N64 game, which Super Mario 3D All-Stars and Nintendo Switch Online both run a version of, with the DS remake's changes at the end.
The three Bowser levels at a glance
| Bowser in the Dark World | Bowser in the Fire Sea | Bowser in the Sky | |
|---|---|---|---|
| Way in | Trapdoor behind the 8-star Big Star Door on the ground-floor mezzanine | Hole in the floor of the Dire, Dire Docks hallway, after "Board Bowser's Sub" | The top of the endless stairs |
| Stars needed | 8 | 30 for the hallway, plus Board Bowser's Sub | 70 |
| Power Stars inside | 1, for 8 red coins | 1, for 8 red coins | 1, for 8 red coins |
| Coins in the level | 80 | 80 | 76 |
| Spinning Hearts | 0 | 2 | 2 |
| 1-Up Mushrooms | 6, but only 3 on a first visit | 7, but 5 until you beat it | 6 |
| Hits to beat Bowser | 1 | 1 | 3 |
| Spiked orbs in the arena | 4 | 4 | 5 |
| Beating him gives | Key to the basement | Key to the upper floors | The Jumbo Star and the ending |
Two rows need a sentence each. The coins have no star attached, because the 100-coin star only exists in the 15 main courses, so in here a coin is purely a heal: one wedge per yellow coin and two per red, per the health guide. And the 1-Up counts change as you progress, because some of those mushrooms are switched off until you hold a key. The level sections below say which.
Four rules that hold in all three
- There is no star select. The decompiled course list numbers the Bowser levels 16, 17 and 18, and the game only offers the star select screen for courses up to 15. Every entry loads the same layout, red coins included; only some 1-Ups depend on your progress.
- The red coin star does not end the level. The decompiled code spawns it as a "no exit" star: Mario celebrates, the game asks whether you want to save, and you carry on. Collect the eight, take the star, then head for the pipe. It does not refill the Power Meter the way a course-ending star does, so bank the healing on the way.
- Falling into the void costs a life. None of the three levels has a safety warp below it, so the game falls back to its death warp: you lose a life, land back in the castle, and the next attempt starts from the top with every red coin back in place. In the Fire Sea the lava lake usually catches you first, and lava burns rather than kills outright.
- You can always come back. Collecting the key does not lock you out, and a return trip is when the missing 1-Ups show up.
Bowser in the Dark World
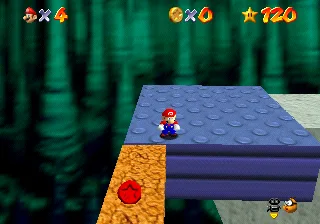
Behind the 8-star Big Star Door is a corridor with a portrait of Peach at the end. Walk toward it, the portrait turns into Bowser, and a trapdoor drops you in. The Super Mario Wiki notes an invisible wall keeps you from ever reaching the painting itself. The beginner guide covers the star doors that get you here.
The level runs in three stretches over a dark green cavern.
The first stretch starts at a green cap block and a flamethrower. Moving squares carry you on to a tall stone platform, and the Super Mario Wiki describes a choice from there: a blue route that is safer but too steep to run up, or a longer, flatter stone route with coins and a flamethrower at its turn.
The middle stretch is a wooden octagon with three Goombas and a yellow block holding a 1-Up, then a bridge onto a green stone path set with six crystals, four of them circled by Amps. It ends at a stone cube with a yellow block sliding in and out of its side.
The last stretch begins on a platform with a single Goomba. A narrow path to the left leads to a round platform with coins, a 1-Up and an Amp. To the right are two seesaws, with more 1-Ups behind them and on the ledges above. Past two more Goombas, climb to a purple switch that raises the staircase to the warp pipe. The sign in front of the pipe is a message from Peach on how to beat Bowser.
The eight red coins in the Dark World
Two of them depend on a switch. Near the first flamethrower is a purple floor switch, and the decompiled level data ties it to four hidden breakable boxes. Step on it and the boxes appear for about 13 seconds (360 frames solid, then 20 blinks, about 40 more frames). An attack or a ground pound breaks a box, so jump onto them instead. The switch resets once its ticking stops, and a broken box returns on the next press, so a miss costs you time, not the coin.
- On a box a short way from the switch.
- At the far end of a row of three boxes back toward where you dropped in.
- Next to the third crystal on the crystal path.
- At the stone cube at the end of that path, reachable while the sliding yellow block sticks out of its side.
- In the far corner of the loop traced by a pair of moving squares that circle each other.
- On the platform off to the left where the last stretch begins, beside the post in its middle.
- Behind the second seesaw.
- Above the far-left ledge that overhangs the seesaws.
With all eight collected, the star appears beside the warp pipe at the top of the staircase, so you pick it up on your way into the fight.
Two reasons to come back. The level data holds six 1-Up Mushrooms, but two only appear once your file has this level's key and one only once it has the Fire Sea key, so a first visit offers three. And the green block at the very start holds a Metal Cap. Metal Mario cannot be set on fire by the flamethrowers, and the cap lasts 20 seconds, but the green switch that makes the block solid is in the Cavern of the Metal Cap, reached through Hazy Maze Cave, which sits in the basement this level's key opens. Until then the Super Mario Wiki notes every cap block is intangible, so on the first trip there is nothing to take. The cap guide covers the switch.
Bowser in the Fire Sea
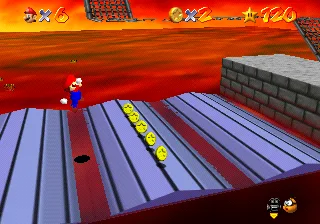
The entrance is a hole in the floor of the basement hallway behind the 30-star door. Until you clear "Board Bowser's Sub", the blue Dire, Dire Docks portal sits in front of it; the Dire, Dire Docks guide covers that star and how the portal moves.
This one is built in three levels stacked above a lava lake.
The lava level. You start next to a wire-mesh platform that moves once you step on it and dips under the lava along the way, so jump to the tilting platforms beside it when it goes under. Past its end, blue platforms sink into the lava and resurface, then comes a Bully and three Goombas around the first Spinning Heart. A rising pole circled by an Amp lifts you to more tilting platforms. A yellow block with three coins sits off to the right, and the pole at the left end takes you into a cage with an elevator up to the next level.
The middle level. A moving platform carries you through a flamethrower to a sloping mound. After that is a grate you hang from to cross the lava, two moving platforms, a couple of Bullies, and a tall set of linked moving platforms up to the top. The Bullies deal no damage and win by shoving you off; the Lethal Lava Land guide covers how to push back.
The top level. A stone slope with a flame thrower, a Bob-omb and a yellow block leads to a row of sinking and rising platforms guarded by flamethrowers and Amps, then a stone structure of rising and falling poles, then a bridge that falls away under you on the way to the warp. That yellow block by the Bob-omb holds ten coins, which is enough to fill the meter from a single wedge, and the level's second Spinning Heart is up here too.
The eight red coins in the Fire Sea
- Above the hole in the middle of a square metal floor with regular coins on it, at the end of the metal path before the first Spinning Heart.
- Above one side of the first tilting platform after the rising pole with the Amp.
- Up in a corner of the elevator cage.
- Below the elevator in the cage. Step onto the elevator, step straight back off, and drop down the hole after it to reach this one.
- Above the octagonal Bully platform at the end of the narrow path by the top of the sloping mound.
- Above the third of the linked purple moving platforms. Look for its small shadow and wait for the platforms to rise.
- Right next to the last flamethrower among the sinking and rising platforms on the top level.
- Above the last sinking and rising pole before the falling bridge.
The star appears on top of a wall shortly before the warp to Bowser. Wall kick or triple jump up to it.
The 1-Ups here follow the same pattern as the Dark World. There are seven in the level data, two of them switched off until you have beaten this Bowser, and one of those two sits right below the spot where the red coin star appears. Two of the five you can get on a first visit are hidden, and one of them is easy to collect on your way: climb to the very top of the pole that leads into the elevator cage and a 1-Up pops out.
Bowser in the Sky
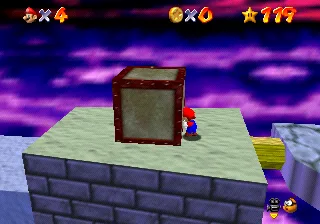
At seventy stars the endless stairs stop looping you back, and the level at the top is a climb in three parts.
The climb. You land on a big arrow-shaped platform pointing the way. A run of stair-step platforms follows, and the last one has a platform that slides out of it and can shove you into the void. At the top is a metal block you can push. Then comes a seesaw that tilts under your weight and drops you if you stand still, a ramp to run up, a spinning platform, and a set of platforms turning like a Ferris wheel. Next, all above one big platform, are a small platform with a Whomp, a ledge with a flame thrower and a spot with a Chuckya. A purple switch raises the stairs onward.
The lift. At the top of the stairs is a long bending platform with flamethrowers and coins. At its end, a lift rides a rail through a line of platforms you jump over, one of which holds a Spinning Heart. The lift turns back at the end of its rail, and snaps back to its start if you stay off it too long. After it come two spinning platforms with a flame thrower, Bob-ombs and Amps, and a pole on the back one.
The top. The pole takes you to a platform with two Goombas and two sliding platforms bridging the gap. Beyond are a bending stone path and two more Ferris-wheel platforms, then the final platform: three Goombas, a few columns, the second Spinning Heart and a steady wind pushing you back. The Super Mario Wiki's advice is to stand right behind the columns. The statues by the pipe, per the same page, show Mario jumping over a fireball near Bowser in the old Super Mario Bros. style.
The eight red coins in the Sky
- Above the second-to-last stair-step platform. Push the metal block over, then jump from it; a backflip also reaches.
- In a corner of the stone path after the first spinning platform, where a Small Piranha appears.
- On a small ledge next to a line of coins, on the large stone platform below the seesaw, on the way to the first Ferris-wheel platforms.
- Above the coins at the top of the bending platform with the flamethrowers.
- Above the first high wooden platform after the Spinning Heart on the lift's path.
- Near the centre of the first spinning platform after the lift.
- Above the pole between the two sliding platforms on the top level.
- On the ledge under the stairs just before the warp pipe.
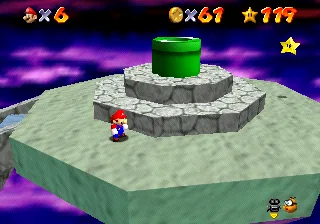
The star appears behind the warp pipe. Ukikipedia's coin breakdown adds one useful number: 28 of the level's 76 coins come from enemies, including 10 from the Whomp and 5 from the Chuckya, so fighting instead of dodging is the healing plan up here. The level data holds six 1-Ups, with none gated behind a key.
The three fights, briefly
Bowser's health is set per level in the decompiled code: one hit in the Dark World, one in the Fire Sea, three in the Sky. Every hit is a throw into a spiked orb, four around each of the first two arenas and five in the last. In the Fire Sea he opens with a big jump, and the arena tilts toward him when he lands from one, which is how you slide into the lava. In the Sky, after the second hit the outer edge of the arena breaks off and leaves a star shape. The boss guide has the throwing technique.
What the A Button Challenge and speedrunners do here
Ukikipedia's counts for the A Button Challenge:
| Level | A presses | Why |
|---|---|---|
| Bowser in the Dark World | 0 | Mostly flat ground; the elevators and the hardest gaps are crossed with precise dive recovers |
| Bowser in the Fire Sea | 1 on the Japanese N64 version, 0 on Wii Virtual Console | The press is a jump off a pole, which the Wii VC version avoids with a rounding glitch |
| Bowser in the Sky | 0 | The opening platforms are the hard part, handled with a misalignment trick and a Chuckya drop |
Speedrunners care about the red coins too. Ukikipedia's standard 16-star route takes the Dark World red coin star as one of its 16, while its beginner route drops it for Swimming Beast in the Cavern, and both run the Fire Sea and the Sky without their reds. The speedrun guide covers where to start.
What Super Mario 64 DS changes
The remake keeps the three levels and adds a second star to each, per the Super Mario Wiki:
| N64 | Super Mario 64 DS | |
|---|---|---|
| Dark World door | 8 stars | 12 stars, Mario only, after Goomboss Battle |
| Sky | 70 stars | 80 stars, Mario only |
| Stars per level | 1, for red coins | 2: red coins plus a Switch Star |
| Spiked orbs, first two fights | 4 | 8 |
| Dark World red coins | Two on switch boxes | One moved near the starting platform |
Each Switch Star is a timed dash. In the Dark World, the switch by the warp pipe drops the star onto a ledge below, reached back down the stairs and across the platforms above the seesaws. In the Fire Sea it appears across a lava pool you have to backtrack over, where Luigi can backflip straight across. In the Sky, the switch on the big stone platform under the first Ferris-wheel platforms sends you back to the spinning platform you passed after the ramp. The version differences guide covers the rest of the remake.
Mistakes these levels punish
- Punching the Dark World switch boxes. They break, and two red coins sit on them. Jump on them instead.
- Standing still on the Sky's seesaw. It keeps tilting under your weight until it drops you.
- Riding the Fire Sea's first wire platform under the lava. Step off onto the tilting platforms when it dives.
- Missing the Fire Sea's under-elevator coin. Board the elevator and step straight off, then drop through the hole.
- Standing in the open on the Sky's final platform. The wind pushes you back toward the edge; stand right behind the columns.
- Staying low in the Fire Sea arena. When he lands from a big jump the floor tilts toward Bowser, so move uphill the moment he jumps.
- Treating a first visit as final. Three Dark World 1-Ups need the Dark World or Fire Sea key before they appear, and two Fire Sea 1-Ups need the Fire Sea key.
Quick Action Checklist
- Know that each Bowser level has one star, for eight red coins, and no star select.
- Take the red coin star, save, and keep going, because it does not end the level.
- Dark World: press the purple switch near the first flamethrower, then jump (never punch) onto the boxes it raises for two reds; they last about 13 seconds per press.
- Dark World: collect the other six at the third crystal, the stone cube, the moving-squares loop, the left-hand platform, behind the second seesaw and above the far-left ledge.
- Fire Sea: leave the wire platform when it dives, and step on and straight off the elevator to drop to the coin below it.
- Fire Sea: wall kick or triple jump onto the wall before the warp for the star.
- Sky: push the metal block for the first red coin, keep moving on the seesaw, and shelter behind the columns from the wind at the end.
- Sky: the star is behind the warp pipe, and 28 of the 76 coins come from enemies.
- Expect one hit to finish the first two Bowsers and three to finish the last.
- Come back after each key for the extra 1-Ups, and after the green switch for the Dark World's Metal Cap.
- On Super Mario 64 DS, look for a second, timed Switch Star in each level.
Frequently Asked Questions
Where are the red coins in Bowser in the Dark World?
Where are the red coins in Bowser in the Fire Sea?
Where are the red coins in Bowser in the Sky?
Does the red coin star in a Bowser level kick you out?
How many hits does Bowser take in each Super Mario 64 fight?
How many stars are in the Bowser levels in Super Mario 64?
Keep Reading
- Mythras blog
- Super Mario 64 coverage hub
- Super Mario 64 boss guide
- Super Mario 64 secret stars guide
- Super Mario 64 beginner guide
- Super Mario 64 Dire, Dire Docks guide
- Super Mario 64 health guide
- Super Mario 64 cap guide
- Super Mario 64 Hazy Maze Cave guide
- Super Mario 64 Lethal Lava Land guide
- Super Mario 64 100 coin stars guide
- Super Mario 64 speedrun guide
- Super Mario 64 version differences
- Bowser in the Dark World — Super Mario Wiki
- Bowser in the Fire Sea — Super Mario Wiki
- Bowser in the Sky — Super Mario Wiki
- Mushroom Castle (Super Mario 64) — Super Mario Wiki
- Endless stairs — Super Mario Wiki
- Cap Block — Super Mario Wiki
- Bowser in the Dark World — Ukikipedia
- Bowser in the Fire Sea — Ukikipedia
- Bowser in the Sky — Ukikipedia
- RTA Guide: 16 Star — Ukikipedia
- bowser.inc.c — Super Mario 64 decompilation (n64decomp)
- hidden_star.inc.c — Super Mario 64 decompilation (n64decomp)
- spawn_star.inc.c — Super Mario 64 decompilation (n64decomp)
- mushroom_1up.inc.c — Super Mario 64 decompilation (n64decomp)
- purple_switch.inc.c — Super Mario 64 decompilation (n64decomp)
- switch_hidden_objects.inc.c — Super Mario 64 decompilation (n64decomp)
- object_helpers.c (cur_obj_wait_then_blink) — Super Mario 64 decompilation (n64decomp)
- interaction.c — Super Mario 64 decompilation (n64decomp)
- level_update.c — Super Mario 64 decompilation (n64decomp)
- course_defines.h — Super Mario 64 decompilation (n64decomp)
- Bowser in the Dark World object placements — Super Mario 64 decompilation (n64decomp)
- Bowser in the Fire Sea object placements — Super Mario 64 decompilation (n64decomp)
- Bowser in the Sky object placements — Super Mario 64 decompilation (n64decomp)
- English dialog text — Super Mario 64 decompilation (n64decomp)
Related Guides
Super Mario 64 Swimming Guide: Tap A, Don't Hold It
Holding A is the slow way to swim in Super Mario 64. Here is the stroke rhythm the code rewards, how the stick steers, how to jump out of the water, what each current does, and the eight seconds of free speed hiding in two clams.
Super Mario 64 Lives and Game Over: What You Actually Lose
A Game Over in Super Mario 64 is a file reload: you keep everything you saved and lose everything you did not. Here is when the game actually writes your file, exactly what a Game Over rolls back, the five courses where a fall is free, and every way to earn a life, from the coin tally to the Monty Mole streak that never runs dry.
Super Mario 64 Music: Every Track and Where It Plays
Super Mario 64 scores 15 courses with seven songs, and only one of them belongs to a single course. Here is which track plays in every course and secret level, the five levels whose music rearranges itself as Mario moves, what triggers the boss music and the jingles, all 36 soundtrack tracks under their 1996 and current names, and where to listen today.
Super Mario 64 120-Star Reward: Yoshi and the Castle Roof
Super Mario 64 does not announce your 120th Power Star. The reward is outside: a cannon grate that stops loading, Yoshi on the castle roof, and a gift that quietly resets the next time you load your file. Here is what 120 stars changes, checked against the wikis and the decompiled code.
Super Mario 64 Beginner Guide: Your First 30 Power Stars
Super Mario 64 does not gate you on difficulty, it gates you on Power Stars. Here is exactly which doors need what, which stars are fastest to grab, and the route that gets a first-timer from one star to thirty without wandering the castle in circles.
Super Mario 64 Snowman's Land Guide: All 7 Stars
Snowman's Land looks like the throwaway snow level, and the wiki record on it backs that read up in one specific way: it is the only one of the game's 15 main courses with no Blue Coins at all. What it does have is two freezing ponds that hurt you in two different ways, an enemy species that appears nowhere else in the game, and a cap-stealing snowman nobody warns you about. Here is every star, the full 127-coin breakdown, and the course's last remaining gap in this vertical.