The Last of Us Part 2 Safe Codes: All 14 Combinations
Fourteen combination locks stand between you and the Safecracker trophy, and Naughty Dog turned nearly every one into a tiny story — a wedding date, a dog's Employee of the Month photo, two apartment numbers. Here is every code, where each clue actually lives, and the sound trick that opens all of them.
The best safe code in The Last of Us Part II is two apartment numbers. In Abby's Shortcut chapter there's a note thread between neighbors — a nervous introduction, a thank-you for cornbread, a bottle of suspiciously good vodka — that ends with one of them dead on a roof and the survivor leaving her supplies behind: combo is our apartment number, then yours. Doors 302 and 304. Dial 30-23-04 and the game quietly hands you a whole short story along with the ammo.
That is how nearly every safe in this game works. Naughty Dog could have scattered fourteen keypads with sticky notes next to them; instead almost every combination is a date, a phone number, a Wi-Fi password or an inside joke, which means safe-hunting in Part II is closer to environmental puzzle-solving than looting. This guide has all fourteen codes, where each clue actually sits, the listening trick that opens any safe with no code at all, and — because people mix them up constantly — how the four safes in the first game work, which depends on which version of it you're playing.
Scope note up front: everything here is about the games. Part II's safes are identical across the 2020 PS4 release and Part II Remastered on PS5 and PC, and none of this has anything to do with the HBO series. If you're hunting every pickup in the first game instead, that's our Part I collectibles guide.
How safes changed between the two games
In the original 2013 game and its Remastered version, safes are glorified artifact checks. Find the note with the combination and the safe opens on interaction — you never touch a dial. Walk up without the note and red text reading NEED COMBINATION appears in the corner of the screen, which is the game telling you to go read more paperwork. The 2022 Part I remake dropped that system: its safes have a real dial you rotate yourself, so the combination is something you enter, not just a flag you collect.
Part II makes you do the dialing too. Every safe takes a two- or three-part combination — XX-XX or XX-XX-XX — entered by physically rotating the dial. Real input has a consequence speedrunners and second-playthrough players figured out immediately: the notes are optional. If you know the numbers, you can walk to any safe in the game, spin the dial cold, and open it on your first visit. That is exactly what the table below lets you do.
The count also ballooned. Part I has four safes; Part II has fourteen combination locks — the wiki's tally, which counts thirteen true safes plus one keypad gate — spread across every chapter of the campaign, with a trophy attached to opening all of them.
Every safe code in The Last of Us Part II
Here is the full list, in campaign order. Codes are exact; clue locations are where the game expects you to learn them.
| # | Chapter (section) | Where the safe is | Code | The clue |
|---|---|---|---|---|
| 1 | Jackson (The Patrol) | Supermarket office off the break room | 07-20-13 | Good boy combo note, on the desk beside the safe |
| 2 | Seattle Day 1, Ellie (Downtown) | Courthouse office lockup | 86-07-22 | List of known WLF agitators, filing cabinet in the same office |
| 3 | Seattle Day 1, Ellie (Downtown) | Westlake Bank vault | 60-23-06 | Bank heist plans, in a bag outside the vault door |
| 4 | Seattle Day 1, Ellie (The Gate) | West 2 checkpoint gate keypad | 0451 | Checkpoint gate codes note, desk drawer at the main gate |
| 5 | Seattle Day 1, Ellie (Capitol Hill) | Thrift store | 55-01-33 | Thrift store reminder — Staci's phone number |
| 6 | Seattle Day 2, Ellie (Hillcrest) | Auto repair garage | 30-82-65 | Dale's combo, pinned in the bar kitchen next door |
| 7 | Seattle Day 2, Ellie (The Seraphites) | Apartment bedroom | 10-08-83 | Evacuation letter — the couple's wedding date |
| 8 | Seattle Day 2, Ellie (The Seraphites) | Pharmacy backroom | 38-55-23 | Pharmacy note, code written out plainly |
| 9 | Seattle Day 3, Ellie (The Flooded City) | Warehouse caged-in area | 70-12-64 | Stash note, on a corpse nearby |
| 10 | Seattle Day 1, Abby (On Foot) | Building past the boat shop | 17-38-07 | WLF gun cache note — "the big win" |
| 11 | Seattle Day 1, Abby (Hostile Territory) | Jasmine Bakery | 68-96-89 | Mei's note: the combination is 689689 |
| 12 | Seattle Day 1, Abby (The Coast) | At the ship's helm, by the wheel | 90-77-01 | None needed — see below |
| 13 | Seattle Day 2, Abby (The Shortcut) | Apartment bedroom | 30-23-04 | Neighbor exchange — apartments 302 and 304 |
| 14 | Seattle Day 2, Abby (The Descent) | Cleaning closet off the gym lobby | 12-18-79 | Gym safe code note — same as the Wi-Fi |
Fourteen entries, six chapters, two playable characters. Now the texture, because half of these are little design lectures in how to do environmental storytelling.
Ellie's nine, from Jackson to the Flooded City
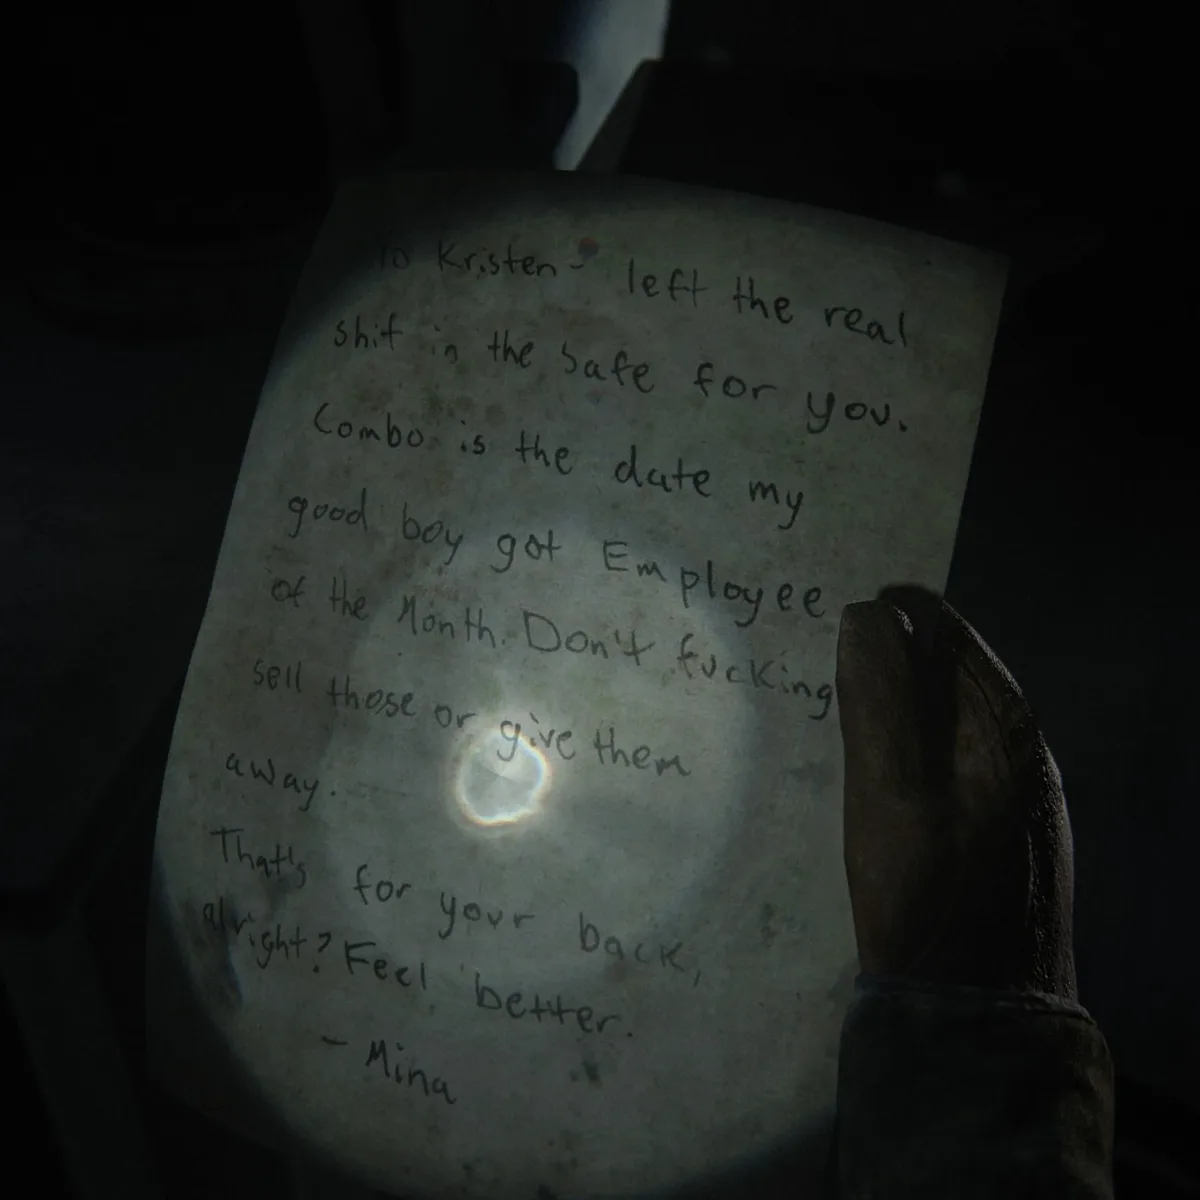
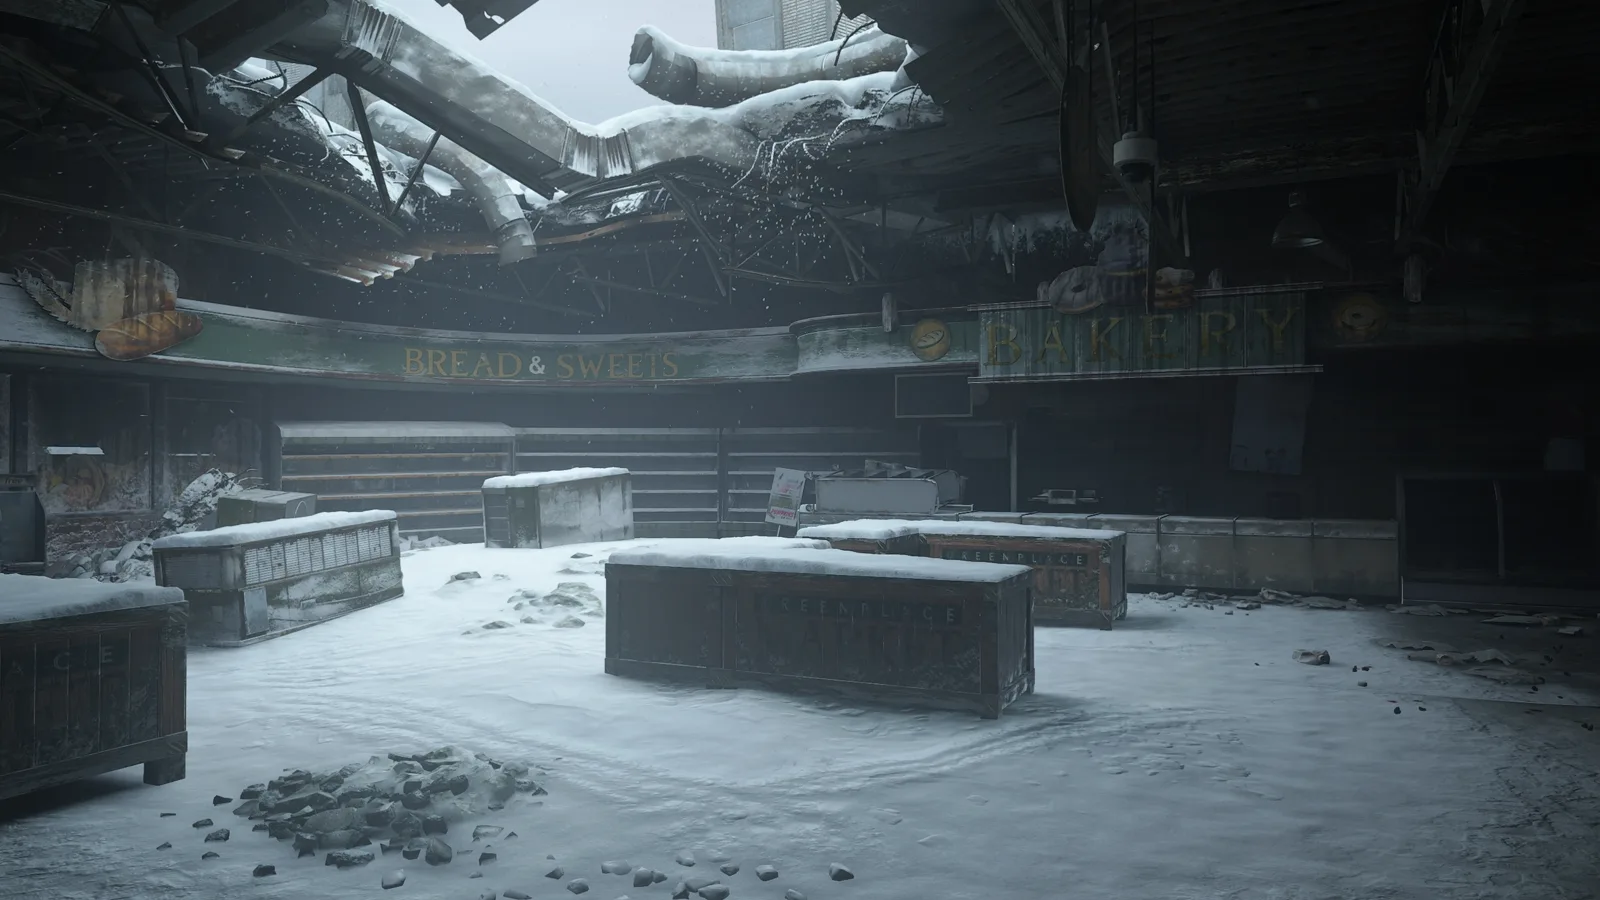
The supermarket safe (07-20-13) is most people's introduction to the system, about an hour into the game. In the office off the Greenplace Market break room, a note from Mina tells her friend Kristen she left "the real shit" in the safe, and that the combo is the date her good boy got Employee of the Month. The store's Employee of the Month honoree is, in fact, a dog, and the date attached to that honor is the combination. It's a tutorial disguised as a joke: the game is teaching you that codes live in the environment, not just on the paper.
The courthouse lockup (86-07-22) is the grimmest of the bunch. Downstairs in the Seattle courthouse, past the executed FEDRA officers, there's an office with a corpse pinned under a whiteboard — pulling the machete out of Lt. Torres' body shakes loose his final memorandum, and the filing cabinet next to him holds a list of WLF targets. The reminder at the bottom of that list — confiscated items go in the office lockup, code 860722 — is your way in.
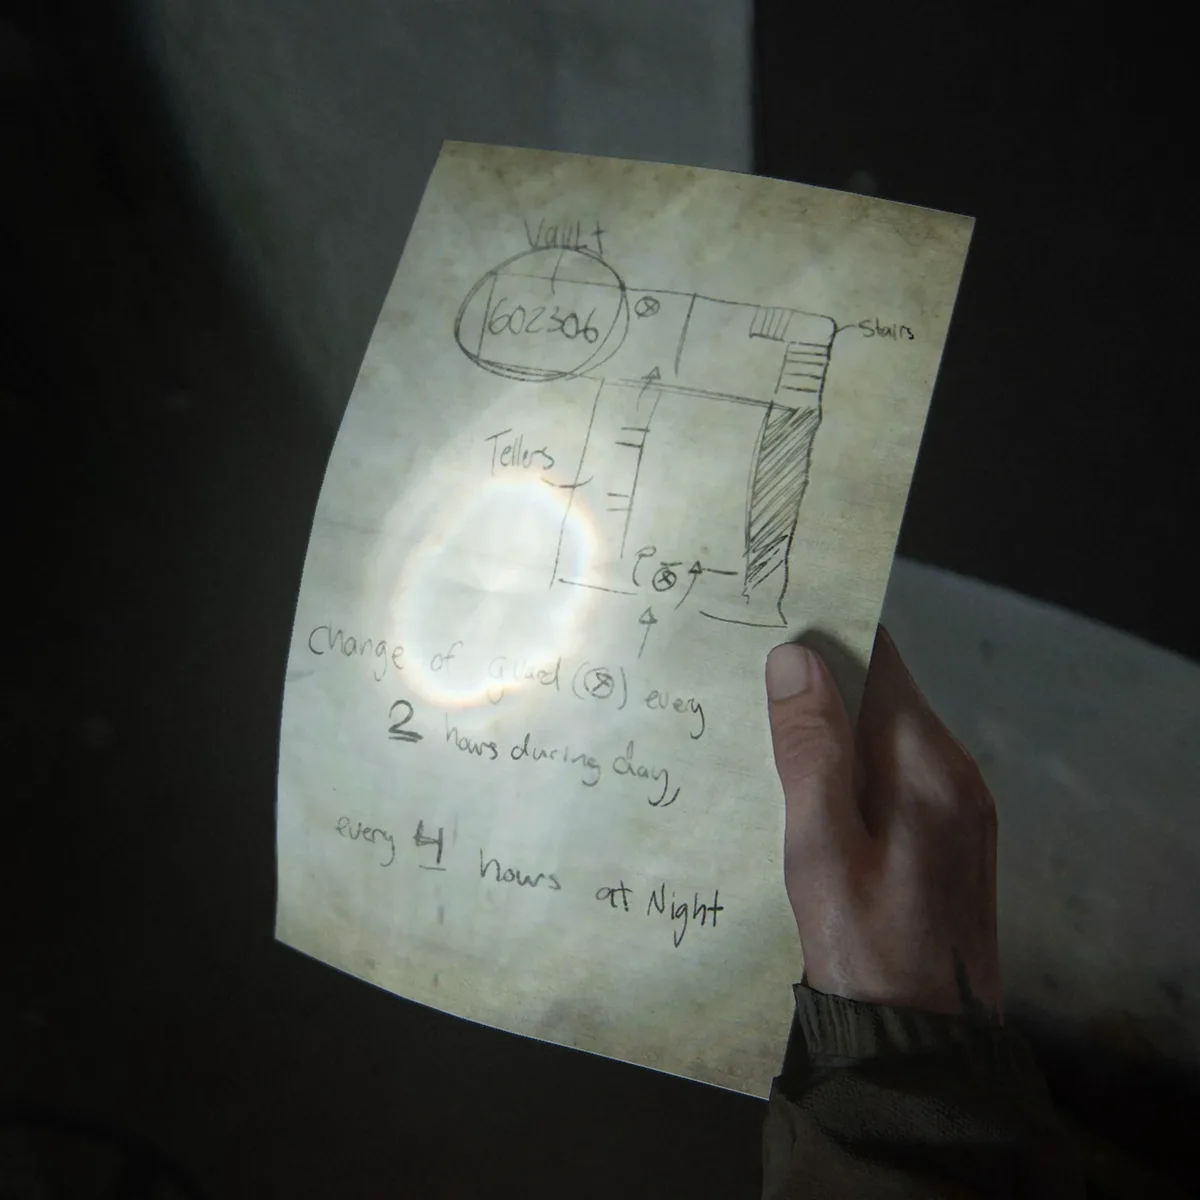
The Westlake Bank vault (60-23-06) is the best optional room in the Downtown open section. The heist plans sit in a bag right outside the vault door — a hand-drawn map with the code circled and guard rotations noted, from a crew that tried to rob the place mid-outbreak. The vault itself holds more than the safe contents: there's a letter beside one of the robbers' bodies and a ring stashed in a corner drawer. Robbing a bank during the apocalypse for money is exactly the kind of decision the artifacts in this game love to quietly judge.
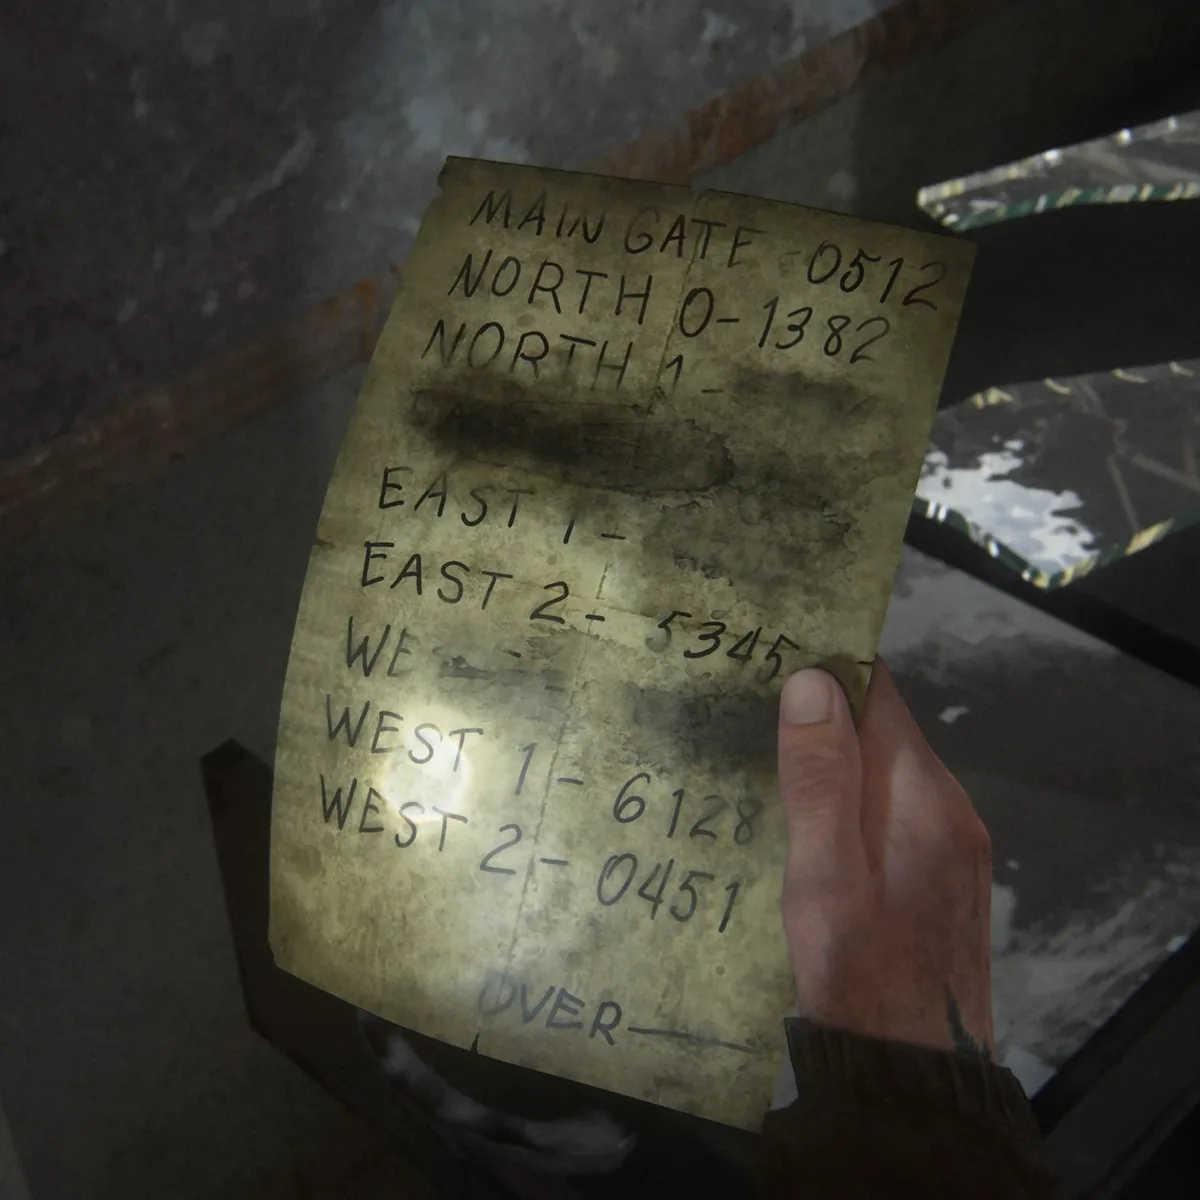
The West 2 gate (0451) is the one lock on this list you cannot miss, because the note that opens it is story-critical: it only appears in the mobile command trailer's desk drawer after you've picked up the map of Seattle, and you need it to leave the area. The wiki counts it among the fourteen combination locks, so it's on the table. And if 0451 rings a bell, it should — that number is the immersive-sim genre's favorite door code, and Naughty Dog knew exactly what it was doing putting it on a keypad in a game about reading other people's notes.
The thrift store safe (55-01-33) hides behind the best-smudged clue in the game. The reminder note says the combo is the last six digits of Staci's phone number, then helpfully provides it as 206-555-01 with the end trailed off. The safe wants 55-01-33.
Hillcrest's garage safe (30-82-65) comes with workplace comedy: the note with Dale's combo — posted in the bar kitchen you reach through the hole in the pet boutique wall — exists because a coworker got tired of Dale asking for the code "eight more times."
The Seraphites apartment safe (10-08-83) has my favorite clue in either game. Ellen's evacuation letter says the combination is "still set to our wedding date — I mean, it's been thirty years, but I assume you still remember when that was, right?" October 8, 1983, thirty years before outbreak day. Naughty Dog did the math on a fictional couple's anniversary so a safe code could double as a love letter.
The pharmacy safe (38-55-23) is a freebie: the note stashing supplies for the trek to the WLF base just writes the code out. Same with the Flooded City warehouse safe (70-12-64) on Day 3 — Randall's stash note, found on his corpse, gives the numbers to a friend he clearly didn't expect to outlive him.
Abby's five: gun caches, a bakery and a boat
The gun cache (17-38-07) in On Foot is the closest the game comes to withholding. Paul's note to Marta — in the rusty construction trailer near where you reunite with Manny — says he left her guns in the lockup and that he's "still using 'the big win' as the combination." No digits anywhere on the page. The area around the safe is what's supposed to tell you about a big win; if you'd rather skip the scavenger hunt, it's 17-38-07.
Jasmine Bakery (68-96-89) hides the single most valuable safe in the game. Mei's note gives the combination as 689689 — you dial it as 68-96-89 — and per the wiki's chapter guide, what's inside is the Close Quarters training manual, one of the manuals that unlocks a whole upgrade branch for Abby. Miss this safe and you're locked out of an entire skill tree until much later, which is a wild thing to hide behind a bakery.
The Coast boat safe (90-77-01) is the odd one out: it sits at the helm of the beached ship, right by the wheel, and the wiki's own walkthrough simply hands you the code rather than pointing at a clue note, so I'll do the same. It pays out another branch-unlocking manual — Ordinance — and the deck between you and it has infected patrolling, so clear before you dial. The ship's log you find aboard is a genuinely great read, but it's lore, not numbers.
The Shortcut apartment (30-23-04) is the cornbread-and-vodka story from the top of this guide. The gym safe (12-18-79) closes things out in The Descent: the note on the juice bar's pinboard says the employee safe code "is the same as the wifi," which is both a joke about every small business you've ever visited and a real puzzle — the Wi-Fi password is posted for customers, or you can just dial 12-18-79 at the cleaning closet off the lobby.
The tumbler trick: cracking safes with no code at all
Here's the mechanic that makes this whole guide technically optional, and it's one of the best sound-design flexes in the game: every safe in Part II can be cracked by ear. Rotate the dial slowly and each number ticks — but when you pass over a correct number, the tumbler emits a distinct, slightly louder click. Stop, work the next wheel, repeat. Outlets like PlayStation Universe and TheWrap documented it back at launch, and once you've heard the difference you can open any safe in the game in under a minute without reading a single note.
Two practical notes on it. First, it needs a quiet room in the real world — the click difference is subtle, so headphones help enormously. Second, it's the ideal tool for the safes whose clues are genuinely missable, like the gun cache, where the note and the environmental answer are both easy to walk past. The intended path is the puzzle; the tumblers are the lockpick.
Part I's four safes work differently by version
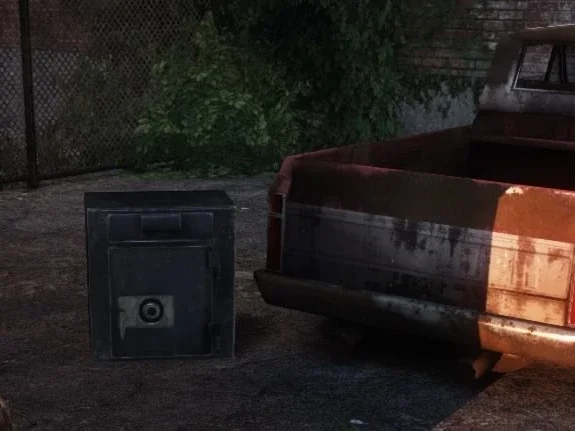
Which rules you play under depends on the version. In the original 2013 release and Remastered there's no dial input at all: find the artifact with the combination and the safe opens when you interact with it. No artifact, no entry, and the NEED COMBINATION warning in red. The 2022 Part I remake changed that — its safes have a dial you rotate manually, the same input system as Part II, which means the codes below work cold: you can walk up and enter them without ever picking up the note.
All four, with the artifact that opens each:
| Chapter | Where | Artifact | Combination |
|---|---|---|---|
| The Outskirts | Bookstore in the subway | Note to Derek | 3-43-78 |
| Bill's Town | Next to the pickup truck | Note to Bob | 5-17-21 |
| Pittsburgh | Behind the hotel counter | Note to staff | 22-10-56 |
| The Suburbs | Second-floor bedroom, last house on the street | Matchbook | 8-21-36 |
The one that matters most is Pittsburgh: the hotel safe contains Shiv: Reinforcement, the third of the game's twelve training manuals, which makes it a permanent upgrade sitting behind a single note pickup. If you've read our crafting and upgrade guide, you already know why a manual beats any pile of ammo — its effect compounds over every remaining chapter.
Safecracker and what's actually in the boxes
Opening every safe in Part II pops the Safecracker trophy — "Unlock every safe" — and the list above is the complete requirement. The West 2 gate can't be missed because its note is mandatory, so in practice you're tracking thirteen optional locks across six chapters. Chapter select tracks collectibles per chapter, so mopping up on a cleared save is painless.
What's inside varies by safe and — this trips people up on hard runs — by difficulty. Safes hold some mix of parts, supplements, ammunition, crafting supplies, training manuals and trading cards, but the wiki is explicit that quantities scale with your difficulty setting, and crafting supplies and gun ammo specifically can vanish from a safe entirely on the harshest settings. On a Grounded-style run the safes stop being jackpots and become exactly as stingy as everything else, which is thematically correct and personally insulting.
The hierarchy, if you're triaging: the two manual safes (Jasmine Bakery and the Coast boat) are non-negotiable because they gate upgrade branches; the bank vault and courthouse lockup are the best pure-loot hauls on Ellie's side; everything else is a nice-to-have. And if all this safe-dialing under pressure sounds like a game mode of its own — it literally is. No Return's Capture encounters are built entirely around breaking into a guarded safe, complete with a challenge for doing it without killing anyone, and our No Return guide covers how those runs work.
Quick Action Checklist
- Part II has 14 combination locks — 13 optional safes plus the mandatory West 2 gate — and opening them all earns Safecracker.
- Codes are physically dialed in Part II, so you can skip every clue and enter combos straight from the table above.
- No code at all? Roll the dial slowly and listen: correct numbers click louder. Headphones make it trivial.
- Never skip Jasmine Bakery (68-96-89) or the Coast boat safe (90-77-01) — each contains a training manual that unlocks one of Abby's upgrade branches.
- The Jackson supermarket safe (07-20-13) is the dog's Employee of the Month date; the Seraphites apartment safe (10-08-83) is a 1983 wedding date. The clues are stories — read them.
- Safe contents shrink with difficulty: crafting supplies and ammo can disappear entirely from a safe on harder settings.
- Part I's safes depend on version: the 2013 original and Remastered auto-open from artifacts, while the 2022 remake has a real dial you work manually. The Pittsburgh hotel safe hides a permanent shiv upgrade manual either way.
- All of this is game-only. Nothing here maps to the HBO series.
Frequently Asked Questions
How many safes are in The Last of Us Part II?
What is the Jackson supermarket safe code?
Can you open safes in Part II without finding the clue notes?
Which safes contain training manuals?
What items do safes contain?
How do safes work in The Last of Us Part I?
Is the West 2 gate code missable?
Keep Reading
- Safe — The Last of Us Wiki
- Good boy combo — The Last of Us Wiki
- The Last of Us Part II trophies — The Last of Us Wiki
- You Can Crack The Last of Us Part 2's Safes By Listening To The Tumblers — PlayStation Universe
- How to Easily Open Any Safe Without the Combination — TheWrap
- All The Last of Us Part 1 safe code combination locations — GamesRadar+
- The Last Of Us Part 1: Complete Safe Combination And Location Guide — TheGamer
Related Guides

The Last of Us Photo Mode Guide: Every Version Compared
Photo Mode has shipped in four Last of Us releases and the toolkit is different in each. How to open it, what each Part II tab does, what Part I and Part II Remastered added, and the slider settings Naughty Dog's own staff use.
The Last of Us Part 2 Crafting Guide: All 12 Recipes
Part II has twelve crafting recipes and neither character gets all of them. Here is every ingredient list, which recipes are locked behind a skill, what one craft yields, and where the ingredients collide.
The Last of Us Part 2 Remastered Skins: How to Unlock Them
The 2020 release of Part II had no outfits you could wear. Remastered added dozens, split between a points shop and No Return challenges. Here is what each one costs or asks of you, and where the lists disagree.
The Last of Us Part 2 Ending Explained
Ellie has Abby underwater, both hands locked around her throat, and every reason in the world to finish it. She lets go anyway. Here is the complete chain of events from the golf club in Jackson to the guitar Ellie can no longer play — verified chapter by chapter.
The Last of Us Infected Guide: How to Beat Every Type
A clicker cannot see you and cannot be strangled. Those two facts decide more encounters than any gun you own. Here is how all four infected stages actually work, and what to spend on each.
The Last of Us Part 2 Accessibility Settings: Every Option
Naughty Dog published its own option-by-option accessibility list for The Last of Us Part II. Here is the whole thing: 82 options across eleven menus, the exact settings each of the three presets switches on, and the menu paths for the ones that are not where you would look.