Ocarina of Time Biggoron's Sword Guide: The Full Trade Quest, Timers and All
The Biggoron's Sword is the strongest blade in Ocarina of Time, and getting it means running an eleven-step trading gauntlet with two real timers hiding in the back half. Here is the whole chain, in order, with the traps that fail people.
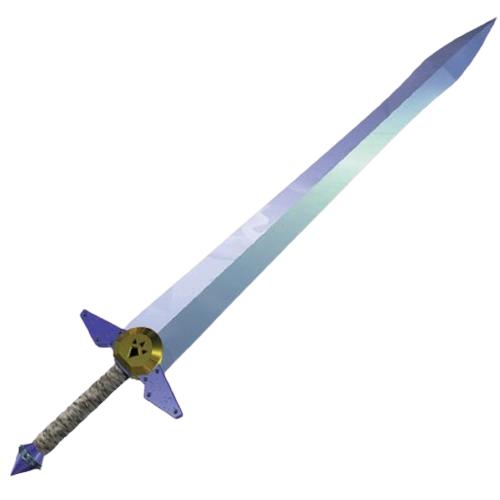
The Biggoron's Sword is the best weapon in Ocarina of Time, and Nintendo buried it at the end of the longest fetch quest in the game. Eleven trades. Two hidden timers. A frog that spoils if you sneeze on it. Most players either bounce off it entirely or brute-force their way through with a walkthrough open in the other hand, missing the two spots that actually fail people.
This is that walkthrough, minus the padding. Every trade in order, who wants what and where they stand, and the exact seconds you have on the steps that punish you. If you only remember one thing: the back half of this quest is a relay race, and warping mid-hand-off is instant death for the timer.
Why the Biggoron's Sword is worth the run
The Biggoron's Sword deals double the damage of the Master Sword. That is the entire pitch, and it is a good one. It swings slower and eats a bit of range compared to the fast Master Sword combo, but on anything that stands still long enough to eat a full hit — Iron Knuckles, Dodongos, the King Dodongo rematch in a race run — it roughly halves your work.
The catch is that it is a two-handed weapon. Equip it and Link puts his shield on his back, so you have zero blocking while it is drawn. That is a real trade-off against Redeads and Iron Knuckles, where shield-canceling matters, and it is why plenty of players keep it on the C-button but swing the Master Sword when they need to turtle. It also cannot be used in the very last phase of the final battle — the game forces the Master Sword into your hands for the killing blow on Ganon, story reasons, no way around it. Everywhere else in Hyrule, it is your damage king.
The Giant's Knife trap
Before you start the quest, you will probably meet Medigoron in Goron City, a big Goron who sells you a "Giant's Knife" for 200 Rupees. It looks identical to the Biggoron's Sword and hits for the same double damage. It is also a scam.
The Giant's Knife shatters after eight swings, or instantly the moment you smack it into a wall. Then you are holding a useless hilt and Medigoron will happily sell you another one for another 200 Rupees. It is one of the great troll items in Nintendo history. The Biggoron's Sword is the exact same blade made permanent — it never breaks, ever. So do not waste your Rupees repeatedly re-buying the knife thinking you are getting value. The knife exists mainly as a breadcrumb pointing you toward the real quest.
What you need before you start
The whole chain is an adult-Link quest, and a couple of stops assume you have already opened up the map:
- Epona helps a lot. The timers in the back half want you crossing Hyrule Field fast. Winning Epona from Lon Lon Ranch first turns two of the tight steps into non-events.
- Zora's Fountain has to be thawed. One trade goes to King Zora, and he is still frozen solid in red ice until you melt him with Blue Fire from the Ice Cavern — the same detour that gates the Water Temple later in the game. If your Zora is still an ice cube, handle that first.
- You can reach Biggoron. He sits at the very summit of Death Mountain, past the crater. You want the Goron Tunic so the heat does not cook you and enough climbing tools to get up top.
None of this is on the critical path — the Biggoron's Sword is pure optional side content the main dungeon route never once forces you to touch. It just happens to make everything after it easier.
The full trading sequence, in order
Eleven hand-offs, start to finish. Steps 1 through 3 are relaxed. Everything from step 4 on has a clock or a gotcha.
1. Pocket Egg to Pocket Cucco
Talk to the Cucco Lady, Anju, in Kakariko Village. She hands you a Pocket Egg. It hatches into a Pocket Cucco after one in-game day passes — so either sleep through a full day-night cycle, or just play the Sun's Song twice to snap the clock forward and pop the chick immediately.
2. Pocket Cucco to Cojiro
Take the Pocket Cucco to Talon, who is snoozing in a house in Kakariko (he never went home to Lon Lon after Ingo took over). Shove the noisy Cucco in his face to wake him up. Grateful and groggy, he gives you Cojiro, a rare blue Cucco that only ever crows for its true owner.
3. Cojiro to the Odd Mushroom
Carry Cojiro into the Lost Woods and turn left immediately. Grog, Anju's slacker brother, is slumped against a tree stump refusing to talk to anyone — except that Cojiro is his lost bird, so he perks up. He gives you an Odd Mushroom and asks you to run it to the potion shop back in Kakariko. This is where the quest stops being polite.
4. Odd Mushroom to Odd Potion (3-minute timer)
The Odd Mushroom is spoiling in your pocket. You have three minutes to reach Granny's Potion Shop in Kakariko and hand it over. Granny grumbles that the mushroom is already too far gone to use, grinds it up anyway, and gives you an Odd Potion. Do not warp during this leg — a warp melody instantly crushes the timer down to a single second and fails the step.
5. Odd Potion to the Poacher's Saw
Run the Odd Potion back to Grog in the Lost Woods. But Grog is gone — in his place stands Fado, a Kokiri girl, who tells you Grog vanished (heavily implied he became a Stalfos, which is the darkest throwaway line in the game). She takes the potion and gives you the Poacher's Saw he left behind. This step is not timed, so breathe.
6. Poacher's Saw to the Broken Goron's Sword
Head to Gerudo Valley and find the carpenter boss, Mutoh, near the broken rope bridge. His crew keeps running off, and he blames a stolen saw. Give him the Poacher's Saw and he hands over a Broken Goron's Sword — a snapped blade he wants returned to its maker on Death Mountain. Not timed.
7. Broken Goron's Sword to the Prescription
Climb to the summit of Death Mountain and talk to Biggoron, the enormous Goron who forges these swords. He would fix the broken blade, but his eyes are wrecked from the volcanic ash and he cannot see to work. He gives you a Prescription to fill. Not timed.
8. Prescription to the Eyeball Frog
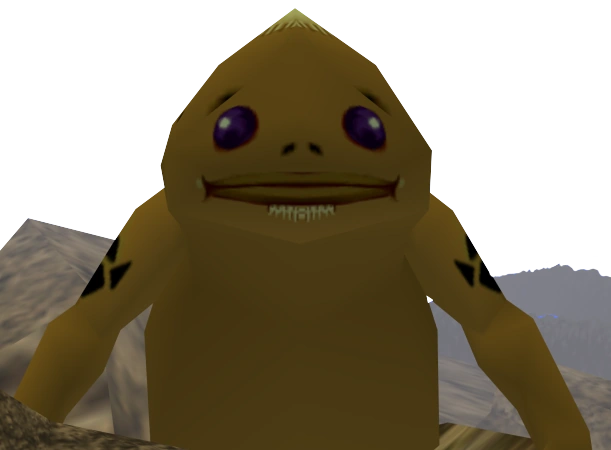
Take the Prescription to King Zora XVI at Zora's Fountain — the one you had to thaw with Blue Fire. He reads it, digs out the medicine's key ingredient, and hands you a live Eyeball Frog to deliver. Not timed on the way in, but the frog you are now holding absolutely is on the way out.
9. Eyeball Frog to the Eye Drops (3-minute timer)
The Eyeball Frog spoils fast. You have three minutes to sprint it from Zora's Fountain to the Lakeside Laboratory at Lake Hylia, where the eccentric scientist is waiting. This is the single tightest leg in the quest — it is a long way across the map. Ride Epona, use the shortcut out of Zora's River to the field, and again, do not warp. He takes the frog and cooks up the World's Finest Eye Drops.

10. Eye Drops to the Claim Check (4-minute timer)
The Eye Drops evaporate. You get four minutes to carry them from Lake Hylia all the way back up to Biggoron on the Death Mountain summit. Four minutes sounds generous until you remember the climb through the crater. The cleanest line: warp is off the table, so play a warp melody to a nearby region before you take the drops if you want a head start, then grab them and run. Biggoron drips them in his eyes, sees again, and takes the Broken Goron's Sword to reforge — handing you a Claim Check in exchange.
11. Claim Check to the Biggoron's Sword
Biggoron needs three days to forge the sword. Go do other things, or just play the Sun's Song six times to burn through three full day-night cycles instantly. Come back to the summit, show him the Claim Check, and he swaps it for the finished Biggoron's Sword. Hold onto that Claim Check until then — if you somehow lose it, there is a recovery path, but it is a headache you do not want.
How to actually beat the timers
The three timed steps — Odd Mushroom (3 min), Eyeball Frog (3 min), Eye Drops (4 min) — are the whole difficulty of this quest, and they trip the same people every time. A few rules that make them trivial:
- Never warp while carrying a timed item. Using any Ocarina warp song forces your remaining time down to one second, which is a guaranteed fail. If you want a warp shortcut, warp to the destination region first, then walk back and pick up the item so the clock starts closer to the goal.
- Have Epona saddled. The Eyeball Frog run from Zora's Fountain to Lake Hylia is brutal on foot and comfortable on horseback. Get Epona before you touch step 9.
- Do not open menus you do not need. The timer keeps ticking in the background, but fumbling in the item menu mid-run wastes real seconds. Know your route before you accept the item.
- The early steps are not timed — only steps 4, 9, and 10 are. If you are panicking on step 6 or 7, relax; those have no clock at all.
N64 vs 3DS differences
The trading sequence itself is identical on the Nintendo 64 original and the 2011 3DS remake — same eleven trades, same NPCs, same three timers. The 3DS version is just kinder about executing them: better framerate for the cross-map sprints, gyro-free menuing, and the general polish makes the Eyeball Frog dash feel less like a coin flip.
Both versions treat the sword the same once you have it: two-handed, unbreakable, double Master Sword damage, no shield while drawn. And in both, the final blow on Ganon still yanks the Master Sword back into your hands regardless of what you have equipped. If you are running the quest for the first time, the 3DS release is the smoother place to eat those timers.
Quick Action Checklist
- Thaw King Zora with Blue Fire and win Epona before starting the quest.
- Skip the Giant's Knife from Medigoron — it breaks in eight hits and it is a money pit.
- Get the Pocket Egg from Anju; hatch it with two Sun's Songs.
- Wake Talon with the Cucco for Cojiro, then wake Grog in the Lost Woods for the Odd Mushroom.
- Odd Mushroom: 3 minutes to Granny's Potion Shop. No warping.
- Return the Odd Potion to Fado for the Poacher's Saw, then trade Mutoh at Gerudo Valley for the Broken Goron's Sword.
- Give Biggoron the broken sword for the Prescription, then King Zora for the Eyeball Frog.
- Eyeball Frog: 3 minutes to the Lakeside Laboratory. Ride Epona.
- Eye Drops: 4 minutes back up to Biggoron on the summit.
- Take the Claim Check, wait three days (six Sun's Songs), and collect the Biggoron's Sword.
Frequently Asked Questions
How do you get the Biggoron's Sword in Ocarina of Time?
Is the Biggoron's Sword better than the Master Sword?
What are the timers in the trading quest?
Should I buy the Giant's Knife from Medigoron?
Why can't I trade with King Zora during the quest?
How long does the Claim Check take?
Can I use the Biggoron's Sword against Ganon?
Keep Reading
Related Guides
Ocarina of Time Gerudo's Fortress: Free All 4 Carpenters
The Gerudo do not want you dead. They want you in a cell. Here is how to cross Gerudo Valley, get through the fortress, beat the four Gerudo Thieves guarding the carpenters, and walk out with the Gerudo Token — plus the collectibles on the grounds.
Ocarina of Time Masks: The Full Trading Sequence
The Happy Mask Shop does not sell you anything — it loans you stock and expects the money back, and one of the four masks is a guaranteed loss. Here is the full chain, every buyer, and the flag bug that quietly deletes a capacity upgrade from your file.
Ocarina of Time Bottle Locations: All 4 Empty Bottles and What to Put in Them
Most players finish Ocarina of Time with two bottles because two of the four are handed out by farm animals. Here is every bottle location, the full Big Poe spawn list, what belongs in each slot, and the sell prices that turn a bottle into a money printer.
Ocarina of Time Fishing Pond Guide: Golden Scale, Sinking Lure, and the Hylian Loach
The Fishing Pond looks like a throwaway 20-Rupee diversion, but it gates a required-adjacent item, hides an illegal lure with four spawn points, and stocks a secret fish most players never see. Here is the actual record math, every lure spot, and the Hylian Loach recipe.
Ocarina of Time Dungeon Order: The Full Route, Explained
Ocarina of Time looks like an open adventure and plays like a corridor. Eight required dungeons, three side dungeons, and exactly one place where the game genuinely lets you pick. Here is the whole route with the reasons behind each lock.

Ocarina of Time Great Fairy Locations: All 6 Fountains and the Order to Get Them
Six Great Fairy Fountains, six blessings, and one of them is gated behind an item you can only find inside the final dungeon. Here is every location, every unlock requirement, and the order that actually makes the rewards useful when you get them.