Ocarina of Time Gerudo's Fortress: Free All 4 Carpenters
The Gerudo do not want you dead. They want you in a cell. Here is how to cross Gerudo Valley, get through the fortress, beat the four Gerudo Thieves guarding the carpenters, and walk out with the Gerudo Token — plus the collectibles on the grounds.
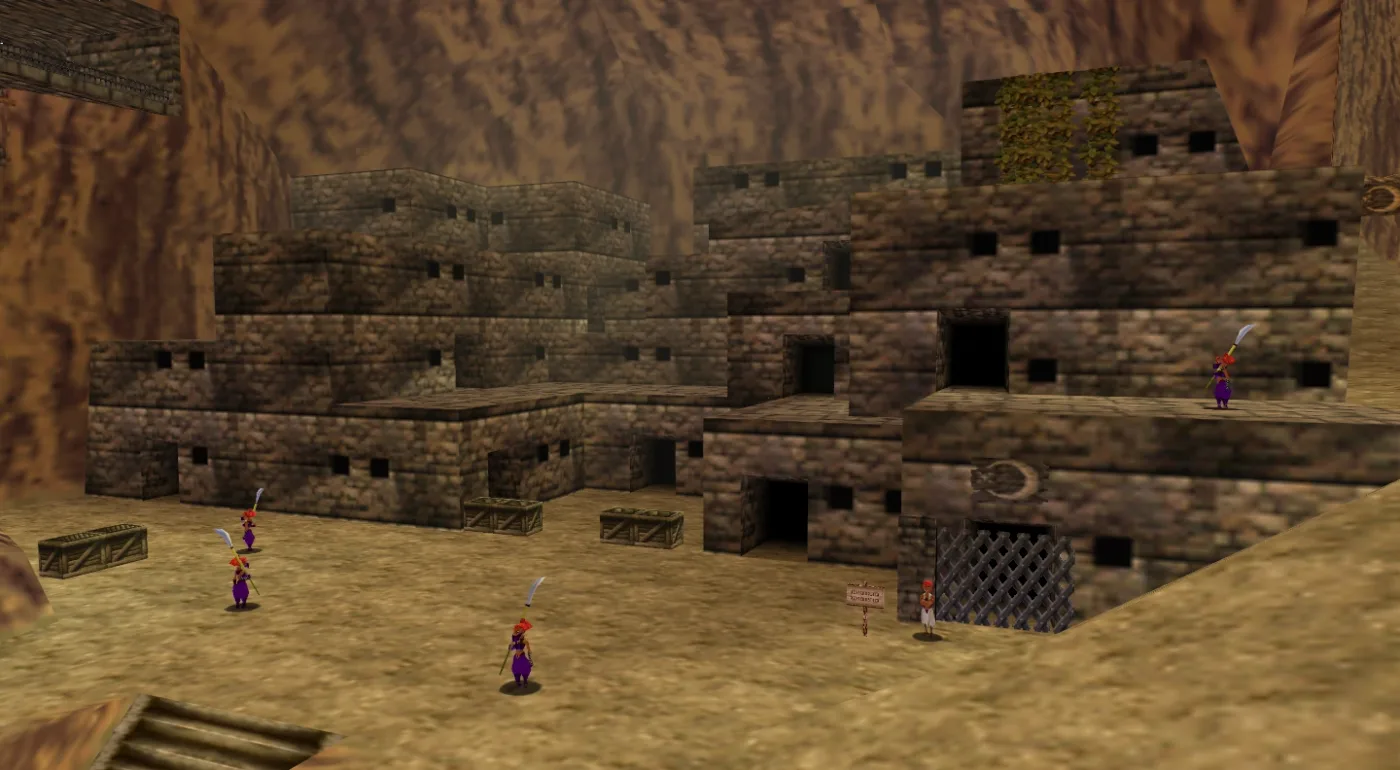
The Gerudo do not want you dead. They want you in a cell. Get spotted by a guard in Gerudo's Fortress and there is no fight and no Game Over — Link is thrown into a cell near the top of the building (or, before he has the Hookshot, dumped back outside), and the whole puzzle of the place is working out how to stop that happening four times in a row.
It is also the gate to the desert. The Haunted Wasteland, the Desert Colossus and the Spirit Temple all sit behind a membership card that the Gerudo only hand to someone who has broken into their home and freed their prisoners. Here is the whole job: the bridge, the rules, the fights, the four carpenters, and what the card opens once you have it.
Gerudo's Fortress at a glance
| Detail | What it is |
|---|---|
| Location | The far end of Gerudo Valley, west of Hyrule Field; the gateway to the Haunted Wasteland |
| Age | Adult Link. As a child, Gerudo guards block the path across the valley |
| Getting there | Cross the broken Gerudo Valley bridge with the Longshot, or jump it on Epona |
| The job | Free four imprisoned carpenters without getting caught |
| Mini-bosses | Four Gerudo Thieves, one guarding each cell |
| Reward | The Gerudo Token (the "Gerudo's Membership Card" in the original N64 text) |
| Opens | The Gerudo Training Ground, the Horseback Archery Range, the Haunted Wasteland gate |
| Also on the grounds | A Piece of Heart in a rooftop chest, two Gold Skulltulas, a quiver upgrade at the archery range |
| Bring | Fairy Bow and plenty of arrows, the Hookshot, and the Longshot or Epona |
Why the carpenters are locked up
The four prisoners are the same crew who were building up Kakariko Village when Link was a child. Seven years later their boss — Zelda Wiki calls him the Master Craftsman; Thonky's walkthrough calls him Mutoh, which Zelda Wiki treats as the name of his Majora's Mask counterpart — has set up a tent beside the gorge. The Gerudo broke the bridge, and his workers are gone: by his account they decided carpentry wasn't cool and walked off to the fortress to become thieves.
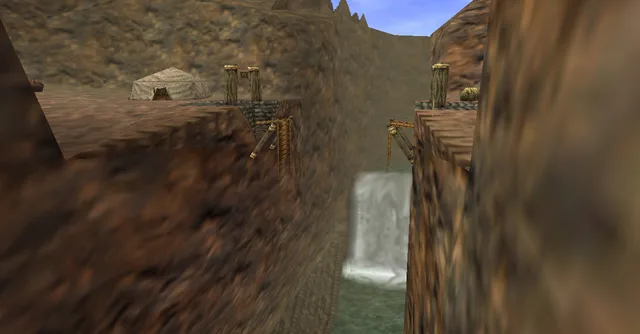
The Gerudo did not want them. They are an all-female group, and the carpenters say they were locked up for exactly that reason. The setup was planted years earlier: Zelda Wiki's page for Ichiro records him in Kakariko as a child, standing in the empty building behind the potion shop, wondering aloud whether thievery is the easy money he is after. It was not.
Free all four and they go home and rebuild the bridge, which is what the Master Craftsman wanted all along. It is a real quality-of-life payoff: no more Longshot or horse jump every time you come this way.
Crossing Gerudo Valley
Two ways over the gap, per Zelda Wiki's Gerudo Valley page:
- The Longshot, from the Water Temple.
- Epona, at a gallop. Our Epona guide covers winning her from Ingo.
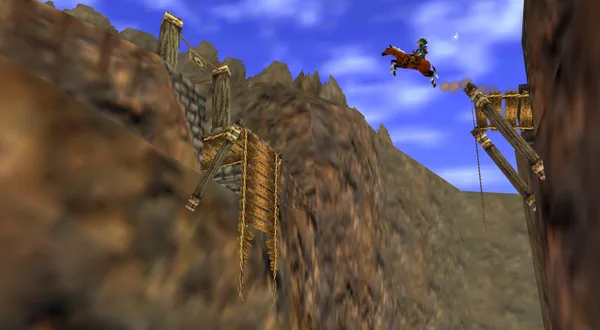
The plain Hookshot does not appear on that list, so do not plan around it. If you have Epona, take her — she is also your ticket into the Horseback Archery Range behind the fortress.
The Master Craftsman by the tent is the one who explains the job; Thonky's walkthrough has him asking you to rescue his men. The valley itself has two Pieces of Heart and four Gold Skulltulas of its own, collected in the table further down.
The rules of getting caught
Getting caught comes down to four rules, all from Zelda Wiki's Gerudo's Fortress and Gerudo Thief pages.
| What happens | Result |
|---|---|
| A patrolling guard spots you | You are caught and jailed |
| A Gerudo Thief lands her spinning jump attack | Link collapses and is jailed; that Thief's health resets |
| You are caught before you own the Hookshot | You are thrown out in front of the Carpenters' tent instead of a cell |
| You are caught with the Hookshot | You land in a cell near the top of the fortress; Hookshot the open wooden window to climb out |
Two more things make the run far less fraught. First, the Fairy Bow stuns patrolling guards — Zelda Wiki says a hit stuns them temporarily, which is how you get past anyone standing in a doorway. Stunned is not beaten, so keep moving. Second, each cell key only fits its own cell. Try a Thief's key on a different carpenter's door and Navi tells you flatly: "This is not the correct key..." Zelda Wiki notes that is not how Small Keys behave anywhere else in the game.
Getting jailed is a setback, not a disaster. Thonky's route even has a line for it: drop from the cell window and take the first door on the left, which is the way to the first carpenter.
Beating a Gerudo Thief
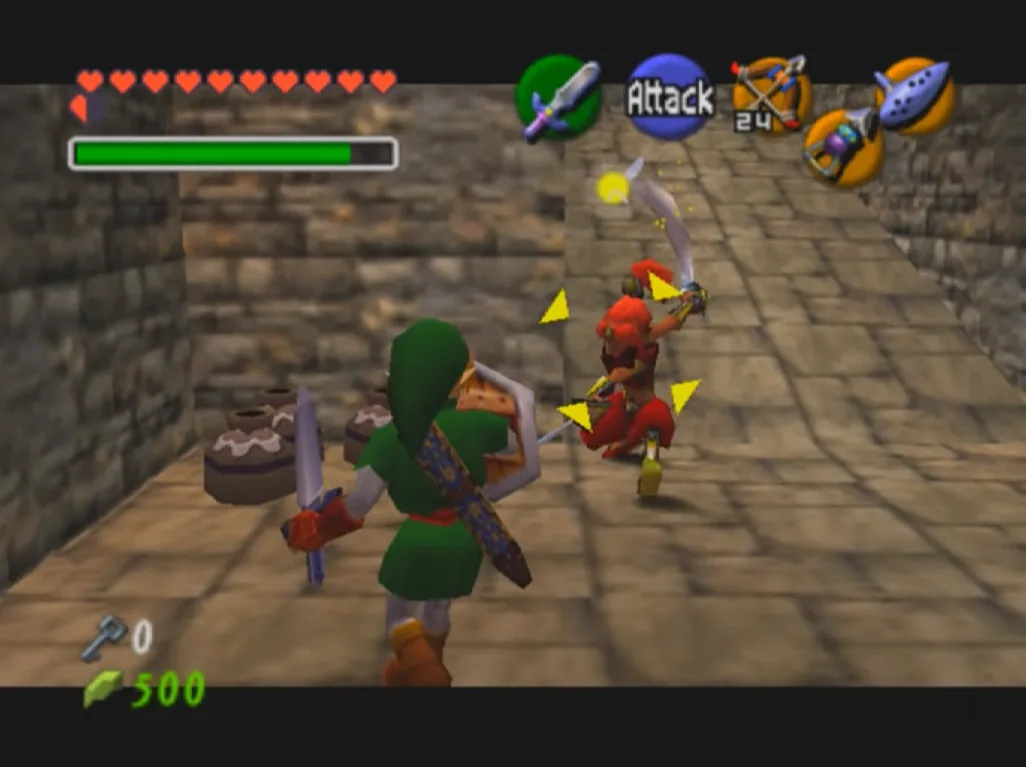
Each carpenter's cell has a Thief waiting. Talk to the prisoner through the bars and she drops in behind you with two scimitars. Zelda Wiki classes these four as middle bosses, and the numbers explain why:
| Gerudo Thief | Detail |
|---|---|
| Health | 20 |
| Scimitar slash | 1/2 Heart, blockable with a shield |
| Spinning jump attack | Cannot be shielded at close range; if it lands, Link is jailed |
| Hits to win | 10 Master Sword slashes, 5 with the Biggoron's Sword; a jump attack counts as two |
| Stunned by | Deku Nuts, the Hookshot |
| Weak to | Sword, Deku Nuts, Hookshot, Fairy Bow |
She does not fight like a Stalfos. She backflips away from your swings, blocks with her blades, and crouches before the spin jump — that crouch is the tell.
Two ways to play it:
- Up close, with a shield. Thonky's advice is to switch off the two-handed Biggoron's Sword so you can block. When she crouches, sidestep; after the jump attack whiffs, hit her. Ten Master Sword slashes is a lot of exchanges, so stun her with a Deku Nut or the Hookshot and get free hits in.
- At range, with arrows. Zelda Wiki notes that if you back away from a Thief she drops her guard, and once an arrow hits she stays open while she darts side to side, so you can keep firing. This is the method I would use. Zelda Wiki's Gerudo Thief page ties capture to the spin jump and says it is unblockable at close range — so distance plus arrows is the low-risk version of this fight.
Beat her and she retreats into the ceiling, leaving the Small Key for that cell. She does not come back.
All four carpenters, in route order
The route below is Thonky's, and so is the order and which carpenter sits where. The spellings are Zelda Wiki's; the third is also spelled Sabooro.
| # | Carpenter | Where | Route notes |
|---|---|---|---|
| 1 | Ichiro | Just inside the fortress | Past the stairs, creep up the slope, stun the guard on your right with an arrow, and take the door farthest to the left |
| 2 | Jiro | Through a door on an outside ledge | Leave by the exit near the cell with a skull over it, take the left door, watch the guard who stops by the crate, exit right, shoot the ledge guard from round the corner, climb up, go through the door |
| 3 | Saburo | Through a door at the foot of the vines | From Jiro's cell, take the passage on the right, climb down the vines, and go through the door straight ahead |
| 4 | Shiro | A lower room reached from outside | Back up the vines, left door, shoot one guard below from where you stand and step forward to shoot the other, up the far ramp outside, drop down to the right, through the lower door, stand still and shoot the guard who walks past |
Every rescue runs the same script: talk through the bars, fight the Thief, take her key, open the cell, talk to the carpenter again. After the fourth, a Gerudo appears, tells you anyone who got past her guards must have real thieving skills, and hands over the Gerudo Token. From then on the guards leave you alone.
What the Gerudo Token opens
Zelda Wiki lists three doors the card unlocks, plus a fourth consequence of the rescue itself:
| Unlocks | What is there |
|---|---|
| Gerudo Training Ground | The optional mini-dungeon inside the fortress, and the Ice Arrow. Full run in our Gerudo Training Ground guide |
| Horseback Archery Range | Needs Epona as well; pays a Piece of Heart and your next quiver upgrade (40 or 50 arrows, depending on which quiver you already carry). Scores and strategy in the Epona guide |
| Haunted Wasteland gate | The road to the Desert Colossus and the Spirit Temple. The two wasteland trials are in our Spirit Temple guide |
| The rebuilt bridge | The carpenters go home and fix it; the Running Man in their tent then challenges you to a race, covered in the mask trading guide |
The Haunted Wasteland is the one you actually need. The Spirit Temple is one of the required dungeons and that gate is the road to it, so on a normal playthrough this rescue is not optional.
Collectibles on the grounds
| Item | Where | What it needs |
|---|---|---|
| Piece of Heart | Chest at the very top of the fortress | The Scarecrow's Song to summon Pierre, then the Hookshot; or Thonky's alternative, the Longshot to the jail cell's windowsill, then down onto the fortress and inside to the area above the cell |
| Red Rupee | Hidden in the boiling cauldron in the fortress kitchen, the central room | Zelda Wiki lists no requirement |
| Gold Skulltula | Fortress back wall, near the Piece of Heart chest | Night; Thonky takes it with the Longshot from a ledge |
| Gold Skulltula | The far bullseye post at the Horseback Archery Range | Night, and the Hookshot |
| Piece of Heart ×2 | Gerudo Valley: a crate on a small ledge over the river, and a ledge behind the waterfall | A Cucco to glide to the crate; a dive near the falls for the other. Details in the heart pieces guide |
| Gold Skulltula ×2 | Gerudo Valley, child: by the wooden bridge near the small waterfall at night, and in the soft soil on the lowest ledge by the river | Boomerang for the first, bugs for the second |
| Gold Skulltula ×2 | Gerudo Valley, adult: behind the Carpenters' tent, and on a stone pillar near the large rocks | Night, and the Hookshot |
The Gold Skulltula requirements come from ZeldaSpeedRuns' location list; the counts match Zelda Wiki's, which puts two in the fortress and four in the valley. How to hunt the rest is in the Gold Skulltula guide.
On the roof chest: the scarecrow you summon is Pierre, not Bonooru. Bonooru is the Lake Hylia scarecrow you teach the melody to as a child; Zelda Wiki's pages for both characters are clear that he then lends you Pierre, who is the one that springs out of the ground. The songs guide walks through setting it up.
The fortress in the randomizer
If you play the Ocarina of Time Randomizer, this area is one of the settings. The randomizer wiki's Gerudo Fortress option has three states:
- Default Behavior — all four carpenters must be rescued before the bridge is built.
- Rescue One Carpenter — only the bottom-left carpenter.
- Open Gerudo Fortress — the carpenters start rescued, and unless the card itself is shuffled you start holding it.
Two related shuffles are worth knowing. The four cell keys can be shuffled into the item pool like dungeon keys (the wiki calls them Thieves' Hideout Keys), and Shuffle Gerudo Card puts the card somewhere else entirely. In current randomizer versions it is the card itself that stops the guards jailing you, so with the card shuffled, freeing the carpenters is not what calms them down.
Version differences and a possible child visit
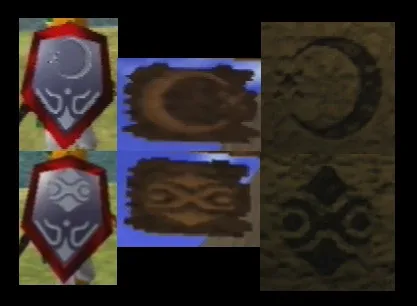
- The emblem changed. The original Nintendo 64 release puts a crescent-and-star symbol on the fortress flags, on various switches and blocks, and on the Mirror Shield. Zelda Wiki's Gerudo Token page records it being replaced by the Crest of the Gerudo in later versions. Fandom's Zelda Wiki says why: the old symbol resembled the real-world Islamic star and crescent, so later releases, Ocarina of Time 3D among them, swapped it out. The same page ties the Fire Temple music change covered in our Fire Temple guide to the same reason.
- A 3DS Easter egg. Ocarina of Time 3D hides a poster of Link from Skyward Sword behind some crates here.
- Child Link at the back door. Warp to the Desert Colossus as a child with the Requiem of Spirit and walk the Haunted Wasteland in reverse, and a Gerudo guards the fortress's back entrance. Zelda Wiki says she looks exactly like the one out front and shares her dialogue.
- A child visit that may have been cut. With glitches or hacks, child Link can get inside the fortress. Zelda Wiki notes that the rooftop chest holds an Odd Mushroom in that version of the scene, and there is a second Piece of Heart on top of the jail cell. The randomizer wiki calls it the extra Piece of Heart above the jail in the child version of the scene: inaccessible without glitches, although shuffling the hideout's entrances can make it reachable. Zelda Wiki's guess is that child Link was once meant to explore the fortress.
Everything above describes the N64 and 3DS game and has not been checked against the Switch 2 remake, so treat positions here as N64 and 3DS positions until it is out.
Quick Action Checklist
- Stock up on arrows before you go. The Fairy Bow stuns patrolling guards and wins the Thief fights from range.
- Cross the broken Gerudo Valley bridge with the Longshot or by jumping it on Epona. The plain Hookshot is not listed as a way across.
- Talk to the Master Craftsman by his tent if you want the setup — he explains where his men went.
- Get the Hookshot first. Without it, getting caught throws you out of the fortress entirely; with it, you land in a cell you can climb out of through the window.
- At each cell, talk to the carpenter, then fight the Gerudo Thief who drops in. Watch for the crouch: Zelda Wiki ties capture mid-fight to her spin jump.
- Back off and use arrows — she drops her guard when you retreat, and stays open once hit.
- Each Thief's key only opens her own carpenter's cell.
- After the fourth carpenter, take the Gerudo Token: it opens the Training Ground, the archery range and the Haunted Wasteland.
- Grab the rooftop Piece of Heart with the Scarecrow's Song and Pierre, or the Longshot to the jail windowsill.
- Come back at night for the fortress's two Gold Skulltulas and the valley's adult pair.
Frequently Asked Questions
How do you get the Gerudo Token in Ocarina of Time?
What happens if you get caught in Gerudo's Fortress?
How do you beat the Gerudo Thieves in Ocarina of Time?
How do you cross the broken bridge in Gerudo Valley?
How do you get the Piece of Heart on top of Gerudo's Fortress?
Can child Link go into Gerudo's Fortress?
Keep Reading
- Mythras blog
- Ocarina of Time coverage hub
- Ocarina of Time Gerudo Training Ground guide
- Ocarina of Time Epona guide
- Ocarina of Time Spirit Temple guide
- Ocarina of Time heart pieces guide
- Ocarina of Time Gold Skulltulas guide
- Ocarina of Time songs guide
- Ocarina of Time mask trading guide
- Ocarina of Time Randomizer beginner guide
- Ocarina of Time Fire Temple guide
- Ocarina of Time Switch 2 remake
- Zelda Wiki — Gerudo's Fortress: getting caught, the Hookshot jail escape, the four carpenters, the kitchen cauldron and the rooftop Piece of Heart
- Zelda Wiki — Gerudo Thief: 20 health, half-heart slash, unblockable spin jump, stuns and the arrow method
- Zelda Wiki — Gerudo Valley: the broken bridge, Longshot or Epona, the carpenters' tent, the rebuilt bridge and the Running Man
- Zelda Wiki — Gerudo Token: how it is earned, what it opens, and the changed emblem in later versions
- Zelda Wiki — Pierre: the scarecrow summoned by the Scarecrow's Song as a Hookshot target
- Zelda Wiki — Bonooru: the Lake Hylia scarecrow who learns the melody and lends Link Pierre
- Zelda Wiki — Ichiro: the carpenter in child-era Kakariko who considers thievery
- Zelda Wiki — Saburo, also known as Sabooro
- Zelda Wiki (Fandom) — Master Craftsman: the carpenters' boss, the broken bridge, and his Majora's Mask counterpart Mutoh
- Zelda Wiki (Fandom) — Crest of the Gerudo: the original N64 emblem and its replacement in later releases
- zeldaret/oot decompilation — Gerudo Thief (En_GeldB): 20 health; a Master Sword slash deals 2, a Biggoron's Sword slash 4, and jump attacks double both
- zeldaret/oot decompilation — Horseback Archery Gerudo (En_Ge1): the 1,500-point prize is the next quiver upgrade, 40 or 50 arrows
- Thonky — Gerudo Fortress walkthrough: the route to all four carpenters, the jail window, and the rooftop Piece of Heart
- ZeldaSpeedRuns — Gold Skulltula locations and requirements, Gerudo's Fortress and Gerudo Valley
- OoT Randomizer Wiki — Readme: the Gerudo Fortress setting, Thieves' Hideout keys and Shuffle Gerudo Card
Related Guides
Ocarina of Time Lost Woods: Route, Upgrades and Hearts
Take the wrong doorway in the Lost Woods and the game just puts you back in Kokiri Forest. Here is the seven-turn route to the Sacred Forest Meadow, how to find it by ear instead, and everything the route walks past: two Pieces of Heart, five capacity upgrades, four Gold Skulltulas and two shortcuts out.
Ocarina of Time Masks: The Full Trading Sequence
The Happy Mask Shop does not sell you anything — it loans you stock and expects the money back, and one of the four masks is a guaranteed loss. Here is the full chain, every buyer, and the flag bug that quietly deletes a capacity upgrade from your file.
Ocarina of Time Bottle Locations: All 4 Empty Bottles and What to Put in Them
Most players finish Ocarina of Time with two bottles because two of the four are handed out by farm animals. Here is every bottle location, the full Big Poe spawn list, what belongs in each slot, and the sell prices that turn a bottle into a money printer.
Ocarina of Time Great Fairy Locations: All 6 Fountains and the Order to Get Them
Six Great Fairy Fountains, six blessings, and one of them is gated behind an item you can only find inside the final dungeon. Here is every location, every unlock requirement, and the order that actually makes the rewards useful when you get them.
Ocarina of Time Dungeon Order: The Full Route, Explained
Ocarina of Time looks like an open adventure and plays like a corridor. Eight required dungeons, three side dungeons, and exactly one place where the game genuinely lets you pick. Here is the whole route with the reasons behind each lock.

Ocarina of Time Gold Skulltulas Guide (All 100 & Key Rewards)
There are 100 Gold Skulltulas in Ocarina of Time, and here is the part nobody tells you: every reward that actually matters is locked in by token 50. This is the full breakdown — the six prizes, the exact thresholds, and how to hunt efficiently across both timelines.