CS2 Inferno Callouts: Every Name on de_inferno and When to Use It
You do not lose Inferno rounds because you forgot what Coffin means. You lose them because someone said "he's banana" when the enemy was already at Car. Here is every named position on de_inferno, where it sits on the radar, and the calls worth losing a teammate over.
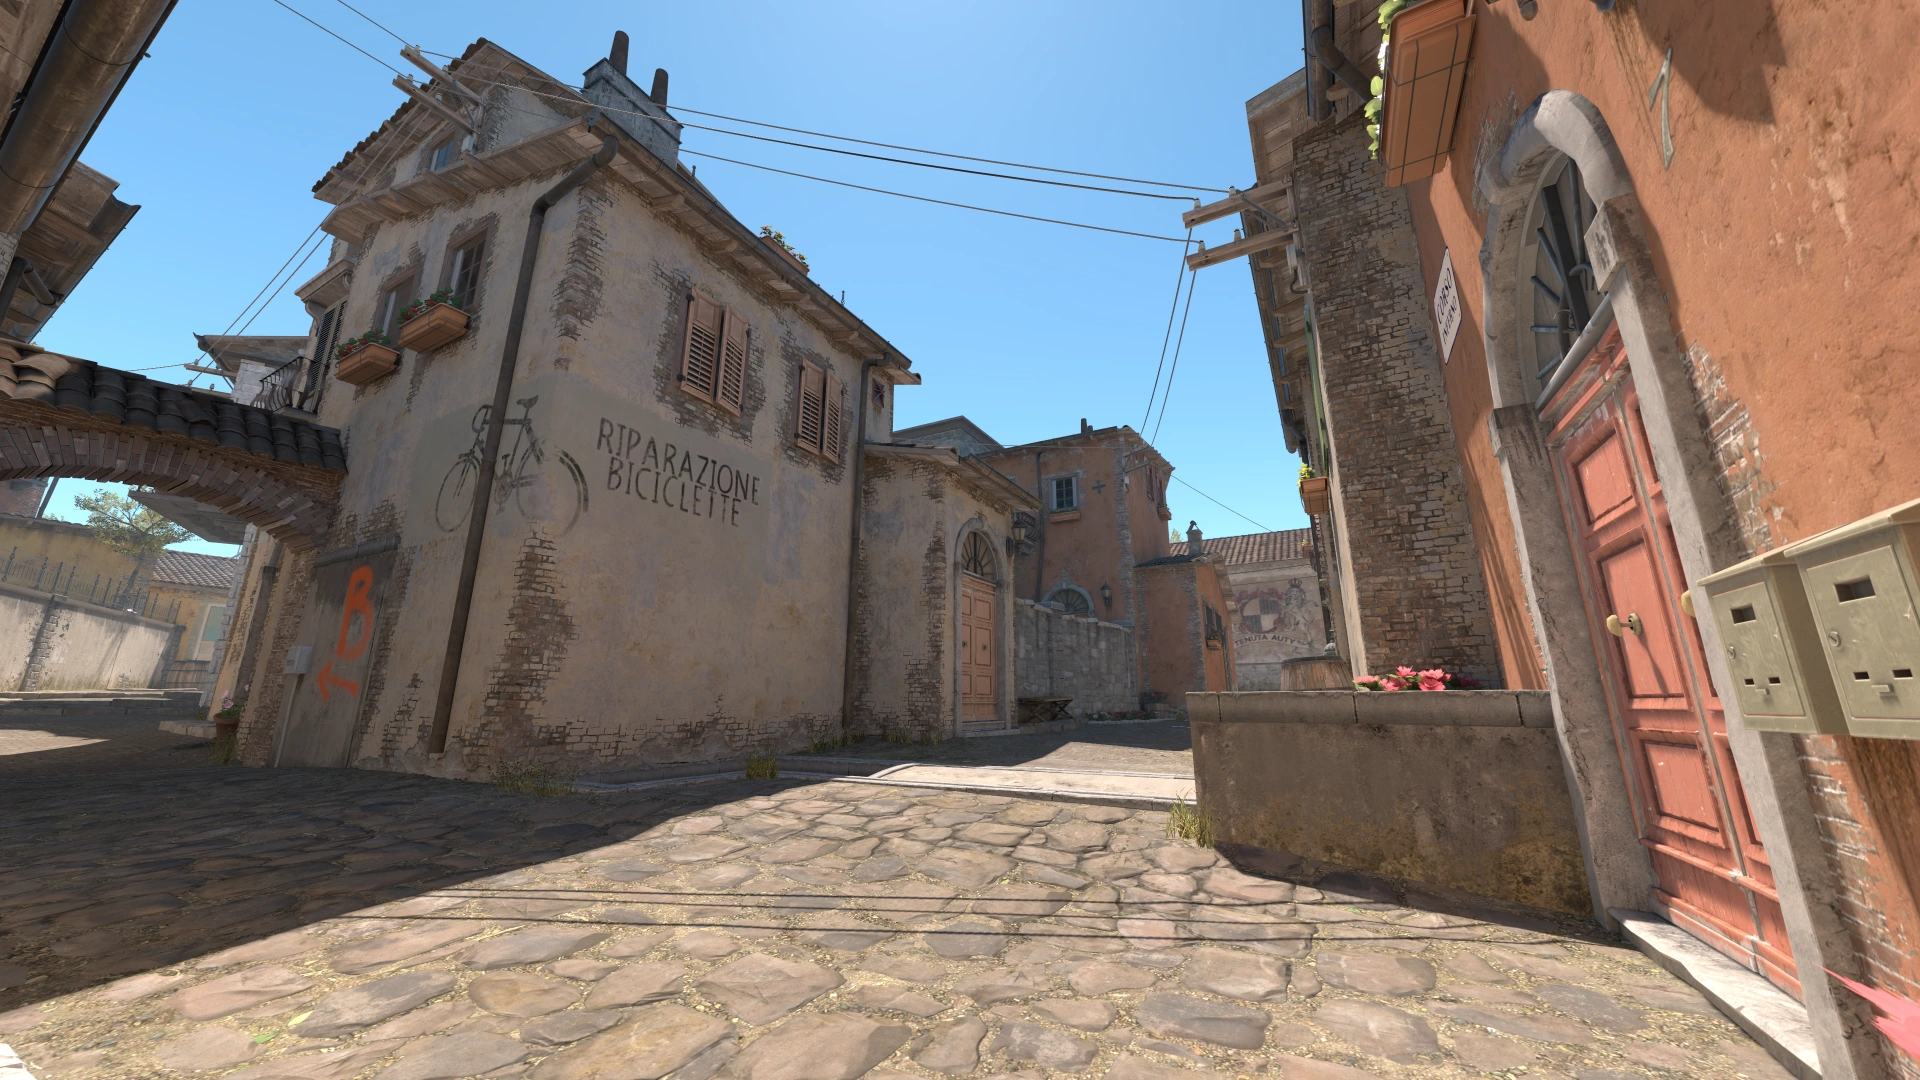
You do not lose Inferno rounds because you forgot what Coffin means. You lose them because somebody said "he's banana" when the enemy was already standing on Car, and by the time the B anchor understood the difference, the smoke was down, the molotov was thrown, and the site was gone.
Inferno is the most communication-dependent map in the pool, and it is not close. It has the tightest chokepoints, the most utility thrown per round, and the two longest-standing standoffs in Counter-Strike — Banana and Apartments — where a single misheard word decides whether your teammate rotates in time or arrives to a planted bomb. The map has been in players' heads for over two decades, and the vocabulary is dense.
So here is the whole thing: every named position on de_inferno, where it actually sits, and which handful are worth losing a teammate over.
Inferno in 30 seconds
Inferno is one of the oldest maps in Counter-Strike. It was created by Chris "Narby" Auty and first shipped in Counter-Strike 1.1 on June 27, 1999 — this is a map older than most of the people currently grinding it in Premier. Valve rebuilt it from scratch for CS:GO in the October 13, 2016 rework, replacing the aging 2012 version with new lighting, wider sightlines, and cleaner geometry, and it returned to the Active Duty group on February 3, 2017, taking Dust II's slot.
Geographically, once the radar is in your head, it splits cleanly:
- T spawn sits on the west side, with two committed exits: left toward Apartments and A, or straight up Banana toward B.
- CT spawn sits central-east, feeding both sites through short interior rotations — the reason Inferno CT sides can play so passive and still cover both bombs.
- A site is the southeast quarter, ringed by Pit, Graveyard, Arch and the Apartments balcony. B site is the northeast corner at the top of Banana. Mid is a narrow, church-flanked lane that connects them.
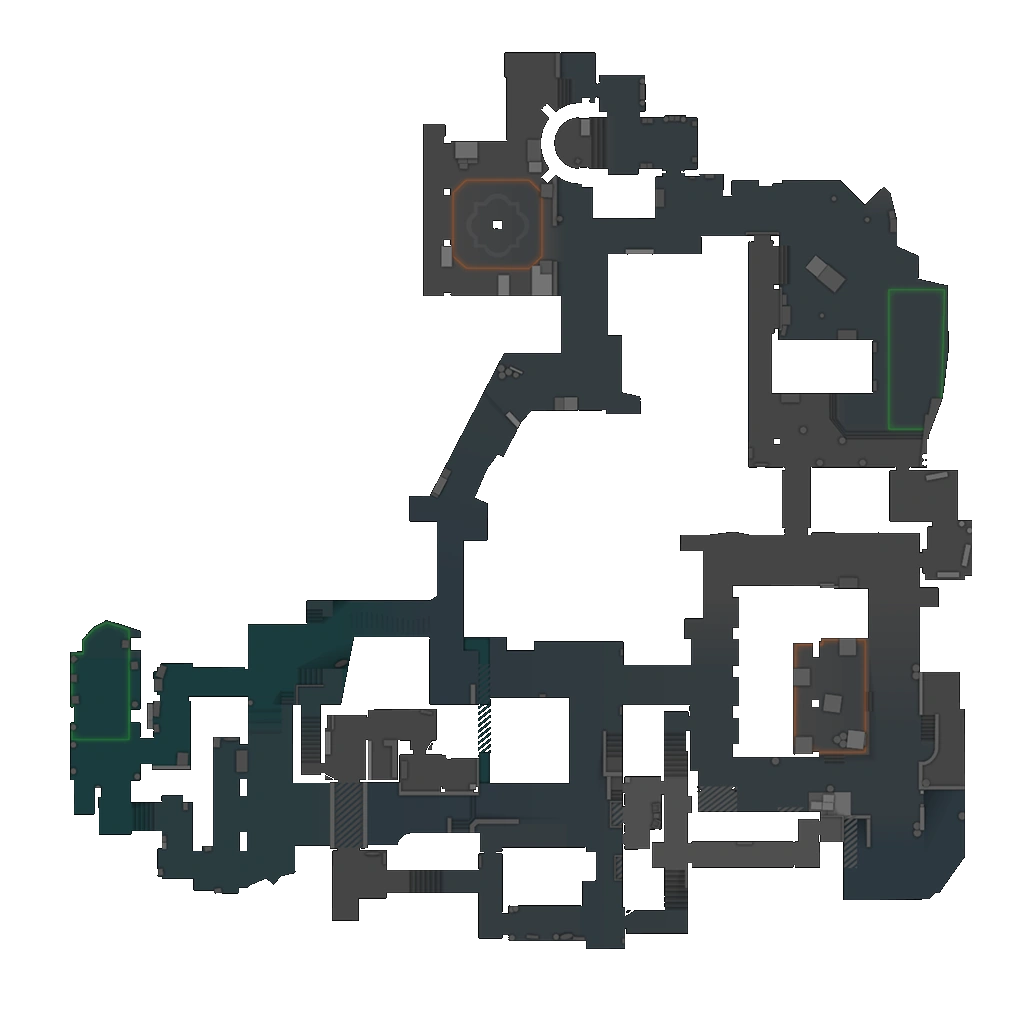
You do not need every name to play the map. You need about fourteen of them, and you need to say them in under a second.
Banana: the lane that owns the map
Banana is the single most contested piece of ground in Counter-Strike. It is the T-side highway to B, it is where the opening molotov of half the rounds on this map lands, and whoever controls it decides whether B is a 5v5 fight or a free plant.
| Callout | Where it is |
|---|---|
| Banana | The long curving corridor from T ramp up to the B bombsite |
| Logs | The wooden log pile providing cover in the lower, T-side stretch of Banana |
| Sandbags | The sandbag cover partway up Banana — the standard CT contest line |
| Car | The vehicle at the top of Banana, the last cover before you step onto B |
| First Oranges | The forward orange-crate stack just inside B from Banana |
| Second Oranges | The second orange-crate stack deeper on the site |
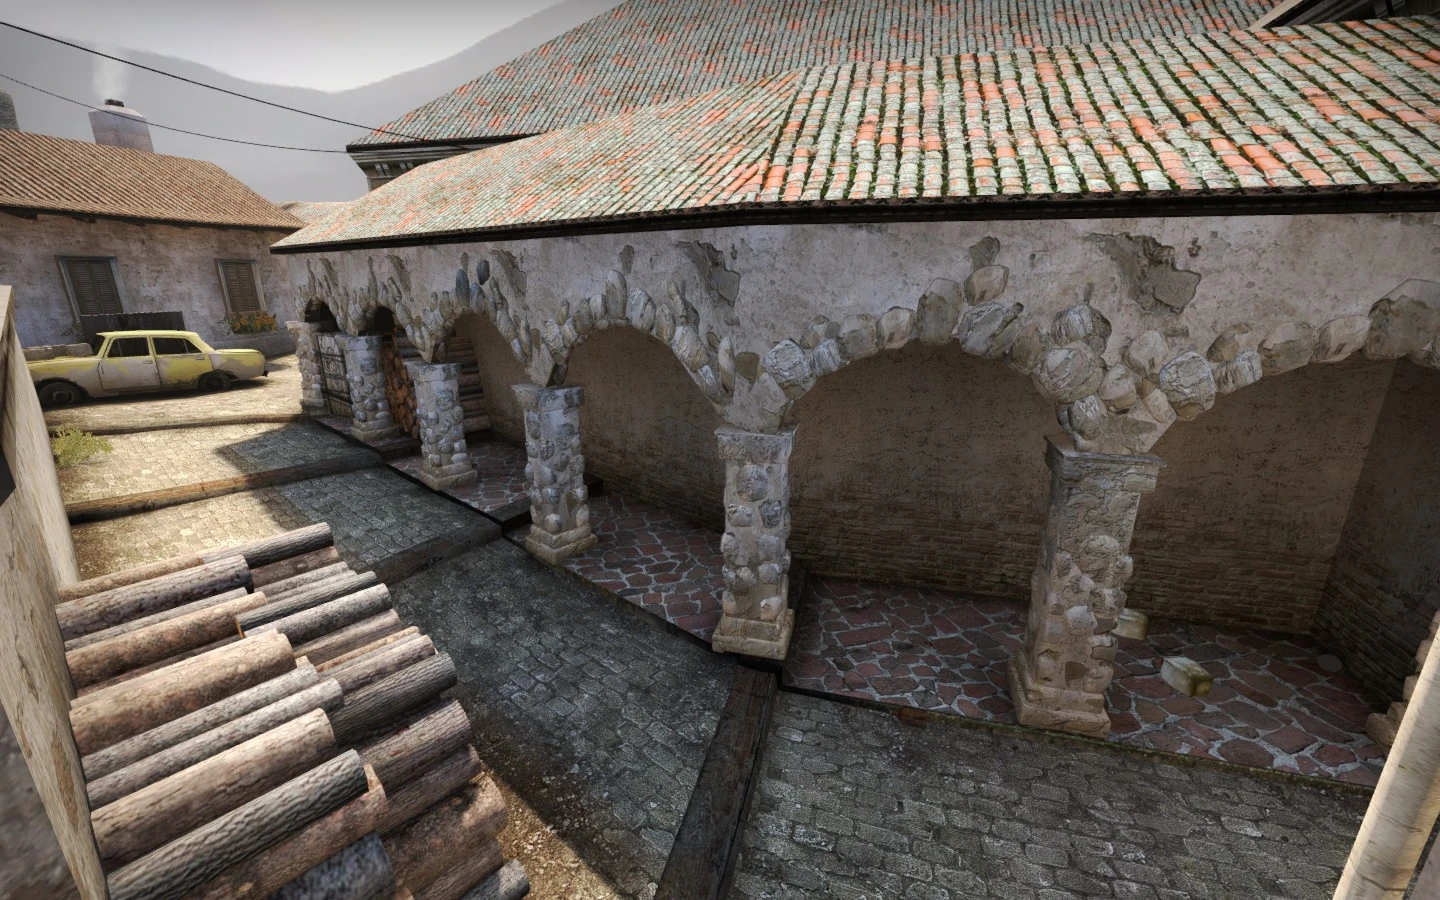
The one distinction that costs people rounds here is Sandbags versus Car. Both are "banana" in lazy comms, and they are a molotov apart. An enemy at Sandbags is contesting the middle of the lane and can be smoked off; an enemy at Car is already at the mouth of the site and your B anchor needs to be looking there now. Name the cover, not the lane.
Banana is also the reason B is so utility-heavy. Every serious CT hold opens with a molotov into the choke and a smoke to deny the push, and every serious T take answers with its own smokes and mollys to clear the CT off Sandbags. If you are guessing at those throws, the CS2 utility guide covers what all that grenade money actually buys you.
B site callouts
B is claustrophobic, dark, and unforgiving. It is a small site with a lot of named boxes, and a retake that walks into the wrong one dies to a crossfire before it clears the corner.
| Callout | Where it is |
|---|---|
| Car | The vehicle at the Banana mouth, top of the site |
| Coffin | The coffin-shaped box near the center of B, a common plant and hiding spot |
| New Box | The crate on the CT side of the site, toward Halls |
| Dark | The shadowed corner on the CT side, easy to lurk and easy to miss |
| First / Second Oranges | The two orange-crate stacks running from Banana into the site |
| Fountain | The recessed fountain area on the CT-facing edge of B |
| Halls | The CT interior hallway feeding B from spawn |
| CT | The CT-side entrance and default anchor position on B |
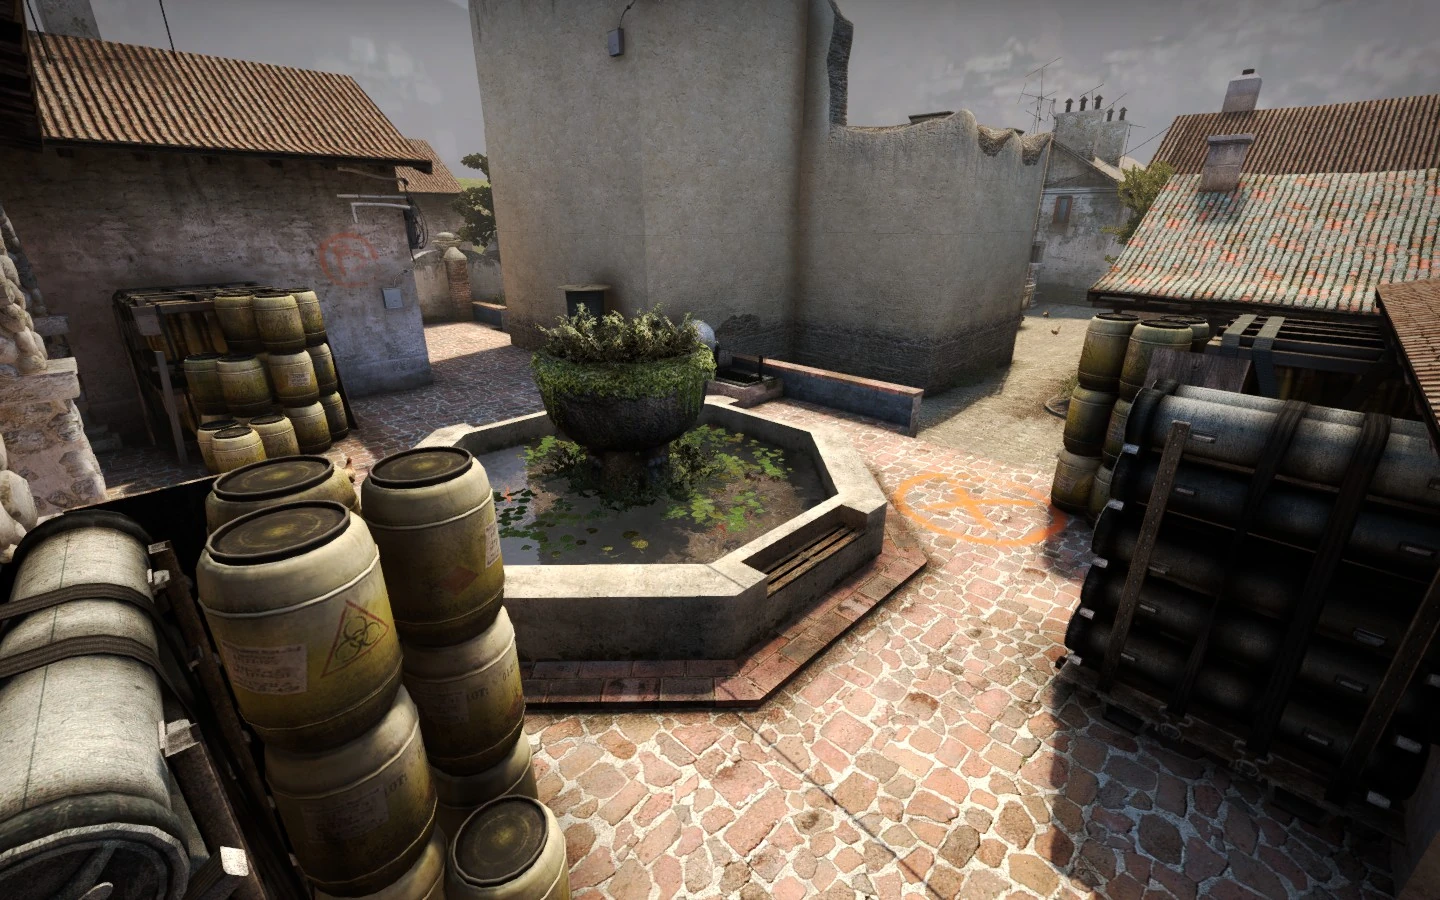
Two of these earn more than a table row.
Coffin is the fight the site is built around. It sits roughly central, it is the most common default plant, and both the T holding the plant and the CT retaking want it. "Bomb is B" tells your retake nothing. "Bomb Coffin, one New Box" tells them exactly which angle to pop and which one to clear.
Dark and New Box are how CTs die on retakes. They are the two spots a lurking T sits after the plant, on opposite sides of the CT entrance. A retaker who checks one and not the other is trading. Name the box you died to — "he's New Box" — and the next player through clears it instead of repeating your mistake.
A site callouts
A is bigger, brighter, and every bit as vocabulary-heavy. Because the T side can hit it from two completely separate directions — through Apartments or through Arch — the callouts here are less about which box and more about which door.
| Callout | Where it is |
|---|---|
| Pit | The sunken area on the near-right of A as CTs face it, a brutal close angle |
| Graveyard | The fenced gravestone plot on the T-approach side of the site |
| Arch | The archway where the mid route opens onto A |
| Library | The room connecting the Arch/mid area toward A and Short |
| Short | The A Short route CTs rotate down from spawn and mid |
| Boiler | The small interior room linking Short and the CT rotation spine |
| Ninja | The tucked pocket by the site wall, the classic stealth-defuse and lurk spot |
| Truck | The truck providing cover on the CT side of the site |
| Default | The standard plant spot near the site's central cover |
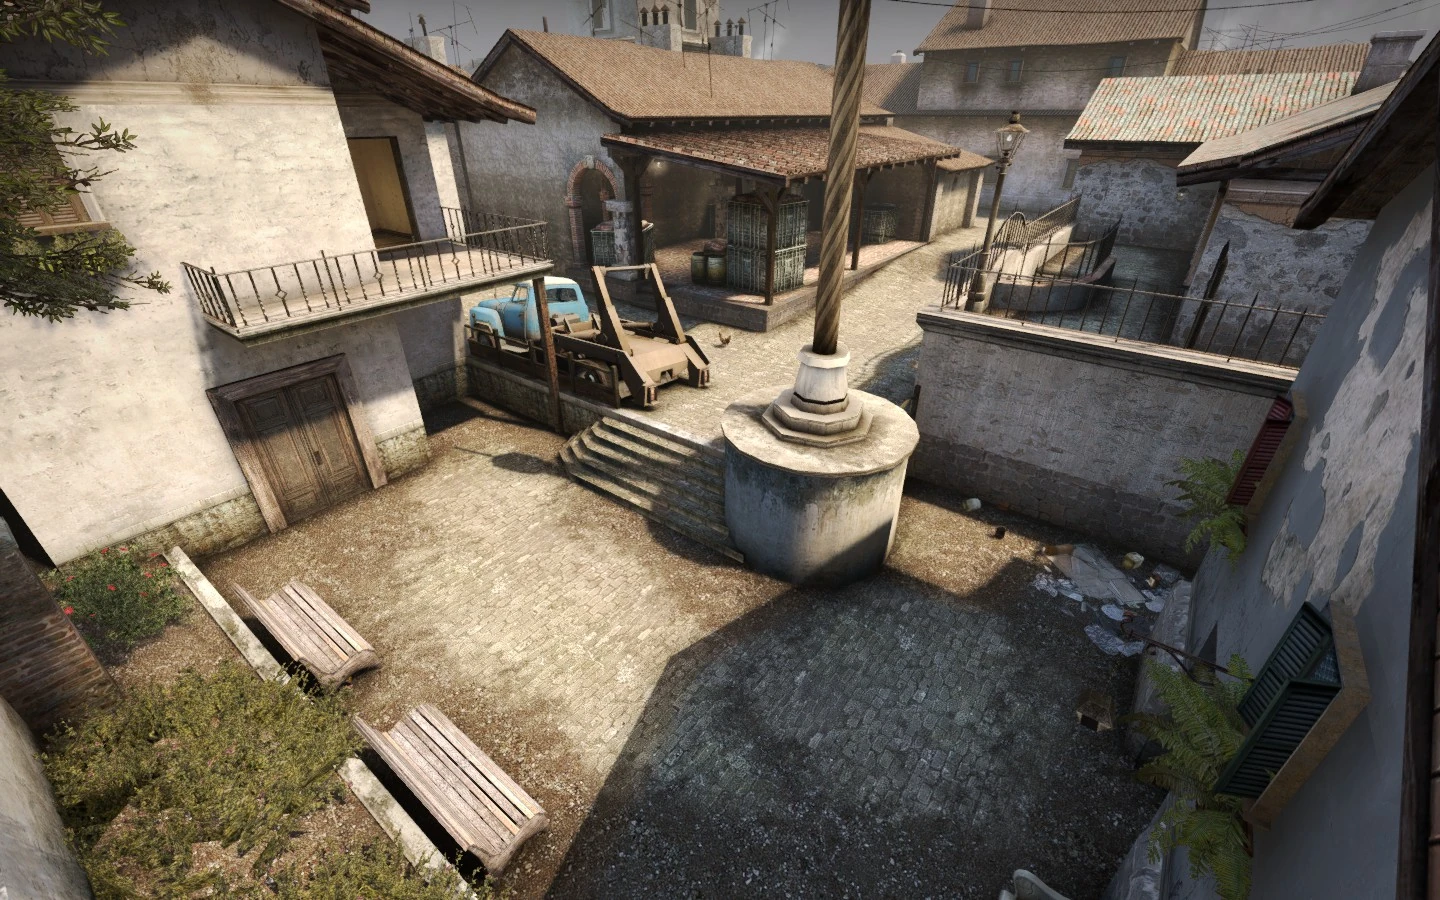
Pit is the angle that decides A. It is the sunken corner on the right as you enter, and a CT sitting in Pit sees anyone stepping out of Apartments before they see him. Half of A executes exist purely to smoke or flash the Pit player off that angle. If you are entering and you do not know whether Pit is smoked, you are entering blind.
Ninja is exactly what it sounds like. It is the pocket near the wall where a T can sit unseen while the CTs retake around him, or where a CT can hide for a stealth defuse. It is famous for a reason — checking Ninja on a retake is the difference between a defuse and a body on the plant.
Apartments and the A approaches
Apartments is Inferno's second great standoff, the Banana of the A side. It is the elevated T route that overlooks A, and controlling it means controlling the site from above.
| Callout | Where it is |
|---|---|
| Apartments | The two-storey T building on the left route to A |
| Balcony | The open balcony out of Apartments that overlooks the A site and Pit |
| Bridge | The raised walkway connecting the Apartments approach across toward A |
| Backalley | The tucked side path off the Apartments route |
| Boiler | The interior room bridging Short and the CT side |
The habit that matters here: Balcony is a height advantage, not just a room. A T on Balcony is above the site with line of sight across Pit and Default the moment they step out — the same relationship Palace has to A on Mirage. If you have played the CS2 Mirage callouts guide angles, this will feel familiar: an enemy above you is a different problem than an enemy beside you, and your call has to say which one it is.
Whoever holds Apps controls the tempo of the A round. The CT that pushes up to contest it early can shut an execute down before it starts — or feed a free opening kill to a lurker who was already there. That duel is why an AWP on the A side is worth so much on Inferno; one pick out of Apps or Balcony collapses the whole take. Our CS2 AWP guide covers when that angle justifies the $4,750.
Mid, Arch, and the connectors
Mid on Inferno is not a lane you fight across the way you do on Mirage. It is a slower, church-flanked corridor that the T side uses to split A and the CT side uses to rotate and gather info.
| Callout | Where it is |
|---|---|
| Top Mid | The T-side entrance to the middle lane |
| Mid | The central stretch between Top Mid and the CT side |
| Second Mid | The forward split off mid that feeds toward Arch and A |
| Bottom Mid | The lower section near the CT and Church side |
| Church | The chapel structure flanking mid, a key CT-side landmark and holding spot |
| Boiler | The room linking the mid/Short side to the CT rotation |
The call people botch here is Second Mid versus Top Mid. Top Mid is a T still deciding what to do; Second Mid is a T committing to the A split and about to be in Arch. One is information, the other is a countdown. Say the specific word.
Mid's real value on Inferno is quiet: it is how a T side fakes B and hits A, and how a CT side takes early map control to deny that fake. A CT who wins mid can be at either bomb quickly; a CT who loses it gets split and dies to a crossfire he never saw set up. If your crosshair keeps ending up on the wrong part of these corridors, the CS2 crosshair settings guide is worth ten minutes before your next session.
The four callouts that decide the round
The full vocabulary is a lot. If you are new to the map, learn these four first and add the rest later:
- Banana. Control of Banana is control of B, full stop. Every B take either wins the lane or smokes it, and every CT hold lives or dies on the Sandbags contest.
- Car. The specific one inside Banana. It is the last cover before B, and "one Car" versus "one Sandbags" is the difference between a retake and a lost site.
- Pit. The angle that owns A. If Pit is not cleared, your entry through Apps dies before he sees anyone.
- Coffin. The heart of B. It is the default plant and the fight both the anchor and the retake want. Name it and your teammate knows the defuse angle before they enter.
How to call it mid-round
Callouts only pay off if they arrive fast enough to act on. The format that works is the same on every map:
Count, position, action. "One Car, pushing" beats "uh, someone's up banana somewhere, I think." Three words, in that order, every time.
A few rules that hold up in real games:
- Never say just "banana." Logs, Sandbags and Car are three different fights at three different distances.
- Call the box, not the site. On B, "he's New Box" is usable; "he's B" is noise. On A, name Pit, Ninja, Graveyard or Truck.
- Distinguish above from beside. An enemy on Balcony or Bridge has height on the A site; an enemy in Pit is on your level. Your rotation holds a different angle for each.
- Update the count out loud. "One down banana, one left" turns a nervous 5v4 into a confident retake.
- Do not call while you are alive and shooting. Win the duel, then talk. Half-called info from a player mid-spray gets teammates baited into bad rotations — and if you are losing those sprays, the CS2 spray control guide is the other half of the problem.
Inferno rewards this discipline more than any map in the pool, because its chokes are so tight that one correct call buys an entire rotation and one wrong call buys the enemy a free plant. The rest of our coverage lives on the Counter-Strike 2 coverage hub.
Quick Action Checklist
- Learn fourteen callouts before you try to learn them all: Banana, Logs, Sandbags, Car, Coffin, New Box, Dark, Pit, Graveyard, Arch, Ninja, Apartments, Balcony and Top Mid cover most rounds.
- Split "banana" into Logs, Sandbags and Car every single time. Never use the bare word.
- On B, name the box — Coffin, New Box, Dark, Oranges — so the retake knows the angle before entering.
- On A, clear Pit before you commit, and check Ninja on every retake.
- Distinguish above from beside: Balcony and Bridge have height on A; Pit does not.
- Split "mid" into Top Mid and Second Mid — one is deciding, one is committing to the A split.
- Use Count, position, action. Three words, in that order.
- Open B holds and takes with utility; the Sandbags molotov and choke smoke decide the lane.
- Call the route the enemy took, not the room you died in.
- Update the count after every kill so your teammates play the real man-advantage, not a guess.
Frequently Asked Questions
What are the main callouts on Inferno in CS2?
What is the difference between Sandbags and Car on Inferno?
Where is Pit on Inferno and why does it matter?
When was Inferno added to Counter-Strike?
What is the Ninja spot on Inferno?
Why is Banana considered the most important part of Inferno?
How many callouts do you actually need to learn on Inferno?
Keep Reading
Related Guides
CS2 Anubis Callouts: Every Name on de_anubis
Anubis came back to Active Duty on January 21, 2026, and Valve rewired part of the map on the same day it did — a bridge drop moved, the mid doors flipped, and a hole opened between something called E-box and the back of bombsite B. E-box is not on the community callout map at all. Here is the wiki's full 47-marker set for Anubis, checked line by line against what Valve has actually written down.
CS2 Ancient Callouts: Every Name on de_ancient
Ancient signposts its own bombsites: the site walls read PLAZA A in amber and PLAZA B in pale blue. Everything else you have to learn from other players. The Counter-Strike Wiki callout map places 30 markers on de_ancient, two of them carrying an A-site label at B-site coordinates, and its update list is at least 13 Valve patches behind. Here is the whole vocabulary, area by area, with the patch-note paper trail.
CS2 Map Pool: Every Active Duty Swap Since Launch
Counter-Strike 2 has run on seven Active Duty maps every day of its life, and Valve has changed that seven exactly five times. Every change was a straight one-in, one-out, four of the five landed on the first day of a Premier season, and you can rebuild the launch pool from the release notes alone. Here is the whole timeline, dated.
CS2 Cache Callouts: Every Name on the Map That Came Back
Valve ended its announcement of Cache's return with a callout: "Don't forget to clear Forklift." Here is every named position on de_cache, which names Valve itself has used in 2026 patch notes, and the one marker the wiki flags as gone.
CS2 Economy Guide: Buy Rounds, Loss Bonus, and MR12
Half the rounds you lose in CS2 are lost in the buy menu, before anyone fires a shot. Here are the exact payout numbers, the loss bonus ladder, and the force-buy math that decides whether your next three rounds are winnable.
CS2 Nuke Callouts: Four Names That Exist on Two Different Floors
On Dust 2, "I am at Ramp" means one place. On Nuke it means two, and one of them is a full floor below the other. Here is every named position on de_nuke across both levels, and the four names that exist twice.