Fortnite Mats and Resource Management Guide
Running out of mats in the endgame isn't bad luck — it's bad management three circles earlier. Here's how to farm efficiently, what the mat cap actually is, the real wood vs brick vs metal trade-offs, when to build vs save, and how to manage heals and ammo so you never show up to the last fight broke.

Running out of mats in the final circle isn't bad luck. It's a decision you made three circles earlier when you spam-built a tower over a fight that didn't matter, or never bothered to farm in the first place, or hoarded so hard you hit the cap and wasted every swing after. Material management is the quiet skill that decides Build-mode endgames, and almost nobody trains it on purpose — they just notice they're out of wood when it's already too late to fix.
Mats are a resource you spend to win fights and survive rotations, governed by a hard cap and a real trade-off between the three types. Manage them well and you arrive at the last high-ground battle with a full bank and the ability to keep re-walling while your opponent runs dry. Manage them badly and you're the player in the open with 40 wood, watching someone box you up. This guide is the whole resource picture — farming, the cap, the wood/brick/metal trade-offs, when to build versus save, and the heals and ammo that round out your inventory.
Mats are a resource you spend, not a score
The first mental shift: your mat count is not a high score to maximize, it's a fuel tank to manage. New builders make one of two opposite mistakes. Either they treat mats as disposable and spam-build everything — cranking 90s over a meaningless mid-game skirmish until they're empty — or they treat mats as precious and hoard, refusing to build when building would've saved their life. Both lose games.
The right model is simple: you want enough mats banked to win the fights that matter, spent efficiently, with a healthy reserve heading into the endgame. That means farming a working stock, not building when terrain already gives you cover, and not dumping your whole bank on a fight you could've walked away from. Mats are spent to buy something — cover, high ground, a sightline block, a rotation across danger. If a build isn't buying you one of those, you're just burning fuel.
This matters only in Build mode. In Zero Build there are no mats at all — your "resource management" is purely heals, ammo, and mobility, which the last section covers. But in Build, the player who understands their mats as a managed fuel tank beats the one who treats the counter as a trophy every single time.
Farming efficiently without wasting the game
Farming is how you fill the tank, and there's a right amount: enough to fight and rotate, gathered without spending half the match swinging a pickaxe at trees while better players loot and position.
How to farm efficiently:
- Hit the blue weak-point. When you swing your harvesting tool at an object, a small circle (the weak-point) appears on it. Hitting that spot makes the object break faster and yields mats more efficiently per swing. Aim for it instead of mindlessly chopping — it's free value on every harvest.
- Farm while you move, not as a separate chore. The efficient player gathers mats on the way to where they're going — clipping a tree, a pallet, a fence as they rotate — rather than stopping in one spot to farm a forest. Standing still farming is loud, exposed, and a waste of the rotation window.
- Know the best sources per type. Trees, wooden pallets, and structures give wood fast. Rocks, walls, and stone formations give brick (stone). Cars, metal containers, and machinery give metal — but metal objects are slow to break and noisy. More on which to prioritize below.
- Don't farm in the open late. Swinging a pickaxe is loud and pins you in place. Farm early and mid-game when it's safe; by the late game your bank should already be set, because farming in a small circle is begging to get third-partied.
A good working target is a solid reserve of your primary build mat (usually wood) plus a chunk of a sturdier type for the endgame — enough that you're never building from near-empty, without spending the whole match on it.
The mat cap and why it matters
Here's the rule that punishes hoarders: you can carry a maximum of 500 of each material type — 500 wood, 500 brick, and 500 metal — for 1,500 total. Once you hit 500 of a type, every additional swing on that material type is wasted; the mats drop on the ground or simply don't get collected. (Some limited-time and team modes raise or remove this cap, but standard Battle Royale caps you at 500 per type.)
Why it matters for management:
- There's no point over-farming a capped type. If you're sitting at 500 wood, swinging at more trees is pure wasted time and noise. Bank it and move on, or switch to farming a type you're short on.
- A balanced bank is better than a maxed one. 500 wood and 0 of everything else is worse than, say, a strong wood stock plus a meaningful brick/metal reserve, because you want fast builds and the option of sturdier endgame structures.
- 500 of your main mat is plenty. You almost never genuinely run out from a full 500 in a single fight unless you're spam-building inefficiently. If you're hitting empty, the problem is usually wasteful building, not an insufficient cap.
Treat 500 as the ceiling, not the goal. The goal is a balanced, healthy bank you actually spend well.
Wood vs brick vs metal
The three materials are not interchangeable. They differ in two things that matter: how fast a freshly-placed build reaches full strength, and how much health that build has once it's fully built. The trade-off is speed versus durability.
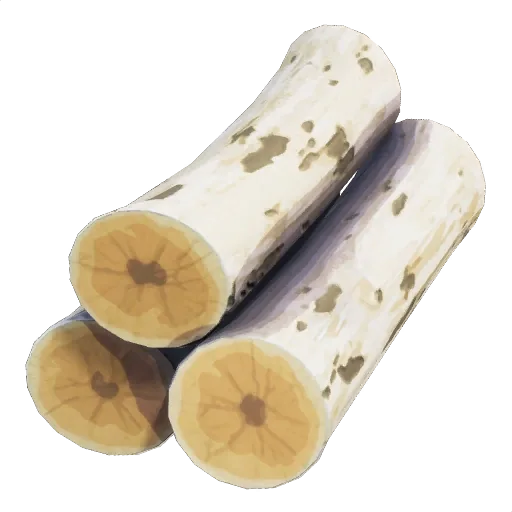
- Wood — fastest to build, lowest max health. A wood wall goes up and reaches its initial strength quickest, which is exactly what you want in a live fight where you're re-walling under fire. Its full health is the lowest of the three, but in a fast fight you rarely live long enough for max health to matter — you care about the wall existing right now. Wood is your default fighting material.
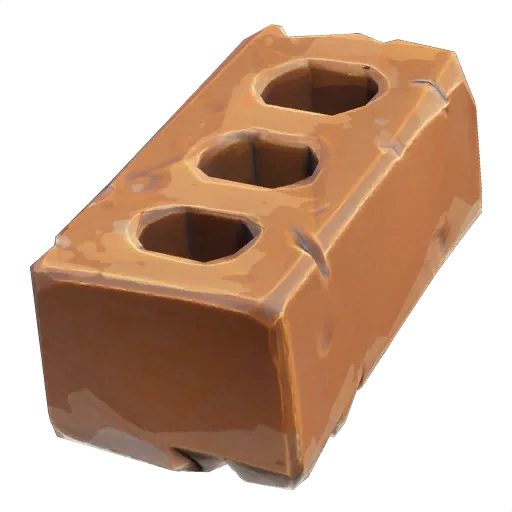
- Brick / stone — the middle ground. Tougher than wood at full health but slower to reach full strength. Good for semi-permanent cover and endgame structures you'll have a second to let build up.
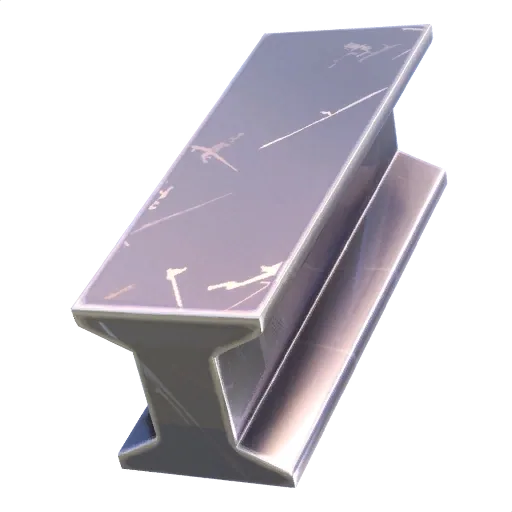
- Metal — slowest to build, highest max health. Metal takes the longest to reach full strength but has the highest ceiling, so it's best for structures you set up in advance and want to survive sustained fire — a fortified endgame position, a base you're holding, cover you build before the shooting starts. Building metal mid-fight is usually a mistake because it's weakest in the first moments while it's still strengthening.
The practical rule: build wood in fights, build metal in advance. Wood for reactive cover when you're trading shots, brick or metal for structures you have a moment to let harden into a wall that eats damage. Carrying a wood-heavy bank with a brick/metal reserve gives you both options.
When to build and when to save
Knowing when not to build is as important as knowing how. Every wall costs mats, and structures get shot out constantly, so the question before every build is: what is this buying me?
Build when:
- You're taking fire and need cover now. A reactive wall between you and incoming damage is mats well spent — it's the entire point of building.
- You need high ground or a sightline. Ramping up to take height in a fight, or blocking an angle that's beaming you, buys you position. Worth it.
- You're crossing danger and the terrain gives you nothing. A quick ramp/wall path across open ground in a rotation can be the difference between making it and dying in a field.
Save (don't build) when:
- Terrain already gives you cover. If there's a rock, a building, or a hill doing the job, use it and pocket your mats. Building cover next to existing cover is a rookie mat-waste.
- The fight doesn't matter. Don't dump 200 mats winning a mid-game skirmish you could've disengaged from. Spend on fights that advance your game, not every gunshot you hear.
- You're already low and it's not life-or-death. If a build won't directly save you and you're running short, hold the mats — you'll want them in the endgame far more than now.
The discipline is reactive, efficient building: throw up the wall you need, take cover behind terrain when it's free, and re-wall only as your structures actually get shot out — not preemptive tunnel-spam. A player who builds only what each moment requires arrives at the endgame with a bank; a player who cranks reflexively arrives empty.
Do not over-farm
Over-farming is the sneaky mistake good-intentioned players make: they know mats matter, so they spend the early and mid game grinding the pickaxe to max — and pay for it in every other resource. The costs are real:
- It wastes the match. Time spent farming a forest is time not spent looting better weapons, taking favorable fights, or holding good position. You can hit 500 wood and still lose because you have a grey pistol and bad position.
- It's loud and exposing. Harvesting is one of the noisiest things you do, and it pins you in one spot. Farming in a contested area or late in the game is an open invitation to get third-partied.
- Past the cap it's literally nothing. Every swing on a maxed type is zero value, as covered above.
The fix is balance: farm a working stock efficiently on the move, then stop and play the actual game. You need enough mats to fight and rotate, not a maxed bank you'll never fully spend. If you find yourself reflexively pickaxing every object you pass while at 400+ wood, that instinct is costing you loot, position, and tempo. (Mats are one input to your whole improvement curve — the improvement roadmap puts farming, aim, building, and game sense in the right order.)
Managing heals and ammo
Mats are only part of your resource picture. Heals and ammo are the other two tanks, and they matter in both Build and Zero Build:
- Carry a mix of fast and slow heals. Slow, long-channel heals (like a Med-Kit for full health, or shield items) are for between fights, used behind cover. Fast heals (minis, splashes, anything you can use quickly) are for topping up mid-fight or on the move. Don't carry only slow heals — you can't channel them in a firefight.
- Heal during downtime, not during damage. Top up to full during the rotation lull behind cover, so you walk into each fight at full health and shield. Healing while exposed gets you killed in the channel. Walk into the endgame full.
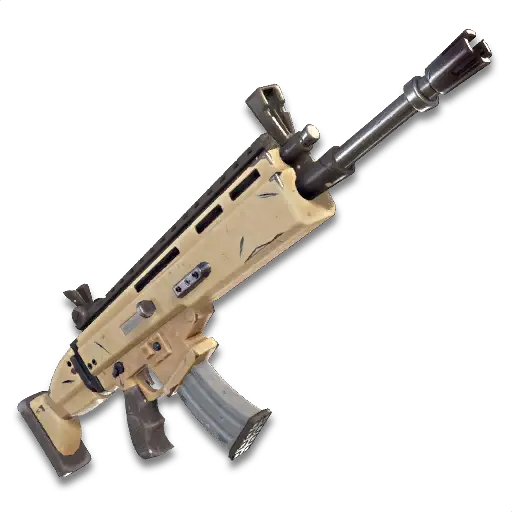
- Don't hoard heals at the cost of a balanced kit. A full inventory of nothing but heals and no balanced weapon loadout is as bad as the reverse. Aim for guns covering close and medium-to-long range plus enough heals to refill a couple of times.
- Track your ammo per gun. Running your main weapon dry mid-fight is a self-inflicted loss. Pick up ammo for the guns you actually shoot, and don't blindly hold a sniper you never fire while starving your AR or shotgun of rounds. Spare ammo for the weapon you use beats a balanced-but-useless spread.
The same gut check applies to all three tanks before the endgame: mats banked (Build mode), full health and shield with a mix of heals, and ammo for the guns you'll actually use. Fix the weakest tank during the lull, because once the final circle closes there's no time to farm, loot, or heal in the open. (Our endgame guide covers how all of this comes together in the final circles.)
Quick Action Checklist
The resource habits that win Build-mode endgames:
- Treat mats as a fuel tank to spend, not a score to max — build only what buys you cover, height, or a rotation
- Farm efficiently: hit the blue weak-point, gather on the move, and stop once your bank is set
- Know the cap is 500 per type (1,500 total) — over-farming a capped type is wasted swings
- Keep a balanced bank: wood-heavy for fighting, with a brick/metal reserve for the endgame
- Build wood in fights (fastest up); build metal in advance (highest health, slow to harden)
- Don't build next to free terrain cover, and don't dump mats on fights that don't matter
- Don't over-farm — it costs you loot, position, and tempo, and is loud and exposing
- Carry a mix of fast and slow heals, top up during downtime, and walk into the endgame full
- Track ammo per gun and stock the weapons you actually shoot
Frequently Asked Questions
Keep Reading
Related Guides

Fortnite Third-Partying Guide: When to Push, When to Hold
Third-partying is the most reliable way to win a fight without earning it — you let two players gut each other, then collect. But the same logic points back at you the second you start shooting. Here's how to be the third party instead of the corpse two of them split.

Fortnite Duos & Trios Strategy: How to Win in Small Teams
Duos and Trios aren't just Squads with empty slots. With fewer guns, every knock swings the math harder, every res is riskier, and one bad split loses the game. Here's how to play 2s and 3s — roles, comms, trading, reboots, shared loot, and third-partying as a small unit.
Fortnite Weak Spots & Aiming Guide: Where to Aim
Two players land the same shots and one does way more damage. The difference isn't aim — it's where they're aiming. Here's the where: headshots and weak spots, crosshair centering, pre-aiming, tracking vs flicking, and aiming the gaps in someone's build.
Fortnite Tunneling Guide: Cross Open Ground Without Dying
Tunneling is how good players cross open ground while being shot at and live to fight in the next zone. It's the move-and-rebuild rhythm that turns a death-march across a field into a moving box nobody can crack. Here's how to actually do it.
Fortnite Weapon Tier List: How to Rank Any Loot Pool
Any Fortnite tier list is stale the second a patch drops. So instead of memorizing this season's gun names, learn how to rank weapons by class and role — the framework that's S-tier in every season.

Best Fortnite Settings for PC & Console
Half your settings menu is noise; a handful of options decide whether you can see, aim, and build. Here's what to change on PC and console, why, and the one number nobody else can pick for you.