Fortnite Endgame Guide: Winning the Final Circles
Most players don't lose Fortnite games in the final circle — they lose them three circles earlier with a bad rotation and an empty inventory. Here's how to play the endgame so you arrive in the last fight with the position, the mats, and the heals to actually close it out.

Most players don't lose Fortnite games in the final circle. They lose them three circles earlier, by sprinting into the new zone at the last second with 50 wood, no shields, and a worse position than everyone who rotated early. By the time the lobby is down to the last handful of players, the game is already mostly decided by who showed up prepared. The final fight is just where the bill comes due.
That's the thing nobody tells you about the endgame: it's not really about clutch aim in the last 1v1. It's about arriving at that 1v1 with the high ground (or the cover), a stack of mats, a full bar of shields, and a read on where everyone else is. Do the boring preparation right and the final fight is easy. Skip it and you're scrambling in the open while a player who planned ahead rains shots down on you. This guide is the whole endgame — zone reading, rotations, positioning, resource management, and how to actually close it out.
The endgame starts three circles early
The single biggest endgame mistake is treating it as a moment instead of a phase. The endgame is the last several circles — roughly from the point where the zones get small and fast and the surviving players get funneled together. Everything you do there should be setting up the next circle, not reacting to the current one.
Here's why early matters so much: the storm deals damage that ramps up the deeper the game goes, so getting caught in late-game storm isn't a slow chip, it's a real threat to your life. And the players who rotate at the last second arrive in the new zone exposed, out of position, and often getting shot from people who were already set up. Late rotation is the most common way good aimers throw winnable games.
The mindset shift: as soon as a circle starts shrinking, you should already be asking "where's the next safe zone likely to be, and what's my route there that keeps me in cover and ahead of the storm?" The endgame rewards players who are always one circle ahead in their head.
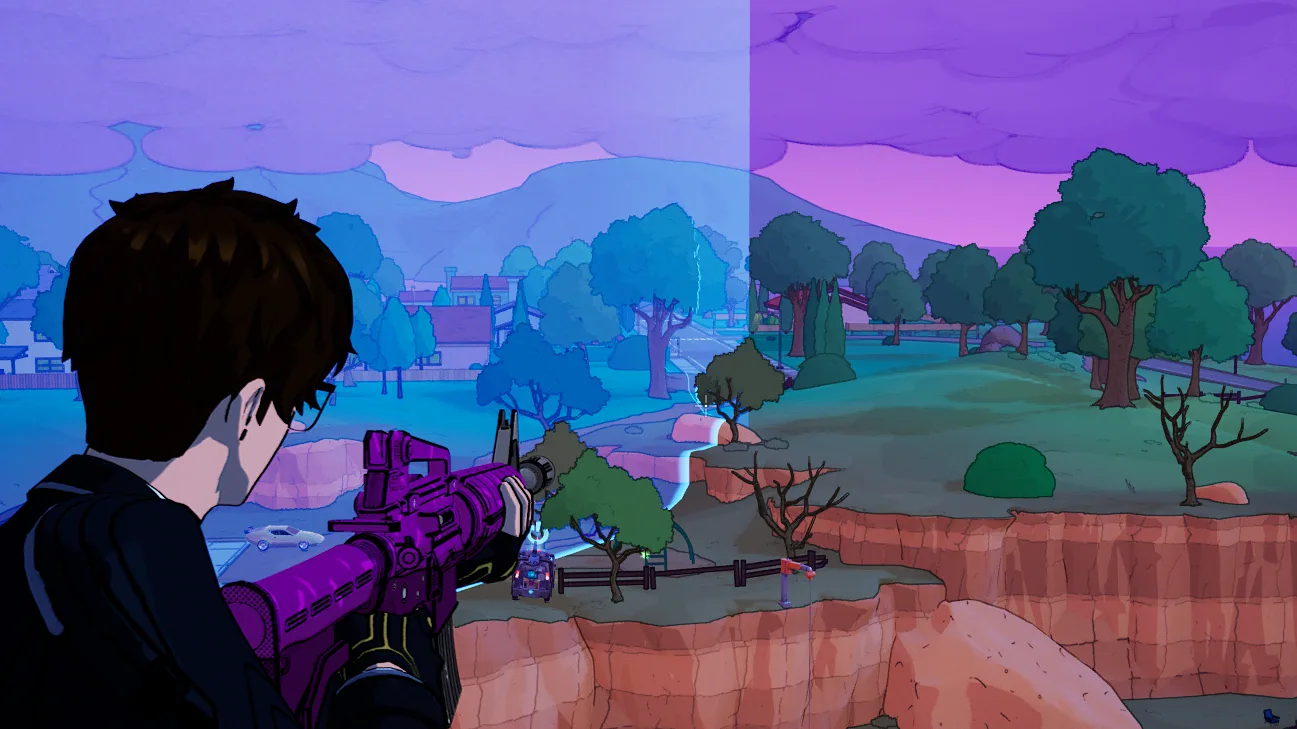
Read the zone before you move
![]()
Every rotation decision starts with reading the zone. When a new circle appears on the map, you get a window before the storm actually moves — use it to make a plan instead of just running toward the white line.
What to read:
- Where the new circle pulls. Is it pulling you across open ground or toward terrain you can use? A zone that drops you into a field with no cover is a zone you want to enter early and from the safe side, not late and exposed.
- The terrain inside the next circle. High ground, hills, buildings, and hard cover are the prizes. The player who claims the best terrain in the next zone controls the fight. Identify it before you move and head for it.
- Which side of the zone you're on. Entering from the storm side means you're pushing into players already set up, with the storm at your back. Whenever you can, rotate to be on the safe side of the circle, pushing inward with the storm threatening everyone else.
- How much time you have. The countdown before the storm closes tells you whether you can loot one more box or need to leave now. Cutting it close to grab loot you don't need is how you eat storm damage in a phase where it actually kills.
Reading the zone is a habit, not a talent. Glance at the map every time a new circle appears, decide your spot and your route, and commit early.
Rotate early and rotate with purpose
Rotating means moving to stay inside the safe zone, but a good rotation does more than avoid the storm — it gains you position. The goal is to arrive at the next circle's best terrain before anyone contesting it does.
The rules of a clean rotation:
- Move during the lull, fight in the hold. Rotate while the storm is closing and players are repositioning, when everyone's heads-down moving. Then hold your spot once you're in the new zone. Don't be the player still crossing open ground when the circle's already set and people are watching the edges.
- Use cover and elevation, not the straight line. The fastest route is rarely the safest. Move tree-to-rock-to-building, along ridgelines and through low ground, so you're not silhouetted in the open the whole way. In Build mode you can build a path across danger; in Zero Build you string together natural cover.
- Carry rotation tools. Anything that gives you mobility — vehicles, launch pads, grapple-style items, and similar movement options — is worth a slot in the late game specifically because it lets you cross a bad rotation fast or reposition out of a losing spot. Movement is survival in the endgame.
- Don't over-rotate into the center. Being dead-center isn't the goal; having a defensible spot with the storm covering one or more of your flanks is. Sometimes the best position hugs the edge of the safe zone so nobody can come at you from the storm side.
A rotation that gets you to high ground or hard cover on the safe side, with heals and mats ready, is worth more than any single kill on the way there.
High ground in Build, cover in Zero Build
The endgame position you want depends entirely on which mode you're in, and the two reward opposite instincts.
In Build mode, high ground is everything. Whoever sits above has the angle, the vision, and the ability to push down on everyone below. The classic endgame is a tower-and-cone battle where players build up to contest the top of the zone. To compete you need:
- Enough mats to build and re-build as your structures get shot out (more on that next).
- The discipline to take high ground late — building a giant tower early just makes you the obvious target. Hold mats, then take the height when the circle is small.
- The ability to retake high ground when you lose it, because in a real endgame you will lose it and have to fight back up.
In Zero Build, there are no towers, so the prize is the best natural cover and elevation. The hill, the building, the cluster of rocks on the safe side of the zone — claim it and force everyone else to push you across open ground. (Our Zero Build guide covers cover usage and mobility in depth.) The endgame logic is the same — control the best ground — but you take it with your feet and your map read instead of building up to it.
Either way, the principle is identical: position is the multiplier on everything else. Good position turns mediocre aim into wins; bad position wastes great aim. Spend your rotations buying position.
Mat management: the resource that runs out
Mats only matter in Build mode, but there they're make-or-break, and most players manage them terribly. You harvest wood, stone, and metal all game, and the endgame is where the bill comes due — if you arrive at the final circle with 80 wood, you cannot fight a high-ground battle, period.
The discipline:
- Farm a healthy stack mid-game. You want a meaningful reserve of mats heading into the endgame. Wood for fast builds, with some stone or metal for sturdier endgame structures that survive more shots. Don't show up to the last fight broke.
- Don't waste mats in early fights. Spamming hundreds of walls on a meaningless mid-game skirmish leaves you empty when it counts. Build what you need to win the trade, no more.
- Build efficiently in the endgame. Every wall costs mats and the structures will get shot out. Re-wall reactively, take cover behind terrain when you can to save mats, and don't tunnel-spam-build when a single well-placed wall does the job.
- Watch the lobby's mats too. Late game, everyone's running low. If you've managed yours and your opponent is clearly out — their walls aren't going back up — that's your cue to push, because a builder with no mats is just a player in the open.
The endgame mat economy is a slow squeeze: whoever runs out first loses the ability to make cover and high ground, and the game collapses on them fast. Be the one with mats left.
Heals and the final inventory
You should walk into the final circles with a full health and shield bar and a stock of heals to refill it. The endgame is a war of attrition, and the player who can keep topping back up outlasts the one rationing a single bandage.
The ideal endgame inventory leans toward:
- A full shield bar going in. Shield is your effective extra health. Showing up to the last fight at partial shield is a self-inflicted handicap — top up before the final circle, while you still have a moment.
- Fast heals over slow ones for the fight itself. Slow, long-channel heals like a Med-Kit are great between fights behind cover, but you can't channel them mid-firefight. For the actual endgame exchange you want quick heals — minis, splashes, anything you can use fast and keep shooting.
- A balanced weapon loadout. Roughly: something for close range, something for medium-to-long, and at least one heal type you can use fast. Don't hoard four guns and zero heals; an endgame with no way to refill is a loss waiting to happen.
- Heal during downtime, not during damage. The same rule as positioning — top up while you're moving or behind cover between exchanges, so you enter each fight full. Healing while exposed gets you killed in the channel.
A useful gut check around the third-from-last circle: full shield? Fast heals in the bag? A gun for every range? Mats if you're in Build mode? Fix whatever's missing now, because there's no time to loot once the final fight starts.
Reading the final fights
The last circle is loud, fast, and crowded — the surviving players are jammed into a tiny space and somebody dies every few seconds. Winning here is about reading the chaos instead of adding to it blindly.
- Let players trade, then clean up. This is third-partying at its most lethal. When two opponents are committed to each other, you don't need to be the third body in the open — hold your position, let them chunk each other, and take the survivor while they're low and out of resources.
- Use sound for the read. In a tiny final circle, every footstep, shot, and reload tells you where people are. Track the fights by ear so you know who's engaged, who's low, and who's about to push you.
- Don't over-peek. The most common final-circle death is greed — peeking one more time to finish a kill and eating a shot from a third player you forgot about. Take your damage, reset behind cover or your build, and re-peek on your terms.
- Mind the closing storm. In the last couple of circles the safe space is tiny and the storm hurts. Sometimes the winning play is letting an over-aggressive opponent get caught between you and the storm — they have to come to you, across the open, with damage ticking. Position so the storm fights on your side.
- Stay full, stay covered, stay patient. The player who wins the endgame is usually not the most aggressive — it's the one who's full on heals, holding good position, and picking the fights that come to them. Let the impatient players kill each other and be the last one standing with resources to spare.
Close it out by playing the position you spent the whole endgame buying. If you arrived with high ground or the best cover, full heals, and mats in the bank, the final fight is yours to lose.
Quick Action Checklist
The endgame habits that actually win Victory Royales:
- Treat the endgame as a phase, not a moment — start planning when zones get small
- Read every new circle: where it pulls, the terrain inside, which side you're on, how much time you have
- Rotate early through cover and elevation, not the straight line; aim for the safe side
- Carry rotation/mobility tools for the late game
- Take high ground late in Build mode; claim the best natural cover in Zero Build
- Farm a healthy mat stack and don't waste it in pointless mid-game fights (Build mode)
- Walk into the final circles at full shield with fast heals and a gun for every range
- In the last circle, let players trade and clean up, use sound, and don't over-peek
- Position so the closing storm fights on your side and let the impatient kill each other
Frequently Asked Questions
Keep Reading
Related Guides

Fortnite Third-Partying Guide: When to Push, When to Hold
Third-partying is the most reliable way to win a fight without earning it — you let two players gut each other, then collect. But the same logic points back at you the second you start shooting. Here's how to be the third party instead of the corpse two of them split.
Fortnite Duos & Trios Strategy: How to Win in Small Teams
Duos and Trios aren't just Squads with empty slots. With fewer guns, every knock swings the math harder, every res is riskier, and one bad split loses the game. Here's how to play 2s and 3s — roles, comms, trading, reboots, shared loot, and third-partying as a small unit.
Fortnite Weak Spots & Aiming Guide: Where to Aim
Two players land the same shots and one does way more damage. The difference isn't aim — it's where they're aiming. Here's the where: headshots and weak spots, crosshair centering, pre-aiming, tracking vs flicking, and aiming the gaps in someone's build.
Fortnite Tunneling Guide: Cross Open Ground Without Dying
Tunneling is how good players cross open ground while being shot at and live to fight in the next zone. It's the move-and-rebuild rhythm that turns a death-march across a field into a moving box nobody can crack. Here's how to actually do it.
Fortnite Weapon Tier List: How to Rank Any Loot Pool
Any Fortnite tier list is stale the second a patch drops. So instead of memorizing this season's gun names, learn how to rank weapons by class and role — the framework that's S-tier in every season.

Best Fortnite Settings for PC & Console
Half your settings menu is noise; a handful of options decide whether you can see, aim, and build. Here's what to change on PC and console, why, and the one number nobody else can pick for you.