Genshin Skirk Build Guide — Talents, Weapon, Artifacts
Two effects in Skirk's kit and one in Escoffier's only reach their ceiling when all four party slots are Hydro or Cryo. In an Escoffier team, swap one teammate for any other element and her Seven-Phase Flash hits land at roughly 55% of what they were.

Why Skirk Needs Her Own Guide
Swap one teammate in a Skirk-and-Escoffier team for any character who is not Hydro or Cryo, and her Seven-Phase Flash hits land at roughly 55% of what they were. That is not a tier-list opinion. It falls out of two effects in her own kit and one in Escoffier's, and the arithmetic is two sections down.
It matters now because she is coming back. The wiki's page for her Version 7.1 Event Wish places "Void Star's Advent" directly after the current Phase 1 banners — Phase 2 — running alongside Escoffier's "La Chanson Cerise," with the dates still blank. HoYoverse's Phase I notice says the current Vesna and Vodyanitsa banners close at 17:59 server time on October 13, 2026. Our 7.1 release guide covered when the rerun lands, not how to build her. This is the build that guide left out.
There is a second hook. HoYoverse's 7.1 update notes schedule a Spiral Abyss for October 16 whose Floor 11 hands every character a 60% Cryo DMG Bonus, whose Floor 12 second half hands out 75%, and whose blessing fires a True DMG shockwave when a character triggers Frozen. Hydro meeting Cryo on a target is what triggers Frozen, and it is the one elemental pairing a Hydro-and-Cryo team has.
What Her Kit Actually Does
HoYoverse's Version 5.7 launch post on the PlayStation Blog says Skirk "forgoes the conventional Elemental Energy system." She runs on Serpent's Subtlety instead, capped at 100, and her Elemental Skill's tooltip lists exactly two ways to get it: using that Skill, and absorbing Void Rifts. The wiki's Elemental Burst page counts her Havoc: Ruin as one of only two Bursts in the game that do not use Energy at all; Mavuika's is the other.
- Elemental Skill, Havoc: Warp (8s cooldown). Tap for 45 Serpent's Subtlety and the Seven-Phase Flash mode: her Normal, Charged and Plunging Attacks become Cryo DMG that no other infusion can override, their AoE and her interruption resistance go up, and her Burst turns into Havoc: Extinction. The mode ends when Serpent's Subtlety runs dry or after 12.5 seconds, and only then does the Skill go on cooldown. Hold for 45 Serpent's Subtlety and a high-speed dash that crosses water and absorbs nearby Void Rifts.
- Elemental Burst, Havoc: Ruin (15s cooldown). Needs at least 50 Serpent's Subtlety, spends all of it on five slashes and a final slash, and hits harder for every point above 50, counting up to 12 of them.
- Havoc: Extinction replaces it inside Seven-Phase Flash, costs nothing, and grants All Shall Wither: her next 10 Normal Attack hits (at most one every 0.1s) deal increased DMG, more again if she absorbed Void Rifts during the cast.
- Reason Beyond Reason (1st Ascension Passive). When a nearby party member triggers Frozen, Superconduct, Cryo Swirl or Cryo Crystallize, a Void Rift opens near the target — once every 2.5 seconds, 3 on the field at most. She absorbs them with a Charged Attack in Seven-Phase Flash, with Havoc: Extinction, or with the Hold dash, for 8 Serpent's Subtlety each.
- Return to Oblivion (4th Ascension Passive) and Mutual Weapons Mentorship (Utility Passive) are the team half of the kit, and they get their own section below.
One line from the wiki's gameplay notes is worth keeping: any Cryo hit from Skirk generates 4 Elemental Particles, once every 15 seconds. Her own Burst runs on Serpent's Subtlety, so those particles only matter to her teammates.
Serpent's Subtlety Is a Clock
The Skill's wiki page gives the drain rate: 6.667 points per second in Seven-Phase Flash. Do the division and a bare tap buys 45 ÷ 6.667 = 6.75 seconds of a mode that can last 12.5. Each absorbed Void Rift adds 8 points, or 1.2 seconds. Running the full 12.5 seconds takes 83.3 points, which is five absorbed rifts on top of the tap.
That is the real job of her teammates. Reason Beyond Reason opens one rift per 2.5 seconds at most, and 12.5 ÷ 2.5 is five, so a team that triggers a qualifying reaction close to that cooldown can hold her in the mode for its whole duration. A team that triggers none drops her out a little past halfway.
The same arithmetic gates the quick-swap style. A Hold also gives 45 points, five short of the 50 that Havoc: Ruin needs, so each Ruin cast needs at least one absorbed rift — the Hold dash absorbs them on its own — unless you have Constellation 2.
The Fourth Hydro-or-Cryo Slot Is the Build
Four effects read the elements in your party, two of Skirk's and two of Escoffier's:
| Effect | Whose | Condition | What it pays |
|---|---|---|---|
| Return to Oblivion | Skirk, 4th Ascension Passive | One Death's Crossing stack (20s) per teammate: a Hydro character landing a Hydro attack, or a Cryo character other than Skirk landing a Cryo attack. Max 3, one per character | Seven-Phase Flash Normal Attack DMG becomes 110% / 120% / 170% of normal; Havoc: Ruin DMG 105% / 115% / 160% |
| Mutual Weapons Mentorship | Skirk, Utility Passive | Every party member is Hydro or Cryo, with at least one of each | Every party member's Elemental Skill level +1 |
| Inspiration-Immersed Seasoning | Escoffier, 4th Ascension Passive | 1 / 2 / 3 / 4 Hydro or Cryo characters in the party | Enemies hit by her Skill or Burst lose 5% / 10% / 15% / 55% Hydro and Cryo RES for 12s |
| Pre-Dinner Dance for Your Taste Buds | Escoffier, Constellation 1 | 4 Hydro or Cryo party members | Party Cryo CRIT DMG +60% for 15s after her Skill or Burst |
Read the last column top to bottom. Death's Crossing jumps from 120% to 170% on the third stack, Escoffier's shred jumps from 15% to 55% on the fourth Hydro or Cryo character, and Mentorship and Escoffier's Constellation 1 are all-or-nothing.
Here is what one off-element flex slot costs, with Skirk, Escoffier and one more Hydro or Cryo teammate left in the party and Escoffier's shred on the target:
- Death's Crossing: 2 stacks instead of 3, so 120% instead of 170%. That is × 0.706.
- Escoffier's shred: 15% instead of 55%. Against an enemy with 10% base Cryo RES that leaves −5% RES, a multiplier of 1.025, instead of −45% and 1.225, by the negative-RES rule in our damage formula guide. That is × 0.837.
- Mentorship: her Skill drops a level. At level 10 instead of 11 the Seven-Phase Flash 1-hit is 262.56% instead of 281.09%. That is × 0.934.
Multiply the three and her Seven-Phase Flash Normal Attacks land at about 55% of the all-Hydro-and-Cryo version, before counting whatever the fourth character brings with them. That is the bar any flex pick has to clear.
Talent Priority: Skill First for the On-Field Style
The trap is in the names. Her Normal Attack talent, Havoc: Sunder, only scales the attacks she makes outside Seven-Phase Flash. Every Seven-Phase Flash hit is scaled by her Elemental Skill talent, Havoc: Warp.
| Talent | What it scales | Value at Lv. 10 |
|---|---|---|
| Elemental Skill (Havoc: Warp) | Seven-Phase Flash 5-hit string | 262.56% / 236.81% / 149.69% × 2 / 159.2% × 2 / 388.68% — 1,505.83% in total |
| Elemental Skill (Havoc: Warp) | Seven-Phase Flash Charged Attack | 88.06% × 3 |
| Elemental Burst (Havoc: Ruin) | Five slashes and a final slash | 220.97% × 5 + 368.28% = 1,473.13%, plus 34.78% ATK per Serpent's Subtlety point above 50, up to 12 points |
| Elemental Burst (Havoc: Extinction) | All Shall Wither on her next 10 Normal Attack hits | Void Rift Absorption DMG Bonus of 8% / 12% / 16% / 20% for 0 / 1 / 2 / 3 rifts absorbed |
| Normal Attack (Havoc: Sunder) | Her plain 5-hit string, outside the mode | 107.78% / 98.43% / 64.09% × 2 / 120.19% / 163.88% — 618.46% in total |
Same five swings, two talents: at level 10 the Seven-Phase Flash string carries 2.4 times the plain one. Normal Attack goes last.
Skill versus Burst depends on which of her two styles you play, and HoYoverse's own 5.7 notes describe her as performing "well both on-field and in quick-swap rotations":
- On-field (Tap, then Normal Attacks): the Skill talent scales almost everything she does, and the Burst talent only scales the All Shall Wither bonus. Skill first. Mentorship's free level lands on this talent too.
- Quick-swap (Hold, then Havoc: Ruin): the Burst talent scales the hit you came for. Burst first.
Her constellations will not settle it for you the way they did in our Vesna and Flins guides. Constellation 3 raises her Burst and Constellation 5 her Skill, so the "C3 marks the main talent" rule of thumb points at the quick-swap style and misreads the on-field one.
Ascension and Talent Materials: Natlan, Fontaine and Mondstadt
| Requirement | What she needs | Where it comes from |
|---|---|---|
| Boss drop | 46 Ensnaring Gaze | Tenebrous Papilla, Quahuacan Cliff, Natlan — a normal boss, 40 Original Resin a claim, drops from boss level 30 |
| Ascension gems | 1 Sliver, 9 Fragments, 9 Chunks, 6 Gemstones of Shivada Jade | Not her own boss: the Tenebrous Papilla pays Agnidus Agate, Vajrada Amethyst and Vayuda Turquoise. 13 normal bosses drop Shivada Jade Gemstones, including the Cryo Regisvine, the Cryo Hypostasis and Snezhnaya's Guardian Blade of Drifting Snow |
| Local specialty | 168 Skysplit Gembloom | Atocpan, Natlan |
| Common drops | 18 / 30 / 36 Meshing Gear, Mechanical Spur Gear and Artificed Dynamic Gear for ascension, plus 18 / 66 / 93 for three talents | Clockwork Meka in Fontaine, or Maintenance Meks converted at Alchemy |
| Talent books | 9 Teachings, 63 Guides, 114 Philosophies of Contention | Blazing Ruins, Coatepec Mountain, Natlan — Monday, Thursday and Sunday |
| Weekly boss drop | 18 Ascended Sample: Knight | Ascended King / Sublimated Queen, Unresolved Chess Game, Falcon Coast, Mondstadt |
| Crowns | 3 Crowns of Insight | One per talent taken to 10 |
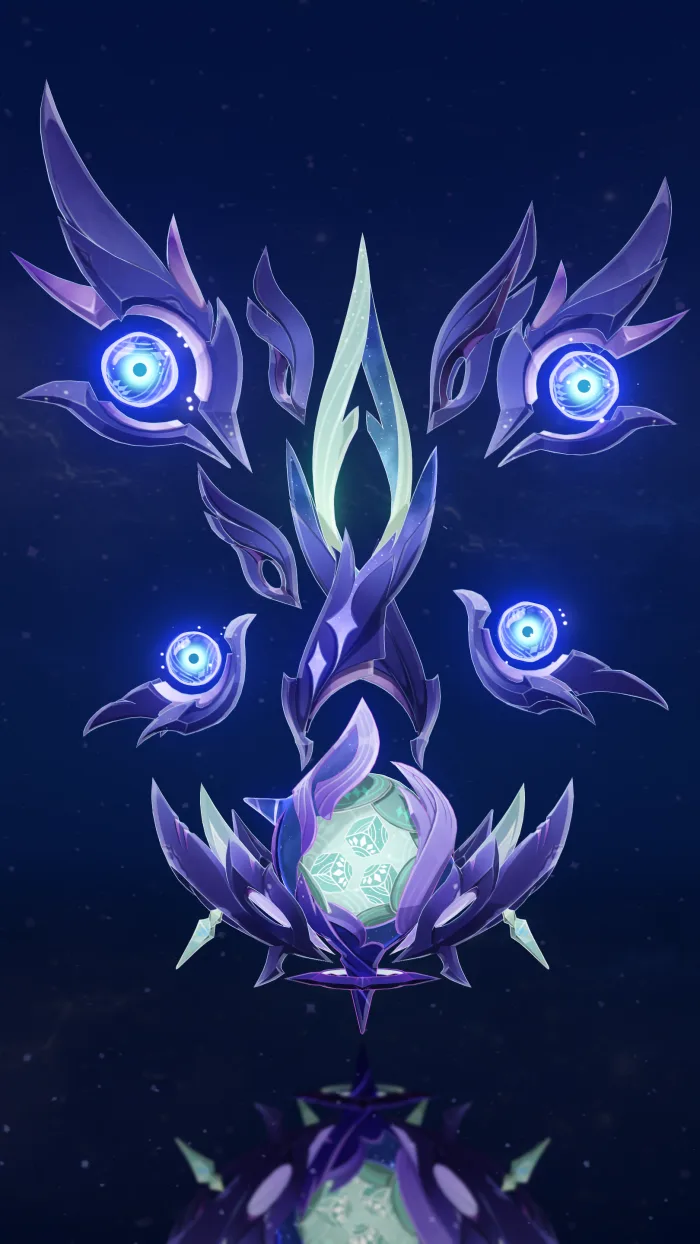
Three things to plan around.
Her boss does not pay her gem. It is the same trap our Vesna guide found in Snezhnaya, pointed the other way: the Guardian Blade of Drifting Snow drops Vesna's Vagabond's Cracked Armor but pays Shivada Jade, so if you are already farming it for Vesna, the gems are Skirk's. The Tenebrous Papilla itself is an odd fight. The wiki records three variants that mimic the attacks of other normal bosses, and it swaps variant every time it respawns.
Her weekly boss checks the reaction her team runs on. The Unresolved Chess Game opens after the Archon Quest "The Gardener" in Interlude Chapter: Act IV, and its second phase asks you to "continuously trigger Frozen" to stop the Ascended King and Sublimated Queen charging a Lethal Blow. Talent materials only drop from boss level 70, and the full claim rules are in our weekly boss guide. Ascended Sample: Knight has three users — Jahoda, Lohen and Skirk — and a Dream Solvent converts the Rook or Queen samples from the same boss into it.
The Mora is the standard bill. 420,000 for ascension plus 1,652,500 per talent taken to 10 comes to 5,377,500 Mora for a fully built Skirk, the same template our Snezhnaya farming guide worked through for the 7.0 characters.
Weapon: Azurelight and the 0 Energy Clause
| Weapon | Source | Base ATK (Lv. 90) | Secondary stat | What the passive does for her (R1 → R5) |
|---|---|---|---|---|
| Azurelight | 5-star, Epitome Invocation | 674 | CRIT Rate 22.1% | For 12s after an Elemental Skill: ATK +24% → +48%. With 0 Energy during that window: a further ATK +24% → +48% and CRIT DMG +40% → +80% |
| The Black Sword | 4-star, Battle Pass (Gnostic Hymn) | 510 | CRIT Rate 27.6% | Normal and Charged Attack DMG +20% → +40%; a Normal or Charged Attack CRIT heals 60% → 100% of ATK, once every 5s |
| Finale of the Deep | 4-star, forgeable (diagram sold by Estelle) | 565 | ATK 27.6% | On Elemental Skill: ATK +12% → +24% for 15s plus a Bond of Life worth 25% Max HP; clearing the Bond grants ATK equal to 2.4% → 4.8% of it, capped at 150 → 300 |
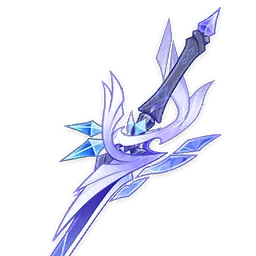
Azurelight has two clauses, and her kit meets both without trying. The 12-second window after a Skill matches a Seven-Phase Flash mode that lasts 12.5 seconds at most. The 0 Energy clause reads the wearer's Elemental Energy, and Skirk is the character HoYoverse describes as forgoing that system; the wiki's page for her banner series calls Azurelight "tailored to Skirk's gameplay mechanics." At R1, inside the window, that is +48% ATK and +40% CRIT DMG on top of 674 base ATK and a 22.1% CRIT Rate secondary. The wiki's Azurelight page lists two weapon-banner runs, both beside a Void Star's Advent wish: June 2025 and March 2026. Whether it joins the 7.1 Phase 2 weapon banner had not been announced as of October 2.
The Black Sword is the Battle Pass option, and it fits because her Seven-Phase Flash hits are Normal Attacks — her own 4th Ascension Passive buffs them as "the Normal Attack DMG dealt by Skirk in Seven-Phase Flash mode." A flat 20% on the hits she lives on, plus a CRIT Rate secondary, makes it the cleanest 4-star read of her kit, if you bought that Battle Pass.
Finale of the Deep is the no-spend answer: an ATK% stat stick with a 12% ATK buff when she uses her Skill, once every 10 seconds. The Bond of Life half needs healing to clear, and Escoffier supplies it — her 1st Ascension Passive heals the active character every second for 9 seconds after her Burst. With Skirk's 12,417 base HP at level 90 and a 4,780 HP Flower, the Bond is about 4,300 HP, so clearing it is worth roughly 100 ATK at R1, under the 150 cap.
Artifacts: Finale of the Deep Galleries
| Set | 2-piece | 4-piece | Where it drops |
|---|---|---|---|
| Finale of the Deep Galleries | Cryo DMG Bonus +15% | With 0 Elemental Energy: Normal Attack DMG +60% and Elemental Burst DMG +60%. Dealing Normal Attack DMG switches the Burst half off for 6s; dealing Burst DMG switches the Normal Attack half off for 6s. Works off-field | Derelict Masonry Dock, Atocpan, Natlan |
| Blizzard Strayer | Cryo DMG Bonus +15% | CRIT Rate +20% against Cryo-affected enemies, a further +20% against Frozen ones (not on the hit that applies Frozen) | Peak of Vindagnyr, Dragonspine, Mondstadt |

Finale of the Deep Galleries shipped in Version 5.5, two versions before Skirk, and its four-piece runs on the same 0 Energy condition as Azurelight. The wiki even notes that the feather in Skirk's hair closely resembles the set's plume, Deep Gallery's Distant Pact. Its two halves map onto her two styles: Seven-Phase Flash strings live on the Normal Attack half, and a Havoc: Ruin cast from the Hold dash gets the Burst half — as long as no Normal Attack DMG landed in the six seconds before it. The domain sits in Atocpan, the same Natlan region as her local specialty, so one trip covers both.
Blizzard Strayer is the set built for the reaction her team runs on. Both sets share the same 15% Cryo two-piece, so two of each gives 30% Cryo DMG Bonus while your four-piece Finale is still rolling. General rules for farming a set without burning out are in our artifact guide.
Main Stats, and Why Energy Recharge Does Nothing
- Sands: ATK%. All three of her combat talents scale on ATK.
- Goblet: Cryo DMG%.
- Circlet: CRIT Rate or CRIT DMG, balanced against her 38.4% CRIT DMG ascension stat and her weapon. Azurelight brings 22.1% CRIT Rate plus up to 40% CRIT DMG at R1; Blizzard Strayer brings up to 40% CRIT Rate against Frozen targets.
- Energy Recharge: skip it on her. Serpent's Subtlety only comes from her Skill and from Void Rifts, so Energy Recharge does nothing for her own Burst. It is a stat for her teammates.
Constellations: C2 Changes the Clock, C6 Is the Ceiling
| Con. | Name | Effect |
|---|---|---|
| C1 | Far to Fall | Every Void Rift absorbed summons a crystal blade for 500% ATK Cryo DMG, counted as Charged Attack DMG |
| C2 | Into the Abyss | +10 Serpent's Subtlety on Skill use; Havoc: Ruin counts up to 10 more points above 50; ATK +70% for 12.5s after Havoc: Extinction, until she leaves Seven-Phase Flash |
| C3 | Serendipitous Sin | Havoc: Ruin +3 levels (max 15) |
| C4 | Fractured Flow | Each Death's Crossing stack also raises her ATK: 10% / 20% / 40% |
| C5 | End of Wishes | Havoc: Warp +3 levels (max 15) |
| C6 | To the Source | Each absorbed Void Rift grants a Havoc: Sever stack (max 3, 15s). Havoc: Ruin spends them all for 750% ATK each as Burst DMG; the 3rd or 5th Seven-Phase Flash hit spends one for 3 × 180% ATK as Normal Attack DMG; taking a hit in the mode spends one to cut that damage by 80% and strike back for 3 × 180% |
C2 is the one that changes how she plays. A tap now starts at 55 Serpent's Subtlety, which stretches a rift-free Seven-Phase Flash from 6.75 to 8.25 seconds; a Hold reaches the 50 Havoc: Ruin needs without a single rift; and the 70% ATK after Havoc: Extinction runs for the rest of the mode. C4 doubles down on the team rule — at three Death's Crossing stacks it adds 40% ATK, at two only 20%, so the fourth Hydro-or-Cryo slot is worth even more. C6 is the ceiling: every rift becomes a stored coordinated attack on top of its Serpent's Subtlety.
Team Comp: Escoffier and Two More
Three requirements fall straight out of the kit:
- Every slot Hydro or Cryo, with at least one Hydro. That is the condition for Mentorship, for three Death's Crossing stacks and for Escoffier's 55%.
- A Hydro character who hits often. Of the four reactions that open a Void Rift, Superconduct needs Electro, Cryo Swirl needs Anemo and Cryo Crystallize needs Geo. In an all-Hydro-and-Cryo party that leaves Frozen, so the Hydro applications are her Serpent's Subtlety supply.
- Escoffier, if you can get her. HoYoverse's 5.6 notes describe her as a support who reduces Hydro and Cryo RES, heals, and deals Cryo DMG off-field. Her shred is one of the three multipliers in the arithmetic above, her Burst heals the whole party, and she is on the same Phase 2 as Skirk.
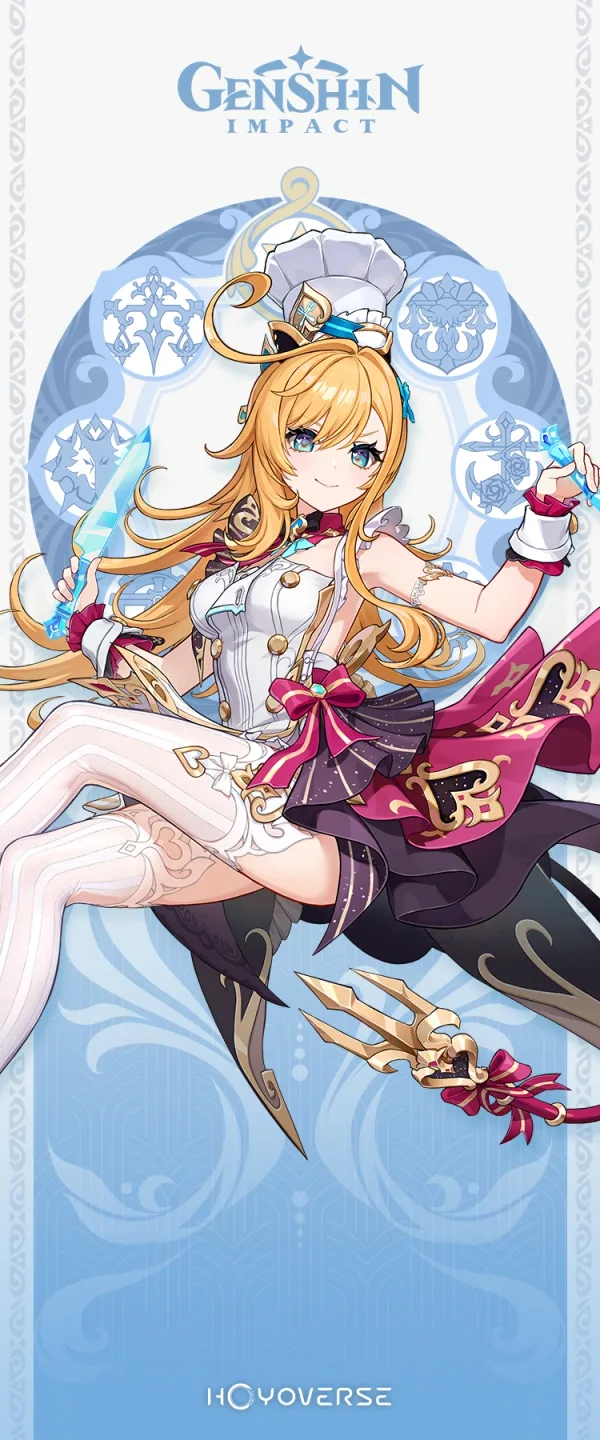
For the other two slots, apply the Death's Crossing rule — any Hydro or Cryo teammate who lands hits of their own element is a stack — and look at what is cheap to get right now:
- The 6th-anniversary selectors, open until 14:59 server time on November 3, 2026, include Mona (Hydro) and Qiqi (Cryo) on the standard list and Tartaglia and Nilou (both Hydro) on the limited one. Tartaglia was Skirk's pupil in the Abyss, per the wiki. Our anniversary selector guide covers what each invitation actually includes.
- Diona and Chongyun, both Cryo 4-stars, are on rate-up on the Phase 1 banners until October 13.
- Her past banners: the 4-stars featured with Skirk on her two previous runs were Dahlia, Candace and Diona in 5.7, and Dahlia, Candace and Charlotte in Luna V. Dahlia and Candace are Hydro, Diona and Charlotte are Cryo. Phase 2's 4-stars have not been announced.
The Stellar Question Her Passive Does Not Answer
Reason Beyond Reason names Frozen, Superconduct, Cryo Swirl and Cryo Crystallize, and the wiki's change history shows no edit to her kit text since 5.7, only Talent Demo wording. Since then, Sandrone, Odette, the Cryo Traveler and Vesna have arrived with passives that turn Cryo Swirl into Stellar Swirl, and the first three also turn Superconduct into Stellar-Conduct, per our Lunar reactions guide and Vesna guide. Neither the wiki nor HoYoverse's notes say whether a converted reaction still opens a Void Rift. The all-Hydro-and-Cryo team runs on Frozen, which none of those enablers convert, so this only matters if you break the team rule — and if you do, test it in-game before building around it.
Where Version 7.1 Lines Up for Her
HoYoverse's 7.1 update notes publish the endgame calendar in advance:
| Date | Mode | What is scheduled | What it means for Skirk |
|---|---|---|---|
| Open since October 1, 2026 | Imaginarium Theater | Required elements: Hydro, Cryo and Anemo | Eligible, and so is an all-Hydro-and-Cryo team around her |
| October 16, 2026 | Spiral Abyss | Floor 11: 60% Cryo DMG Bonus and 60% Anemo DMG Bonus. Floor 12 second half: 75% Cryo DMG Bonus. Blessing "Stardread Moon": triggering Frozen, Shatter, Superconduct, Stellar-Conduct, Cryo Swirl or Stellar Swirl releases a True DMG shockwave, once every 2s | Cryo DMG Bonus on Floor 11 and Floor 12's second half, and her team's Frozen triggers the blessing |
| November 1, 2026 | Imaginarium Theater | Required elements: Hydro, Electro and Geo. Special Guest Stars: Qiqi, Odette, Vesna and Jahoda | Not eligible: Cryo is not a required element and she is not a guest star |
The Abyss date lands three days after Phase 1 closes. How the Moon Spire pays out is in our Spiral Abyss guide, and the Theater's rules are in our Imaginarium Theater guide.
More Genshin coverage lives on the Genshin Impact coverage hub, and the rest of our game guides are on the Mythras blog.
Quick Action Checklist
- Skirk's Event Wish, "Void Star's Advent," is listed for 7.1 Phase 2 alongside Escoffier's "La Chanson Cerise." Phase 1 ends at 17:59 server time on October 13, 2026; Phase 2 dates are not published yet.
- Build the whole team out of Hydro and Cryo characters, with at least one Hydro: that switches on Mentorship (+1 Skill level for everyone), three Death's Crossing stacks (170% Seven-Phase Flash Normal Attack DMG) and Escoffier's 55% Hydro and Cryo RES shred. With Escoffier in the party, one off-element slot leaves her Seven-Phase Flash hits at about 55%.
- A bare tap gives 6.75 seconds of Seven-Phase Flash. Each absorbed Void Rift adds 1.2 seconds, and Frozen is the rift trigger an all-Hydro-and-Cryo team produces.
- Level her Elemental Skill first if you play her on-field, because it scales every Seven-Phase Flash hit. Level the Burst first for the Hold-then-Havoc: Ruin quick-swap style. Normal Attack goes last either way.
- Farm Natlan for Ensnaring Gaze (Tenebrous Papilla), Skysplit Gembloom (Atocpan), Contention books (Blazing Ruins, Mon/Thu/Sun) and Finale of the Deep Galleries (Derelict Masonry Dock). Gears come from Fontaine's Clockwork Meka, and 18 Ascended Sample: Knight from the Unresolved Chess Game in Mondstadt.
- Her boss drops no Shivada Jade. The wiki lists 13 normal bosses that drop its Gemstones, including the Guardian Blade of Drifting Snow that Vesna players already farm.
- Azurelight is her signature sword; both of its clauses fit her kit. The Black Sword (Battle Pass) and the forgeable Finale of the Deep are the 4-star options.
- Wear 4-piece Finale of the Deep Galleries with an ATK% Sands, a Cryo DMG Goblet and a CRIT Circlet. Skip Energy Recharge on her.
- C2 is the constellation that changes her rotation; C6 is the ceiling.
- She fits the Imaginarium Theater season open since October 1 and the October 16 Abyss, with its Cryo DMG Bonuses and a blessing that fires on Frozen. She cannot enter the November 1 Theater season.
Frequently Asked Questions
What talent should you level first for Skirk in Genshin Impact?
What team does Skirk need in Genshin Impact?
What is Skirk's best weapon in Genshin Impact?
What artifacts should Skirk use?
What materials does Skirk need to ascend?
When does Skirk rerun in Genshin Impact 7.1?
Keep Reading
- HoYoverse — "A Rekviem for the Underworld" Version 7.1 Update Details: the October 1 and November 1 Imaginarium Theater seasons and the October 16 Spiral Abyss Ley Line Disorders and Stardread Moon blessing
- HoYoverse — Version 7.1 Event Wishes Notice, Phase I: banner end time of 2026/10/13 17:59 and the Diona, Faruzan and Chongyun 4-star rate-up
- HoYoverse — "A Space and Time for You" Version 5.7 Update Details: Skirk as a flexible Cryo DPS for on-field and quick-swap play, and the Azurelight passive
- PlayStation Blog (post by HoYoverse) — Genshin Impact Version 5.7 arrives with Skirk: Serpent's Subtlety in place of Elemental Energy, Void Rifts and the Hydro/Cryo team bonus
- HoYoverse — "Paralogism" Version 5.6 Update Details: Escoffier's role as a Hydro and Cryo RES-shred, healing, off-field Cryo support
- HoYoverse — "Day of the Flame's Return" Version 5.5 Update Details: Finale of the Deep Galleries set text and the Derelict Masonry Dock domain
- Genshin Impact Wiki — Skirk: ascension stats and materials, full talent tables, passives, constellations, particle generation, banner history and change history
- Genshin Impact Wiki — Havoc: Warp: Skirk's Elemental Skill, Seven-Phase Flash scaling and the 6.667-per-second Serpent's Subtlety drain
- Genshin Impact Wiki — Havoc: Ruin: Skirk's Elemental Burst, Havoc: Extinction and the All Shall Wither bonus
- Genshin Impact Wiki — Reason Beyond Reason: Skirk's 1st Ascension Passive and the four Void Rift reactions
- Genshin Impact Wiki — Return to Oblivion: Skirk's 4th Ascension Passive and Death's Crossing
- Genshin Impact Wiki — Mutual Weapons Mentorship: Skirk's Utility Passive raising party Elemental Skill levels
- Genshin Impact Wiki — Elemental Burst: Havoc: Ruin and Hour of Burning Skies as the two Bursts that do not use Energy
- Genshin Impact Wiki — Escoffier: Inspiration-Immersed Seasoning, Better to Salivate Than Medicate and Constellation 1
- Genshin Impact Wiki — Void Star's Advent/7.1: Skirk's Phase 2 Event Wish alongside La Chanson Cerise, dates TBA
- Genshin Impact Wiki — Void Star's Advent: wish history and Azurelight described as tailored to Skirk's gameplay mechanics
- Genshin Impact Wiki — Azurelight: base stats, Whitehill's Bestowal at R1-R5, and its June 2025 and March 2026 Epitome Invocation runs
- Genshin Impact Wiki — The Black Sword: Battle Pass source, base stats and Justice at R1-R5
- Genshin Impact Wiki — Finale of the Deep: forging diagram, base stats and An End Sublime at R1-R5
- Genshin Impact Wiki — Bond of Life: cleared once healing equal to its value is received
- Genshin Impact Wiki — Finale of the Deep Galleries: set bonuses, domain and the Deep Gallery's Distant Pact trivia
- Genshin Impact Wiki — Blizzard Strayer: set bonuses and the note that the 4-piece does not apply on the hit that applies Frozen
- Genshin Impact Wiki — Derelict Masonry Dock: Atocpan location and artifact sets
- Genshin Impact Wiki — Tenebrous Papilla: Quahuacan Cliff location, Ensnaring Gaze and gem drops, and its mimicry variants
- Genshin Impact Wiki — Shivada Jade Gemstone: the 13 normal bosses and 6 weekly bosses that drop it
- Genshin Impact Wiki — Skysplit Gembloom: Atocpan local specialty
- Genshin Impact Wiki — Meshing Gear: Clockwork Meka drop and Maintenance Mek conversion
- Genshin Impact Wiki — Blazing Ruins: Coatepec Mountain location and the Monday/Thursday/Sunday Contention rotation
- Genshin Impact Wiki — Unresolved Chess Game: Falcon Coast location, unlock quest, Frozen-based Ley Line Disorder and reward table
- Genshin Impact Wiki — Ascended Sample: Knight: Dream Solvent conversions and its three users
- Genshin Impact Wiki — Stellar Swirl: Sandrone, Odette and the Cryo Traveler converting Superconduct and Cryo Swirl
- Genshin Impact Wiki — Splendid Prelude: Vesna's passive converting party Cryo Swirl into Stellar Swirl
- Genshin Impact Wiki — Damage: the piecewise RES multiplier used for the shred arithmetic
- Genshin Impact Wiki — Across the Frozen Wilds, Honing One's Edge: the standard anniversary selector and its end time
- Genshin Impact Wiki — Tabletop Troupe: A Gathering on Adventure's Eve: the limited anniversary selector and its six characters
Related Guides

Genshin Escoffier Build Guide — Talents, Weapon, Artifacts
Nothing you equip on Escoffier changes her 55% Hydro and Cryo RES shred: it reads your party, not her stats. Her build decides everything else — how hard her Cooking Mek hits, how much she heals, and whether her Burst comes back on time.

Genshin Vesna Build Guide — Talents, Weapon, Artifacts
Vesna's biggest hits change damage formulas depending on whether a Stellar Swirl went off in the last eight seconds. Build her like an ordinary Anemo carry and you are optimising the half of her kit that does the least.

Genshin Vodyanitsa Build Guide — Talents, Weapon, Artifacts
Vodyanitsa's signature ascension passive does precisely nothing below 40,000 Max HP, and both halves of its bonus cap out at exactly 65,000 — a target most support builds never plan a single roll around.
Genshin Flins Build Guide — Talents, Weapon, Artifacts
Flins does not poke a shield and walk away. His whole kit is a two-stage transformation that turns his own Elemental Skill and Burst into direct Lunar-Charged hits, which means the stat priorities and artifact math for a normal Electro DPS do not apply to him. Here is what actually moves his damage, talent by talent.
Genshin Artifact Guide — Stats, Rolls and Resin Math
A five-star artifact can roll the exact same substat four times and give you anywhere from 10.88 percent to 15.54 percent CRIT DMG. Understanding that spread is the difference between a functional account and a museum of half-built characters.
Best F2P Teams in Genshin Impact — Four-Star Squads That Clear
Xiangling costs one Spiral Abyss clear. Xingqiu costs nothing but a Beginners' Wish. Bennett is on the standard banner forever. Put those three together and you have a team that has been clearing endgame content since 2020 and still does.