Genshin Odette Build Guide — Talents, Weapon, Artifacts
The hit that ends Odette's dance duet is 550.37% of her ATK as Stellar-Conduct DMG or 825.55% as Stellar Swirl DMG at talent level 10. Which one you get depends on the teammate beside her, and that choice decides her weapon, her artifacts and her team.

Why Odette Needs Her Own Guide
At talent level 10, the hit that ends Odette's dance duet is worth 550.37% of her ATK as Stellar-Conduct DMG, or 825.55% as Stellar Swirl DMG. Same button, same talent level. What decides which one you get is the teammate standing beside her.
That is the build question this site has not answered yet. Odette turns up across our Genshin coverage as a name on the Stellar enabler list, as the owner of the farm route Vodyanitsa copies and as a Special Guest Star, but never with a guide of her own. HoYoverse's Version 7.0 update notes describe her as a support who enables both Stellar-Conduct and Stellar Swirl, deals Stellar Glimmer DMG continuously from off-field, provides consistent Cryo application and increases the party's Stellar Glimmer DMG. All four are true, and together they pull her gear away from what an ordinary Cryo off-fielder wears.
What Her Kit Actually Does
Her Elemental Skill, Adagio: Phantom Night Dancers, deals AoE Cryo DMG and summons her Solo Dance Double for 20 seconds, on a 15-second cooldown. The double alternates two dance moves, Plume and Wing, performing one every 2 seconds, each dealing AoE Cryo DMG. Only one double can be out at a time, and casting again re-summons it with a fresh timer.
For 6 seconds after the Skill, the button becomes the special Skill Adagio: Coda at Dawn's Tolling. It is a dance duet that deals three instances of AoE Cryo DMG, then a finisher that is always reaction damage: Stellar-Conduct DMG by default, or Stellar Swirl DMG while she is in Radiance: Stellar Swirl. After a Coda, if she is in either Radiance state while the double is still out, each Plume and Wing move adds an extra hit of the matching Stellar type.
Her Elemental Burst, Presto: Bluebird Finale, costs 60 Energy on a 15-second cooldown. It slashes three times and finishes with a fourth hit, summons or recalls the double with its duration refreshed, and opens the Coda window for 6 seconds. It also grants Snow Swan's Dream, which raises the Stellar Glimmer reaction DMG Odette deals by 50% for 20 seconds at talent level 10 (14% at level 1).
Three passives shape the build:
- Spring Rite of the Chosen One (1st Ascension). Summoning the double gives her 4 stacks of Marvelous Splendor, each worth 15% Stellar Glimmer DMG. Off-field she loses one stack a second, and the other nearby party members gain the same number at the same moment. The stacks last until the double leaves or she summons a new one. This is her biggest party buff: four seconds after she swaps out, the rest of the team holds 4 stacks, +60% Stellar Glimmer DMG.
- Pathetique of Pateticheskaya (4th Ascension). For every 100 ATK she has over 1,000, her Stellar Glimmer DMG gains 1.5% of its original value, up to 30%, which lands at 3,000 ATK. The wiki notes that it raises the base DMG multiplier directly and only applies to Stellar Glimmer DMG she deals herself.
- Dance of Aurore (Stellar Jubilee). Party Superconduct becomes Stellar-Conduct and party Cryo Swirl becomes Stellar Swirl, and the Base DMG of both rises 0.7% per 100 of her ATK, up to 14% at 2,000 ATK. She enters Radiance: Stellar-Conduct while inside a Polestar Field, or Radiance: Stellar Swirl for 8 seconds after a nearby party member triggers Stellar Swirl.
That last passive is the difference between her and Vesna, the other Stellar enabler we have built: Vesna's passive names Cryo Swirl only, per our Vesna build guide, while Odette converts both halves of the Stellar family. Her utility passive shows Snezhnaya's local specialties on the mini-map and has no bearing on the build.
Two Damage Formulas in One Kit
Odette deals two kinds of damage. Her plain Cryo hits are the Skill cast, Coda's three DoT hits, the double's dance moves and the Burst. Her Stellar Glimmer hits are Coda's finisher, the dance-move add-ons and her Constellation 1 and 4 extras. The wiki's Damage page gives directly dealt Stellar Glimmer DMG its own formula:
| Bracket | Plain Cryo hit | Stellar Glimmer hit |
|---|---|---|
| Talent % × ATK | Yes | Yes, times a base reaction coefficient: 1 for Stellar Swirl, 1 to 2 for Stellar-Conduct |
| Her 4th Ascension Passive (ATK over 1,000) | No | Yes, up to +30% on the base multiplier |
| Stellar Jubilee Base DMG Bonus (up to 14%) | No | Yes |
| DMG Bonus (Cryo goblet, a Polestar Field's Cryo bonus) | Yes | No |
| Enemy DEF multiplier | Yes | No |
| Elemental Mastery bonus plus reaction bonuses (Snow Swan's Dream, Marvelous Splendor, Heart of the Furnace) | No | Yes, all added into one sum |
| Enemy Cryo RES | Yes | Yes: her Stellar hits are Cryo DMG |
| CRIT Rate and CRIT DMG | Yes | Yes |
| Elevation (her Constellation 6) | No | Yes |
Two rows decide most of her build. The first is DEF: against a same-level enemy the DEF multiplier is 0.5, as our damage formula guide works through, so a Stellar hit that skips it is doubled before anything else is counted. The second is the reaction-bonus sum. Her own kit and her best artifact set already fill it. Off the field, after her stacks have moved to the team, Snow Swan's Dream and a Heart of the Furnace still put 100% into that sum, so it reads 2.0 before any Elemental Mastery. 100 EM is a 28.6% bonus by the 6 × EM / (EM + 2000) curve, which moves 2.0 to 2.286: a 14% gain. On a character whose sum starts at 1, the same 100 EM is a 28.6% gain. ATK and CRIT sit in their own multipliers and are not diluted that way.
The rest of the Lunar and Stellar rulebook is in our Lunar reactions guide.
Stellar Swirl or Stellar-Conduct: Pick One Lane
Every Stellar hit in her kit comes in two sizes:
| Her Stellar hit | As Stellar-Conduct DMG | As Stellar Swirl DMG |
|---|---|---|
| Coda finisher (Skill Lv. 10) | 550.37% | 825.55% |
| Plume move add-on (Skill Lv. 10) | 48.64% | 72.95% |
| Wing move add-on (Skill Lv. 10) | 58.16% | 87.24% |
| Constellation 1 extra hit | 300% | 450% |
| Constellation 4 coordinated attack | 66% | 99% |
The Stellar Swirl number is 1.5 times its Stellar-Conduct twin on every row. Stellar-Conduct has a way to close that gap. The wiki's Stellar-Conduct page says a triggered Stellar-Conduct creates a Starlight Prism that holds a Polestar Field for 7 seconds. Every 4 seconds, the field counts the Cryo and Electro hits that applied an element inside it and raises Stellar-Conduct's base reaction coefficient from 1 to 1.45 for one recorded hit, plus 0.05 for each further hit, up to 2.0 at twelve. Direct Stellar Swirl DMG stays at a coefficient of 1.
So the break-even is two recorded hits: 550.37% × 1.5 is 825.55%. A field that records three or more hits in its 4-second window makes her Stellar-Conduct hits the bigger ones. With no field, or a field that records nothing, they stay at the smaller number.
The rest of what each lane brings:
- Stellar-Conduct. Characters inside a Polestar Field get +20% Cryo and Electro DMG Bonus, rising to between 29% and 40% once hits are recorded, and enemies inside it lose 40% Physical RES. Neither reaches her Stellar hits: the first is DMG Bonus, which only her plain Cryo hits use, and she deals no Physical DMG worth shredding.
- Stellar Swirl. Radiance: Stellar Swirl lasts 8 seconds after a nearby Stellar Swirl. Outside that window, her finisher falls back to Stellar-Conduct DMG, so cast Coda while the swirls are still landing.
Do not try to run both. The wiki's note on Radiance: Stellar Glimmer says a character can only hold one Radiance state at a time, and Radiance: Stellar-Conduct applies first when both could trigger. In a team with Electro and Anemo both reacting with her Cryo, standing in a Polestar Field puts her on the Stellar-Conduct column.
Talent Priority: Skill First, Burst for the Bonus
| Talent | Hit | Value at Lv. 10 |
|---|---|---|
| Elemental Skill | Skill DMG, then Coda's three DoT hits (plain Cryo) | 194.54%, then 172.51% × 3 |
| Elemental Skill | Coda finisher | 550.37% Stellar-Conduct / 825.55% Stellar Swirl |
| Elemental Skill | Plume / Wing dance moves (plain Cryo, one every 2s for 20s) | 77.47% / 92.64% |
| Elemental Skill | Plume / Wing Stellar add-ons, after a Coda while she is in Radiance | 48.64% or 72.95% / 58.16% or 87.24% |
| Elemental Burst | Three slashes and a final slash (plain Cryo) | 198.32% × 3, then 306.49%; 60 Energy, 15s cooldown |
| Elemental Burst | Snow Swan's Dream, her Stellar Glimmer reaction DMG for 20s | +50% (14% at Lv. 1) |
Level the Elemental Skill first. Every Stellar Glimmer hit she deals at constellation 0 comes from it, and taking it from level 1 to 10 multiplies all of them by 1.8: the Swirl finisher goes from 458.64% to 825.55%. The Burst comes second, for Snow Swan's Dream, which climbs from 14% to 50% across the same ten levels. Normal Attack is last; HoYoverse describes her as a support who deals her damage from off-field, and nothing in her kit is attached to her basic attacks. Her constellations agree with the order: Constellation 3 raises the Skill by three levels, Constellation 5 the Burst.
Her Energy sources are her Skill and Coda (5 particles when the Skill DMG or Coda's DoT hits, at most once every 12 seconds, per the wiki) and, with her signature sword at 3 Lake-Hued Lament stacks, 4 Energy from Stellar Glimmer triggers or DMG once every 3.5 seconds. How much Energy Recharge that leaves you needing depends on the team, so size it in your own rotation with the method in our Energy Recharge guide.
Ascension and Talent Materials: Everfrozen Earth, Fellfrost Peak, Sumeru
| Requirement | What she needs | Where it comes from |
|---|---|---|
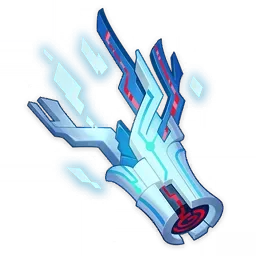
| Boss drop | 46 Unscorched Blossom Branch | Immortal Construct, Everfrozen Earth: a normal boss, 40 Original Resin a claim, boss level 30+ |
| Ascension gems | 1 Sliver, 9 Fragments, 9 Chunks, 6 Gemstones of Shivada Jade | Not her own boss. The Guardian Blade of Drifting Snow in Fellfrost Peak drops Shivada Jade |
| Local specialty | 168 Frostfairy Flower | Snezhnograd, the Sanctuary of Grief and Pilgrimage to the Sacred Gorge; or a Luxuriant Glebe in the Serenitea Pot (2 days 22 hours, 1 per seed) |
| Common drops | 18 / 30 / 36 Ethereal Glimmershard, Crystal and Crystalscale Stone for ascension, plus 18 / 66 / 93 for three talents | Snowland Fae |
| Talent books | 9 Teachings, 63 Guides, 114 Philosophies of Charity | Relics of the Fallen Grace, Fellfrost Peak: Monday, Thursday and Sunday |
| Weekly boss drop | 18 Twisted Withered Branch | Exalted Master of the Heretical Path (Il Dottore), Binding Field of Universal Nirvana, Chatrakam Cave, Sumeru; talent materials need boss level 70+ |
| Crowns | 3 Crowns of Insight | One per talent taken to 10 |
Three things to plan around:
- Her boss pays the wrong gem. The Immortal Construct's reward table lists Agnidus Agate, so it feeds her branches and nothing else. Shivada Jade comes from 13 normal bosses and 6 weekly bosses on the wiki's list. The closest fit for her other farms is the Guardian Blade of Drifting Snow, which shares Fellfrost Peak with Relics of the Fallen Grace, so a Monday, Thursday or Sunday trip there covers her books and her gems in one go. Il Dottore, her weekly boss, is also on that list, so his domain can pay Shivada Jade alongside her branches.
- Twisted Withered Branch is hers alone. The wiki lists Odette as its only talent user. It shares Il Dottore's drop table with Counterfeit Resin and with Profaned Sprout, which Vesna uses, and a Dream Solvent converts either of those into a branch. Our weekly boss guide has the domain unlock and the discount rules.
- The Mora bill is the standard one: 420,000 for ascension plus 1,652,500 per talent from 1 to 10, so 5,377,500 for the whole build. That matches the Snezhnayan template in our Snezhnaya farming guide.
Weapon: Whitelake Frostfeather or a Forged Emberwell
| Weapon | Source | Base ATK (Lv. 90) | Secondary stat | Passive (R1 → R5) |
|---|---|---|---|---|
| Whitelake Frostfeather | 5-star, event-exclusive; Version 7.0 Epitome Invocation, ended September 1, 2026 | 674 | CRIT Rate 22.1% | Elemental Skill hits grant Lake-Hued Lament: ATK +8% → +16% per stack for 8s, max 3. At 3 stacks: Stellar Glimmer CRIT DMG +50% → +110%, and Stellar Glimmer triggers or DMG restore 4 → 6 Energy once every 3.5s. Works off-field |
| Emberwell | 4-star, forgeable | 510 | Elemental Mastery 165 | Triggering any reaction: ATK +16% → +32%. Triggering a Stellar Glimmer reaction: Stellar Glimmer reaction DMG +16% → +32%. Both last 12s and work off-field |
| New Bough | 4-star, event-exclusive; Version 7.1 Phase I Epitome Invocation | 510 | CRIT DMG 55.1% | Hits within 12s of her Skill grant Verdant (max 3, 6s each): ATK +4% and EM +20 per stack. In Radiance: Stellar Glimmer it becomes ATK +6% and Stellar Glimmer reaction DMG +8% per stack. Every value doubles at R5 |
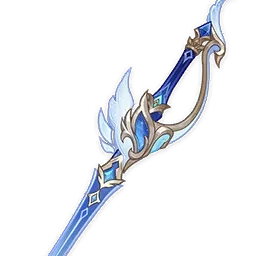
Whitelake Frostfeather was released alongside her, and every clause points at her kit. Her ascension stat is CRIT DMG, and the sword's secondary is CRIT Rate. At 3 stacks it adds a CRIT DMG bonus that only applies to Stellar Glimmer DMG, which is where her biggest hits live. The Energy refund feeds a 60-cost Burst. The stacks come from Elemental Skill hits, and Coda alone deals three Cryo DoT instances before its finisher. Neither it nor New Bough is on the Version 7.1 Phase II weapon banner, which features Azurelight and Symphonist of Scents until November 3, 2026.
Emberwell is the no-wish answer, with a catch in the word "triggering." Once you have its diagram from Kuzmichev in Snezhnograd, each copy costs 1 Borderland Sword Billet, 50 Rainbowdrop Crystal, 50 White Iron Chunk and 500 Mora, and refining it takes more forged copies, not pulls. Both halves of its passive need the wielder to trigger the reaction. In a Stellar-Conduct team, Odette's Cryo landing on an Electro-affected target triggers Stellar-Conduct, so both halves work. In a team of only Cryo and Anemo characters, her teammates' Anemo leaves nothing behind for her Cryo to react with, because Anemo attacks cannot apply an aura (per the wiki's Elemental Gauge Theory page). The Anemo character triggers the Stellar Swirls, and Emberwell's passive mostly sits idle on her. Treat it as a Stellar-Conduct-team sword.
New Bough is a CRIT DMG stick that turns into a Stellar Glimmer DMG buff in Radiance. Like Whitelake, it is event-exclusive, and its only banner so far, Version 7.1 Phase I, closed on October 13.
Artifacts: Heart of the Furnace Belongs on Her
| Set | 2-piece | 4-piece | Does it work on Odette? |
|---|---|---|---|
| Heart of the Furnace | ATK +18% | For 12s after the wearer triggers a Stellar Glimmer reaction or deals Stellar Glimmer reaction DMG: wearer ATK +12%, and Stellar Glimmer reaction DMG +50% for all nearby party members. Works off-field; the DMG bonus from two copies does not stack | Yes, in either lane |
| Scarlet Proof | ATK +18% | The wearer gains CRIT Rate +16% and Stellar Swirl DMG +40% for 10s after triggering a Stellar Swirl reaction | No: the 4-piece never switches on for her |

Heart of the Furnace's 4-piece accepts two triggers, triggering a Stellar Glimmer reaction or dealing Stellar Glimmer DMG, and Odette meets the second on every Coda. Its finisher is Stellar Glimmer DMG every time, Stellar-Conduct DMG by default even with no Radiance at all. So she switches the set on herself, in either lane, with no help from a teammate, and the set's text lets it trigger while she is off-field too. Our Vesna guide puts Heart of the Furnace on a teammate who triggers Stellar Swirl themselves, because a Cryo applier who only lays down the aura does not meet the trigger. Odette is the Cryo applier who does meet it, because she deals Stellar Glimmer DMG directly.
Scarlet Proof is the opposite case. Its 4-piece asks the wearer to trigger Stellar Swirl, which the wiki defines as Anemo landing on a Cryo-affected target. None of Odette's talents deal Anemo DMG, so the 40% and the 16% CRIT Rate never reach her. Leave the set for the Anemo carry.
One exception. If a teammate already wears Heart of the Furnace, a second copy's 50% does not stack, and a second 4-piece only adds 30% ATK to her (18% plus 12%). A 2-piece of each Snezhnaya set is 36% ATK, the better fallback. Both sets drop from Inverted Glacier in Everfrozen Earth, and HoYoverse's 7.0 notes also put them in the Domain Reliquary rewards from Spiral Abyss Floors 9 to 12. From October 26 to November 2, 2026, HoYoverse's Overflowing Favor event doubles up to three Original Resin claims a day there or at any other Domain of Blessing; our Phase II events roundup has the details, and our artifact guide covers farming in general.
Main Stats and the Two ATK Lines
- Sands: ATK%.
- Goblet: ATK% rather than Cryo DMG%. A Cryo DMG Bonus reaches only her plain hits. ATK reaches every hit she deals, her 4th Ascension bonus and the party's Dance of Aurore bonus.
- Circlet: CRIT Rate with Whitelake Frostfeather. Her base 5% plus the sword's 22.1% is 27.1% CRIT Rate before artifacts. On her Stellar hits, CRIT DMG is already 50% base, plus 38.4% from ascension, plus 50% from three Lake-Hued Lament stacks: 138.4%. A 31.1% CRIT Rate Circlet takes her to 58.2%.
- Substats: ATK%, CRIT Rate and CRIT DMG first, Elemental Mastery after them, for the bracket reason above.
Two ATK numbers matter. 2,000 ATK caps Dance of Aurore's 14% party bonus. 3,000 ATK caps her own 4th Ascension bonus at 30%, so ATK keeps paying her own Stellar hits after the party bonus stops growing.
With Whitelake Frostfeather, a level 90 Odette has 334.85 base ATK plus the sword's 674, which is 1,008.85. Add the ATK% Sands and ATK% Goblet above (46.6% each), the 18% two-piece and a 311 ATK Plume, and she sits at 1,008.85 × 2.112 + 311 = 2,442 ATK before substats, already past the party cap. Three Lake-Hued Lament stacks (+24%) take that to 2,684, which puts her 4th Ascension bonus at about 25%. With Emberwell, the same pieces reach 2,095 ATK, or 2,230 with its 16% ATK bonus active, so either sword clears 2,000 before substats and the ATK you roll on top goes toward the 3,000 cap on her own bonus.
Constellations: C1 Is Hers, C4 and C6 Are the Team's
| Con. | Effect |
|---|---|
| C1 | At the end of a Coda, an extra AoE Cryo hit: Stellar-Conduct DMG at 300% ATK, or Stellar Swirl DMG at 450% ATK in Radiance: Stellar Swirl. Summoning the double also gains her 2 stacks of Marvelous Splendor, and off-field she now sheds them at 2 per second |
| C2 | Each active Marvelous Splendor stack also raises the character's ATK by 7%. In Radiance with the double out, enemies near the double lose 20% Cryo and Electro RES (Stellar-Conduct) or Cryo and Anemo RES (Stellar Swirl) |
| C3 | Elemental Skill +3 levels (max 15) |
| C4 | Snow Swan's Dream also raises other nearby party members' Stellar Glimmer reaction DMG by 50% of its value. When a party member deals Stellar Glimmer reaction DMG, she adds a coordinated AoE Cryo hit once every 3.5s: 66% ATK as Stellar-Conduct DMG, or 99% as Stellar Swirl DMG |
| C5 | Elemental Burst +3 levels (max 15) |
| C6 | Granting Marvelous Splendor to the party no longer drains her own stacks. Characters holding Marvelous Splendor have their Stellar Glimmer reaction DMG Elevated by 25%, and hers is Elevated by a further 20% |
C1 is the one that adds damage to her own column: another Stellar hit per Coda, and in the Swirl lane it is worth more than half a level 10 finisher. C2 is the quiet one. Cryo is in both of its RES cuts, and her Stellar hits are Cryo DMG, so it raises her own numbers and the team's. C4 passes half of Snow Swan's Dream to the rest of the party: +25% Stellar Glimmer reaction DMG at Burst level 10. C6 is the ceiling. It stops the drain that normally empties her own stacks as she gives them away, and Elevation is its own multiplier, outside the bracket her other bonuses share.
Team Comp: Her Banner Already Picked the Partners
HoYoverse's wish notice for Odette's banner, "Swan's Shadow in Silken Ice," boosted three 4-stars beside her: Alyosha (Electro), Sucrose (Anemo) and Lynette (Anemo). That is one partner for each lane. She needs no second Stellar enabler, because she converts both reactions herself. Her Dance of Aurore and Vesna's Splendid Prelude both raise Stellar Swirl Base DMG, but neither passive's text nor the wiki says whether two of them add together, so plan on 14%.
The Stellar Swirl lane needs an Anemo character to do the swirling.
- Vesna is the 5-star match. She is an on-field Anemo sword DPS who cannot enter Radiance without Cryo on the target, and Odette's double puts Cryo down every 2 seconds. A 20-second double on a 15-second cooldown means the recast lands before the old one expires.
- When Odette swaps out, Vesna picks up her Marvelous Splendor stacks.
- Split the gear: Heart of the Furnace on Odette, Scarlet Proof on Vesna, who is the one triggering the swirls. Our Vesna build guide covers her side.
- Sucrose and Lynette, from Odette's own banner, are the 4-star Anemo options.
- Vodyanitsa upgrades the Stellar Vortex a swirl leaves behind; see our Vodyanitsa build guide.
The Stellar-Conduct lane needs Electro, and it is where a forged Emberwell does its full job.
- Alyosha is a 4-star Electro polearm whom the wiki tags as off-field and support. In Radiance: Stellar-Conduct, his Hunter's Precision effect also raises the Stellar-Conduct DMG of "all currently active party members" by 20%, per his wiki page.
- More Electro and Cryo hits inside the Polestar Field push the Stellar-Conduct coefficient toward 2.0.
The November 1, 2026 Imaginarium Theater season requires Hydro, Electro and Geo, per HoYoverse's Version 7.1 notes, and names Odette one of four Special Guest Stars alongside Qiqi, Vesna and Jahoda. She is exempt from the element requirement, and Electro, her Stellar-Conduct partner's element, is one of the three required ones. Guest-star rules are in our Imaginarium Theater guide.
More Genshin coverage lives on the Genshin Impact coverage hub, and the rest of our game guides are on the Mythras blog.
Quick Action Checklist
- Odette is a 5-star Cryo sword support whose Coda finisher and post-Coda dance moves deal Stellar Glimmer DMG. She converts both Superconduct and Cryo Swirl.
- Level the Elemental Skill first: it multiplies every Stellar hit she deals by 1.8 from level 1 to 10. Level the Burst second for Snow Swan's Dream (+50% at level 10) and Normal Attack last.
- Choose one lane. At Skill level 10 the finisher is 825.55% as Stellar Swirl DMG against 550.37% as Stellar-Conduct, and Stellar-Conduct only catches up once a Polestar Field records two hits.
- Don't mix Electro and Anemo if you want the Stellar Swirl numbers. Radiance: Stellar-Conduct takes priority.
- Farm the Immortal Construct (Everfrozen Earth) for Unscorched Blossom Branch and the Guardian Blade of Drifting Snow (Fellfrost Peak) for Shivada Jade. Run Charity books at Relics of the Fallen Grace on Monday, Thursday and Sunday, and Twisted Withered Branch at Il Dottore in Sumeru.
- Whitelake Frostfeather is her signature 5-star. Emberwell is the forgeable 4-star, but only in a Stellar-Conduct team, where she triggers reactions herself.
- Wear 4-piece Heart of the Furnace on her. She switches it on herself with every Coda finisher. Skip Scarlet Proof's 4-piece: she never triggers Stellar Swirl.
- Use ATK% Sands and Goblet and a CRIT Rate Circlet with Whitelake. Aim for 2,000 ATK to cap the party bonus. ATK keeps raising her own Stellar hits up to 3,000.
- Partners from her own banner: Alyosha for Stellar-Conduct, Sucrose or Lynette for Stellar Swirl. Vesna is the 5-star Anemo carry she feeds Cryo to.
Frequently Asked Questions
What talent should you level first for Odette in Genshin Impact?
What is Odette's best weapon in Genshin Impact?
What artifacts should Odette use?
Is Odette better in Stellar Swirl or Stellar-Conduct teams?
Why does Odette's Coda deal Stellar-Conduct DMG in my Anemo team?
What materials does Odette need to ascend in Genshin Impact?
Keep Reading
- HoYoverse — "Everwinter Without Mercy" Version 7.0 Update Details: Odette as a Stellar-Conduct and Stellar Swirl support with off-field Stellar Glimmer DMG and consistent Cryo application; Whitelake Frostfeather; Emberwell; Scarlet Proof and Heart of the Furnace
- HoYoverse — Version 7.0 Event Wishes Notice, Phase I: "Swan's Shadow in Silken Ice" with Alyosha, Sucrose and Lynette, and the Whitelake Frostfeather Epitome Invocation to 2026/9/1 17:59
- HoYoverse — Version 7.1 Event Wishes Notice, Phase I: New Bough on the Epitome Invocation weapon banner
- HoYoverse — Version 7.1 Event Wishes Notice, Phase II: Azurelight and Symphonist of Scents on the Epitome Invocation, to 2026/11/03 14:59
- HoYoverse — "A Rekviem for the Underworld" Version 7.1 Update Details: the November 1 Imaginarium Theater season (Hydro, Electro, Geo; Special Guest Stars Qiqi, Odette, Vesna and Jahoda)
- HoYoLAB (official) — "Overflowing Favor" Event: double Domain of Blessing rewards with Original Resin, up to 3 times a day, 2026/10/26 04:00 – 2026/11/02 03:59
- Genshin Impact Wiki — Odette: ascension stats and materials, talent tables, passives, constellations, the Radiance: Stellar Glimmer priority note, and her Event Wish history
- Genshin Impact Wiki — Adagio: Phantom Night Dancers: Coda at Dawn's Tolling, the Solo Dance Double, particle generation and dance-move timing
- Genshin Impact Wiki — Presto: Bluebird Finale: slash scaling and Snow Swan's Dream at levels 1-13
- Genshin Impact Wiki — Spring Rite of the Chosen One: Marvelous Splendor stacks and their transfer to the party
- Genshin Impact Wiki — Pathetique of Pateticheskaya: Odette's 4th Ascension Passive and its base DMG multiplier note
- Genshin Impact Wiki — Dance of Aurore: Odette's Stellar Jubilee Passive
- Genshin Impact Wiki — Damage: the shared formula for direct Lunar and Stellar Glimmer DMG, base reaction coefficients and the EM bonus curve
- Genshin Impact Wiki — Stellar-Conduct: Starlight Prism, Polestar Field buffs and the recorded-hit coefficient table
- Genshin Impact Wiki — Stellar Swirl: triggered by inflicting Anemo on a Cryo-affected target
- Genshin Impact Wiki — Elemental Gauge Theory: Anemo and Geo attacks cannot apply an aura
- Genshin Impact Wiki — Whitelake Frostfeather: base stats and Snow Swan's Finale at R1-R5
- Genshin Impact Wiki — Emberwell: forging recipe, Kuzmichev diagram and Starfire Upon the Snowplains at R1-R5
- Genshin Impact Wiki — New Bough: base stats and Wildgrowth at R1-R5
- Genshin Impact Wiki — Heart of the Furnace: set bonuses and Inverted Glacier as its source
- Genshin Impact Wiki — Scarlet Proof: set bonuses and Inverted Glacier as its source
- Genshin Impact Wiki — Unscorched Blossom Branch: Lv. 30+ Immortal Construct drop used by Odette and Vodyanitsa
- Genshin Impact Wiki — Immortal Construct: Everfrozen Earth location, 40 Original Resin claim and Agnidus Agate drops
- Genshin Impact Wiki — Shivada Jade Gemstone: the 13 normal bosses and 6 weekly bosses that drop it
- Genshin Impact Wiki — Guardian Blade of Drifting Snow: Fellfrost Peak normal boss
- Genshin Impact Wiki — Frostfairy Flower: spawn areas and Luxuriant Glebe gardening
- Genshin Impact Wiki — Ethereal Glimmershard: dropped by Snowland Fae
- Genshin Impact Wiki — Philosophies of Charity: Relics of the Fallen Grace on Monday, Thursday and Sunday
- Genshin Impact Wiki — Relics of the Fallen Grace: Fellfrost Peak, Snezhnaya
- Genshin Impact Wiki — Twisted Withered Branch: Lv. 70+ Il Dottore drop, Dream Solvent conversions, Odette as its only user
- Genshin Impact Wiki — Binding Field of Universal Nirvana: Chatrakam Cave, Lokapala Jungle, Sumeru
- Genshin Impact Wiki — Alyosha: Hunter's Precision and its Radiance: Stellar-Conduct clause
- Genshin Impact Wiki — Artifact main stat scaling: 311 ATK Plume, 46.6% ATK and 31.1% CRIT Rate at max level
- Genshin Impact Wiki — CRIT: 5% base CRIT Rate and 50% base CRIT DMG
Related Guides

Genshin Escoffier Build Guide — Talents, Weapon, Artifacts
Nothing you equip on Escoffier changes her 55% Hydro and Cryo RES shred: it reads your party, not her stats. Her build decides everything else — how hard her Cooking Mek hits, how much she heals, and whether her Burst comes back on time.

Genshin Skirk Build Guide — Talents, Weapon, Artifacts
Two effects in Skirk's kit and one in Escoffier's only reach their ceiling when all four party slots are Hydro or Cryo. In an Escoffier team, swap one teammate for any other element and her Seven-Phase Flash hits land at roughly 55% of what they were.

Genshin Vesna Build Guide — Talents, Weapon, Artifacts
Vesna's biggest hits change damage formulas depending on whether a Stellar Swirl went off in the last eight seconds. Build her like an ordinary Anemo carry and you are optimising the half of her kit that does the least.

Genshin Vodyanitsa Build Guide — Talents, Weapon, Artifacts
Vodyanitsa's signature ascension passive does precisely nothing below 40,000 Max HP, and both halves of its bonus cap out at exactly 65,000 — a target most support builds never plan a single roll around.

Genshin Artifact Guide — Stats, Rolls and Resin Math
A five-star artifact can roll the exact same substat four times and give you anywhere from 10.88 percent to 15.54 percent CRIT DMG. Understanding that spread is the difference between a functional account and a museum of half-built characters.

Genshin Flins Build Guide — Talents, Weapon, Artifacts
Flins does not poke a shield and walk away. His whole kit is a two-stage transformation that turns his own Elemental Skill and Burst into direct Lunar-Charged hits, which means the stat priorities and artifact math for a normal Electro DPS do not apply to him. Here is what actually moves his damage, talent by talent.