Genshin Shadow Realm Guide — Firearms, Ammo, Rewards
Version 7.0 dropped a third-person shooter inside Genshin Impact. Your roster, artifacts, food and jump button do not come with you — the Traveler enters on base stats of 3,000 HP and 1,000 ATK carrying two guns and a grenade. Here are the three firearms and their numbers, the four frag crystals, where ammo comes from, and every unlock gate between you and the Edge of Survival scoreboard.

Genshin Took Your Roster and Handed You a Rifle
Version 7.0, "Everwinter Without Mercy," went live on 12 August 2026 and opened Snezhnaya — the seventh region, and the one the Fatui have been threatening us with since Mondstadt. Buried in the update details under "New Gameplay," HoYoverse wrote a line that sounds like a joke and is not: Third-Person Shooter Combat Gameplay.
Inside the Shadow Realm, the camera drops behind the Traveler's shoulder and the game stops being Genshin. Your party is gone. Your artifacts are gone. Elemental Sight, food and the jump button are switched off. You get a flat stat block, two guns, a grenade, and cover to hide behind.
That last part matters more than the novelty. Because the Traveler enters on a base stat block — 3,000 HP, 1,000 ATK, 600 DEF and 200 Stamina — none of your artifact, weapon or constellation progress transfers. A day-one whale and an Adventure Rank 20 account fight the same enemies at the same numbers. What does scale is which firearms you have unlocked, which accessories are bolted to them, and one stamina track described below.
So this guide is about the things that do carry: the gear, and the gates in front of it.
What the Shadow Realm Switches Off
Read this table before your first run — the reflexes the mode takes away are the ones you use without thinking.
| Genshin system | Inside the Shadow Realm |
|---|---|
| Your party | Gone — Traveler only |
| Character stats and artifacts | Replaced by a base block: 3,000 HP, 1,000 ATK, 600 DEF, 200 Stamina |
| Enemy level scaling | Static across every World Level |
| Elemental Sight | Unavailable |
| Food and healing dishes | Unavailable — health pickups on the map instead |
| Jumping | Unavailable |
| Sprint | Repurposed: double-tap to slide |
| Fall damage | Greatly reduced where it applies at all |
| Prime Ice Constructs | Usable in the open-world Shadow Realms and mini realms |
The slide is what replaces your Elemental Skill dashes. Double-tapping run makes the Traveler slide a short distance, and it costs stamina — unless you are sliding down a slope, which is free. Prime Ice Constructs still work in the open-world Shadow Realms and the mini realms, so ziplines and platforms are the other half of your movement kit; inside Edge of Survival, Prime Ice is switched off and the slide is all you have.
The one stat that is not frozen is that stamina bar. Shadow Wingdrops — one-hit collectibles marked on the minimap with a bat-like icon — hand you samples to deposit in the Shadow Realm Analyzer aboard the train, unlocked by progressing through "Gunfire in the Silent Lands." Each of the Analyzer's first five levels raises Max Shadow Realm Combat Stamina by 40, so a fully banked Analyzer doubles the 200 you start with. Version 7.0 ships 58 Shadow Wingdrops and level 5 costs 52 of them, with higher levels flagged for future updates. The Analyzer levels also pay Mora, Hero's Wit, Sanctifying Essence, a Fragile Resin, a Crown of Insight and an Acquaint Fate on the way through.
Cover is real and symmetrical. You can crouch behind barricades and low walls; the human enemies do exactly the same thing to you. And aiming down the sights tightens accuracy rather than just zooming, so hip-fire is a spray-and-pray option, not the default.
Ammo behaves like a shooter's, not an RPG's. Fire until the magazine is empty and pulling the trigger again auto-reloads; you can also force a reload manually, which is what you should be doing behind cover instead of finding out mid-firefight.
The Unlock Chain Runs Through Chapter VII
Nothing here is a side activity you can stumble into. Every piece of the shooter hangs off the new Archon Quest, and HoYoverse spelled the gates out in the update notes.
| What unlocks | Requirement |
|---|---|
| Snezhnaya Teleport Waypoint | Auto-granted southwest of Volkodlak Tundra after Prologue: Act III, "Song of the Dragon and Freedom" |
| Archon Quest Chapter VII: Act I | Adventure Rank 18 or above, plus Prologue: Act III complete |
| Eye of Graeae gadget | Progress through Chapter VII: Act I |
| Firearms and the shooter mode | Progress through Chapter VII: Act I |
| Prime Ice Constructs, Snezhnaya Adventure Journal, Snezhnaya World Quests | Complete "Gunfire in the Silent Lands" in Chapter VII: Act I |
| Snezhnaya Daily Commissions | Progress through "Great Deeds on the Tundra" in Chapter VII: Act I |
| Special Recruitment Project: Cycle Training | Progress through Chapter VII: Act II, "Wraith's Nocturne," then clear the prerequisite quest it unlocks |
| Firearm Accessory Archive | Reach it at Huntsman's Cabin after "Remnants of the Shadow Realm (Part 1)" |
"Gunfire in the Silent Lands" is the load-bearing one. It is the second part of Chapter VII: Act I, it starts in Sretomorozsk in the Volkodlak Tundra, and its step list is effectively the shooter tutorial — drive the train with the Eye of Graeae, fight through corrupted enemies, learn the Freeze Mark and the Prime Ice zipline, pick up the Frag Crystal blueprint, pick up the Balsag's Sunwheel blueprint, then push to the Shadow Realm Core. It pays 1,500 Adventure EXP, 66,000 Mora, 6 Hero's Wit and 12 Mystic Enhancement Ore, and completing its second step hands you Alyosha as a playable character.
You Can Skip Every Archon Quest In Between
If your account stalled somewhere in Sumeru or Fontaine, this is the paragraph of the 7.0 notes to read.
HoYoverse states that Travelers who meet the unlock requirements can use the automatically unlocked Teleport Waypoint to reach Snezhnaya and begin Chapter VII: Act I even if they have not completed the preceding Archon Quests, including "Song of the Welkin Moon: Act X." The requirement is Adventure Rank 18 and the Mondstadt prologue — that is it. Whole chapters of story you never finished are not standing between you and the shooter.
The Three Firearms and Their Numbers
There are three firearms plus four frag crystals, and that is the complete set as of Version 7.0. You carry two primary firearms and one frag crystal at a time, swapped through the Eye of Graeae's loadout menu or the in-field firearms menu.
| Firearm | Type | Element | Listed DMG | Fire rate | Magazine | Weak-point multiplier | How you get it |
|---|---|---|---|---|---|---|---|
| Shatanaya's Frostsilver | Assault rifle | Cryo | 10 | 500 | 45 | 150% | "Gunfire in the Silent Lands" |
| Ashamez's Thunder | Assault rifle | Electro | 8 | 400 | 30 | 125% | Shadow Realm Vault Access Card Level 3 |
| Balsag's Sunwheel | Grenade launcher | Pyro / Hydro / Cryo | 100 | 75 | 6 | Every hit counts as a weak point | "Gunfire in the Silent Lands" |
The Sunwheel row is the one to stare at. Its tutorial text says any opponent struck by a grenade is treated as having been hit at a weak point, which means it never needs you to land a headshot to get its full number. Against anything you cannot line up a clean head shot on, that removes the aiming problem entirely.
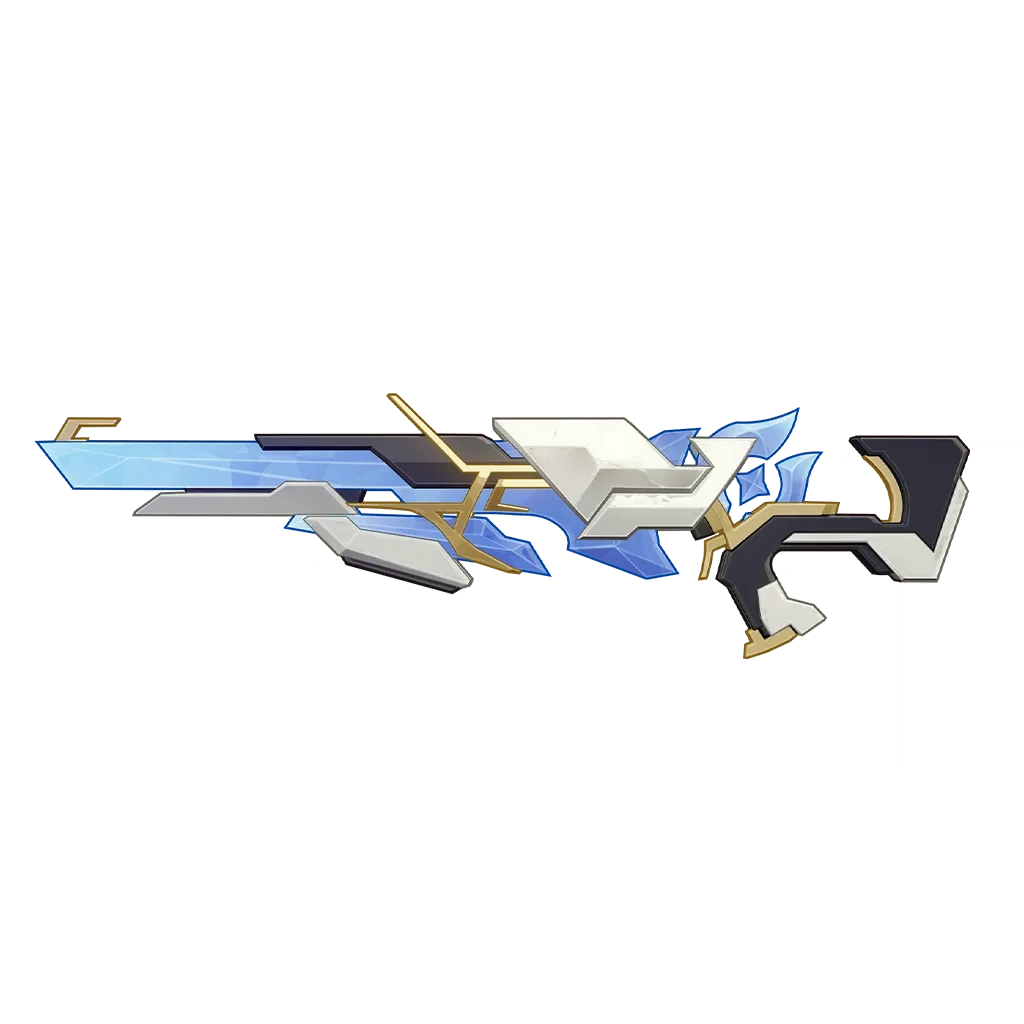
Shatanaya's Frostsilver Is a Rifle That Turns Into a Railgun
The Frostsilver is your starter and it has two modes. Normal Attacks build stacks of Frigid Glory; once you have enough, the Simulated Elemental Skill button flips you into Breakthrough mode. In Breakthrough you cannot fire normally, but holding the attack launches a Rayspear that pierces opponents in its path for 150% of ATK as Cryo DMG. Breakthrough ends when Frigid Glory runs dry or when you tap the skill again.
Its base customization lets you charge longer to spend three Rayspear uses at once for a Conflux Rayspear at 600% of ATK. That is the biggest single number available to you in the mode.
One catch worth knowing before you wonder why your rifle is not doing Cryo damage: the Frostsilver's Normal Attacks start as Physical DMG. They only convert to Cryo rounds after you fit the muzzle accessory and fire a set number of shots.
Ashamez's Thunder Shoots the Scenery on Purpose
The Thunder is the Electro rifle, and it is built around a mechanic the rest of Genshin taught you in Version Luna VIII: the Starlight Prism.
Its Simulated Elemental Skill switches to Lightsear mode for 6 seconds, turning Normal Attacks into Chain Lightning that tracks marked opponents for 10% of ATK as Electro DMG and bounces for 3% — twice, hitting each opponent once. But in Lightsear, prisms hit by your fire stack a Golden Flute's Whistle counter: 1 stack for a Normal Attack or a bounced hit, 2 for a direct un-bounced Chain Lightning hit. At 10 stacks the prism dumps its whole charge for 8% of ATK as AoE Electro DMG, counted as Stellar-Conduct reaction damage.
The Frostsilver has its own version — a Rayspear that hits a Starlight Prism deflects into a nearby opponent for 40% of the original damage, also as Stellar-Conduct. If the Starlight Prism and Polestar Field mechanics are new to you, they are the same ones your overworld teams use, and we broke the whole family down in the Genshin Lunar reactions guide.
In aiming mode the Thunder's rounds lock on and home in on targets, which makes it the answer to the Oprichniki Snipers perched somewhere you cannot comfortably reach.
Balsag's Sunwheel Carries Three Elements in One Barrel
The Sunwheel is a semi-automatic grenade launcher whose Simulated Elemental Skill rotates its rounds through Pyro to Hydro to Cryo, one switch every 2 seconds. Grenades arc, and aiming draws the flight path before you fire.
That rotation is the whole point of HoYoverse's framing of this mode — the official line is that you "defeat opponents through Elemental Reactions." A Hydro grenade followed by a Cryo grenade is a Freeze; a Cryo grenade into an Electro chain is Stellar-Conduct territory. The Sunwheel is the applicator and the rifles are the follow-up.
Its base customization gives the next attack +100% CRIT Rate after it triggers an Elemental Reaction on an opponent or after you reload — which makes reloading a deliberate offensive action rather than downtime.
Frag Crystals Are the Third Slot
You carry one frag crystal type into a run. They are not interchangeable — the four behave completely differently, and the listed damage values are not remotely close to each other.
| Frag Crystal | Element | Listed DMG | What it does |
|---|---|---|---|
| Frag Crystal - Pyro | Pyro | 12 | Detonates on a timer or on hitting an object, then deals AoE Pyro DMG at intervals at its landing point |
| Frag Crystal - Hydro | Hydro | 30 | Bounces between different opponents, targeted opponents first, dealing Hydro DMG |
| Frag Crystal - Electro | Electro | 25 | Creates a drifting Electro field that ticks AoE damage and slows further on contact with an opponent or object |
| Frag Crystal - Cryo | Cryo | 80 | Bounces off objects up to twice, then detonates for AoE Cryo DMG once every 2s, up to 7 times |
The Cryo crystal's listed 80 is the highest of the four and it ticks seven times, which makes it an area-denial tool rather than a burst tool. The Hydro one is the opposite — it seeks bodies, so it is the one to throw into a clumped squad you have not lined up yet.
All four come from "Gunfire in the Silent Lands," so there is no gate on switching between them once you have finished the quest.
Ammo Is a Map Resource, Not a Stat
You do not carry a reserve you bought. You find it, and the pickups come in three shapes that are worth memorising because you will be reading them at a glance under fire.
| Pickup | What it looks like | What it gives |
|---|---|---|
| Assault rifle ammo | A blue-tipped arrow | 75 rounds |
| Grenade ammo | A yellow, circular object | 6 rounds |
| Frag crystal | A red spike | 1 crystal |
Where you are changes how those boxes behave, and the story quest teaches you the generous version of the rule:
- Pale Crown Palace and Flamefeather Valley — ammo boxes respawn. There is a short cooldown, then the box can be opened again. Boxes serve all players in the instance.
- Mini Shadow Realms — ammo boxes are one-time use and despawn when you interact with them. Health pickups still respawn, and Prime Ice Constructs still work.
- Edge of Survival — ammo boxes are one-time use, and Prime Ice cannot be used at all.
Note what that does to the Sunwheel. Six rounds in the magazine, six per grenade pickup, and no restocking in the endgame mode. The grenade launcher is a tool you spend on specific problems, not a primary.
Accessories Are Where the Progression Actually Lives
Since your character sheet does nothing in here, the accessory system is the build system. Each firearm has four accessory slots — Muzzle, Ammo Feed, Gunstock and Gunsights — plus a base customization that is always on. Twelve accessories across three guns, and you view and manage them through the Firearm Accessory Archive at Huntsman's Cabin, available after "Remnants of the Shadow Realm (Part 1)."
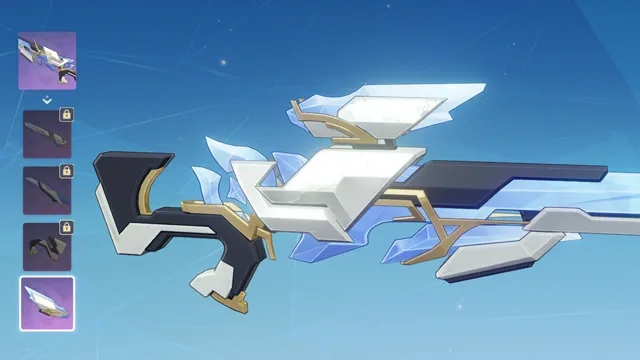
They are not cosmetic, and several of them change what the gun is. Here is the full set of twelve.
| Firearm | Accessory | What it changes |
|---|---|---|
| Shatanaya's Frostsilver | Muzzle | Converts Normal Attacks to Cryo DMG past 2 stacks, and stacks up to 50% Cryo and Physical DMG Bonus |
| Shatanaya's Frostsilver | Ammo Feed | +30 initial ammo, +10% firing speed, +2 maximum Rayspear uses in Breakthrough |
| Shatanaya's Frostsilver | Gunstock | Steadier fire, and each Rayspear charge spent adds 5% Normal Attack DMG for 10s, up to 2 stacks |
| Shatanaya's Frostsilver | Gunsights | Advanced aiming, and a Rayspear hit cuts the target's Cryo RES and Physical RES by 30% for 8s |
| Ashamez's Thunder | Muzzle | Chain Lightning bounces two more times and may re-hit previous targets |
| Ashamez's Thunder | Ammo Feed | +20 initial ammo, and every 12 Chain Lightning shots in Lightsear upgrade the next 3 into Gathered Storm |
| Ashamez's Thunder | Gunstock | 33% chance on hit to cut the skill cooldown by 1s, plus 0.25s more inside a Polestar Field |
| Ashamez's Thunder | Gunsights | Advanced aiming, +25% Electro DMG Bonus, +25% to Electro damage counted as Stellar-Conduct |
| Balsag's Sunwheel | Muzzle | While aiming, tapping the skill fires the current element and advances to the next in the rotation |
| Balsag's Sunwheel | Ammo Feed | Much faster reload, and 3 rounds loaded at once instead of 1 |
| Balsag's Sunwheel | Gunstock | Sliding auto-reloads the gun, plus 20% Pyro, Hydro and Cryo DMG Bonus |
| Balsag's Sunwheel | Gunsights | Hits cut the target's DEF by 25% for 8s |
The Sunwheel Gunstock is the sleeper. It ties reloading to the slide, folding your defensive movement and your reload into one input — and the Sunwheel's base customization gives +100% CRIT Rate on the shot after a reload. Slide, fire, guaranteed crit.
The Vault Access Card and Incomplete Data Blocks
Firearms and firearm parts are locked inside Shadow Realm Vaults, and the key is a Shadow Realm Vault Access Card obtained at Huntsman's Cabin. It replaces the Strange Card from "Hunter on the Snowfields" and it has six levels.
The currency is the Incomplete Data Block, a one-time reward for clearing a Shadow Realm challenge for the first time. Each block raises the card by one level, up to level 6 — and the consumption is automatic: any blocks already sitting in your inventory when you obtain the card, and every one you pick up afterwards, are spent the moment you get them. There is no decision to make and nothing to hoard.
The card's level is what lifts Shadow Realm barriers inside the vaults. Ashamez's Thunder, the Electro rifle, is behind Level 3 — so if you are wondering why you only have two guns, the answer is that your card has not climbed to Level 3 yet, and the only way up is first-clearing more Shadow Realm challenges.
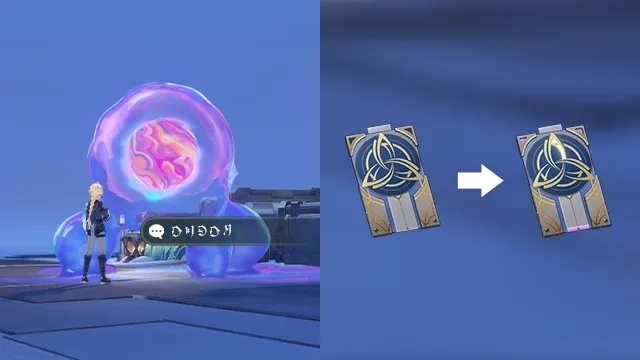
Mini Shadow Realms and the Fatui Inside Them
Beyond the two large Shadow Realm zones, Snezhnaya is dotted with mini Shadow Realms. They are tracked in the Snezhnaya Adventure Journal, and you can spot an uncleared one on the minimap as a patch of dark purple mist with an Energy Commission official standing outside it. Find the rift and enter through it.
The objective is simple — eliminate everything — and the roster is entirely Fatui. Five behaviours are worth knowing in advance:
- Oprichniki Snipers sit in awkward, hard-to-reach spots and track you. The laser off their rifle is the tell, and it is the one thing that gives you warning.
- Oprichniki Line Troopers use cover and shoot back. Left alone they wind up a Frag Crystal throw for AoE Pyro damage, telegraphed by a fury-style bar. Shoot them during the wind-up and they drop the grenade.
- Oprichniki Medics heal their allies. The Elite version also applies a Hydro Ward on a successful heal, which is a reason to kill medics before damage-dealers.
- Kamikaze 'Bots in Electro and Hydro flavours rush you and detonate on contact. You can shoot them early and use the blast against the enemies around them.
- Shielded enemies carry a barrier that blocks all incoming attacks. The only answer is a specialised frag crystal, flagged on screen, thrown at them. Those respawn as often as you need, so missing the throw costs you nothing but time.
The wiki logs five mini realms and the corroded boss waiting in each, with Facility called out as the exception to the boss-at-the-end rule:
| Mini Shadow Realm | Boss |
|---|---|
| Facility | Oprichniki Hailstorm Cannoneer |
| Floating Base | Two Mirror Maidens |
| Maintenance Center | Cutting Edge Fire Support Ground Effect Landcruiser |
| Ice Quarry | Oprichniki Thunderblitz Gvardiya |
| Ruins | Oprichniki Fireblade Shock Trooper |
One footgun: if you leave the play area in a mini realm, the instance cancels and you are put back at the entrance. Nothing is lost, but a good run is.
Edge of Survival Is the Endgame
Edge of Survival is a simulated Shadow Realm at the shooting range aboard your train, and it is where the mode stops being a story set piece. HoYoverse describes it as the place to "push your enemy-clearing skills to the limit," and it ships with leaderboards — a Frontrunners' Edge panel per stage with All Records and Friends' Records tabs. The All Records tab came online on 17 August 2026 once data compilation finished.
Version 7.0 ships three stages, with HoYoverse stating more will be added in future versions:
- Formation Breaker
- Close Quarter Frenzy
- Frigid Storm — gated behind the quest "To Gaze Upon the Dreaming Pale Crown"
Each stage unlocks by entering the Shadow Realm at its matching Snezhnaya location, and clearing one unlocks the tutorial quest "The Shooting Range and the Deep Shadow Realm."
The scoring is a timer game. You get a set time, points for kills, and defeating an enemy adds time back. Clear the stage with time to spare and the leftover converts at 1,000 points per second. Die and you restart at the last checkpoint with damaged enemies healed to full — but anything you already killed stays dead, so a death costs you the clock, not the progress.
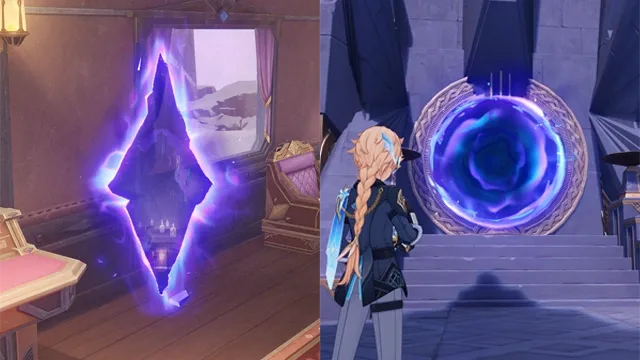
Difficulty Points Set Your Multiplier
You are not picking a difficulty from a menu. You are stacking modifiers, each worth points, and the total decides the tier.
| Tier | Modifier points | Score multiplier | Enemy HP |
|---|---|---|---|
| Normal | up to 2 | baseline | baseline |
| Advancing | 3-5 | 2.5x | 2.0x |
| Hard | 6-8 | 5.0x | 3.0x |
| Extreme | 9 | 10.0x | 4.5x |
Every stage offers the same shape of menu: a damage multiplier worth +2 at 40% or +4 at 80%, four special features worth +1 each, and one Tempering Clause worth +1. Add the maximum of each and you get 9 — which is exactly the Extreme threshold, on all three stages.
Extreme is not available on demand. You must have already banked at least 300,000 points on a lower difficulty before the game will let you try it.
The special features are stage-specific and they are real changes, not flat stat bumps. Formation Breaker can convert Fatui Medics' Hydro abilities to Electro and make Snipers fire Cryo rounds. Frigid Storm adds a Moldering Mark that deals 1% of your Max HP as damage on a repeating tick after you kill a marked enemy, cleared only by killing the next one. Both of those change which gun you want in your hands.
What the Score Thresholds Pay
Rewards are score milestones, and each one also drops an Edge of Survival Medal.
| Challenge score | Medals | Rewards |
|---|---|---|
| 50,000 | 1 | 15 Primogems, 20,000 Mora, 3 Mystic Enhancement Ore |
| 200,000 | 1 | 15 Primogems, 20,000 Mora, 3 Mystic Enhancement Ore |
| 400,000 | 1 | 20,000 Mora, 1 Fragile Resin, 3 Mystic Enhancement Ore |
| 600,000 | 1 | 20,000 Mora, 3 Sanctifying Unction, 3 Mystic Enhancement Ore |
Those medals feed a separate badge track, claimed at the shooting range trophy case:
| Medals | Reward |
|---|---|
| 1 | Ashamez's Thunder: Gunstock accessory |
| 3 | Balsag's Sunwheel: Gunsights accessory |
| 6 | Avatar frame — Keen Edge |
| 9 | Balsag's Sunwheel: Gunstock accessory |
| 12 | Cape accessory — Stardust Trail |
Do the arithmetic across those two tables and they line up exactly: four thresholds on each of three stages is twelve medals, which is the full length of the badge track. Clearing every threshold on every stage finishes it with nothing left over.
It also means three of the twelve firearm accessories listed above are claimed from the trophy case rather than the vaults — including two of the Sunwheel's four. If you want the slide-reload build, the scoreboard is the route to it.
Cycle Training Is the Weekly Loop
The repeatable, low-effort version of all this is Special Recruitment Project: Cycle Training. Each week you accept new Training Quests from Yarovaya, which task you with entering and cleaning up specific Shadow Realms; complete a set number of those weekly quests and you collect the rewards. It unlocks off a prerequisite quest that Chapter VII: Act II, "Wraith's Nocturne," opens up.
Finishing all of the Cycle Training quests awards the "Snezhnaya: Fleeting Glimpses" namecard.
That is the shape of the whole mode: a weekly quest loop for the steady drip, first-clears of mini realms for the Data Blocks that unlock guns and parts, and Edge of Survival for the scoreboard and the accessories that finish your loadout.
More Genshin coverage lives on the Genshin Impact coverage hub, and the rest of our game guides are on the Mythras blog.
Quick Action Checklist
- The Shadow Realm's third-person shooter mode arrived with Version 7.0, "Everwinter Without Mercy," on 12 August 2026, alongside the Snezhnaya region.
- The Traveler fights on a base stat block inside it — 3,000 HP, 1,000 ATK, 600 DEF and 200 Stamina — and enemy levels are static across every World Level. Your artifacts and constellations do nothing in there. The only stat you can raise is Shadow Realm Combat Stamina, +40 per Shadow Realm Analyzer level for the first five levels.
- Chapter VII: Act I needs Adventure Rank 18 and Prologue: Act III only. You may skip every Archon Quest in between, including "Song of the Welkin Moon: Act X."
- "Gunfire in the Silent Lands" is the quest that hands you the shooter, Shatanaya's Frostsilver, Balsag's Sunwheel and all four frag crystals.
- Ashamez's Thunder needs Shadow Realm Vault Access Card Level 3, which you reach by feeding the card Incomplete Data Blocks from Shadow Realm first-clears.
- Incomplete Data Blocks are consumed automatically the moment you get them, up to card level 6. Nothing to save, nothing to plan.
- You carry two firearms and one frag crystal. Frostsilver holds 45 rounds, Thunder 30, Sunwheel 6.
- Frostsilver Normal Attacks deal Physical DMG until you fit the muzzle accessory.
- Every Sunwheel grenade hit is treated as a weak-point hit; the rifles need actual weak-point shots for their 150% and 125% multipliers.
- Ammo boxes respawn in Pale Crown Palace and Flamefeather Valley, but are one-time use in mini Shadow Realms and in Edge of Survival, where Prime Ice is also disabled.
- Shoot an Oprichniki Line Trooper during its frag wind-up and it drops the grenade. Shielded enemies need the on-screen marked frag crystal thrown at them.
- Edge of Survival tiers come from stacked modifier points, not a menu: up to 2 is Normal, 3-5 is Advancing at 2.5x score, 6-8 is Hard at 5.0x, and 9 is Extreme at 10.0x. Extreme also requires 300,000 points already banked on a lower tier.
- Leftover time converts to score at 1,000 points per second, and kills add time back to the clock.
- Four score thresholds on three stages is 12 Edge of Survival Medals, exactly the length of the badge track — which pays out three firearm accessories, an avatar frame and a cape.
Frequently Asked Questions
What is the Shadow Realm in Genshin Impact?
How do you unlock the third-person shooter mode in Genshin Impact?
How many firearms are in Genshin Impact and how do you get them?
How do you level up the Shadow Realm Vault Access Card?
What are the Edge of Survival rewards in Genshin Impact?
How do you unlock Extreme difficulty in Edge of Survival?
Keep Reading
- HoYoverse — "Everwinter Without Mercy" Version 7.0 Update Details: Third-Person Shooter Combat Gameplay, Cycle Training, Edge of Survival, Chapter VII unlock criteria and the Snezhnaya waypoint
- Genshin Impact Wiki — Shadow Realm: fixed Traveler stats, disabled systems, cover and sliding, ammo box yields, mini realm enemies and bosses
- Genshin Impact Wiki — Firearm list, the four accessory slots per gun and the Firearm Accessory Archive location
- Genshin Impact Wiki — Shatanaya's Frostsilver stats, Breakthrough mode, Conflux Rayspear and its four accessories
- Genshin Impact Wiki — Ashamez's Thunder stats, Lightsear mode, Golden Flute's Whistle stacking and its Vault Access Card Level 3 unlock
- Genshin Impact Wiki — Balsag's Sunwheel stats, element rotation, weak-point rule and its accessories
- Genshin Impact Wiki — Frag Crystal listed damage values and detonation behaviour for all four elements
- Genshin Impact Wiki — Shadow Realm Vault Access Card levels 1-6 and the Incomplete Data Block upgrade rule
- Genshin Impact Wiki — Incomplete Data Block source and its automatic consumption
- Genshin Impact Wiki — Edge of Survival stages, difficulty point tiers, score multipliers, time-to-score conversion, reward thresholds and badge track
- Genshin Impact Wiki — Gunfire in the Silent Lands quest steps, start location and rewards
- Genshin Impact Wiki — Eye of Graeae gadget functions, including the firearm and tactical gear loadout
- Genshin Impact Wiki — Shadow Realm Analyzer levels, Shadow Wingdrop costs and the +40 Max Shadow Realm Combat Stamina per level
- Genshin Impact Wiki — Version 7.0 release date, new region, new systems and new domains
Related Guides
Genshin Fishing Guide — Bait, Fish and Free Weapons
Fishing hands you three four-star weapons, all refinable to R5, for zero Primogems and zero Original Resin. It also hides the cost behind eight separate shops, twelve bait recipes and a 72-hour respawn timer. Here are the actual numbers: what each reward costs in fish, which bait catches what, and which of those fish only exist after dark.
Genshin Snezhnaya Farming Guide — Domains, Days, Drops
Version 7.0 dropped three permanent domains, two normal bosses, four enemy drop families and two local specialties into Snezhnaya — and locked the whole nation behind a single Archon Quest. Here is what each source pays, which day it pays it, and who on your account is actually waiting for it.

Genshin Miliastra Wonderland Guide — What It Actually Pays
Miliastra Wonderland runs on its own currencies, so you can ignore most of it. Three things leak back into Teyvat: a free 5-star you can't take into the endgame, about 200 Primogems this update, and a Battle Pass deal that makes one of its passes free.
Genshin World Level Guide — What Each Level Pays
World Level is the number on your profile that quietly rewrites your drop table: which artifact rarities and ascension gem tiers bosses can drop, and what a Ley Line Blossom pays. Here is what each of the ten levels changes, which three thresholds actually move money, and exactly what you give up if you lower it.

Genshin Artifact Guide — Stats, Rolls and Resin Math
A five-star artifact can roll the exact same substat four times and give you anywhere from 10.88 percent to 15.54 percent CRIT DMG. Understanding that spread is the difference between a functional account and a museum of half-built characters.

Genshin Weekly Boss Guide — Which Boss Drops What
Fourteen weekly bosses, three discounted claims a week, and one rule worth checking before you spend: below boss level 70 a Trounce Blossom pays zero talent materials. Here is the full drop map, the level thresholds, and which boss the character you are building actually needs.