How to Play the Gundam Card Game - Resources, Shields, Pilots, and the Six-Card Life Total
Your entire life total in the Gundam Card Game is six face-down cards with 1 HP each, plus a token base with 3 HP. This is the complete rules walkthrough - the separate resource deck, the Level and Cost split, setup, the five card types, pairing Pilots into Link Units, the five phases, and combat - checked line by line against Bandai's Comprehensive Rules Ver. 1.8.0.
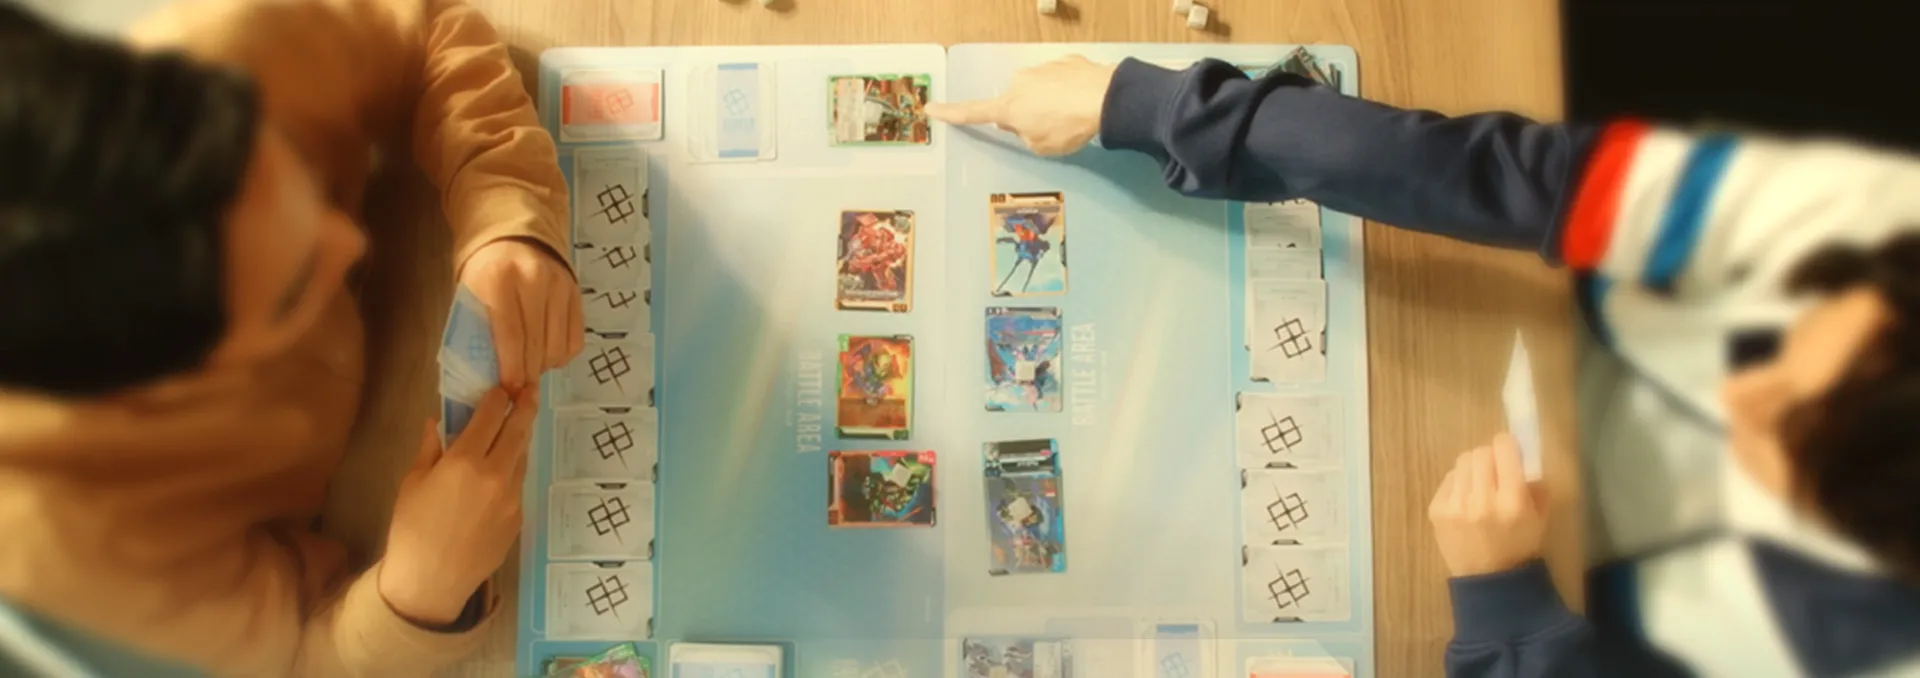
Six face-down cards sit along the edge of your playmat. That is your life total. Not twenty life, not a stack of prize cards - six cards with one hit point each, and you were not allowed to look at them when you put them there.
That single design choice is the reason the Gundam Card Game plays fast and feels mean. A 5 AP mobile suit and a 1 AP mobile suit break exactly the same number of shields. Everything else in the rulebook is downstream of that.
Here is the whole game, checked line by line against Bandai's Comprehensive Rules Ver. 1.8.0 (updated 10 July 2026) rather than a forum summary.
What the Gundam Card Game actually is
It is a two-player trading card game from Bandai, launched worldwide in July 2025 with the GD01 booster set Newtype Rising. Cards are printed in English, Japanese and Simplified Chinese, and the card pool crosses the whole Gundam franchise - Universal Century suits share a set with Witch from Mercury and G Gundam.
Rule 1-1-1 is blunt about the format: "Gundam Card Game is a competitive game between two players." Multiplayer variants exist as a separate ruleset, but the default is heads-up.
Mechanically you deploy Units into a battle area, put Pilots underneath them, attack with those Units, and grind through your opponent's defensive layer until they take a hit with nothing left to absorb it.
What you need on the table
Bandai's official play guide lists exactly four things:
- A 50-card deck of Unit, Pilot, Command and Base cards.
- A 10-card resource deck made only of Resource cards.
- Token cards - specifically one EX Base and one EX Resource per player.
- Damage counters. Dice work. Damage sits on Units and Bases as counters and does not wipe between turns unless something heals it.
That is it. No life pad, because there is no life total to track.
How you win and how you lose
There is no win condition in this game. There are only two ways to lose, and rule 1-2-1 says the player who is not defeated wins.
- You take battle damage from a Unit while you have no cards in your shield area (rule 1-2-2-1). Note the wording: no cards in the shield area, which means no shields and no Base. An empty shield section with a Base still standing does not lose you the game.
- You have no cards remaining in your deck (rule 1-2-2-2).
Read that second one carefully, because it is not the Magic rule. You do not lose when you try to draw from an empty deck - you lose the moment the deck is empty. Rule 7-3-1-1 spells it out: draw the last card of your deck and you immediately lose. Drawing your 50th card is a loss, not a reprieve. If you have played Magic and internalised the London mulligan era's "you lose on the draw attempt" instinct, unlearn it here.
You can also concede at any time (rule 1-2-4), and no card effect can force you to.
The two decks and why resources are separate
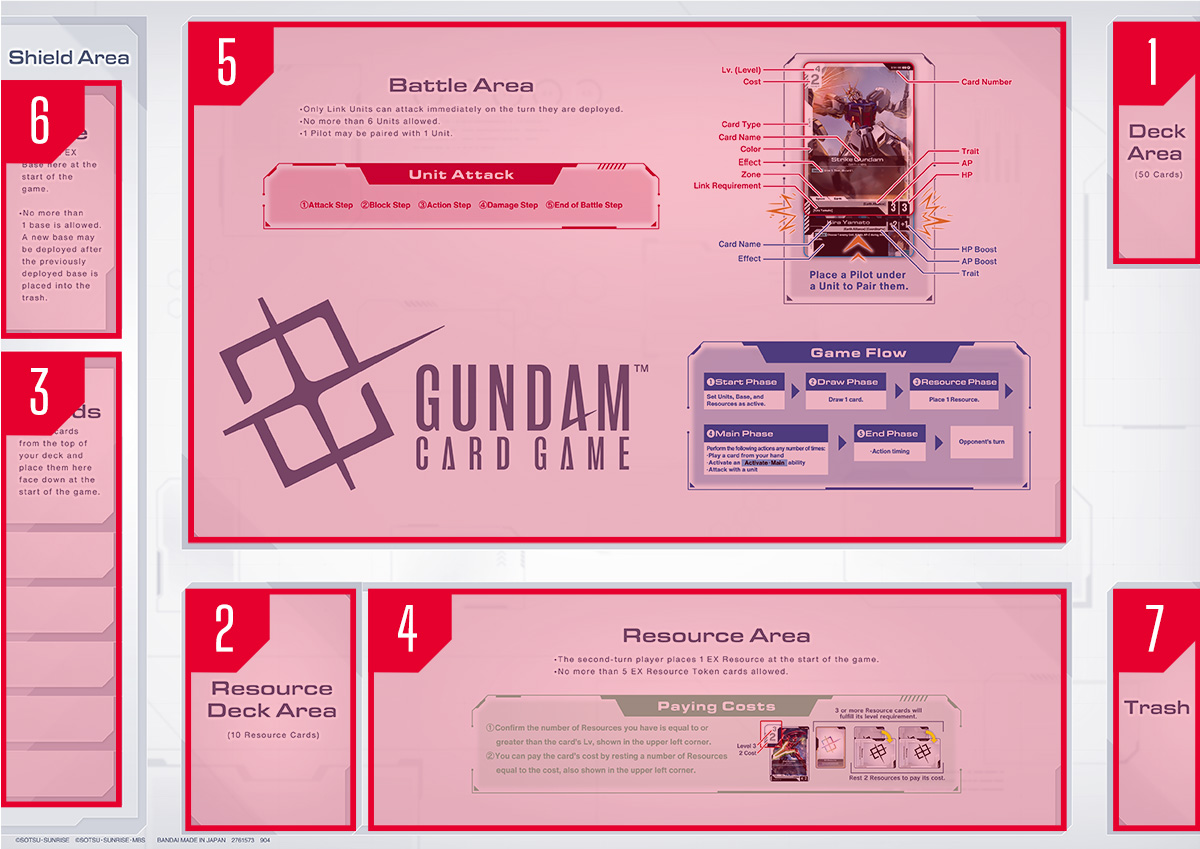
Every player runs two piles. The main deck is exactly 50 cards. The resource deck is exactly 10 cards and contains nothing but Resource cards (rule 6-1-1).
This is the single biggest structural difference between this game and most of its competition. In Magic you draw lands out of your main deck and pray. In Lorcana you convert a real card in hand into ink and eat the card disadvantage. Here, neither happens. Your ramp lives in its own sealed 10-card stack and hits automatically.
During the resource phase, "the active player places one Resource card from their resource deck into their resource area face up and active" (rule 7-4-1). It is not a choice, it does not cost you a card from hand, and you cannot flood or screw on it. Ten turns of guaranteed ramp, no variance.
The knock-on effect is that your 50 cards are 50 pieces of gameplay. That is why decks feel dense and why a game reaching turn eight already feels like a long one. And because "any number of Resource cards with the same card number can be included in a resource deck" (rule 6-1-1-5), there is essentially no deck-building decision there for a new player. Ten copies, done.
Your resource area caps at 15 Resources, with at most five of those being EX Resources (rule 4-4-2).
Level and cost are two different taxes
This trips up everyone in game one. Every non-Resource card has both a Lv. in the top-left corner and a Cost just beneath it, and they are checked separately.
- Level is a gate. Rule 2-9-1: the condition is satisfied when the number of Resources in your resource area is equal to or greater than the card's level, and "whether a Resource is active or rested makes no difference." Level checks how far into the game you are, not what you can afford.
- Cost is the actual payment. Rule 2-10-1: you pay by resting that many active Resources.
So a Lv. 4 / Cost 2 card needs four Resources sitting in your area, but only rests two of them. You will regularly have the cost and not the level, which means the card is dead in hand for a turn no matter how much mana-equivalent you have spare. Plan your curve around the level number, not the cost number.
Playing a card follows a fixed four-step sequence (rule 7-5-2-2): reveal it from hand, confirm you meet the Lv. condition, choose and rest enough Resources to pay the cost, then play it.
Setting up a game
Straight from section 6-2:
- Both players shuffle and present a legal 50-card deck and 10-card resource deck.
- Determine Player One and Player Two however you like - the rules literally suggest rock paper scissors or a die roll. The winner chooses who goes first.
- Each player draws five cards.
- Starting with Player One, each player may redraw once: return the entire hand to the bottom of the deck, draw five new cards, then shuffle. You are not required to.
- Each player takes the top six cards of their deck, one at a time, and places them face down into their shield section without looking.
- Each player places one active EX Base token into their base section.
- Player Two only places one active EX Resource token into their resource area.
- Player One takes the first turn.
Two things worth flagging. First, the redraw is all-or-nothing and costs you nothing in card count - a genuinely generous mulligan compared to most TCGs. Second, there is no first-turn draw skip anywhere in the comprehensive rules. Player One draws on turn one. Player Two's compensation is the EX Resource, which is a one-shot: rule 5-17-3-2-3 says that when an EX Resource is used to pay a cost, it is removed from the game entirely.
The EX Base and your six shields
Your shield area has two sections, and they behave completely differently.
The shield section holds those six face-down cards. Rule 4-6-4-2: "Cards in the shield section are treated as Shields with 1 HP each." They are private - neither player may look at them or reorder them - and when you move one, you take the top card.
The base section holds at most one Base, face up and public. Everyone starts with an EX Base token, which rule 5-17-3-1-1 defines as a Base token with 0 AP and 3 HP. Zero attack, three hit points, sitting in front of your shields.
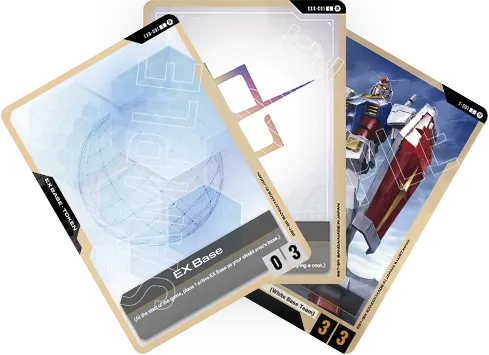
Here is why that matters: "While a Base is present, damage dealt to the shield area is preferentially dealt to that base" (rule 3-5-3). You cannot swing past a Base. It soaks everything until it dies. And unlike shields, a Base actually tracks damage with counters, so AP above 1 is not wasted against it.
Which produces the defining maths of this game. Against your shields, a 1 AP Unit and a 6 AP Unit each destroy exactly one shield per attack, because a shield has 1 HP and rule 8-5-2-3-1 destroys it on 1 or more damage. Against your EX Base, that 6 AP Unit kills a 3 HP base in one swing and a 1 AP Unit needs three turns. Wide beats tall against shields; tall beats wide against bases.
When a shield is destroyed it is revealed before it hits the trash, and if it has a Burst effect you choose whether to activate it, without paying its cost (rules 5-10-3 and 13-2-5). Your defence can bite back. That is a real reason not to break the last shield early if you cannot close the game.
The five card types
Rule 2-3-2 names all five: Unit, Pilot, Command, Base, Resource. The first four make up your 50-card deck; Resources are the separate stack.
Units are the mobile suits. They deploy into the battle area, they have AP and HP, and rule 3-2-3 is short and total: "Only Units can attack." A newly deployed Unit cannot attack the turn it arrives (rule 3-2-4) unless it is a Link Unit. You may have up to six Units in the battle area (rule 4-5-4), and if you deploy a seventh, rule 11-4-2 makes you choose one already there and trash it - which is explicitly not treated as being destroyed, so no on-death triggers.
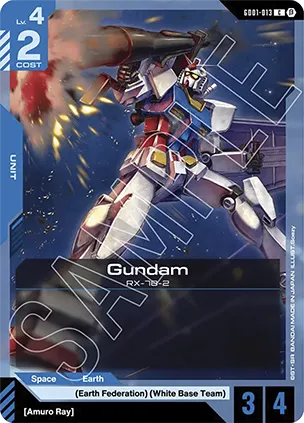
Pilots go underneath Units. They cannot exist in the battle area on their own (rule 3-3-3).
Commands are one-shot effects. They come with a timing keyword - Main means your main phase with nothing attacking, Action means during an action step. Some Commands also carry a Pilot effect on the bottom half, and rule 3-4-6-2 lets you pair such a card as a Pilot instead of firing the command. That flexibility is the closest thing this game has to a modal spell.
Bases deploy into your base section. They have AP and HP like Units, and only one can sit there at a time - playing a second makes you trash the first (rule 11-5-2).
Resources are the ten-card stack. They never do anything but rest to pay costs.
Every non-Resource card also carries a colour: blue, green, red, white or purple (rule 2-4-2-1). If you have read our color pie breakdown, the instinct transfers, but the constraint here is harder - see the deck-building section.
Pairing Pilots and the Link Unit payoff
Pairing is placing a Pilot card face up beneath a Unit in the battle area (rule 5-9-1). It costs you a card play, and it is close to permanent.
The rules that matter:
- A Unit can have at most one Pilot (rule 3-3-4).
- You cannot freely remove or swap a paired Pilot (rule 3-3-5).
- If the Unit dies or bounces, the Pilot goes with it (rule 3-3-6).
- A Pilot's AP and HP are printed as modifiers like +1 and +2, and are added to the paired Unit (rule 3-3-8-1).
- A Pilot's traits are not gained by the Unit (rule 3-3-7). Neither is its colour (rule 2-4-3).
The two-text layout confuses people, so learn it once. Text printed above the card name belongs to the Pilot card itself - typically its Burst effect, the thing that fires if it was sitting in your shields. Text printed below the card name is gained by the Unit it is paired with (rule 3-3-9).
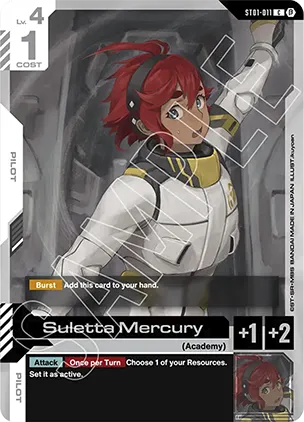
Now the payoff. Only Unit cards have link conditions (rule 2-12-2) - a Pilot name or trait printed at the bottom of the card in brackets. Pair a Pilot that satisfies it and you have a Link Unit, and rule 3-2-6-3 gives Link Units the thing every other Unit lacks: they can attack immediately on the turn they are deployed.
That is the entire tempo engine of the game. Two cards and two costs in one turn for a suit that swings the moment it lands, versus one card that sits there looking pretty until your next turn. It is also why the GD05 set's new Link Rare rarity - built around exactly these Unit-and-Pilot pairings - is the flavour hook Bandai leaned on hardest for the anniversary.
Partial name matches count. If a Unit's link requirement reads Garrod Ran, a Pilot named Garrod Ran & Tiffa Adill satisfies it, because the requirement checks whether the card name contains the bracketed text (rule 3-2-6-4).
The turn in five phases
Rule 7-1-1: start phase, draw phase, resource phase, main phase, end phase. In order, every turn.
Start phase. Two steps. The active step sets every rested card in your battle area, resource area and base section back to active, all simultaneously. Then the start step fires any "at the start of the turn" effects.
Draw phase. Draw one. Empty your deck doing it and you lose on the spot.
Resource phase. Place one Resource from your resource deck, face up and active.
Main phase. You may, in any order and as many times as you can afford: play a card from hand, activate an Activate-Main effect, or attack with a Unit (rule 7-5-1). Attacking is a main-phase action here, not its own combat phase - a small wording difference that matters, because you can attack, resolve the battle, and then keep deploying with whatever Resources you have left.
End phase. Four steps. First an action step, where the standby player goes first and both players can fire Action Commands and Activate-Action effects. Then the end step for "at the end of the turn" triggers. Then the hand step, where you discard down to 10 (rule 4-8-4). Then cleanup, where "during this turn" effects expire.
That end-phase action step is easy to miss and is where a lot of instant-speed interaction actually lands.
Attacking, blocking and damage
Declaring an attack starts a battle with five steps in order (rule 8-1): attack step, block step, action step, damage step, battle end step.
Attack step. Select one active Unit, rest it, and declare a target. Rule 8-2-1 allows exactly two legal targets: "the opposing player or a rested enemy Unit."
Sit with that. You cannot attack an active enemy Unit. A freshly deployed blocker is untouchable until it does something that rests it. Units rest by attacking, by blocking, or by activating a rest-cost ability like Support. So combat in this game is punitive rather than proactive - you kill things that already committed. If you have played Cookie Run: Braverse or the Pokemon TCG, where the defender is always a valid target, this is the biggest adjustment.
Block step. The defender may activate Blocker on one active Unit, redirecting the attack to it. Once per attack (rule 8-3-2), and the originally targeted Unit cannot block for itself (rule 8-3-3).
Action step. Both players get a window, standby player first, for Action Commands and Activate-Action effects.
Damage step. Now it resolves, and it depends on the target.
Attacking a player:
- No Base and no Shields in their shield area: the Unit deals AP as battle damage to the player, who is immediately defeated (rule 8-5-2-2). Game over.
- Shields but no Base: the Unit deals damage equal to its AP to the top Shield. Any amount of 1 or more destroys it. Reveal it, resolve its Burst if you want it, trash it.
- A Base present: all the damage goes to the Base instead (rule 8-5-2-4), tracked with counters until its HP hits zero.
Attacking a Unit: both Units deal damage equal to their AP to each other simultaneously (rule 8-5-3-2). Trades are real and mutual destruction is treated as happening at the same time. First Strike breaks the symmetry: the attacker deals its damage first, and if that kills the defender, the defender deals none back.
Battle end step. "During this battle" effects fall off, and you return to your main phase - so a successful attack does not end your turn.
Keywords you will meet early
Section 13 defines these. Keyword effects print inside angle brackets on the card; timing keywords print inside the bracket glyphs.
- Repair (n) - at the end of your turn, this Unit recovers n HP.
- Breach (n) - when this Unit destroys an enemy Unit with battle damage on your turn, deal n damage to the first card in that opponent's shield area. It hits the Base if there is one, otherwise the top shield. It fires even if both Units died.
- Support (n) - an Activate-Main ability: rest this Unit to give another friendly Unit AP +n for the turn. Note that resting it makes it a legal attack target.
- Blocker - rest this Unit when a block is declared to redirect the attack to it.
- First Strike - deals battle damage before the enemy does when attacking.
- High-Maneuver - while this Unit is attacking, enemy Units cannot activate Blocker.
- Suppression - when this Unit deals battle damage to an enemy Shield, it damages the first two Shields simultaneously. This is the one clean way around the one-attack-one-shield ceiling.
- Burst - printed on cards that can end up in your shield section. When that shield is destroyed and revealed, you may activate the effect without paying its cost. Always optional.
Repair, Breach and Support stack additively rather than as separate copies. Blocker, First Strike, High-Maneuver and Suppression cannot be doubled up on one Unit.
Deck-building rules that get enforced
Four constraints, all from rule 6-1-1 and rule 2-1-2:
- Exactly 50 cards in the main deck. Not a minimum. Exactly.
- Exactly 10 cards in the resource deck, all Resource cards.
- One or two colours only. The rules give the examples themselves - an all-red deck is legal, a green-and-white deck is legal. Three colours is not.
- Up to four copies of cards sharing a card number. Alternate art does not create a new card; the number is what counts.
Official tournament play layers a banned and restricted list on top, where a restricted (2) designation caps you at two copies across deck and sideboard combined. Bandai updates that list periodically - the current one carries effective dates of 1 April 2026 and 24 July 2026 as of this writing, so check the official rules page before an event rather than trusting a deck list you found online.
What to buy as of September 2026
Everything below is from Bandai's official product and DECKS pages, re-checked 26 September 2026.
Starter decks are the honest entry point. Bandai has four listed for 25 September 2026: ST11 Aquatic Assault, ST12 Raging Onslaught, ST13 Silent Barrage and ST14 Heavy Dominion. The ST11 page lists a $15.99 MSRP and contents of a ready-to-play 50-card deck, 10 Resource cards, four token cards, a paper damage counter, a rule and playsheet, and a bonus pack. That is a complete, legal, playable game in one box - the deck is already 50 cards and the resource deck is already 10, so you are not buying a half-product.
Boosters. GD05 Freedom Ascension released 24 July 2026 at $4.99 per 12-card pack, and it is the game's first-anniversary set - Bandai's own copy leads on Strike Freedom Gundam and Nu Gundam finally arriving. It introduces the Link Rare rarity built around paired Units and Pilots. The box configuration is on the same product page, printed down the side of the display: 12 cards per booster pack, 24 packs per booster box.
Two gaps are worth naming, because they are what people fill in with guesses. The first narrowed on 25 September 2026, when Bandai's official DECKS page added a 50-card build for each September starter - ST11 Marine, ST12 Close Combat, ST13 Bit / Funnel and ST14 Heavy Armed. Read the card list before you treat one as the box contents, though: each of the four splices in cards from earlier sets, so it is an upgrade recipe rather than an inventory. ST12 Close Combat runs 31 ST12 cards alongside 19 from GD01 and GD05, four copies of GD01-050 LaGOWE among them, and skips ST12-013 even though that card is pictured on the ST12 product page. The product pages themselves still print box contents and the colour pair (Raging Onslaught red-purple, Silent Barrage green-red, Heavy Dominion green-white) but not the 50 cards inside. The second gap is untouched: Bandai publishes no pull rates for any Gundam Card Game product, so a "one in X packs" figure is somebody counting their own openings rather than a number from the publisher.
Quick reference
- Decks: exactly 50 main, exactly 10 resource, one or two colours, max 4 of a card number.
- Setup: draw 5, one optional full redraw, 6 face-down shields, EX Base for both, EX Resource for Player Two only.
- Shields: 1 HP each. One attack destroys one shield regardless of AP.
- EX Base: 0 AP, 3 HP, and it eats all shield-area damage while it stands.
- Level vs Cost: level = how many Resources you must have; cost = how many you rest.
- Turn: start, draw, resource, main, end.
- Attack targets: the opposing player, or a rested enemy Unit. Never an active one.
- Link Unit: Unit plus a Pilot matching its link requirement. It can attack the turn it deploys.
- You lose by taking battle damage with an empty shield area, or by having zero cards in your deck.
Learn the level-and-cost split and the rested-target rule and you will stop making the two mistakes that lose new players their first ten games.
Frequently Asked Questions
How many cards are in a Gundam Card Game deck?
Why does the Gundam Card Game use a separate resource deck?
What is the EX Base in the Gundam Card Game?
How much damage does it take to break a shield?
Can you attack any enemy Unit in the Gundam Card Game?
What makes a Link Unit and why does it matter?
Do you lose when you try to draw from an empty deck?
Keep Reading
- Gundam Card Game Comprehensive Rules Ver. 1.8.0 (Bandai, PDF)
- GUNDAM CARD GAME Official Rules Index
- GUNDAM CARD GAME Official Play Guide
- Freedom Ascension [GD05] Product Page
- Aquatic Assault [ST11] Starter Deck Product Page
- Raging Onslaught [ST12] Starter Deck Product Page
- GUNDAM CARD GAME Official DECKS Page
- ST12 Close Combat Deck (Bandai DECKS page, 25 September 2026)
Related Guides
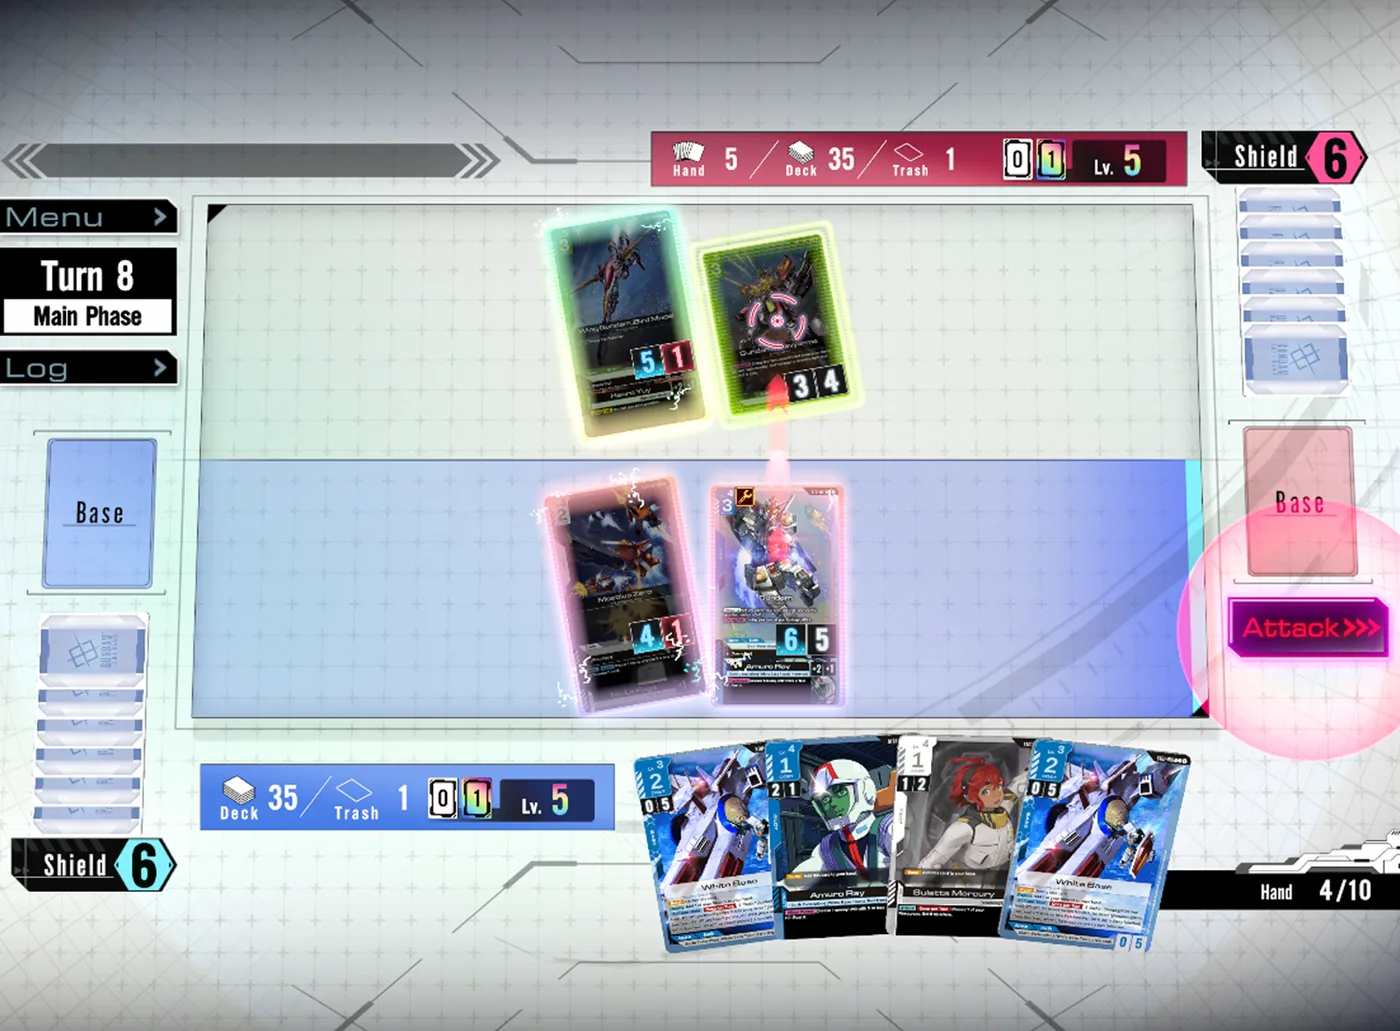
Can You Play the Gundam Card Game Online?
Bandai's free Gundam Card Game Teaching App has been on the App Store since June 2025, and nothing in its description or its eight updates describes playing another person. Here is what its two modes do, what it has and has not been updated with, and the webcam rules Bandai wrote into its Tournament Rules Manual for playing a real opponent online.
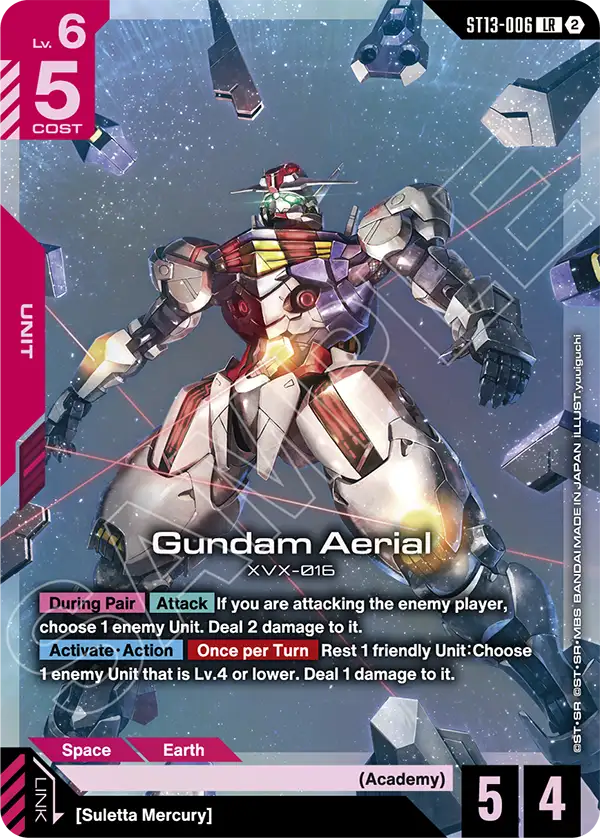
Gundam Card Game Timing Keywords: All 13 and When They Fire
Section 13-2 of the Gundam Card Game Comprehensive Rules defines 13 timing keywords, and 715 of the 956 main-deck cards open an effect with at least one. Here is what each one is, when it fires, how many cards print it, the colour it wears on the printed card, and the rulings that separate When Paired, During Pair, When Linked and During Link.
![The official Gundam Card Game Unit token T-029 Bit / Funnel from Silent Barrage [ST13]: a beige-framed token card showing purple, red-capped bit pods and magenta funnels firing white beams through a blue starfield, with the line This Unit can't be paired with a Pilot or attack, the Long-Range Weapon trait, and 2 AP and 2 HP along the bottom, under a SAMPLE watermark.](/images/blog/gundam-tcg/gundam-card-game-tokens-guide/gundam-t-029-bit-funnel-token-card.webp)
Gundam Card Game Tokens - All 29, and What to Bring
The English card database holds 29 Unit tokens and 32 deck cards that make them, and Bandai's own Aquatic Assault build needs three token cards from a different starter deck. Here is every token, every card that makes one, the six-copy rule, what three Bandai documents say about substitutes, and where the database gets its own tokens wrong.
How to Qualify for the Gundam Card Game World Championships
Eleven of the 22 Season 2 Regionals on Bandai's World Championships 26-27 calendar have been played, and the rest run from 3 October to 20 December 2026. Here is every route to an Area Finals seat - the Top 16 invite, the Store Championship lottery and its attendance cliffs, the Last Chance Qualifiers in Orlando and London, the open finals in Latin America and Oceania - plus the one Regional that falls inside Stardust Trails' first week, and a Season 2 prize ladder that turns out to be one Zeong board handed out in pieces.
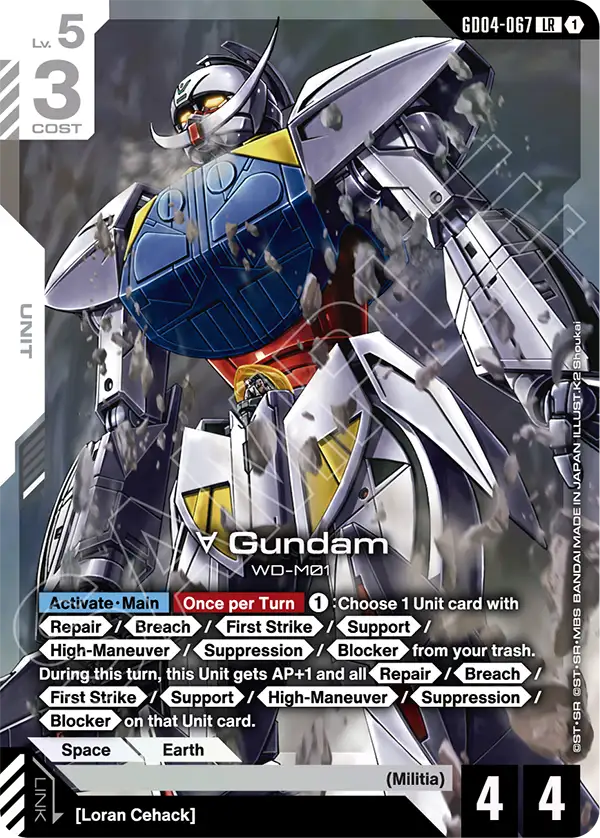
Gundam Card Game Errata and Comprehensive Rules Updates
Bandai has corrected the text of three Gundam Card Game cards, and on 30 September 2026 its own card database still shows the uncorrected wording on all three. Here is each errata and what it changes at the table, plus a version-by-version account of the Comprehensive Rules from 1.0 to 1.9.0, built by comparing every archived English PDF against the next - including three rules the official changelog never lists.
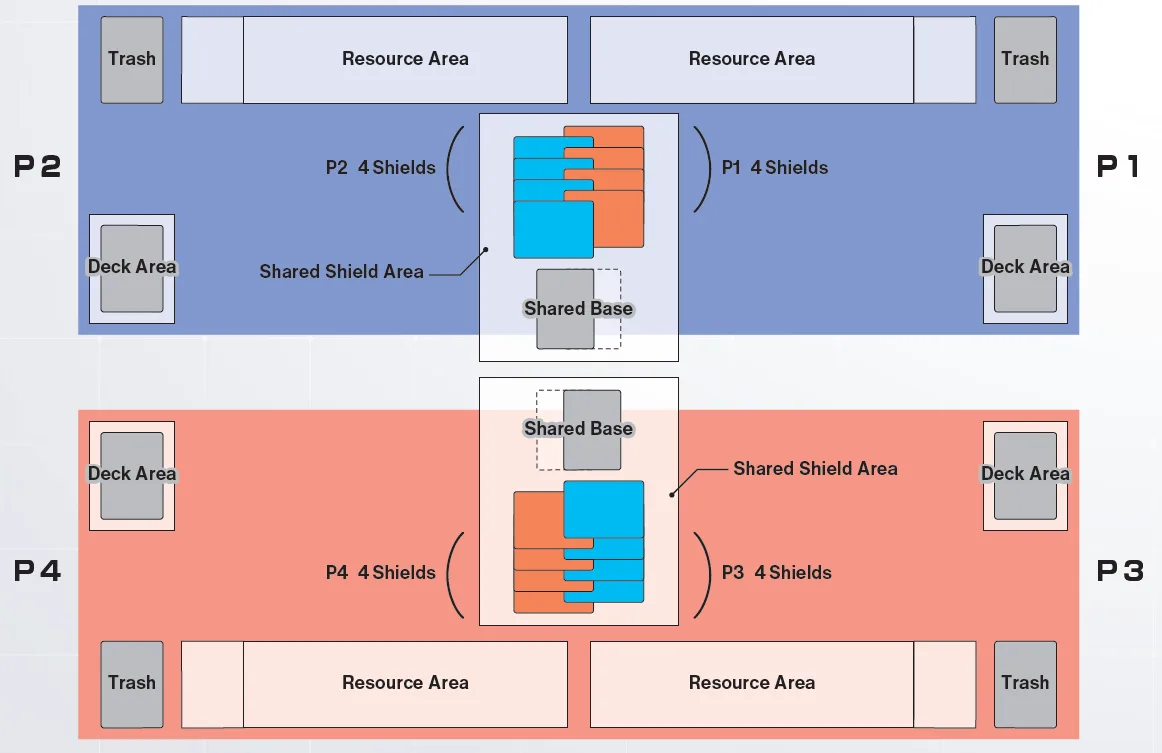
Gundam Card Game Multiplayer Rules - 2v2 and Battle Royale
On 25 September 2026 a store release event opened with a Battle Royale option and Bandai posted four decklist pairs built for 2v2 Team Battle. Most of the 1v1 game carries over, but a handful of rules change who gets EX Resources, whose hand a Shield lands in and what "friendly" means once your partner sits next to you - and Bandai's own two rules documents disagree on one of them. Here is every change, the 11 multiplayer rulings I found in Bandai's FAQ, the 35 cards whose text reads the size of the table, and what Bandai's 14 team decklists do differently.