Minecraft Ocean Monument Guide: Guardians, Loot & Conduits
An ocean monument is the only place in Minecraft you'll find sponges, three elder guardians that hit you with Mining Fatigue III before you even see them, and the prismarine you need to build a conduit. Here is how to find one, beat it, and walk out with the loot.
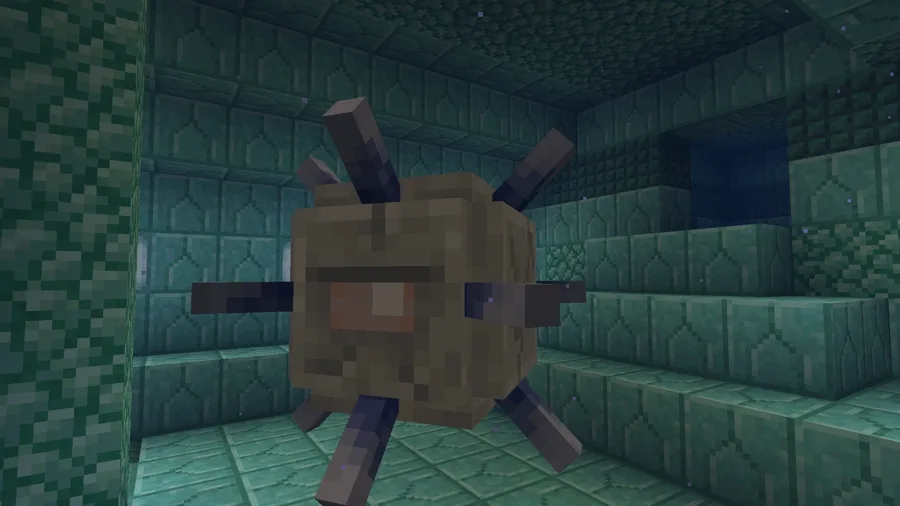
Three elder guardians hit you with Mining Fatigue III the moment you swim into range — before you've even seen the monument, before you've taken a single point of damage. Your pickaxe stops working on anything that matters, your attack speed drops 30%, and you've got a ghostly fish-face flashing on your screen telling you exactly how this is going to go. That is the ocean monument's entire defense, and it is genuinely clever: the building protects itself by making you bad at mining the building.
But you have to crack it. The monument is the only place sponges exist, one of two places prismarine comes from, and the source of the dark prismarine and prismarine bricks you need to build a conduit — the underwater beacon that gives you permanent water breathing, night vision, and faster mining. Here is how to find a monument, deal with the elder guardians, choose between draining it or powering through, and grab every block worth taking.
Why raid a monument at all
Four things live here that you cannot get anywhere else, or barely anywhere else:
- Sponges. This is the only structure in the game that contains sponges. Drop a wet sponge, dry it in a furnace, and you get a dry sponge that instantly soaks up a block of water — the single best tool for draining anything underwater. If you ever want to build a dry base on the seafloor, you need these.
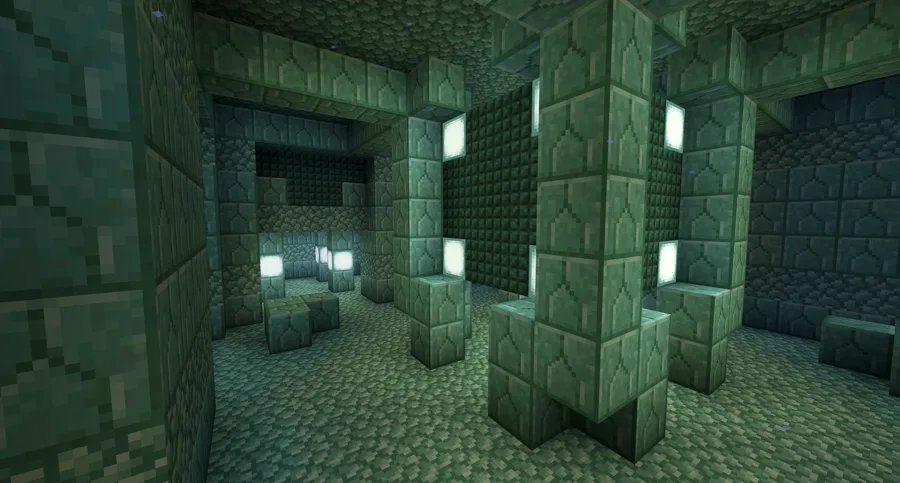
- Prismarine, prismarine bricks, dark prismarine, and sea lanterns. The monument is built entirely out of these, and they are gorgeous building blocks you can mine by the thousand. Prismarine only comes from monuments and ocean ruins.
- The conduit ingredients. A conduit's activation frame is built from prismarine-family blocks, and the monument is a free quarry of them. More on the conduit at the bottom.
- Gold blocks. The treasure chamber holds eight gold blocks encased in dark prismarine. Not life-changing, but it is 72 gold ingots sitting in one room.
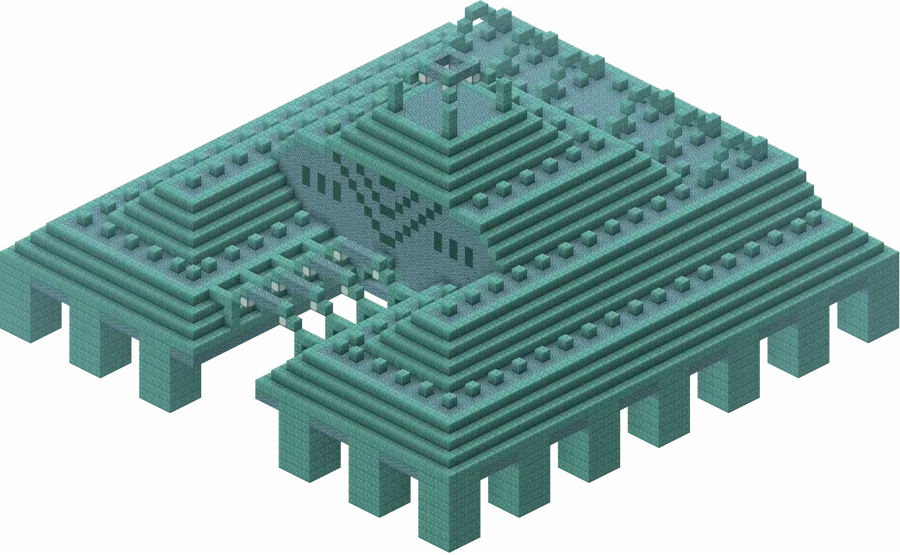
The monument is also just one of the most striking structures in the game — a 58x58-block prismarine fortress glowing with sea lanterns, propped up on giant pillars over the seafloor. It is worth seeing.
How to find an ocean monument
Monuments generate in deep ocean biomes and their variants (cold, warm, frozen, lukewarm deep ocean). They do not spawn in shallow oceans, so if you are paddling around a regular ocean you are in the wrong depth. You have two ways to track one down:
- Buy an ocean explorer map. A cartographer villager sells ocean explorer maps for emeralds and a compass at one of its higher trade tiers. The map marks the nearest monument relative to your position and updates as you travel toward it. This is by far the most reliable method — it points you straight at one.
- Explore deep ocean by boat. Monuments are large and lit, so from the surface in clear water you can sometimes spot the dark prismarine bulk and the glow of sea lanterns below you. Sail across deep ocean, look down, and watch for the silhouette.
The cartographer route is worth the villager setup. Wandering deep ocean hoping to swim over one works, but it can eat an entire session.
The three elder guardians and Mining Fatigue
Every ocean monument contains exactly three elder guardians — one in the top room and one in each of the two wings. They do not respawn once killed, so there is a finite number per world, and clearing all three is what permanently shuts off the monument's defense.
Here is the mechanic that defines the whole fight. Each elder guardian periodically scans for any player within a 50-block spherical radius and hits them with Mining Fatigue III for 5 minutes. The effect:
- Tanks your mining speed so hard that breaking the monument's prismarine takes absurdly long — this is the whole point of it.
- Cuts your attack speed by 30%, so even fighting back is slower.
- Goes through blocks. You will get hit before you can see the guardian, even underground or behind walls. Invisibility does not stop it.
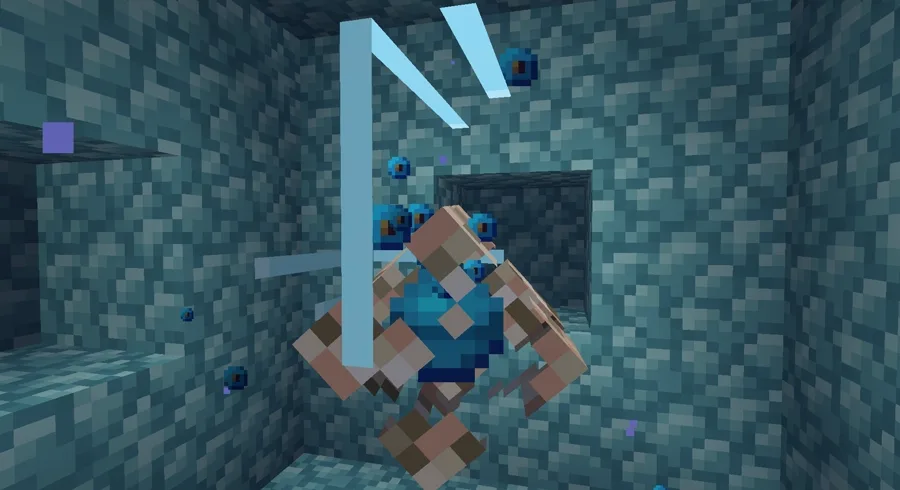
On top of the curse, elder guardians (and the smaller regular guardians that swarm the area) fire a laser beam that charges up and then deals damage you cannot dodge once it locks on, and they have defensive spikes — hit one while its spikes are out and you take damage back. So you have got a curse you can't avoid, ranged lasers, and melee punishment all at once.
The takeaway: Mining Fatigue is the real boss, not the guardians' damage. Plan the whole raid around removing it, because until all three elder guardians are dead, mining the monument for loot is a slog.
The milk trick and how to actually fight
The classic counter to Mining Fatigue is a bucket of milk. Drinking milk clears all status effects, including the curse — so the loop is: get cursed, drink milk, mine or fight for a bit, get re-cursed, drink milk again. Carry a stack of milk buckets (or a few you refill from cows before the trip) and you can keep working through the debuff. It does not make you immune; it just lets you reset on demand.
Milk is a stopgap, though. The clean solution is to kill the elder guardians, after which no new Mining Fatigue gets applied and you can mine freely. To fight effectively underwater you want:
- Respiration III on a helmet and Aqua Affinity so you can breathe longer and mine at normal speed underwater. These two enchantments are close to mandatory for monument work.
- Depth Strider III boots so you can actually move instead of swimming in slow motion.
- A Potion of Water Breathing or Night Vision (or both) to extend air and see in the gloom. A conduit later replaces these permanently.
- A strong melee weapon. Guardians have low health but there are a lot of them; a Sharpness diamond or netherite sword clears the regular guardians fast.
- A trident with the Impaling enchantment, which deals bonus damage to aquatic mobs (including guardians) and is one of the best monument weapons if you have one.
Approach the monument, take the first Mining Fatigue hit, push inside to the rooms, and hunt down the three elder guardians one at a time. They are slow-moving and not hard to corner once you are in melee. Once all three are dead, the curse stops refreshing — wait out the last 5-minute timer (or drink milk) and the monument is yours to strip.
Draining vs conduit: the two strategies
There are two real ways to make a monument livable enough to loot it. Most experienced players use a mix.
The conduit approach (the lazy-good one). Build a conduit at the monument first, using prismarine you mine on the way in. An active conduit grants Conduit Power to everyone in water within its range — that means permanent water breathing, underwater night vision, and a mining-speed boost, with no potion timers to manage. A fully built conduit also actively damages hostile mobs (including guardians) within 8 blocks, so it slowly thins the swarm for you. This does not remove Mining Fatigue — only killing the elder guardians does that — but it solves the air, vision, and chip-damage problems for the rest of the raid in one block.
The draining approach (the thorough one). Some players drain part or all of the monument so they can work in air instead of water. The tools:
- Sponges soak up water instantly — but you only get sponges from the monument, so this is more useful for a second visit or for clearing specific rooms once you are inside.
- Sand or gravel dropped from the surface fills water columns, but it is slow and tedious at monument scale.
- Most people drain a working room or two, not the entire 58x58 structure. Fully draining a monument is a massive, multi-hour project that only base-builders bother with.
The practical play for a first clear: bring potions and milk, kill the three elder guardians, drop a conduit if you can, and only drain a small area if you specifically want a dry workspace. Full draining is a flex, not a requirement.
The loot: sponges, gold, and prismarine
Here is what you are actually taking home. Note the monument is the largest structure in the game with no loot chest — there is no treasure chest to open. The loot is the blocks and the mob drops.
- Sponge rooms. Some monuments contain one or more rooms with roughly 30 wet sponges stuck to the ceiling. Sponge rooms have an opening only in the floor, so you swim up into them. Not every monument has a sponge room — generation is random — so do not panic if your first one is dry of them. Each elder guardian also drops one wet sponge when killed, so a clear nets at least three regardless.
- The treasure chamber. A tall room near the center holds eight gold blocks wrapped in dark prismarine. Mine through the dark prismarine to reach them. That is 72 gold ingots' worth.
- Prismarine by the truckload. The entire structure is prismarine, prismarine bricks, dark prismarine, and sea lanterns. Mine as much as you want — it is one of the best decorative block hauls in the game, and you need the prismarine family for your conduit frame.
- Guardian drops. Regular guardians and elder guardians drop prismarine shards, prismarine crystals (used to craft sea lanterns), raw fish, and occasionally rare drops. Looting boosts these.
Dry your wet sponges in a furnace to turn them into reusable dry sponges. A dry sponge soaks up water, then you re-dry it and reuse it — that loop is how you drain anything later.
Building a conduit
The conduit is the payoff of the whole monument trip, so here is the exact recipe and build.
Crafting the conduit block: Surround 1 Heart of the Sea with 8 nautilus shells in a crafting grid. The Heart of the Sea comes from buried treasure chests (found with treasure maps from shipwrecks and ocean ruins), and nautilus shells come from fishing, drowned drops, and wandering trader trades. Gathering eight nautilus shells is usually the bottleneck.
Activating it: Place the conduit in the center of a 3x3x3 volume of water, then build an activation frame around it. The frame is three open 5x5 squares — one on each axis (think three intersecting rings centered on the conduit). Only these blocks count toward activation:
- Prismarine
- Dark prismarine
- Prismarine bricks
- Sea lanterns
(Slabs, stairs, and walls of those blocks do not work — full blocks only.)
The range scales with how many frame blocks you place:
- 16 frame blocks is the minimum to activate, giving a 32-block effective range.
- A full frame of 42 blocks gives the maximum 96-block range and unlocks the conduit's attack effect, which damages hostile mobs within 8 blocks of it.
Since you are standing in a monument made entirely of the correct blocks, building the frame is trivial — mine the prismarine around you and place it. Once active, the conduit gives everyone in its watery range Conduit Power: restored oxygen (functionally unlimited underwater breathing), underwater night vision, and a roughly 17% mining-speed boost. It is the single best quality-of-life block for any ocean project, and the reason monuments are worth revisiting.
Java vs Bedrock notes
The monument is nearly identical across editions, with a few timing and behavior differences:
- Mining Fatigue application timing differs. On Java, an elder guardian periodically scans a 50-block radius and applies the curse. In Bedrock, it inflicts any unafflicted player within range immediately. Either way you get cursed early and often.
- The conduit frame, recipe, and range are the same on both editions — 16 blocks minimum for 32-block range, 42 for the full 96-block range and the attack effect.
- Ocean explorer maps from cartographers exist on both editions and point to the nearest monument.
- Drowned and nautilus shell drop rates vary slightly between editions, which affects how fast you gather conduit ingredients.
- Coordinates are F3 on Java; enable "Show Coordinates" in world settings on Bedrock to track your map progress.
Monument raid checklist
- Locate a monument in a deep ocean biome — buy an ocean explorer map from a cartographer
- Enchant a helmet with Respiration III + Aqua Affinity (close to mandatory)
- Bring Depth Strider boots, Water Breathing and/or Night Vision potions
- Pack a stack of milk buckets to clear Mining Fatigue on demand
- Bring a Sharpness sword, ideally a Trident with Impaling for the guardians
- Kill all three elder guardians (top room + both wings) to permanently stop the curse
- Mine prismarine on the way in to build a conduit frame at the monument
- Grab the eight gold blocks in the treasure chamber and any sponge room (~30 sponges)
- Dry wet sponges in a furnace for reusable water-removal tools
- Craft a conduit (1 Heart of the Sea + 8 nautilus shells) and activate it with a 42-block prismarine frame for max range
Frequently Asked Questions
Keep Reading
Related Guides

Minecraft Woodland Mansion Guide: Loot, Vindicators & the Totem
A woodland mansion is the only structure where you can punch an evoker to death and walk out with a Totem of Undying — the item that revives you the next time something one-shots you. It's also a maze full of axe-wielding vindicators and hidden rooms with diamonds behind fake walls. Here's how to find one, clear it without dying, and grab everything worth grabbing.
Best Minecraft Texture Packs to Try
A texture pack swaps what every block looks like without touching how the game plays — and the right one fixes vanilla's blurriest, ugliest textures or doubles the resolution. Here are the packs worth installing, what each one actually changes, and the install path for both Java and Bedrock.
Best Minecraft Shaders to Install Right Now
The right shader pack turns Minecraft's flat lighting into rolling shadows, real water, and sunsets that actually look like sunsets. Here are the packs worth installing, ranked by how good they look against how hard they hit your frame rate, plus the install path that does not involve OptiFine.

Minecraft Biomes Guide: Every Biome Worth Finding
Minecraft has over sixty biomes and most of them are scenery. These are the ones with a reason to visit — the resources, the structures, the mobs you can only get there — plus the rare biomes worth a long expedition.

Minecraft Survival Guide for Beginners — Surviving Your First Days
You have about ten minutes of daylight before the sun sets and the world tries to kill you. Here is exactly what to do with them — punch a tree, build a tool chain, and get a roof over your head before the zombies arrive.

Best Minecraft Enchantments, Ranked — The Ones Worth Your XP
Mending is the enchantment that ends the grind — gear that repairs itself forever. Everything else is a fight over your XP and anvil uses. Here is what actually earns a slot, ranked, with the real max levels.