Minecraft Raids & Pillagers Guide: Outposts, Waves & Heroes
A raid is the closest thing survival Minecraft has to a horde mode, and most players either dread it or have no idea how to start one on purpose. Here is how Bad Omen, the waves, and the Hero of the Village discount actually work — current 1.21 mechanics, not the old village-entry version.
A raid is the closest thing survival Minecraft has to a horde mode — wave after wave of crossbow-toting pillagers, axe-swinging vindicators, spell-casting evokers, and a ravager built like a runaway minecart, all converging on one village. Most players experience their first raid by accident and lose half the villagers before they understand what is happening. Done on purpose, it is one of the best XP, emerald, and Totem of Undying farms in the game.
This guide covers the whole loop the way it works in modern Minecraft (1.21+): where raiders come from, the Bad Omen / Raid Omen rework that changed how raids start, exactly how many waves you face and what is in them, how to beat the dangerous mobs, and how to milk the Hero of the Village discount afterward. Numbers are checked against the Minecraft Wiki, because the raid-trigger mechanic changed in 2024 and a lot of guides still describe the old version.
Pillager outposts and patrols
Before you can run a raid, you need Bad Omen, and that comes from illagers out in the world. There are two sources.
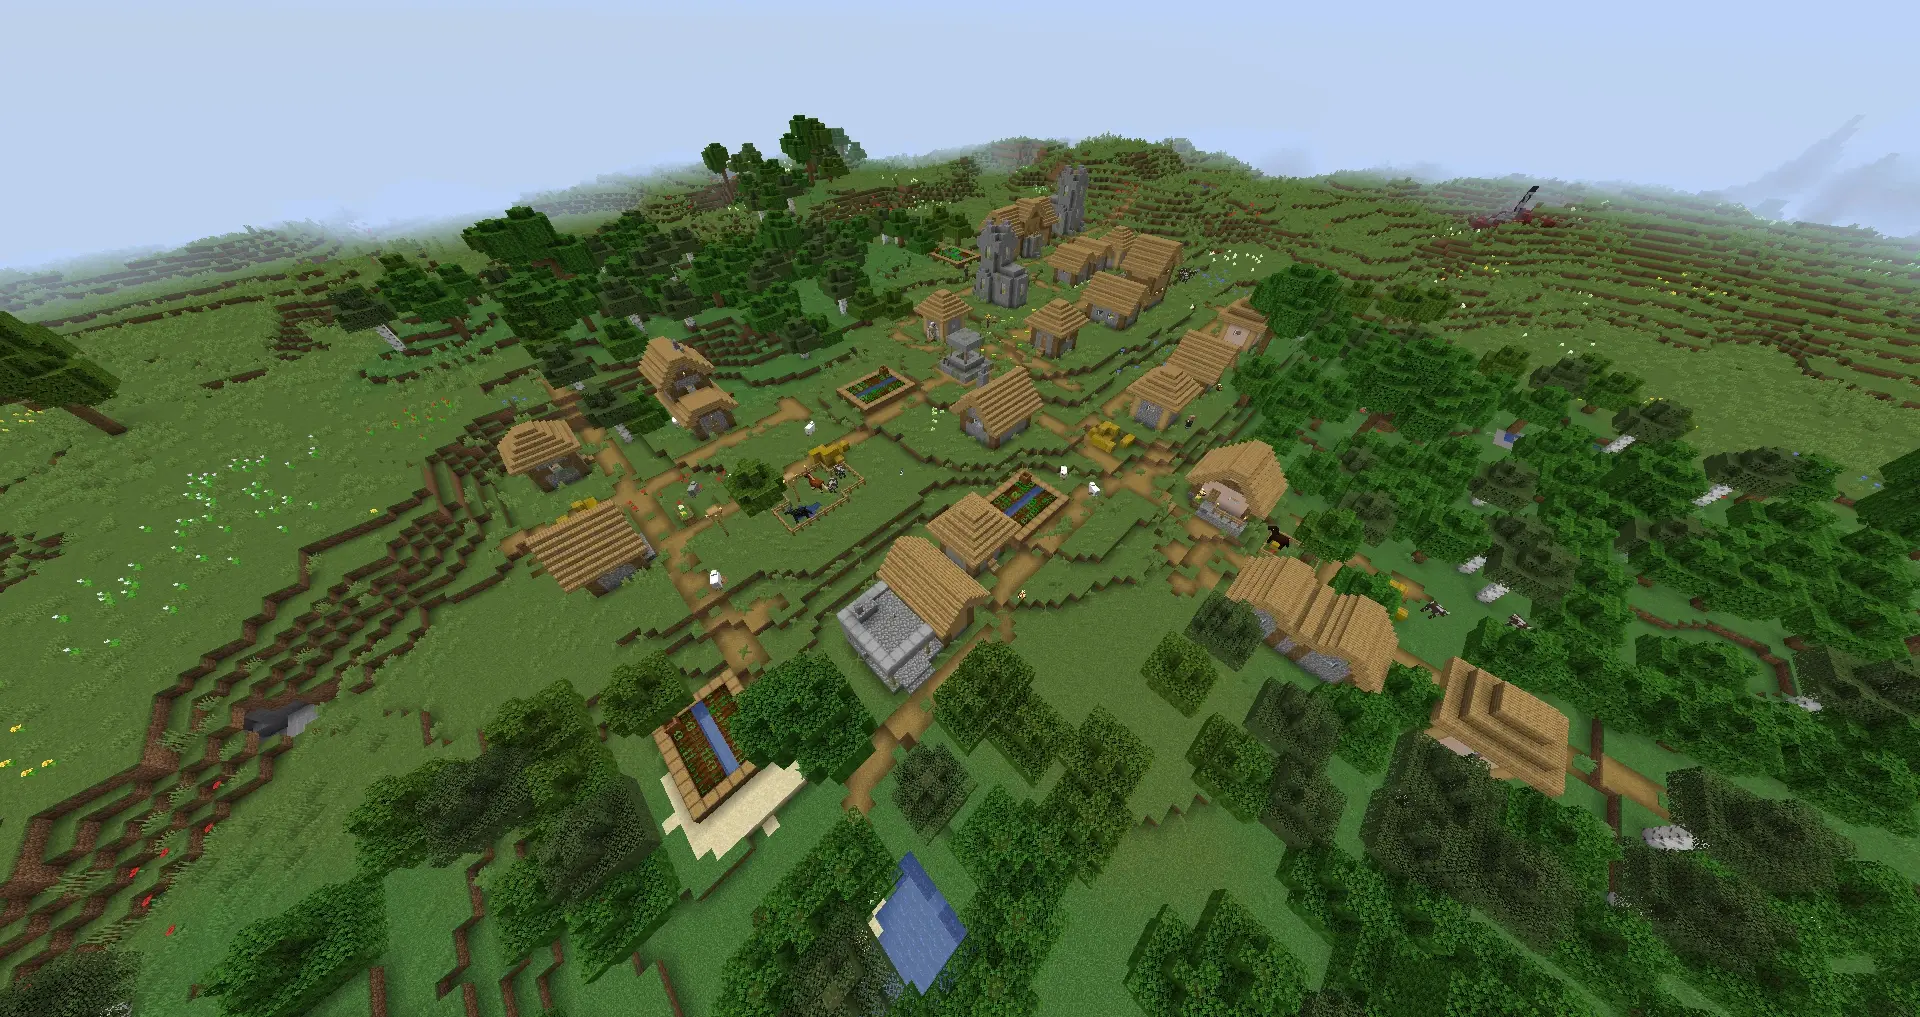
Pillager outposts are tall dark-oak-and-cobblestone watchtowers that generate in the same biomes as villages — plains, taiga, deserts, savannas. The tower has a chest at the top with crossbows, arrows, enchanted books, Bottles o' Enchanting, and a 25% shot at a Sentry Armor Trim. Pillagers spawn around the structure continuously, so it doubles as a crossbow farm. You will also find caged mobs nearby: an iron golem has an 85% chance to be locked in a cage, and an allay has a 50% chance to appear in a separate one — free the allay, it is genuinely useful.
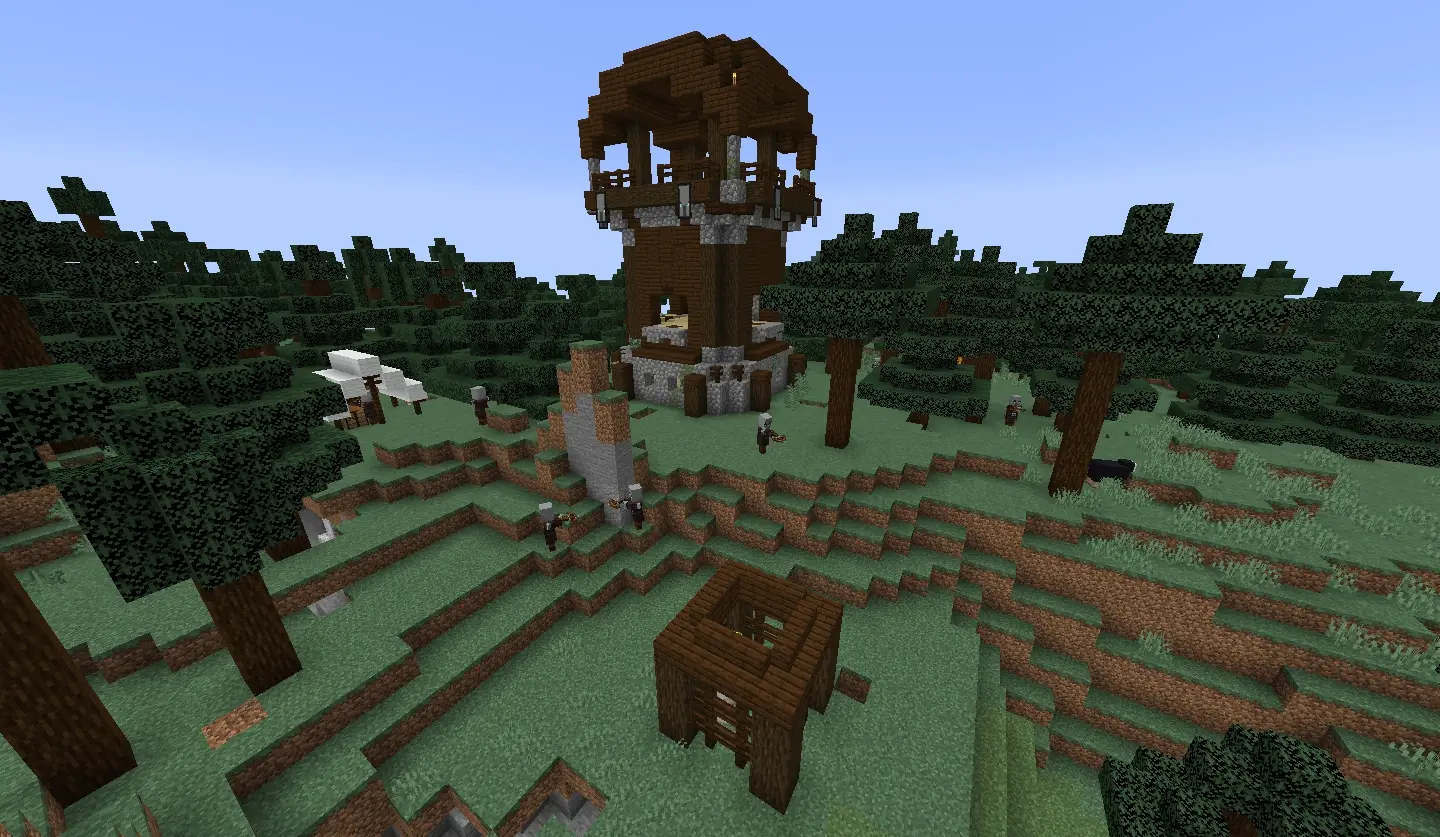
Patrols are roving groups of pillagers that spawn in the wild after a few in-game days, usually led by a captain carrying an ominous banner on its head. The captain is the key target.
In both cases, killing the captain is how you get the Ominous Bottle — and that is the new path to a raid.
Bad Omen and Raid Omen (the 2024 rework)
This is the part most old guides get wrong, so read carefully. The mechanic changed in version 1.21.
The old way (pre-1.21): killing a raid captain gave you the Bad Omen effect directly, and walking into a village instantly triggered a raid.
The current way (1.21+):
- Kill a raid/outpost captain — the one wearing the ominous banner — and instead of an effect, it drops an Ominous Bottle of a random level between 1 and 5.
- Drink the Ominous Bottle to gain the Bad Omen effect, which now lasts 1 hour 40 minutes regardless of level.
- Enter a village while you have Bad Omen. The effect converts into Raid Omen, and after a 30-second countdown, the raid begins.
That extra step — bottle the omen, drink when ready — is a quality-of-life win: you can grind a stack of Ominous Bottles, store them, and start a raid exactly when your defenses are set up rather than the second you stumble into town. If you change your mind, drinking milk clears Bad Omen like any other effect before it converts.
A practical note: in Java Edition, Bad Omen levels above 2 add an extra raider wave and crank up the raiders' enchanted gear, and the resulting Hero of the Village matches the omen level. In Bedrock, the omen level does not change the raid itself — it only matters for trial spawners.
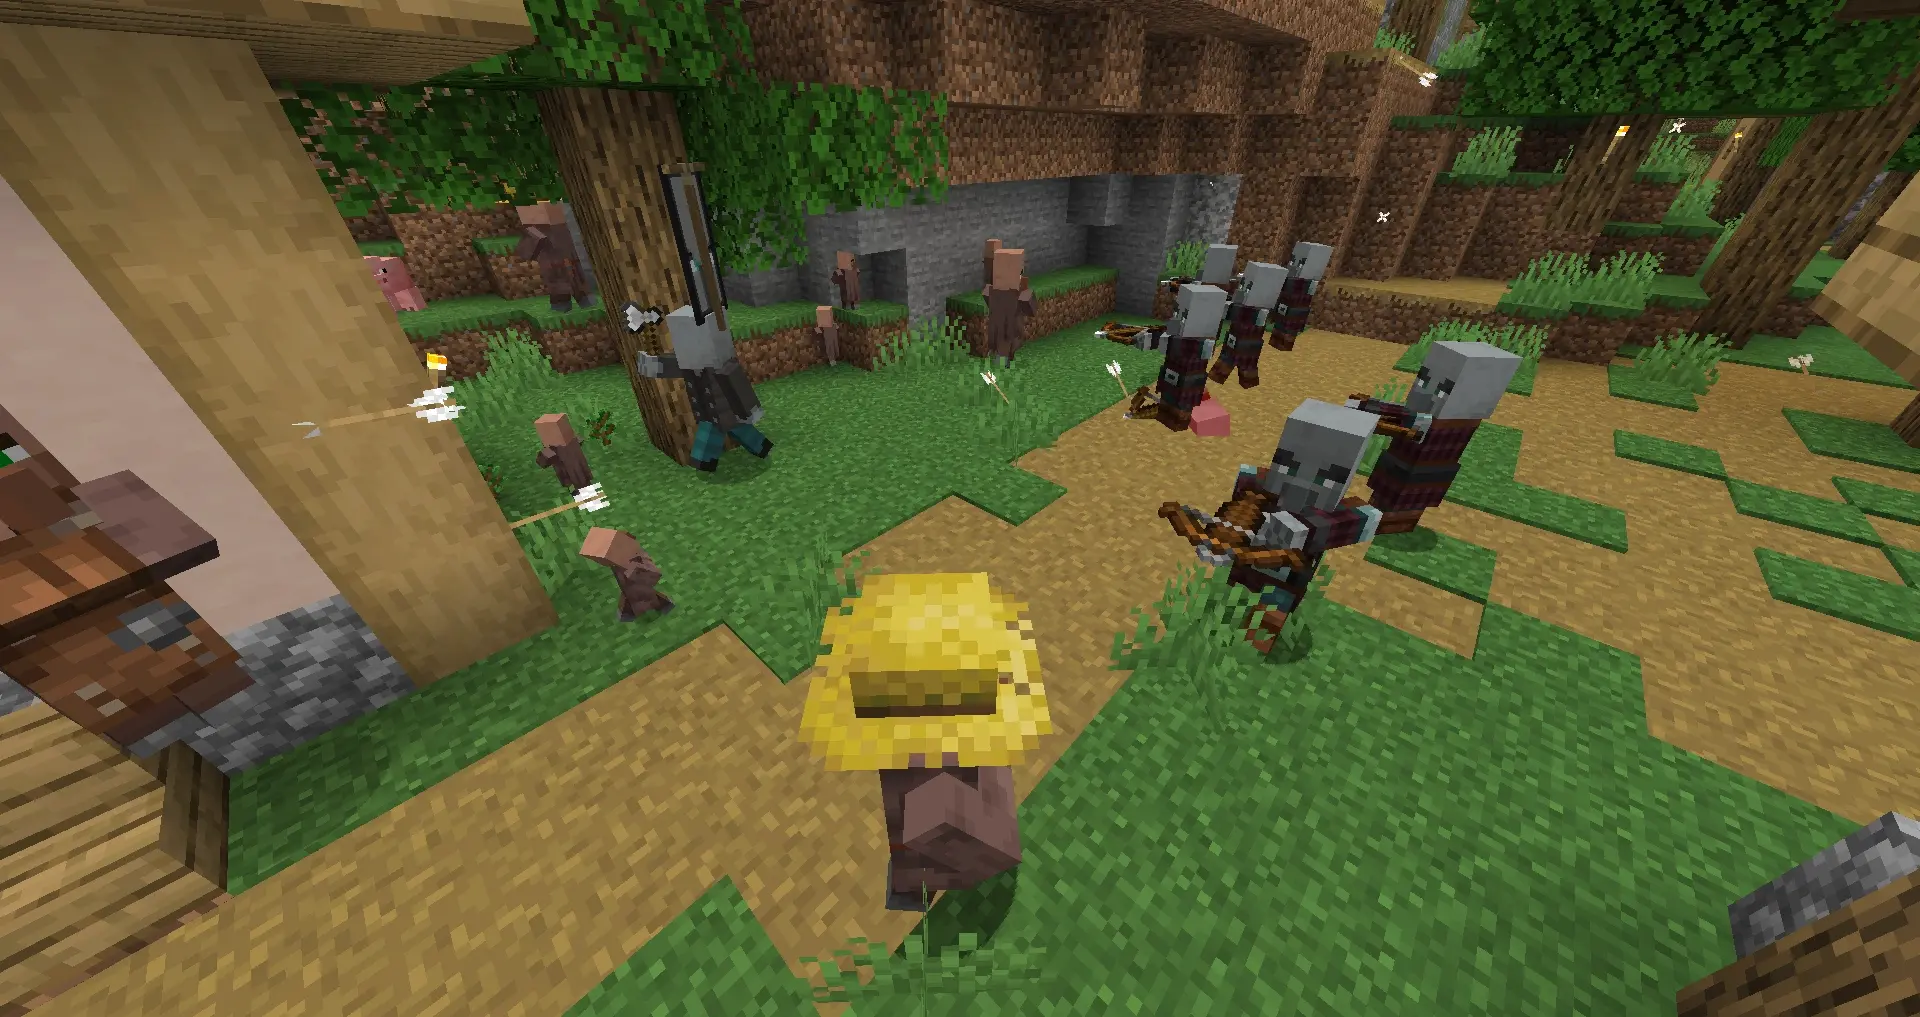
How a raid plays out
When the Raid Omen timer expires, a purple "Raid" boss bar appears at the top of your screen, a horn sounds, and the first wave spawns at the edge of the village and marches toward its center. The boss bar tracks how many raiders are left in the current wave; clear them and the next wave horn blows.
Raiders are smart about it. They actively hunt down villagers and will path toward beds and workstations, and if you hide, they will eventually come find you. Leaving a wave's last raider alive does not pause the clock forever — stragglers get a glowing outline so you can hunt them down.
You lose the raid if every villager dies (and you have no way to repopulate the village), at which point the bar reads "Raid - Defeat" and the raiders celebrate. You win by clearing the final wave. Ringing the village bell highlights all nearby raiders with a glowing outline for a few seconds — handy for finding that one pillager stuck on a roof.
Wave counts by difficulty
The number of waves scales hard with difficulty, which is the single biggest factor in how brutal your raid is:
- Easy: 3 waves (4 with a higher-level omen)
- Normal: 5 waves (6 with a higher-level omen)
- Hard: 7 waves (8 with a higher-level omen)
So a Hard-difficulty raid with a level-2-plus Ominous Bottle is 8 waves of escalating illagers. If you are farming raids for loot, Hard gives the most raiders per omen but also the most ways to die. Build your defenses around the difficulty you actually play on.
The illagers you'll fight
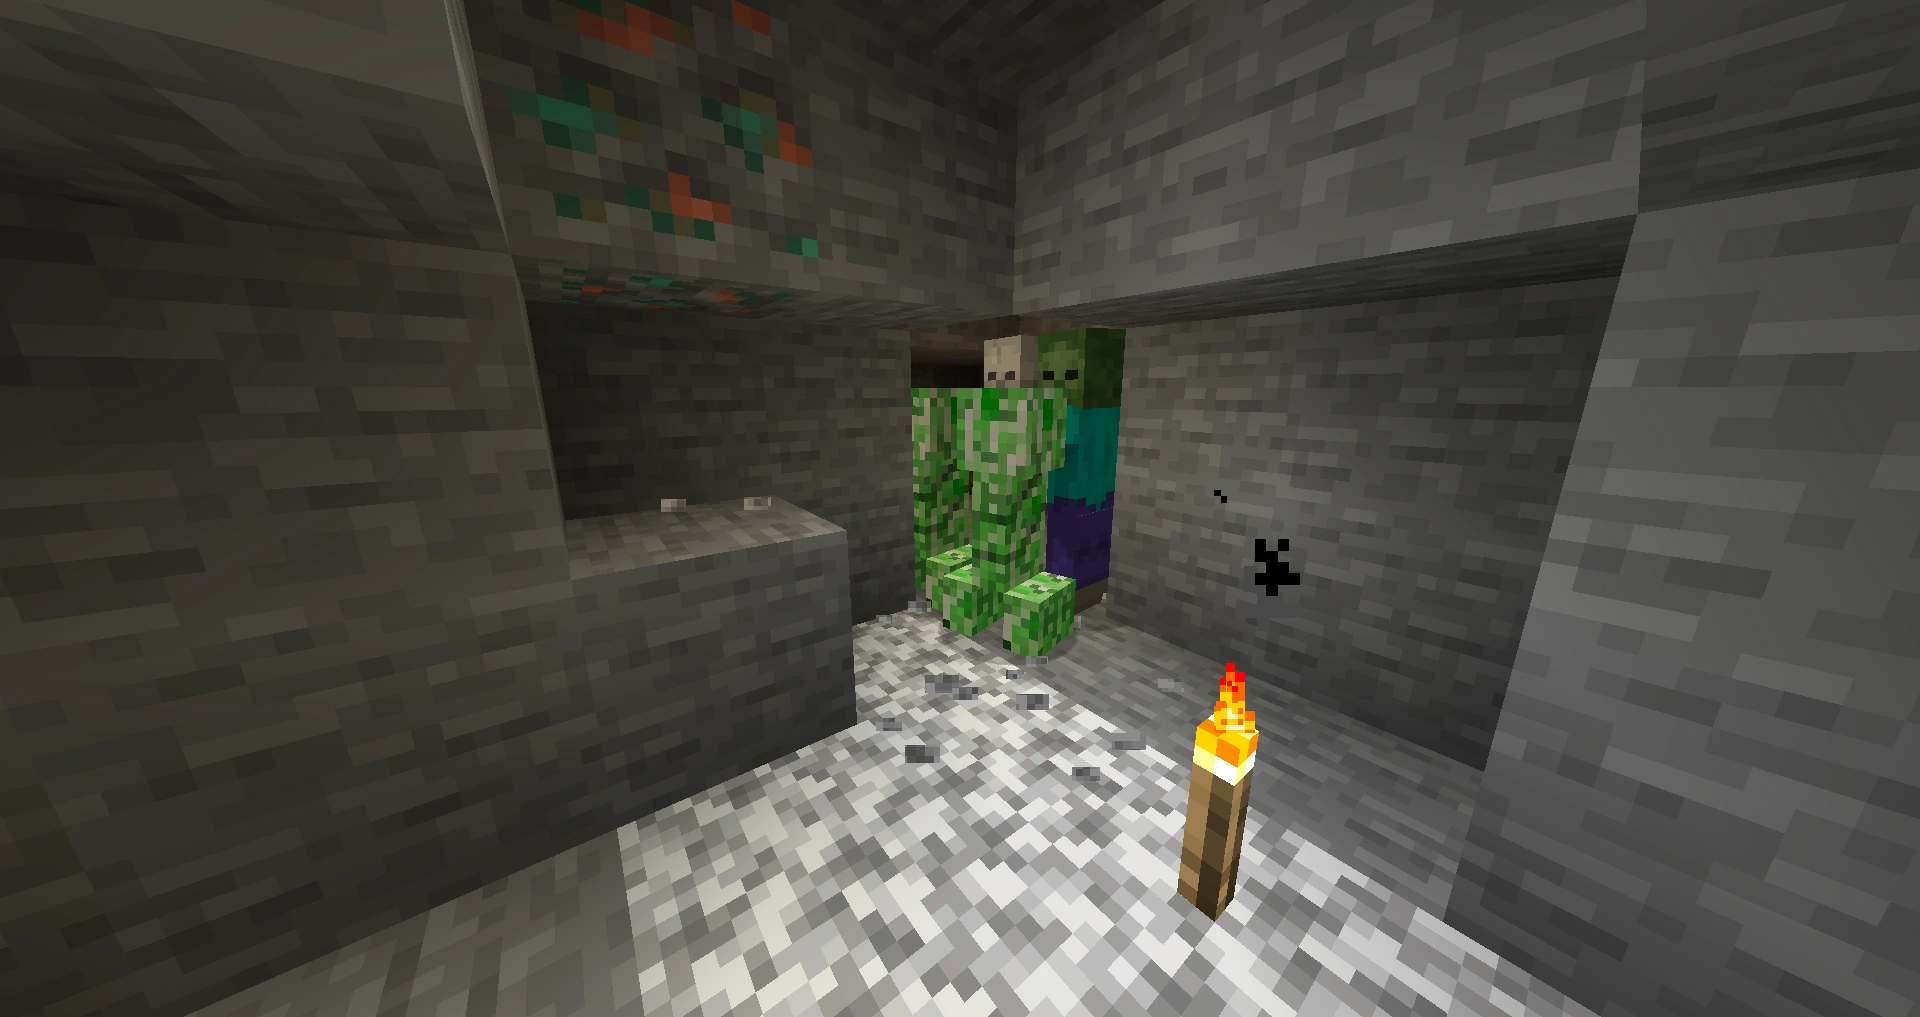
Each wave mixes raider types, with the nastier ones showing up in later waves:
- Pillagers — the crossbow grunts. Ranged, weak individually, dangerous in numbers. They make up the bulk of early waves (a Normal wave 1 is around 4–6 pillagers plus a ravager).
- Vindicators — illagers with iron axes and 24 HP. Their melee hits for 13 damage on Normal and a terrifying 19.5 on Hard, and they close distance fast. These are the ones that actually delete villagers. (Fun fact: a vindicator renamed "Johnny" with a name tag turns hostile to almost everything, including other mobs.)
- Evokers — robed spellcasters with 24 HP that summon three vexes (small flying pests) and rows of evoker fangs that bite for 6 magic damage each. They show up in later waves (wave 5+).
- Witches — throw harmful splash potions and heal other raiders. Annoying support.
- Ravagers — the tanks, often ridden by a pillager or evoker. Covered below.

The evoker is the one to prioritize for loot: it always drops a Totem of Undying (a 100% drop), the item that saves you from a killing blow. A few full raids will stock you with totems for the rest of the world.
Ravagers: the tank that ruins your day
The ravager is the heavy unit and the reason unprepared raids fall apart. The numbers:
- 100 HP (50 hearts) — it soaks an absurd amount of damage.
- Melee gore attack: 12 damage on Normal, 18 on Hard.
- A roar attack that hits everything in range for 6 (Normal) / 9 (Hard) and knocks them back about 5 blocks — it will fling you off a wall.
- It tramples crops and breaks leaves, so it will chew through a flimsy farm-fence defense.
- It is often ridden by an illager that shoots or casts from its back, so you are fighting two threats stacked on one body.
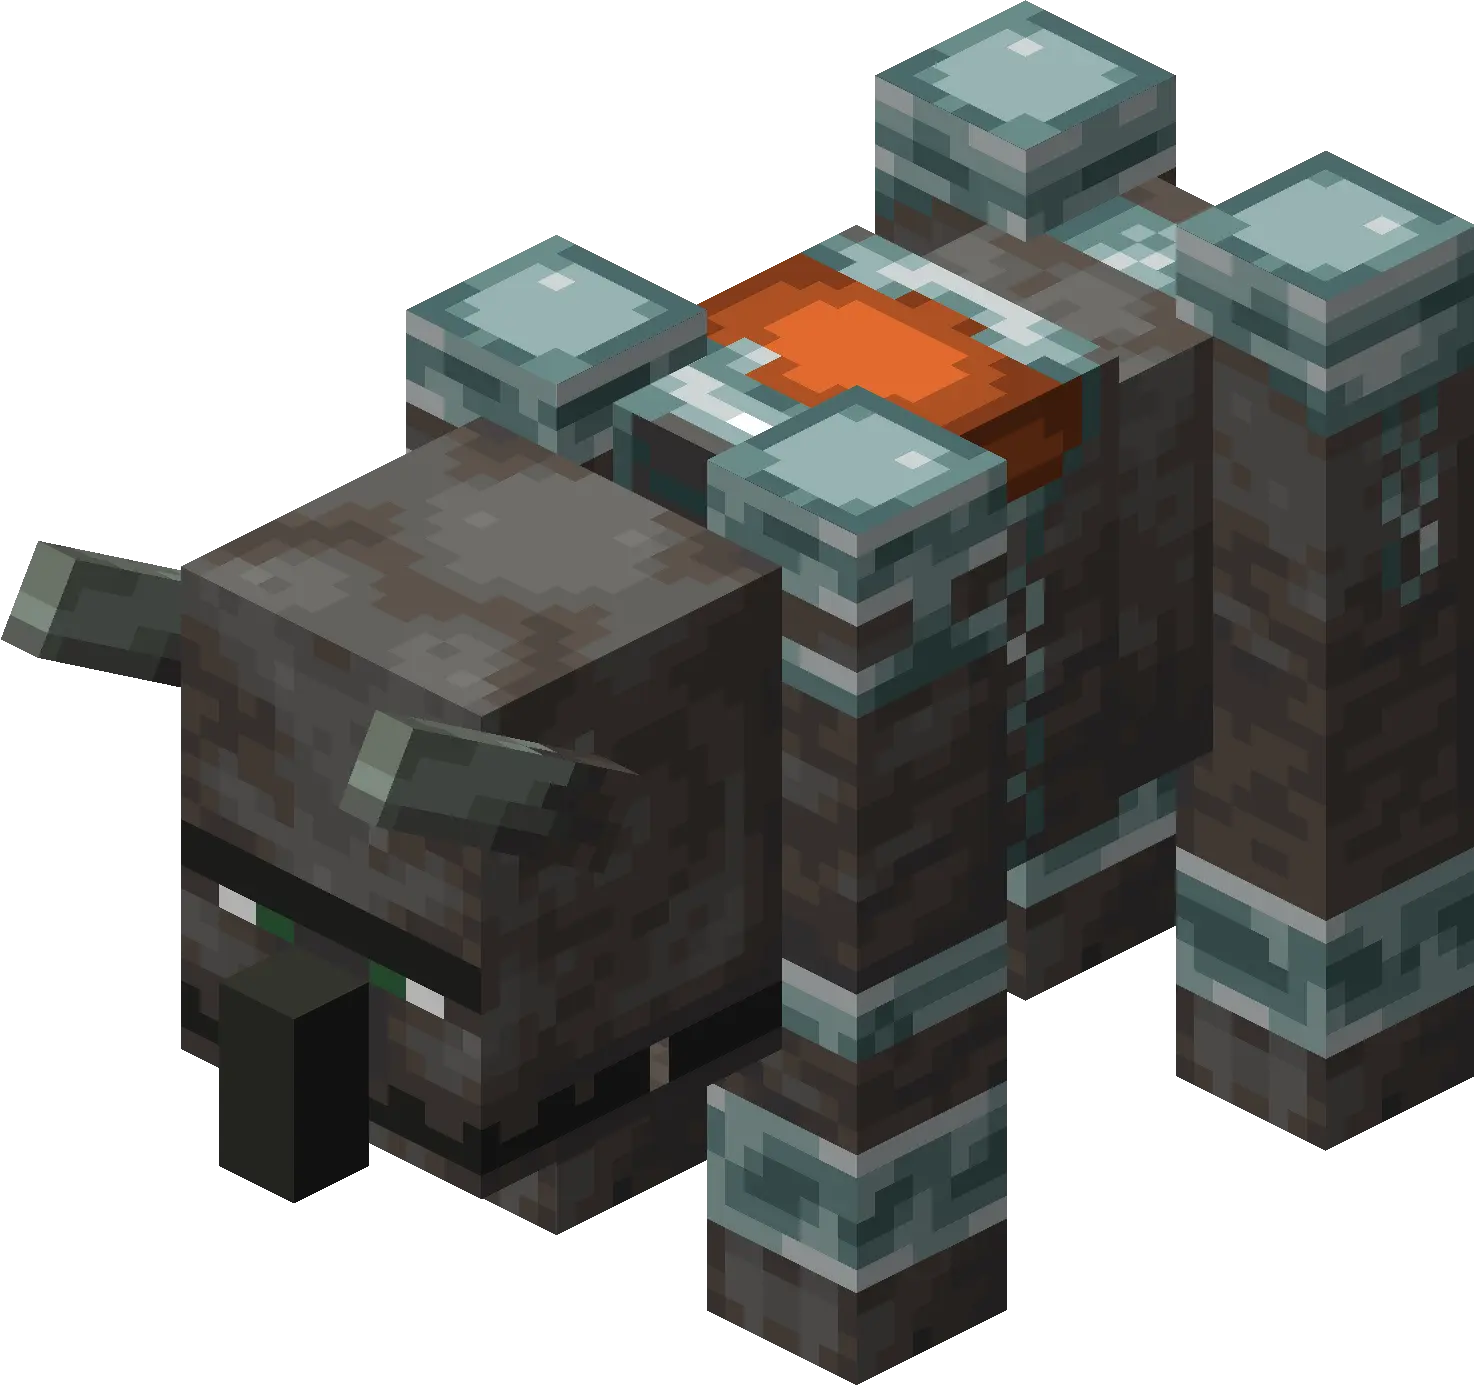
It always drops a saddle and gives 20 XP. The play against a ravager is to fight it in a corridor where its knockback shoves it into a wall instead of off your platform, or to drop it into a pit. Do not try to facetank it on open ground while pillagers shoot you.
How to actually win a raid
A raid is winnable solo if you set up before you drink the bottle. The plan:
- Pick the right village and fortify it. Wall off the area, light it fully so nothing else spawns, and give villagers a safe room with beds and workstations so they cannot wander into axe range. A small, defensible village beats a sprawling one.
- Build iron golems. Golems are your front line — they soak hits and one-shot pillagers. Two or three golems patrolling the center swing most raids in your favor.
- Fight in a funnel. Create a chokepoint so you face raiders a few at a time instead of a full wave at once. A 1-wide corridor with you at the end turns 6 pillagers into a single-file line.
- Bring the right kit. A Sharpness or Smite axe shreds illagers, a crossbow with Multishot/Piercing clears clustered pillagers, and a shield blocks crossbow bolts (just not the ravager's gore). Carry a Totem of Undying in your offhand from the very first raid onward.
- Kill priority: ravager rider, then evoker, then ravager, then vindicators. Drop the rider so the ravager is just a slow tank, grab the evoker's totem, then clean up. A good enchantment loadout and solid armor make all of this dramatically easier.
- Use the bell. Ring it to find stragglers between waves so a hidden pillager does not stall your clear.
If you are farming raids, the fully automatic route is a raid farm that funnels raiders into a kill chamber — see the best Minecraft farms for where that fits in your base build.
Hero of the Village: the real reward
Win a raid and every player who killed at least one raider gets Hero of the Village, an effect that lasts 40 minutes and is the actual reason to farm raids. What it does:
- Massive trade discounts. At level I, villager trade prices drop by 30%. Each additional level (tied to your omen level, up to V in Java) shaves off another ~6.25%, capping at a 55% discount at level V.
- Free gifts. In Java, nearby villagers will throw items at you based on their profession — a farmer tosses bread or crops, a fisherman tosses fish, a cleric tosses redstone or glowstone, and so on. Stand near a worked village with the effect and you get a small pile of free stuff.
That 30–55% discount is enormous if you are buying enchanted books, mending tools, or other expensive trades. The smart loop is: stockpile Ominous Bottles, run a raid in a well-defended trading-hall village, then immediately spend the 40-minute window buying everything at a discount. Pair it with a strong villager trading hall and a single raid pays for a lot of gear.
Java vs Bedrock raid notes
The raid system is mostly identical across editions, with a few differences:
- Omen level effects. In Java, a higher-level Ominous Bottle adds an extra wave, boosts raider enchantments, and raises your Hero of the Village level. In Bedrock, the omen level does not affect the raid or Hero of the Village (there is only one level) — it only matters for trial spawners.
- Villager gifts (the profession-based item throws) are a Java Edition feature.
- Wave counts (3 / 5 / 7 by difficulty) and the Bad Omen → Raid Omen → raid flow are the same on both editions.
- Totem of Undying drops 100% from evokers on both editions.
Quick Action Checklist
- Find a pillager outpost or wait for a patrol; kill the captain wearing the ominous banner
- Collect the Ominous Bottle it drops (level 1–5) — drink it when ready to gain Bad Omen
- Enter a village with Bad Omen; it becomes Raid Omen and a raid starts after 30 seconds
- Fortify first: wall the village, light it, build 2–3 iron golems, give villagers a safe room
- Expect 3 waves on Easy, 5 on Normal, 7 on Hard (one more with a higher omen level)
- Kill priority: ravager rider → evoker (free Totem of Undying) → ravager → vindicators
- Fight in a 1-wide funnel and keep a Totem of Undying in your offhand
- Ring the village bell to glow-highlight stragglers between waves
- Win the final wave to earn Hero of the Village (40 min, 30–55% trade discounts + villager gifts)
- Spend that 40-minute window buying expensive trades at a discount
Frequently Asked Questions
Keep Reading
Related Guides
Minecraft Villages Guide: Types, Golems & Defense
A village is the single best piece of free real estate in the game — beds, food, an iron golem bodyguard, and a 13-profession economy you didn't have to build. Here is how villages actually work: the biome types, every job-site block, golem spawning, raid defense, and the zombie-villager cure that quietly breaks trade prices.

Minecraft Deep Dark & Warden Guide: Sculk, Cities & Survival
The Deep Dark is the one biome that can kill you with a mob you are not supposed to fight. Here is how sculk shriekers summon the Warden, what its sonic boom actually does, and how to loot an Ancient City without ever waking the thing up.
Minecraft Mob Spawning Explained: Light Levels, Mob Caps, and Spawn-Proofing
The "keep it above light level 7" rule everyone still repeats died in 1.18. Here is the ruleset the game actually runs: what it checks before a mob appears, how far one torch really reaches, why your farm is capped, and the Java-versus-Bedrock differences that quietly break cross-play builds.

Minecraft Cherry Grove Guide: Wood, Pink Petals, and Mobs
The cherry grove is the prettiest biome in Minecraft and one of the most underrated places to start a world. It's a meadow with pink trees on paper, but it quietly hands you a whole salmon-colored wood set, a renewable decoration block, emeralds in the hills, and bees on the branches.
Minecraft Survival Guide for Beginners — Surviving Your First Days
You have about ten minutes of daylight before the sun sets and the world tries to kill you. Here is exactly what to do with them — punch a tree, build a tool chain, and get a roof over your head before the zombies arrive.

Best Minecraft Enchantments, Ranked — The Ones Worth Your XP
Mending is the enchantment that ends the grind — gear that repairs itself forever. Everything else is a fight over your XP and anvil uses. Here is what actually earns a slot, ranked, with the real max levels.