PUBG Healing and Boost Items Guide
Half the players who die to the blue zone or lose a winnable fight got their healing math wrong. Here's every PUBG heal and boost item, the 75 HP cap nobody explains, and how to manage your boost bar like the good players do.

Half the players who lose a winnable PUBG fight didn't get out-aimed — they got out-healed. They were sitting at 60 health when the fight started because they never topped off, or they panic-cracked a med kit in the open and got shot mid-animation, or they spent the whole match ignoring the little orange boost bar that was quietly handing free health and movement speed to the enemy who actually used it. Healing in PUBG: Battlegrounds is a resource-management game running underneath the gunfight, and most players are losing it without realizing there's a game to lose.
The system has two completely separate bars that people constantly confuse: your health, which heals items restore directly, and your boost, which boost items fill and which then passively regenerates health and speeds you up over time. Understanding the difference — and the hard 75 HP cap that splits your healing items into two jobs — is the entire skill. This guide breaks down every heal and boost item, what each one actually does, the cast times, and the management habits that separate players who outlast the blue zone from players who bleed out behind a rock.
It's evergreen — the exact percentages get nudged patch to patch, but the structure of the system doesn't change. Pair it with the movement and positioning guide, because where you heal matters as much as what you heal with.
The two systems: health and boost
Two bars, two jobs:
- Health (the white bar) is your life. It runs 0-100. When it hits zero you're downed (in squads) or dead. Healing items restore it directly and immediately-ish.
- Boost (the orange/yellow bar above it) is a buff meter. Boost items fill it, and once it's above zero it does two things over time: it slowly regenerates your health, and at higher levels it increases your movement speed. Boost drains continuously, so you have to keep topping it up.
The key insight most newer players miss: boost is how you get from a topped-off-but-not-full state to actual full health, and it's how you stay fast in the late circles. A player running a full boost bar is regenerating health passively and moving faster than a player who isn't — they're winning the fight before it starts. The good players treat boost as a permanent background buff they never let run dry, not as an emergency item. We'll get to exactly how that bar behaves below.
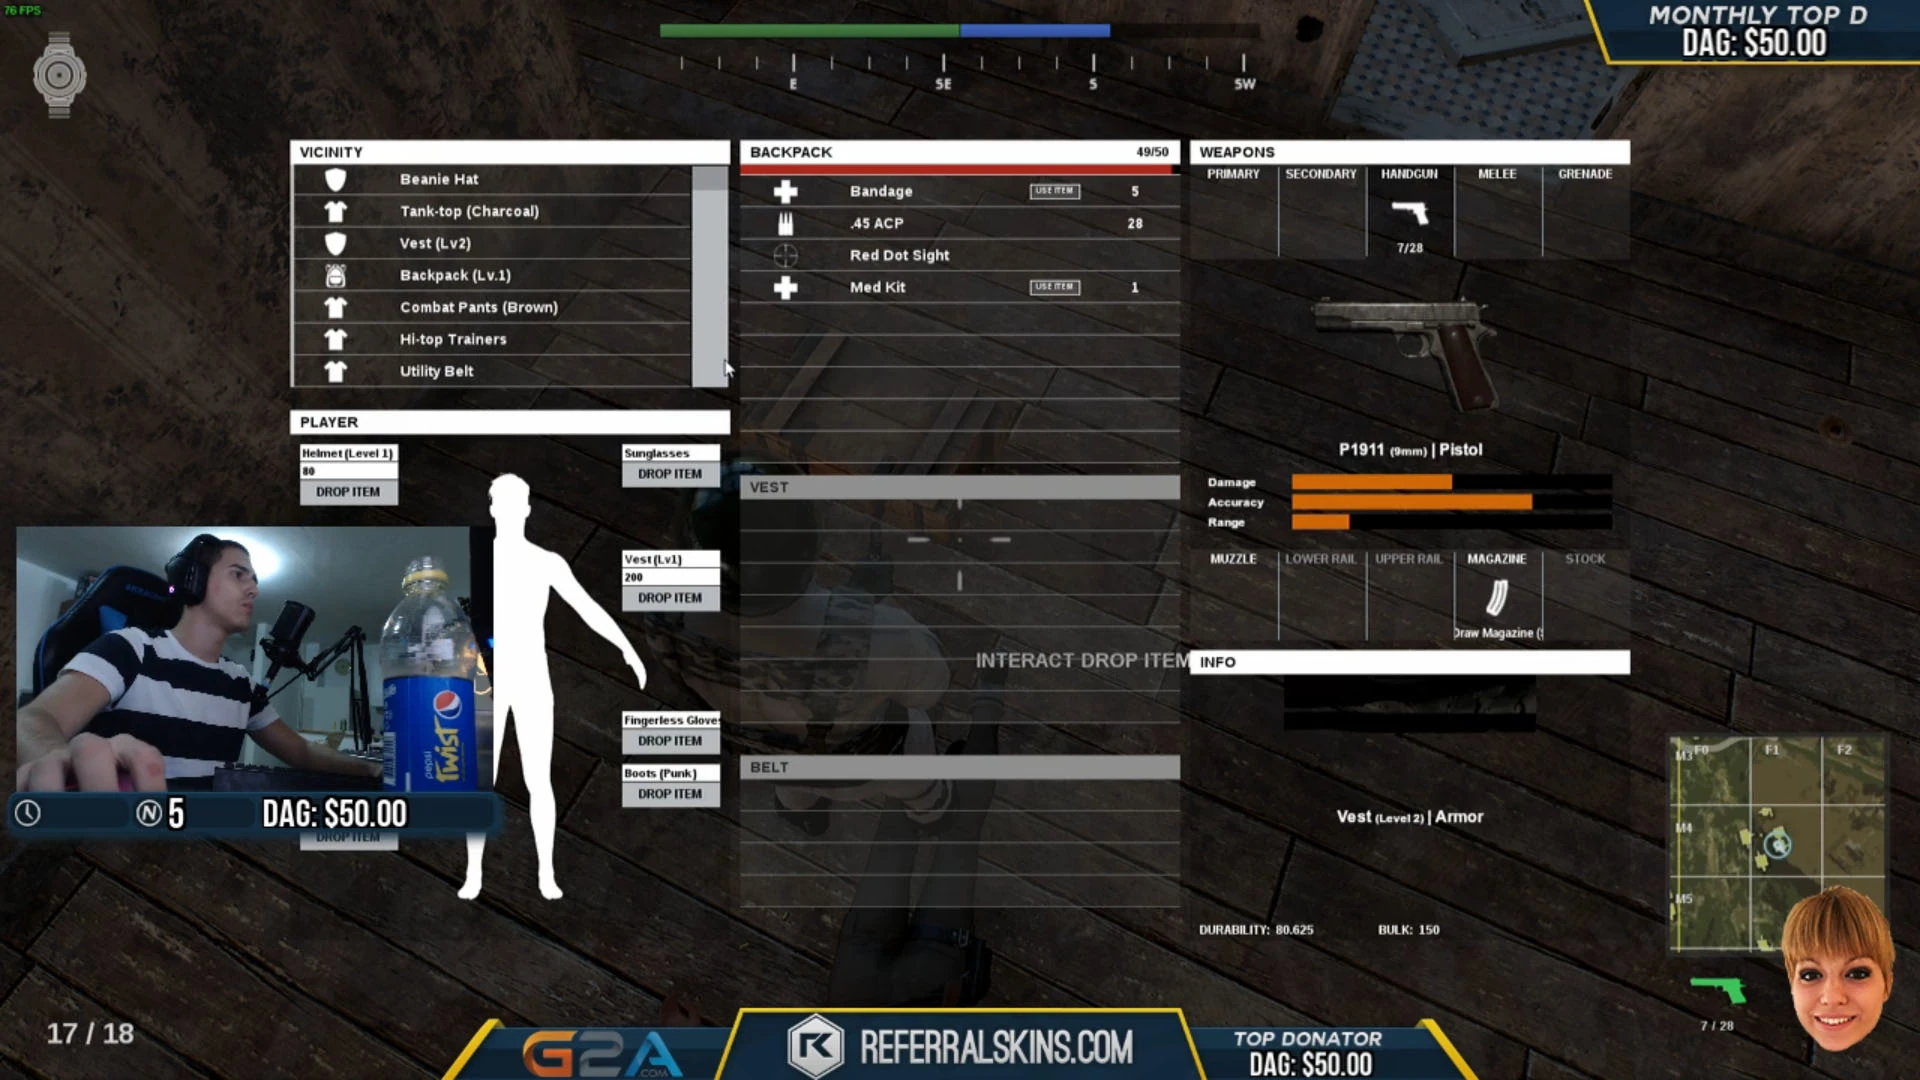
The healing items: bandages, first aid, med kit
Three direct-heal items, in ascending order of power and cast time. (All cast times are the standard values; certain perks or events can adjust them, but these are the baselines, and any action — taking damage, moving in some cases, swapping items — cancels the heal.)
| Item | What it does | Cast time | The catch |
|---|---|---|---|
| Bandage | Heals 10 HP, applied over a short window | ~4 seconds | Cannot be used when your health is above 75. You'll often chain several |
| First Aid Kit | Heals you up to 75 HP in one use | ~6 seconds | Also capped at 75 — it will not push you above it |
| Med Kit | Heals you all the way to 100 HP | ~8 seconds | The only item that gets you above 75. Bulky and slow |
Bandages are your cheap, common, high-volume heal. Each one restores 10 HP, they're tiny, and you'll carry a stack of them. The trade is volume and time: getting from 30 to 75 on bandages alone means chaining several four-second casts, which is a long time to be vulnerable. Use them to top off small chip damage when you're safe, not to recover from a real beating mid-fight.
First Aid Kits are the workhorse. One kit takes you straight up to 75 HP in a single six-second cast, which is far more efficient than spamming bandages for the same result. This is the item you reach for after most fights — it's the fastest way back to fighting-fit short of the cap. Carry a healthy stack of these; they're the backbone of your healing economy.
Med Kits are the premium heal and the only item that takes you above 75, all the way to full 100 HP in one use. They're bulky, they take a full eight seconds to cast, and they're rarer than bandages or first aid kits, so you won't be swimming in them. Save them for the late game when full health actually matters, or for the moment you need to go from cracked to topped-off before a final fight — not for casual chip damage you could've bandaged.
The 75 HP cap that trips everyone up
Here's the single most important rule in PUBG healing, and the one nobody explains in the tutorial: bandages and first aid kits cannot heal you above 75 HP. Period. You can chain bandages all day and you'll stop at 75. A first aid kit stops at 75. The white bar simply will not climb past three-quarters using those items.
So how do you get to 100? Two ways, and only two:
- A Med Kit, which heals directly to full.
- Boost. A filled boost bar passively regenerates your health past 75 and up toward 100 over time — this is the main way most players close that final quarter without burning a precious med kit.
This is why the system is really two halves working together. Your cheap items (bandages, first aid) get you efficiently to 75. Your boost bar — fed by energy drinks, painkillers, and syringes — carries you the rest of the way to 100 and keeps you there. If you've ever wondered why you "can't heal past 75," now you know: you were using the wrong tool for that last 25, and the answer is almost always boost, not a med kit you should be hoarding.
The boost items: energy drink, painkillers, syringe
Three items fill the boost bar, in ascending order of how much they add.

| Item | Boost added | Cast time | Role |
|---|---|---|---|
| Energy Drink | +40 boost | ~4 seconds | Common, fast, cheap. Your everyday boost topper |
| Painkillers | +60 boost | ~6 seconds | A bigger single hit of boost than the drink |
| Adrenaline Syringe | +100 boost (fills the entire bar) | ~6 seconds | The rare, max-tier boost — instantly maxes the bar |
Energy Drinks add 40 boost in a quick four-second cast and are common enough that you should always be carrying several. This is your bread-and-butter boost item — sip one whenever your bar is low and you're safe. Two or three of them will get you well up the bar.
Painkillers add a larger 60 boost per use over six seconds. Same idea as the energy drink, just a bigger single chunk, which makes them efficient when you want to climb the bar fast without juggling four separate drinks. Carry them alongside your energy drinks.
Adrenaline Syringes are the king of boost: a single syringe adds 100 boost, which fills the entire bar to maximum in one six-second cast. That maxes out both your passive health regen and your movement-speed bonus instantly. Syringes are rare, so they're a special-occasion item — pop one before a final circle push, or to instantly get the full top-tier speed buff when you need to reposition under fire. One syringe replaces juggling several drinks.
How the boost bar actually works
The boost bar isn't one flat buff — it's tiered, and the higher you fill it, the more it does. The mechanics, in plain terms:
- Boost constantly drains once you have any, so it's a "keep topping up" resource, not a one-and-done.
- The lower tiers (a partially-filled bar) give you passive health regeneration over time — slow at first, faster as the bar climbs. This regen is what carries you past the 75 cap toward 100.
- The higher tiers (a mostly- or fully-filled bar) add a movement-speed bonus on top of the regen, and the top of the bar gives the biggest speed boost. A fully-boosted player is noticeably faster on foot.
- The whole point: a full bar means you're healing for free and outrunning anyone who isn't boosted. In the late game, where every player is taking chip damage from the circle and every reposition is a footrace, that's a permanent edge.
The practical rule the good players live by: keep your boost bar at least into the speed-bonus tiers at all times after the early game. Sip an energy drink whenever it dips and you're safe. You're effectively running a constant heal-and-speed buff that costs you nothing but common consumables, and your opponents who ignore it are slower and lower than you in every late fight. This pairs directly with circle discipline — see our endgame circle strategy for when that speed edge decides the match.
Healing while moving and in a fight
PUBG does not (in standard play) let you sprint and heal at the same time — using a heal or boost item slows you to a walk and locks you into the cast animation, and taking damage cancels it outright. That single rule dictates when and where you heal:
- Never heal in the open. A six-second first aid kit is six seconds of you walking in a straight line, unable to shoot, broadcasting your position. Get behind hard cover first.
- Break line of sight, then heal. The correct sequence after a fight is disengage → behind cover → heal — not heal-where-you-stand. If you're still being shot, the cast cancels and you've wasted nothing but also gained nothing.
- Pre-heal and pre-boost before you push, not during. Top off your health and fill your boost before you enter a fight, so you go in at 100 with a full bar. Healing mid-push is how you lose the push.
- In squads, use teammates as cover. One player heals while the others hold the angle. Solo, you have to make the cover yourself with terrain or smoke — which is exactly what the throwables in our utility guide are for. A smoke grenade is a portable heal-safe zone.
The mistake that kills people is treating healing as a reaction — "I'm low, heal now, wherever I am." It's a setup. You create the safe window first, then heal into it.
What to carry and when to use it
A solid mid-game inventory of consumables looks roughly like this, adjusted for how much space you want to spend:
- A stack of bandages for cheap top-offs of small chip damage when safe.
- A healthy stack of first aid kits — your main heal, the workhorse that gets you to 75 fast.
- One or two med kits, saved for the late game and the final-fight top-off to 100.
- Several energy drinks and/or painkillers, sipped constantly to keep the boost bar in the speed tiers.
- An adrenaline syringe if you find one, held for a final-circle push or an emergency max-speed reposition.
The usage logic, simplified: bandages for scratches, first aid for real damage up to 75, med kit only for the last 25 when it counts, and boost running constantly in the background. Get those four habits right and you'll routinely roll into the final circle at full health with a full boost bar while the player across from you is at 70 and slow. For the broader inventory-management picture — what to drop, what to prioritize, how much to carry — see our looting and inventory guide.
Quick Action Checklist
- Remember the cap: bandages and first aid kits stop at 75 HP — only a med kit or boost gets you to 100
- Use bandages for small chip damage, first aid kits as your main heal to 75
- Save med kits for the late game and final-fight top-offs to full
- Keep your boost bar topped into the speed tiers at all times after the early game
- Sip energy drinks (+40) and painkillers (+60) constantly when you're safe
- Hold adrenaline syringes (fills the whole bar) for a final-circle push or emergency reposition
- Never heal in the open — break line of sight and get behind hard cover first
- Pre-heal and pre-boost before a push, never during it
- Use a smoke grenade or a teammate as cover to create a safe healing window
- Let boost — not a hoarded med kit — carry you that last 25 HP from 75 to 100
Frequently Asked Questions
Keep Reading
Related Guides
PUBG Audio Guide: How to Win Fights With Sound
Half the players you lose to heard you first. Sound in PUBG is free information — footstep direction, gunfire distance, a door you didn't open. Here's how to read all of it and turn your ears into a radar.
PUBG Looting & Inventory Management Guide
Half the players who die in PUBG die rich — full of loot they never needed and short on the three things that actually keep you alive. Here's how to loot fast, carry smart, and stop hoarding garbage.
Best PUBG Console Settings (PS5 & Xbox)
Default controller settings are why you keep losing gunfights you should win. Here's how to pick a controller layout, dial in three separate sensitivities, set your dead zones, and stop fighting your sticks on PS5 and Xbox.
PUBG Best Graphics Settings for High FPS
Pros don't run PUBG on low settings because their rigs are weak — they do it because flat, ugly graphics show enemies faster and feed a frame rate that makes tracking easier. Here's the exact PC tuning for max FPS and visibility.

Best Weapons in PUBG: Tier List
Every PUBG tier list is out of date the moment a balance patch drops. So here's the list, ranked by role, plus the durable logic to re-tier any gun yourself when the next patch shakes things up.
Best PUBG Loadouts & Attachments
A naked M416 and a fully kitted M416 are basically two different guns. Here's how to build the strongest two-gun loadouts in PUBG and the attachment priority that turns loot into recoil control.