PUBG Sanhok Map Guide: Drops, Rotations & Endgame
Sanhok is the 4x4 jungle map that turned PUBG's slow-burn formula into a sprint. Here's a real guide to the small map — where to drop, how to survive the constant fights, how to rotate through the dense cover, and how to win the fastest endgame in the game.
Sanhok is what happened when PUBG looked at its own ten-minute looting simulator and decided you should be in a gunfight by the second minute. It's the 4x4 jungle map — a quarter the size of Erangel and Miramar — and it took the slow-burn battle royale and turned it into a sprint. Drop, get a gun, fight, loot the body, fight again. If the big maps are a chess match, Sanhok is speed chess with a knife.
That compression is the whole point, and it's also where most players go wrong. They drop Sanhok with their Erangel brain still on — loot patiently, avoid early fights, play for placement — and then die confused in the third firefight they didn't want. Sanhok doesn't let you avoid fights; it puts a fight in your lap whether you asked for one or not. The players who love it are the ones who lean into the chaos, and the players who hate it are the ones still trying to play it slow. Here's the actual guide: the layout, the drops, the loot-and-fight tempo, and how to win the fastest endgame in PUBG.
The map that sped PUBG up
Sanhok is the 3rd playable map PUBG released, and it broke the size mold on purpose: a 4x4 km island against the 8x8 footprint of Erangel and Miramar. Cramming a full lobby onto a quarter of the land means you're never far from another team, and the developers leaned all the way in — it was the first PUBG map to use the dynamic blue zone, which reads how many players are alive and speeds up or slows down the circle accordingly. Fewer survivors, faster zone. The whole system is tuned to keep the pace high and the matches short.
The map is a lush Southeast Asian jungle, inspired by islands in Thailand and the Philippines, and the foliage is a gameplay mechanic, not set dressing. Dense trees, tall grass, and broken terrain mean cover is everywhere — which sounds great until you realize it's everywhere for the enemy too. Sanhok is a map of close-range ambushes, sudden flanks, and bushes that are absolutely a person. Play it expecting a quiet loot run and the jungle eats you.
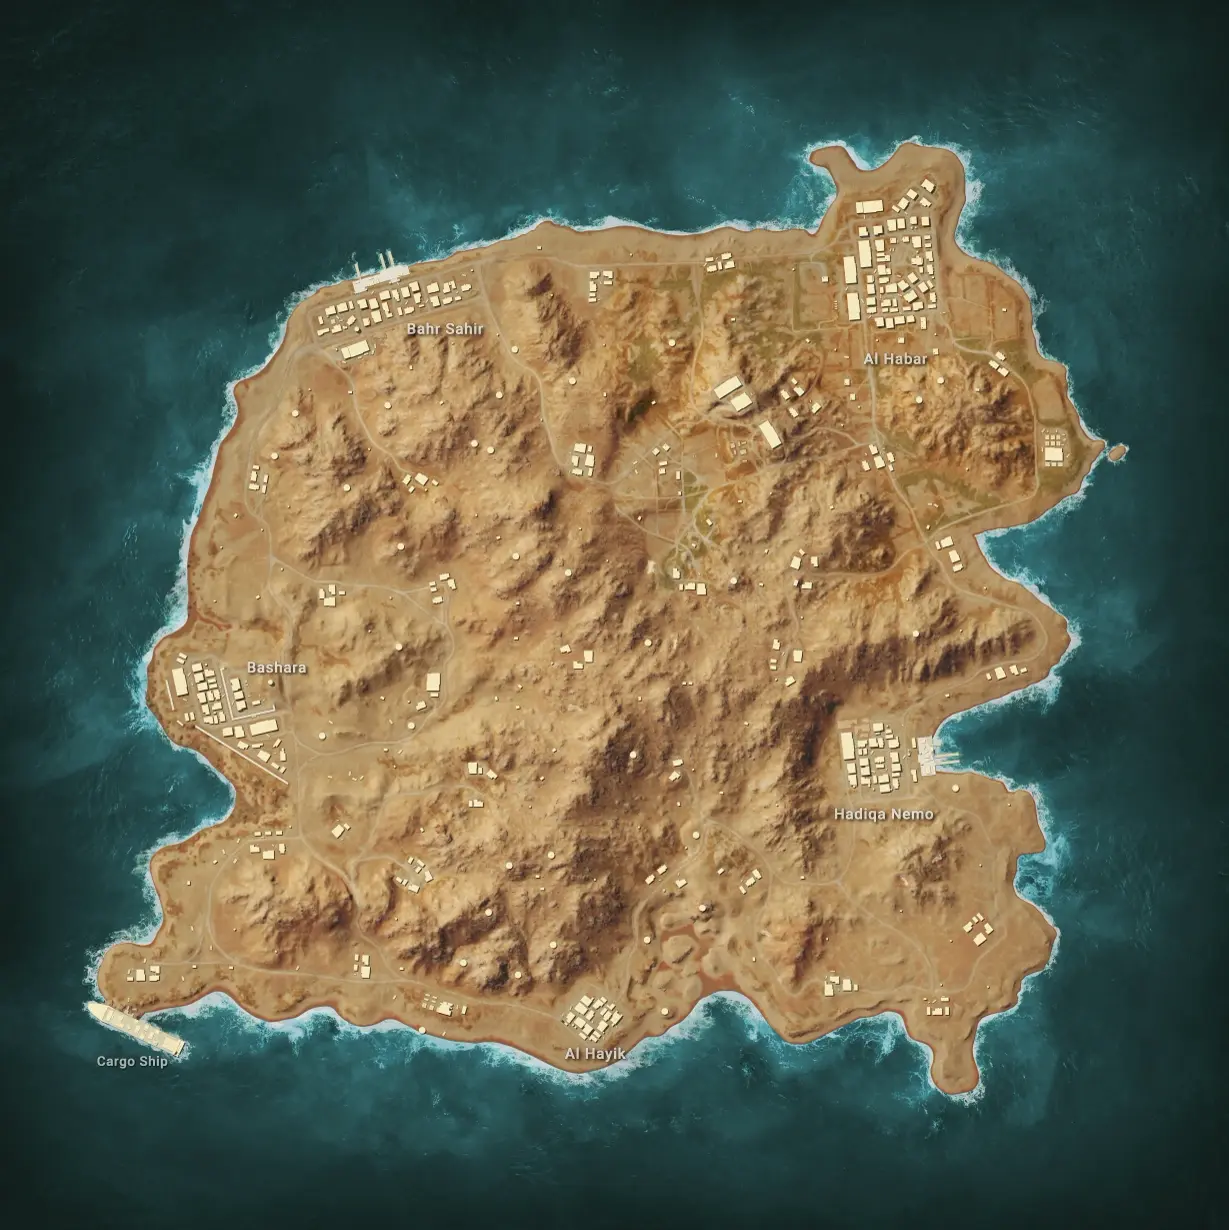
How Sanhok is laid out
Sanhok is a 4x4 km island, compact enough that you can see most of the major compounds from a single ridge. It's built around a handful of dense, high-value compounds connected by rivers, hills, and thick jungle, with a few standout landmarks that anchor the whole map. Because it's so small, the named locations sit close together — rotating between two major compounds that would be a vehicle drive on Erangel is a short jog here.
The named locations you actually need to know:
| POI | Where | What it is |
|---|---|---|
| Bootcamp | Center | The hottest drop — a dense island compound that's the map's CQC arena |
| Paradise Resort | North | Large resort complex, top-tier loot, frequent fights |
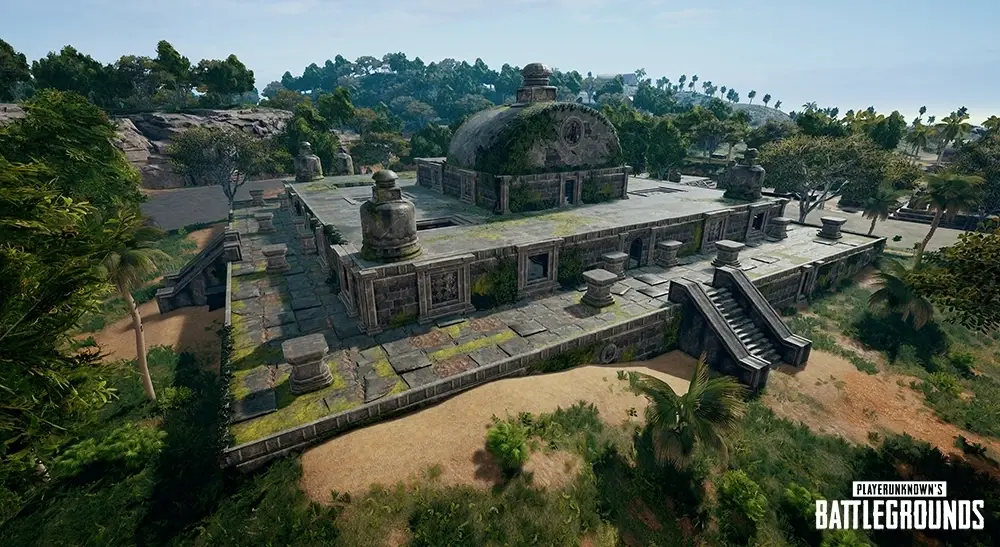
| Ruins | West-center | The temple ruins — strong loot in a tight, layered footprint |
| Camp Bravo | South | Military camp compound, dense loot |
| Camp Charlie | East | Military camp compound, dense loot |
| Quarry | Southwest | Industrial dig site, good loot with verticality |
| Docks | East coast | Coastal compound, solid gear |
| Mongnai / Na Kham / Lakawi | Scattered | Mid-size compounds, reliable loot, less traffic |
| Tambang | West | Village compound, decent loot |
| Cave | Central | A literal cave landmark with concentrated loot |
Between those are villages (Pai Nan, Ban Tai, Khao, Tat Mok) and a whole lot of jungle. The mental model: dense loot-compounds packed tightly across a small island, with thick foliage between them so every rotation is a potential ambush.
The hot drops
On a map this small, "hot" is the default state — but these are the spots that reliably draw a crowd and a fight in the first thirty seconds.
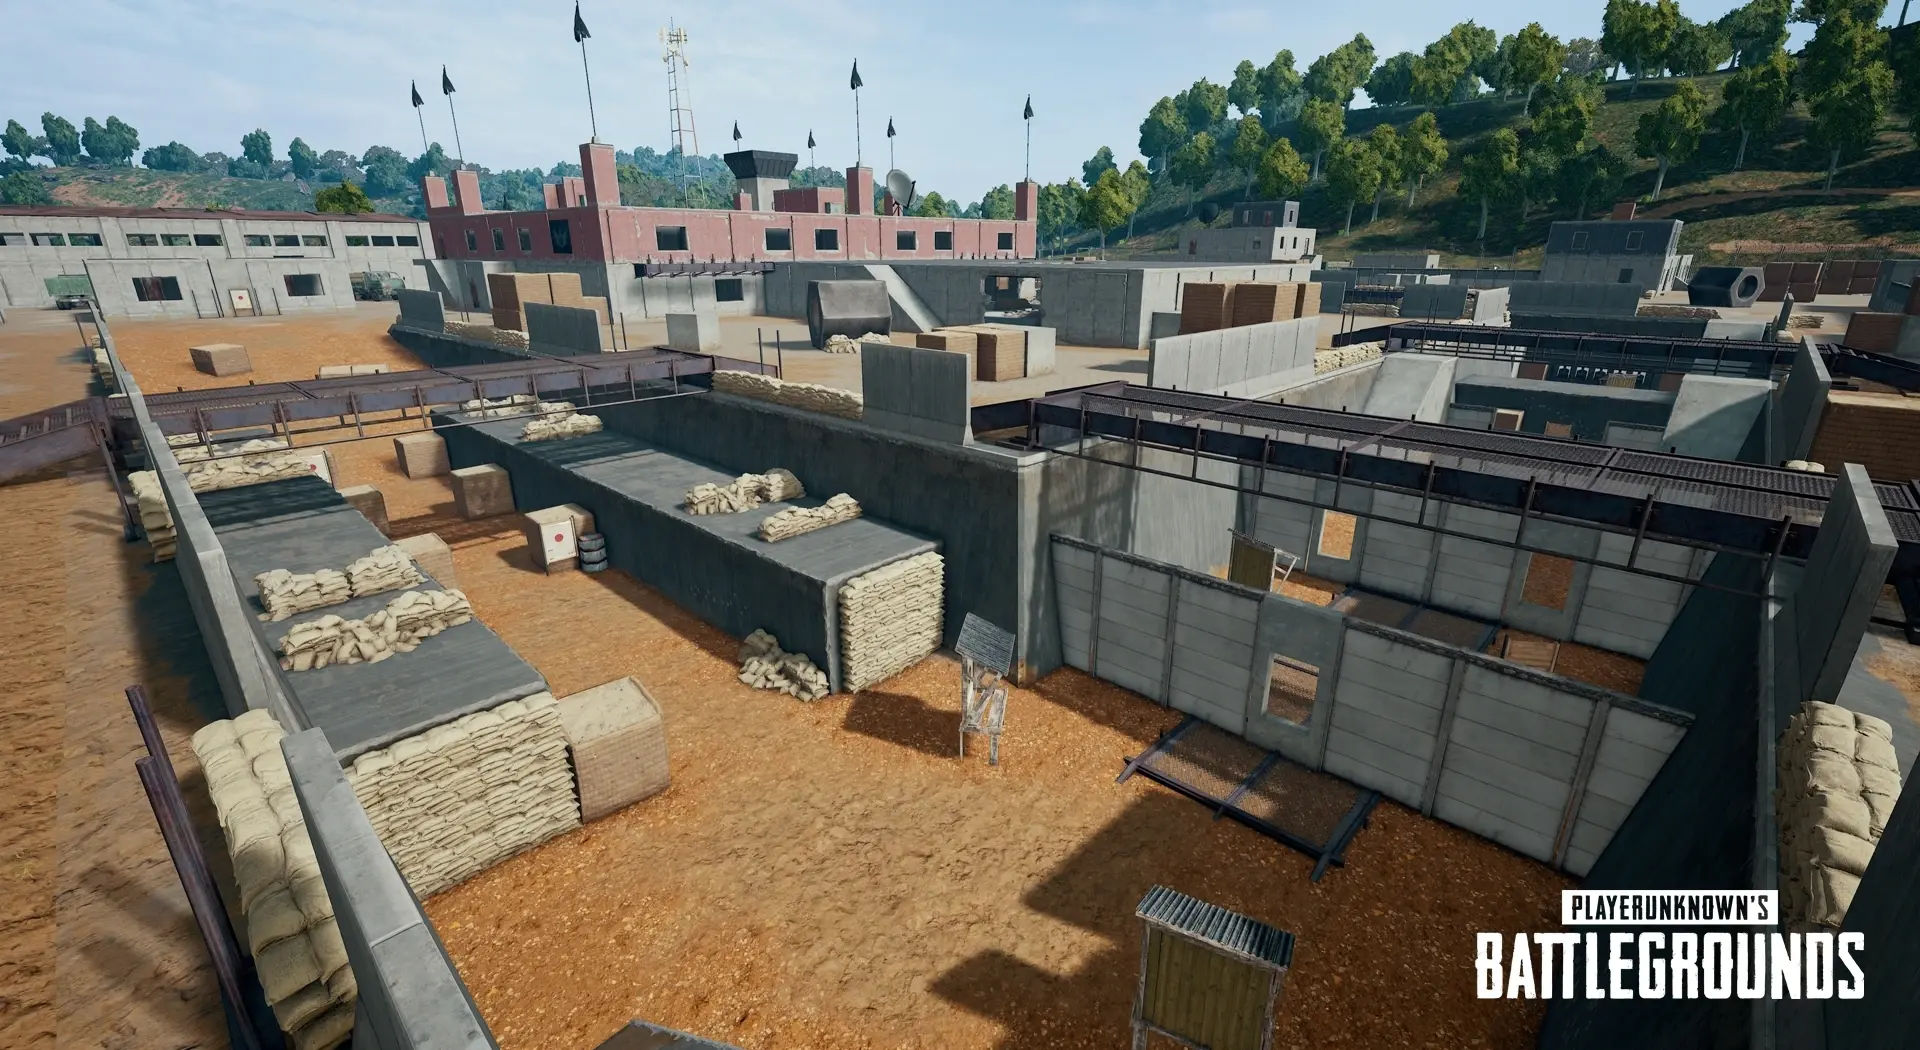
Bootcamp is the Pochinki of Sanhok and then some. It's a dense compound of identical buildings on a small central island, it has fantastic loot, and it sits dead center, so it's near basically every flight path. The result is the most consistent bloodbath in PUBG — drop here and you're in a multi-team brawl before your boots hit the ground. It's the best CQC gym in the game and the worst place to land if you want to survive. Take a roof or an edge building, grab a gun first, and clear the buildings methodically.
Paradise Resort up north is the other premier hot drop. It's a large resort complex with top-tier loot spread across multiple buildings and a pool area, which makes it both rich and contested. There's enough room that you can sometimes land on a far building and gear before the fights find you, but expect company. Great loot for the squad willing to fight for it.
Ruins in the west-center is the temple compound — a tight, layered, multi-level footprint stuffed with loot. The vertical, stacked design makes for nasty close-range fights where elevation and grenades win, and it pulls a steady stream of drops because the loot density is excellent for how compact it is.
The safe loot drops
"Safe" is relative on a 4x4, but these spots get you geared with a real chance of avoiding the opening-minute pileup.
Mongnai, Na Kham, and Lakawi are mid-size compounds scattered around the edges of the map with reliable loot and meaningfully less traffic than the big three. Land at one of these, gear up, and you can rotate into the center on your own terms instead of fighting the whole lobby at once.
Camp Bravo and Camp Charlie — the two military camps on the south and east — are dense, loot-rich compounds that draw fights but aren't quite the Bootcamp-level magnet. They're a good middle ground: strong gear, a fight or two, but not the full-lobby blender. Docks on the east coast and Tambang in the west are quieter still, with solid loot and a longer (but on this map, still short) rotation to the action.
The honest truth: on Sanhok, even your "safe" drop is a coin flip to be contested, because the map is small enough that the plane and the early circle put teams almost everywhere. The edge compounds just shift the odds in your favor — they don't guarantee peace.
The loot-and-fight tempo
Sanhok has a rhythm the big maps don't, and learning it is most of getting good on the map. The loot is dense and generous — you'll be fully kitted faster here than anywhere else, which is by design, because the map wants you fighting, not foraging. That changes how you play the early game completely:
- Loot fast, then commit. You don't need to clear an entire compound for gear on Sanhok; you'll find a kit in the first building or two. Grab the essentials — gun, ammo, armor, meds — and start hunting instead of vacuuming up every attachment.
- Loot the bodies, not the buildings. With this many fights, the fastest gear upgrades come off the players you kill. A fresh kill is a loot crate that already has the good stuff. Win the fight, grab the upgrade, move before the third party arrives.
- Expect the third party. Every gunfight on Sanhok is a dinner bell, and the small map means someone is always close enough to hear it and come running. Finish fights fast, reposition immediately, and never sit looting in the open where you just made noise.
- Close-range first, range second. This is a CQC map. An SMG, a shotgun, or a fast-handling AR with a red dot or 2x will win you far more Sanhok fights than a sniper setup. Save the long optics for the rare open ridge.
Rotations in the jungle
Rotating on Sanhok is short but dangerous. The distances are tiny, so you're rarely far from the circle — but the dense jungle between compounds is prime ambush country, and the small map means enemies are always nearby. The rotation rules flip from the big maps:
- Distance isn't the problem; ambushes are. You can reach almost any circle on foot in time, so don't panic-sprint. The real threat is the team waiting in the treeline along the obvious path. Move through cover, check your flanks, and assume every thick bush could be a player.
- Use the foliage as a cloak, not a blindfold. The same trees and grass that hide enemies hide you. Move through them deliberately, break line of sight constantly, and prone in tall grass to disappear when you need to reset a fight.
- Hold compounds, don't camp the open. Because the map is small and the zone is fast, getting caught in the open jungle late is deadly. Rotate compound to compound — they're close together — and use the buildings as cover anchors between moves.
- Watch the rivers and bridges. Sanhok's rivers and crossings funnel movement just like Erangel's, only at smaller scale. The team that controls a crossing or a key ridge controls who reaches the circle.
Vehicles and the small map
Vehicles matter differently on Sanhok. Because the island is only 4x4, you can foot-rotate almost any circle, so you don't need a car the way you do on Miramar's open desert. Sanhok also features lighter, map-appropriate transport — the small map favors quick two- and four-seat vehicles and boats around the coast and rivers rather than the big maps' long-haul rides.
The Sanhok vehicle rules:
- Use them to relocate fast, not to cross map. The map is small, so a vehicle is most useful for a quick repositioning burst — jumping a ridge to flank, or escaping a third party — rather than a long rotation.
- They're loud on a quiet map. On a 4x4 with this much foliage, an engine carries and announces you to every nearby team. Use vehicles in bursts, then ditch them and go quiet on foot.
- Boats own the coast and rivers. The island's water gives boats a real niche for coastal rotations and flanks that avoid the camped land routes. They're exposed on open water, so use them with a destination and cover in mind.
Reading the fast endgame
Sanhok endgames are the fastest in PUBG, and the dynamic blue zone is why. As players die, the circle accelerates, so the final zones close on you quicker than the muscle memory you built on the big maps expects. Combine that with dense foliage and tight compounds and you get short, brutal, close-range final circles where positioning and utility decide everything.
What to look for as the circle closes:
- Be set early — the zone won't wait. The dynamic blue zone means late circles can pull fast, so claim your final-circle cover before the scramble. Getting caught mid-rotation in a fast Sanhok zone is a common, avoidable death.
- Win the close range. Final circles here are often tight and bushy, so the fight is decided at SMG and grenade range. Stock up on throwables — frags and smokes are huge in the cramped final compounds.
- Use the foliage, but don't trust it blindly. Tall grass and bushes are real cover and real concealment in the endgame, but everyone knows that, so the smart teams are pre-aiming the obvious bushes. Hold a spot with actual hard cover behind the concealment when you can.
- Expect the close-quarters scramble. Sanhok rarely gives you a clean open-field endgame — it's usually a knife-fight in a compound or a bush. Lean into it: high ground, hard cover, full throwables, and the patience to let the fast zone push the other teams to you.
If you want the broader zone-reading framework that applies to every map, our PUBG endgame circle strategy goes deeper on circle prediction and final-circle positioning. Sanhok just runs the same playbook at double speed.
Quick Action Checklist
- Play Sanhok fast — it's a 4x4 that puts a fight in your lap whether you want one or not
- Drop Bootcamp, Paradise Resort, or Ruins for fights; Mongnai, Na Kham, Lakawi, or Docks to gear with fewer teams
- Loot the essentials in one or two buildings, then commit — and loot bodies over buildings
- Run close-range guns (SMG, shotgun, fast AR with red dot/2x); save long optics for the rare ridge
- Treat every rotation as ambush country — move through cover and check the treeline
- Use vehicles for quick repositioning bursts, not long hauls, and ditch them before you go quiet
- Respect the dynamic blue zone — late circles pull fast, so be set in cover early
- Stock throwables for the cramped close-range endgame and hold hard cover, not just bushes
Frequently Asked Questions
Keep Reading
Related Guides
PUBG Haven Map Guide: The Pillar, Caches & CQC Chaos
Haven is the one PUBG map where the AI shoots back. A 1x1 industrial island, 32 players, an armed faction called the Pillar guarding the loot, and a helicopter with a spotlight hunting you. Here's how to survive it.
PUBG Karakin Map Guide: Black Zone, Breaches & Drops
Karakin is PUBG's 2x2 desert pressure cooker — 64 players, no vehicles, and a Black Zone that deletes whole compounds mid-match. Here's where to drop, how to breach, and how to not get blown up by your own map.
PUBG Paramo Map Guide: Volcano, Lava & Heli Drops
Paramo is the PUBG map where the landmarks move between matches, the lava actually kills you, and you ride a helicopter in instead of jumping from a plane. Here's how to read a map that refuses to stay still.

PUBG Deston Map Guide: Drops, Recall & Endgame
Deston is the 8x8 that broke PUBG's rulebook — Ascenders up skyscrapers, gliders off rooftops, a Blue Chip recall system that brings dead teammates back, and swamps that aren't quite land or water. Here's where to drop, how to use the gadgets, and how to read the endgame.

Best Weapons in PUBG: Tier List
Every PUBG tier list is out of date the moment a balance patch drops. So here's the list, ranked by role, plus the durable logic to re-tier any gun yourself when the next patch shakes things up.
Best PUBG Loadouts & Attachments
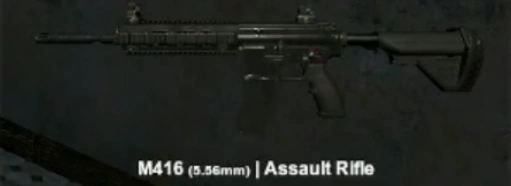
A naked M416 and a fully kitted M416 are basically two different guns. Here's how to build the strongest two-gun loadouts in PUBG and the attachment priority that turns loot into recoil control.