RE4 Remake Charms Guide: Best Charms and Where to Get Them
Charms look like a cosmetic gacha you hang on your briefcase. One of them removes a full unit of gunpowder from every single craft you make for the rest of the run. That is not cosmetic — that is the best economy upgrade in the game, and it costs three tokens.
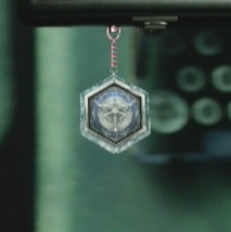
The first time you clear a shooting range and the machine spits out a little enameled figure you hang on your briefcase, it reads as filler. A cosmetic. A reason to keep playing the target minigame. So most people shrug, hang whatever dropped, and never think about charms again.
That is a mistake, and here is the one number that proves it: the Cute Bear charm removes one full unit of gunpowder from the cost of every single craft you make for the rest of the run. Over a full playthrough that is hundreds of resources you keep. Nothing else you bolt onto that case comes close.
The whole system looks like a small gacha with a couple of genuinely game-changing prizes buried in it — though, as you'll see below, the machine is more predictable than it lets on. Below is how the machine really works, how to feed it efficiently, and which of the 30-plus charms are worth the three slots you actually get. Effects and rarities here are pulled from the Resident Evil Wiki charm entries.
How charms actually work
Charms are passive modifiers you attach to your attaché case. You get three slots — center, left and right — and you swap them at any typewriter through the Customize Case menu, the same screen where you change the case skin for its own bonus. There is no cooldown and no cost to switch, so you can run a crafting loadout in the village and a combat loadout for a boss.
Every charm does exactly one thing, and it does it for the whole run as long as it is equipped. The effects fall into a few buckets: crafting cost and yield, healing potency, item resale value, and repair or upgrade discounts. A few outliers do something weirder, like the Striker's flat +8% running speed or the Iluminados Emblem's +20% melee critical hit rate.
The key framing: charms are not loot you collect for a checklist. They are three permanent perks, and picking the right three changes how much ammo and cash you have for the entire game.
The reward machine is not really random
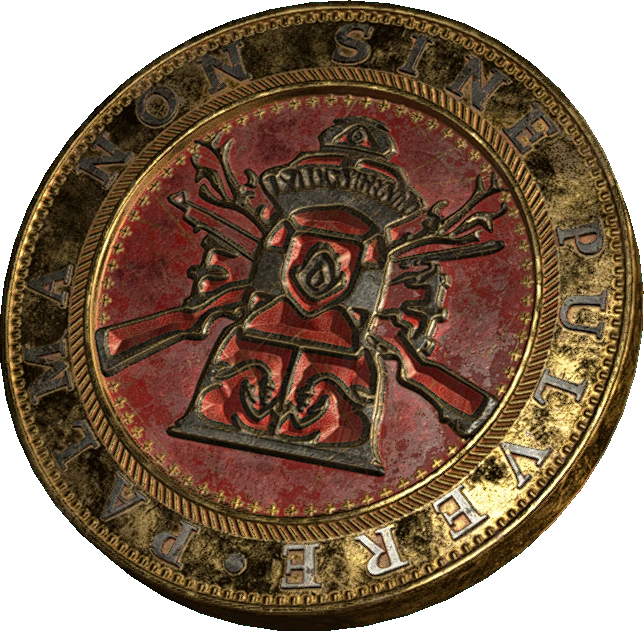
You do not buy specific charms. You feed a reward machine that sits by the door of every shooting range and it dispenses one per pull. Each pull costs three tokens, and tokens come in two flavors:
- Silver Tokens — the standard drop. A pull of three silvers weights toward common and rare charms.
- Gold Tokens — rarer. Loading gold tokens raises your odds of a higher-rarity result, so the Epic and Legendary charms come out of gold pulls far more often than silver ones.
Charms sort into four rarities — Common, Rare, Epic, Legendary — and the good stuff (Cute Bear, Striker) sits at the top of that ladder. The two best charms in the game are Legendary, so you are chasing them through the machine rather than picking them off a shelf.
Here is the part that changes how you play it: the machine is not a slot machine. Game8's testing found the result of a pull is fixed by the combination of tokens you insert — the same mix of silvers and golds returns the same charm even after reloading a save, a different mix returns a different charm, and insertion order does not matter. So save before you pull, and if you dislike the result — a duplicate, a common — reload and change the combination instead of feeding it more tokens. That turns duplicates from a tax into something you can mostly dodge.
How to farm tokens fast
Tokens have two sources. The first is the shooting range itself: each range has a set of challenges, and clearing challenge objectives pays out tokens, with better performance paying gold instead of silver. The ranges are scattered across the campaign — one shows up in the village, more in the castle and island — and the targets escalate, so a range you steamrolled early is worth revisiting once your aim and weapons have improved.
The second source is the Merchant. In later chapters he stocks tokens you can buy with Spinels, the blue gemstone currency you also spend on his request rewards. That matters because Spinels are the one resource pesetas cannot buy, so there is a real opportunity cost — the same Spinels could go toward an exclusive weapon ticket. My rule: grind the ranges for tokens while you are there anyway, and only buy tokens from the Merchant late, once your weapon upgrades are locked in and Spinels are just piling up.
If you want the parallel breakdown on what else those blue stones should fund first, the Merchant and spinel guide covers the priority order.
The charms that actually matter
Thirty-plus charms exist. You have three slots. Ruthless triage is the whole game here, so ignore the ones that buff resale on fish you will never sell and focus on these.
Cute Bear: the economy breaker
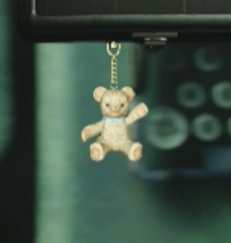
Cute Bear (Legendary): -1 gunpowder used when crafting. This is the best charm in the game and it is not close. Gunpowder is the bottleneck resource behind almost every ammo type you craft, and shaving a full unit off each recipe compounds over hundreds of crafts. On a run where you are hand-loading shotgun shells and magnum rounds, that is effectively free ammo for the entire campaign. If you pull it, it never leaves your case. Full stop.
Iluminados Emblem for a knife build
Iluminados Emblem (Epic): +20% melee critical hit rate. Melee is already one of Leon's best tools in the remake — a kick or suplex after a stagger clears crowds and costs no ammo. Bumping the crit rate on those follow-ups by a fifth means more instant kills and more knife durability saved, because critical melee finishers do not chew your blade. If you lean on parries and the roundhouse the way the remake wants you to, this is your second slot. It pairs naturally with the knife-heavy approach the beginner guide pushes for conserving ammo early.
The resale and discount tier
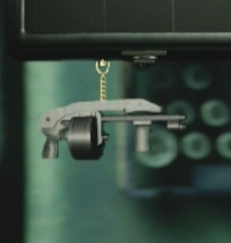
The rest of the standouts are money charms (plus the Striker), and money buys the weapon upgrades that actually win fights:
| Charm | Rarity | Effect |
|---|---|---|
| Striker | Legendary | +8% running speed |
| Ashley Graham | Epic | +50% health recovery from green herbs |
| Merchant | Epic | 5% off weapon upgrades |
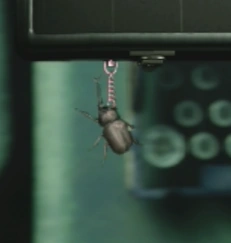
| Rhinoceros Beetle | Epic | +100% recovery item resale value |
| Luis Sera | Rare | +20% weapon resale value |
| Leon w/ Shotgun | Rare | +40% ammo resale value |
| Ada Wong | Rare | 30% off body armor repairs |
| Chicken | Rare | +100% health recovery from all egg types |
The Striker's +8% speed sounds minor until you are kiting Garrador or sprinting a chainsaw-woman gauntlet; extra distance is extra safety with zero downside. Ashley Graham turning a green herb into a 50% stronger heal is quietly excellent on higher difficulties where herbs are scarce. And the Merchant charm's flat 5% off upgrades pays for itself many times over across a full run of maxing weapons — pair it with the weapon upgrade guide to decide where that saved cash goes.
The common crafting charms
The bottom rarity is stuffed with charms that read like "+15% Handgun Ammo Craft Bonus Frequency" or "+20% Shotgun Shells Craft Bonus Frequency." These do not lower the cost of a craft — they raise the chance that a given craft rolls a bonus yield, handing you extra rounds for the same materials. Examples off the common tier include Don Jose (+15% handgun ammo craft bonus frequency), Don Diego (+15% rifle ammo craft bonus frequency) and Soldier w/ Hammer (+20% handgun ammo craft bonus frequency).
They are fine, and if you main one weapon you can slot the matching one. But they are strictly worse than Cute Bear, because a guaranteed -1 gunpowder on every craft beats a percentage chance at a bonus on one ammo type. Treat the crafting-frequency commons as filler for your third slot until something better drops.
My three-slot loadouts
Because switching is free at any typewriter, there is no single correct answer — but here are the two setups I actually run.
Economy run (default): Cute Bear + Merchant + Luis Sera. You craft cheaper, upgrade cheaper, and sell weapons you replace for more. This is the loadout that snowballs your peseta count and gets weapons maxed fastest, which matters most against the game's bigger bosses.
Combat run (bosses and Professional): Cute Bear + Iluminados Emblem + Striker. Keep the free ammo from the Bear, add melee crits and movement speed for the fights where positioning and stagger windows decide whether you live. Swap Striker for Ashley Graham if herbs are your bottleneck instead of ammo.
Notice Cute Bear is in both. That is the point — pull it, keep it, and only ever debate the other two slots.
If you are still sitting on a pile of unsold treasure to fund all this, the treasure combination guide is where the real money is; charms just help you keep more of it.
Quick Action Checklist
- You get three charm slots and can swap them free at any typewriter — no reason not to re-tune per area.
- The reward machine costs three tokens per pull, and the result is fixed by your silver/gold combination — save first, and reload with a different mix if you pull a dupe.
- Gold Tokens weight the result toward Epic and Legendary charms. Save them to fish for the top tier.
- Earn tokens by clearing shooting-range challenges; buy more from the Merchant with Spinels only in late chapters.
- Cute Bear (-1 gunpowder per craft) is the best charm in the game. Equip it the second you pull it and never remove it.
- Iluminados Emblem (+20% melee crit) is your combat pick; Striker (+8% run speed) is pure survivability.
- Money charms — Merchant (5% off upgrades), Luis Sera (+20% weapon resale) — snowball your economy for weapon maxing.
- The common "+X% craft bonus frequency" charms are filler. A guaranteed gunpowder discount beats a chance at bonus yield.
Frequently Asked Questions
What is the best charm in the Resident Evil 4 remake?
How do you get charms in the Resident Evil 4 remake?
What is the difference between Silver and Gold Tokens in RE4 remake?
How many charms can you equip at once in the RE4 remake?
Is the Iluminados Emblem charm worth using in RE4 remake?
Should I buy charm tokens from the Merchant in RE4 remake?
Do crafting charms lower the cost of ammo in RE4 remake?
Keep Reading
Related Guides
RE4 Remake Platforms: Every Version and What It Needs
The Resident Evil 4 remake is sold on PlayStation, Xbox, Steam, Apple's App Store and, from October 16, the Switch 2 eShop, and the versions are not the same deal. Here is what each one needs to run, what it costs at list, and what it adds or leaves out.
RE4 Remake Small Key Locations: All 8 Locked Drawers
The Resident Evil 4 remake has eight Small Keys for eight locked drawers, with no spare. Here is where every key is, what every drawer holds, the order that never strands a key, and the five drawers Ada opens in Separate Ways with keys she has to buy.
RE4 Gold Edition on Switch 2: What Hands-On Previews Show
Capcom's September 9 announcement gave Resident Evil 4 Gold Edition a release date and a price on Switch 2, but said nothing about how it would actually run. Tokyo Game Show 2026 is where that got answered — by the press who played it, not by Capcom.
RE4 Remake Switch 2 Release Date and Gold Edition Price
Capcom confirmed Resident Evil 4 Gold Edition for Switch 2 at the September 9 Nintendo Direct — the remake's first native, installed release on Nintendo hardware after three years as a cloud-only stream. Here is the launch date, the price, exactly what the bundle includes, and what it quietly leaves out.

Resident Evil 4 Remake Beginner Guide: Survive the Village
The 2023 remake gives Leon a parry and takes away his indestructible knife. That single trade is the whole learning curve. Here is how to stop dying in the village and start playing the game the way it wants to be played.
RE4 Remake Costumes and Accessories: Every Perk
Capcom's own manual calls costumes and accessories a Perk system, not a wardrobe. Most of the 39 options in the Resident Evil 4 remake do nothing mechanically — but six of them, one costume and five accessories, genuinely change how the game plays, and four of those five accessory perks are locked behind an S+ run on a specific difficulty.