Super Mario 64 Dire Dire Docks Guide: All 7 Stars in Order
Dire, Dire Docks has a before and an after. Beating Bowser in the Fire Sea takes the submarine out of the course and puts poles across the ceiling in its place, and one of the seven stars cannot be taken until that has happened. Here is every star, the order that stops the course fighting you, the chest sequence, and where all 106 coins sit.
The first star in Dire, Dire Docks is the one the whole game hangs on. The Super Mario Wiki's note on Board Bowser's Sub is blunt about it: setting aside the Jumbo Star, which does not count toward your total, it is the only Power Star you actually need to beat Super Mario 64 without glitches. Everything else is optional. That one is not.
Collecting it is also what starts the course pulling itself apart. Taking Board Bowser's Sub moves the Dire, Dire Docks portal to the back of the castle hallway and exposes the entrance to Bowser in the Fire Sea. Beating that fight sends the submarine out of the course for good — and the poles you need for the red coins only exist once it has gone.
So this course has a before and an after, and one star sits on the far side of the line. Here is every star, the order that stops that from mattering, the chest sequence, and where all 106 coins are.
Getting in: the 30-star door and the portal that moves
Dire, Dire Docks is the ninth course, behind the Big Star Door to the left of the Mushroom Castle's main basement room, and that door wants 30 Power Stars. Being in the basement at all requires the key from Bowser in the Dark World. The beginner guide walks the whole castle progression in order.
The entrance is not a framed painting like most courses: the Super Mario Wiki describes it as a large water-like portal at the front of the hallway, and you walk or jump straight into it. Before you take the course's first star, that portal is physically covering the hole that leads to Bowser in the Fire Sea. Take the star and it slides to the end of the hall, and the Fire Sea opens.
One navigation note that saves confusion: the course reuses Jolly Roger Bay's music. The Super Mario Wiki records two layers on top of it — synths are added when you are in the tunnel, and a drum beat is added when you are on land in the second area. If the track thickened, you moved.
The course rearranges itself, and it does not rearrange back
This is the rule that shapes how you route Dire, Dire Docks, and it is worth having straight before you pick a star.
| State | What is in the second area | Consequence |
|---|---|---|
| Before Bowser in the Fire Sea | Bowser's Sub on the surface, hatch cover in place. No poles. | Pole-Jumping for Red Coins cannot be done normally — the Super Mario Wiki states plainly that the course Bowser in the Fire Sea must be completed for the poles to appear. |
| After Bowser in the Fire Sea | Sub gone. Poles slide across the ceiling. A large exit into the Castle Grounds opens to the south. | The red coins are reachable. The Board Bowser's Sub star stays put and now needs a well-timed jump from the poles. The southern exit sucks you out of the course if you swim near it. |
Two things follow from that table. First, the sub does not come back: you cannot star-select your way to it once Bowser in the Fire Sea is cleared. Ukikipedia's RTA guide for the course says exactly that, and routes Pole-Jumping for Red Coins together with the 100-coin star before the Fire Sea fight, because runners use the sub itself. Second, if you are playing normally and cannot find the poles, you have not missed a switch — you have not beaten Bowser in the Fire Sea yet.
The seven stars, mission by mission
Six numbered missions plus the 100-coin star. Nothing here is a boss — the boss guide lists Dire, Dire Docks among the courses with no fight in them at all.
Board Bowser's Sub
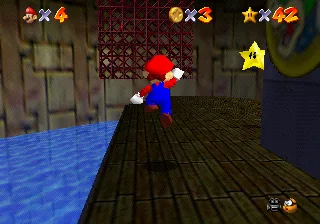
The star is on the deck of Bowser's Sub, in the second area. Swim the tunnel, climb onto the boardwalk that runs along the wall, and stand on the Purple ! Switch — that spawns a set of blocks you use as platforms to climb to the top of the sub. The star is on the far side.
Collecting it opens Bowser in the Fire Sea. If you have already beaten that fight and the sub has left, the star is still there: the Super Mario Wiki says it can be taken with a well-executed jump from the poles.
Chests in the Current
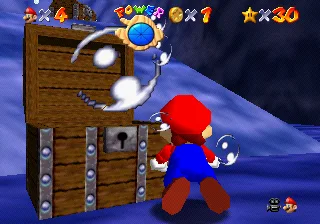
Four treasure chests on the floor of the first area, opened in one specific order. Open the wrong one and Mario is electrocuted and the puzzle resets to the start. Open the right one and an air bubble comes out of it, which is your confirmation.
| Order | Chest |
|---|---|
| 1 | Behind the whirlpool, next to the clam shell |
| 2 | Below the entrance to the tunnel, next to the seaweed and coins |
| 3 | Behind the whirlpool, to the right (removed in the DS version) |
| 4 | Directly in front of the whirlpool |
The star appears to the left of the tunnel entrance once all four are open. The difficulty is not the sequence, it is the address: three of the four chests are at the whirlpool, and the whirlpool kills.
Pole-Jumping for Red Coins
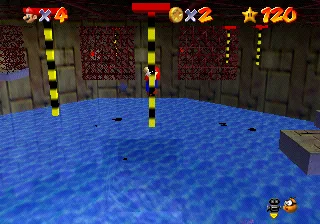
All eight red coins are in the second area, most of them suspended in mid-air. The poles are the intended route to them and the poles need Bowser in the Fire Sea cleared, so this is the star to leave until after that fight.
Getting up there starts the same way as the sub star: hit the Purple ! Switch on the boardwalk to create the blocks that let you reach the platforms above.
- First platform: one red coin, and two sets of poles — one to the left leading to three more red coins, one leading onward.
- Second platform: holds the Star Marker, and splits again. The right path is three poles to jump between and ends at a single red coin. The forward path is a longer run of poles.
- With all eight banked, the Power Star appears back at the Star Marker.
That accounts for five — one on the first platform, three down the left poles, one at the end of the right path — with the remaining three out along the forward run. Both branches end at coins rather than at the Star Marker, so clear them before you commit to the long run forward.
Through the Jet Stream
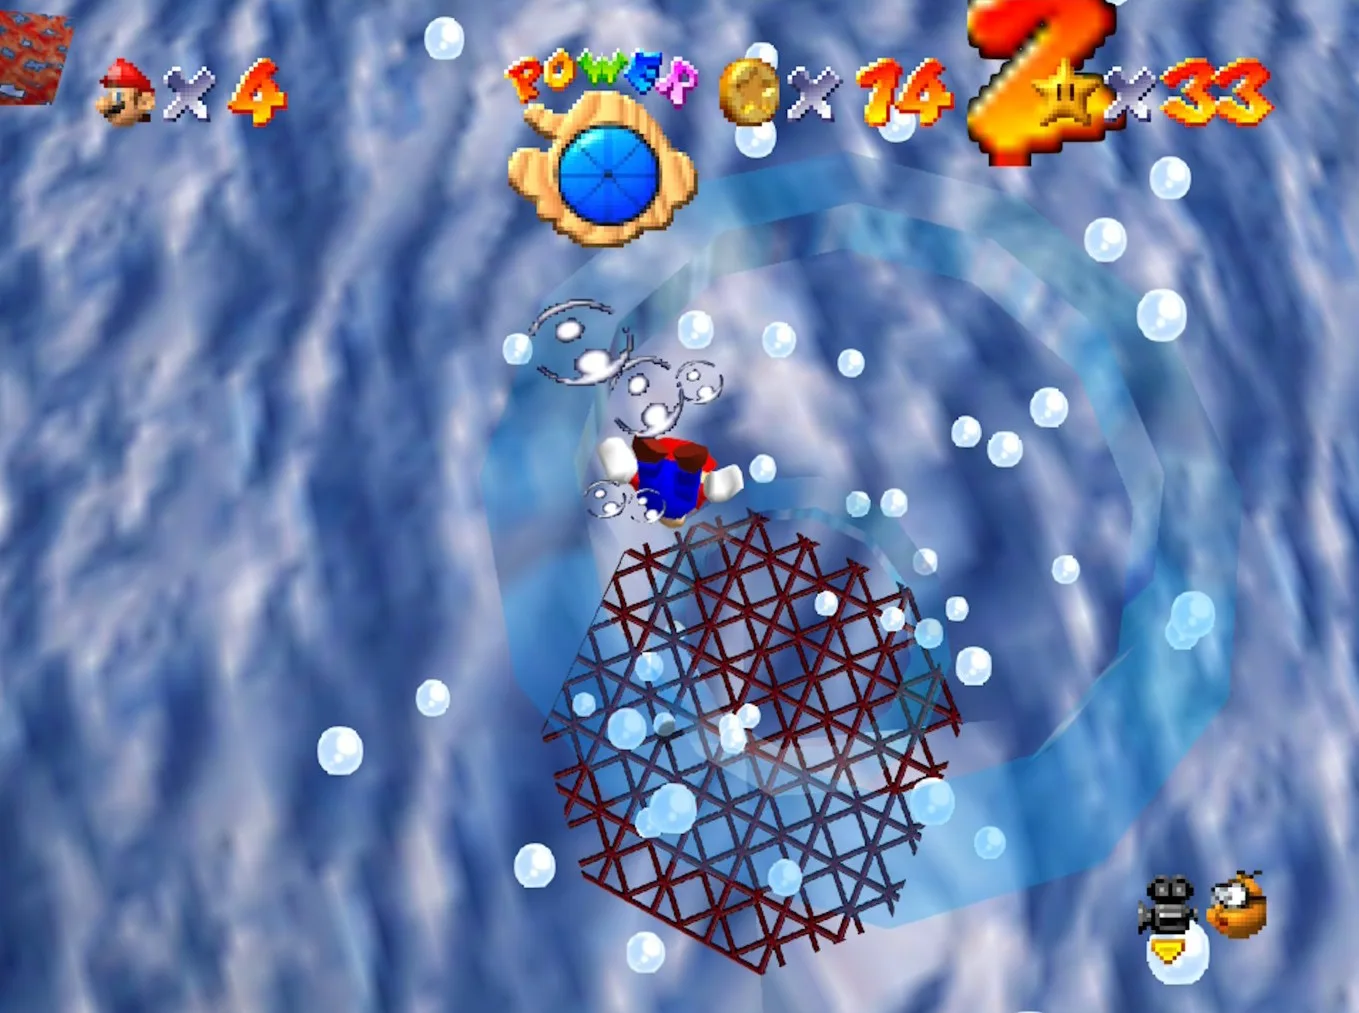
On the floor of the second area is a steel grate with bubble rings pouring out of it. Swim through five of them in a row. Miss one and the counter resets to zero — a red number appears above Mario each time one counts, so you can see the run building.
Five consecutive rings spawns the star directly above the grate, and here is the catch: the jet of water pushes you off it, so you cannot just swim in and take it. Surface, grab the Metal Cap from the green block on the boardwalk, and sink. Metal Mario walks the sea floor and picks it up on the way past.
Ukikipedia adds a small mercy: unlike the Jolly Roger Bay mission of the same name, this star sits low enough that Metal Mario can walk into it without needing to get any height. And yes, Jolly Roger Bay has a mission with the same name: the Super Mario Wiki records this as the only mission in the game that shares its title with another one.
The Manta Ray's Reward
Same five-ring rule, different source. A Manta Ray circles the whirlpool in the first area, about halfway down, leaving bubble rings behind it. Swim through five in a row and the star appears above the whirlpool — which means the reward is parked on top of the thing that kills you, so approach it from above and take it cleanly.
Two details worth carrying. The Manta appears in every mission except Board Bowser's Sub, so if you selected star 1 and cannot find it, that is why. And its tail deals damage — follow the rings, do not swim into the animal.
The rings themselves are free healing: each one restores two wedges of the Power Meter, which the health guide covers alongside the rest of the game's healing values. In a course with no Spinning Heart, that matters.
Collect the Caps
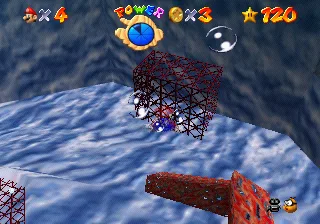
The star is inside a cage at the bottom of the second area, on the left. The boardwalk above carries both cap blocks: green for the Metal Cap, blue for the Vanish Cap.
The Super Mario Wiki gives two ways in:
- Both caps. Take Vanish and Metal, long jump off the boardwalk into the water, sink, and walk to the cage on the right. Metal Mario sinks and walks; Vanish phases through the wire mesh. You are on a 20-second clock, so line the jump up first.
- Vanish only. Long jump off the boardwalk and swim into the cage. It works, and it is fiddly, because Mario swims slowly and the timer does not care.
Ukikipedia flags the timing detail that makes the two-cap version practical: the Vanish Cap's 20-second timer resets when you grab the Metal Cap. Take Vanish first, then Metal, and you get a full window instead of the scraps of one.
100 Coins
The Player's Guide called this one Above the Submarine Pen. The course holds 106 coins, so you have six of margin — the 100-coin stars guide ranks it second-tightest in the game.
The part that guide does not spell out is which coins you are forced to take. Only 60 of the 106 are yellow. The other 46 are the eight red coins (16) and the blue coin block above the sub (30). Do the arithmetic on the table below and both are compulsory: skip the blue coin block and you cap at 76, skip the red coins and you cap at 90. There is no route to 100 here that leaves either alone.
Which is why pairing this with Pole-Jumping for Red Coins is not a preference, it is the shape of the course — you have to collect those eight red coins anyway.
The order that stops the course fighting you
| # | Star | Do it | Why |
|---|---|---|---|
| 1 | Board Bowser's Sub | First | It is the easy version of that climb while the sub is still there, and until you have it the star menu cannot load any other version of the course |
| 2 | Chests in the Current | Any time | First area, nothing to do with the submarine |
| 3 | The Manta Ray's Reward | After star 1 | The Manta is not present in the star 1 version of the course |
| 4 | Through the Jet Stream | Needs the Metal Cap switch | Second area floor, no poles involved |
| 5 | Collect the Caps | Needs the Vanish switch, and the Metal switch for the easier route | Boardwalk and cage, no poles involved |
| 6 | Bowser in the Fire Sea | After star 1 opens it | This is what removes the sub and spawns the poles |
| 7 | Pole-Jumping for Red Coins + 100 Coins | After the Fire Sea | The poles exist now, and the red coins are 16 of the 100 anyway |
That order is not the mission numbering, and it does not need to be. The mission you pick from the menu sets the course up rather than locking the reward: you can collect any Power Star that is actually present while you are in the level. It is just the one that never leaves you swimming around looking for poles that have not spawned.
Where the 106 coins live
Ukikipedia's coin breakdown for course nine:
| Location | Coins |
|---|---|
| Sloped line of coins underwater on the wall near the start | 5 |
| Two vertical lines of coins, by the chests and the first current | 10 |
| Three coins surrounding a chest on the sea floor | 3 |
| Three rings of coins leading to the sub area | 24 |
| Ring of coins on the sea floor, by the clam with the Koopa Shell | 8 |
| Vertical line of coins by the moat exit | 5 |
| Line of coins on the wooden dock in the sub area | 5 |
| 8 Red Coins | 16 |
| Blue coin block above the sub | 30 |
| Total | 106 |
Two notes on that table. The three rings of coins on the way to the sub area are 24 coins in one stretch — nearly a quarter of the course, collected while swimming somewhere you were going anyway. And the line of coins by the moat exit sits next to the hole into the Castle Grounds that only opens after Bowser in the Fire Sea; the same hole will suck you out of the course if you drift into it, so take that line and move.
The course also hands out exactly one 1-Up, and it is hidden: swimming into the clam shell by the chests in the starting area triggers it.
Two course versions, and what the manta changes
Ukikipedia lists two versions of Dire, Dire Docks, selected by which star you pick from the menu. If there are uncollected blue stars in the menu, the last version you can select is the first blue star, not the ones after it.
| Version | Selected from | Difference |
|---|---|---|
| Version 1 | Star 1 (the default until star 1 is completed) | The Manta Ray is not present |
| Version 2 | Stars 2 through 6, once Board Bowser's Sub is collected | The Manta Ray appears |
There is no cap-thief and no weather change here, so the version choice is far less consequential than it is in a course like Shifting Sand Land. The one practical use: if you want the first area quiet while you work the chests, star 1 has no Manta in it.
The things down here that kill you outright
Dire, Dire Docks is thin on enemies and heavy on environment. The Super Mario Wiki's layout notes list Bubs in the water, the Manta Ray, the treasure chests and the whirlpool, plus a place to come up for air halfway through the tunnel. Note where that is before you need it.
- The whirlpool. Get too close in the first area and Mario is pulled in and killed. It does not damage you first. As the health guide puts it, the whirlpool is in the family of things that kill regardless of how full your meter is, alongside the death barrier and Shifting Sand Land's quicksand.
- The southern exit, after the Fire Sea. The hole that opens once the sub leaves is an exit into the Castle Grounds, and the Super Mario Wiki notes it will suck you up if you go near it. Leaving the course is not a death, but coins reset on re-entry, so on a 100-coin run it costs the same.
- The air meter. Underwater the Power Meter doubles as your oxygen. The course carries no Spinning Heart and no cannon, so the bubble rings, the surface, and the coins themselves are the whole healing kit.
What the A Button Challenge did down here
Ukikipedia's A-press table is unusually tidy: five of the seven stars need zero A presses, and the other two need half of one each. The 0.5 notation is not a rounding — holding an object while swimming requires the A button to be held, without ever pressing it again, so it costs half a press by the challenge's accounting. The two that need it are Pole-Jumping for Red Coins and the 100-coin star, both of which involve carrying a shell through the loading zone.
The rest of the challenge tables say something about how the level is built:
| Challenge | Result in Dire, Dire Docks |
|---|---|
| B Button Challenge | Entire course clearable in 0 B presses |
| Z Button Challenge | Entire course clearable in 0 Z presses |
| Pacifist Challenge | All seven stars |
| Capless/Cannonless | All seven stars |
| No Buttons Allowed | No stars — every one of them requires swimming |
| No Joystick Allowed | No stars — Mario cannot turn in the water |
| Floor is Lava | Every star except 100 Coins, because Mario starts the level in the water |
Two unsolved challenges are still filed here: reaching a Parallel Universe in the starting area, and ground pounding the blue coin block without pressing A.
What Super Mario 64 DS changes
| N64 | Super Mario 64 DS | |
|---|---|---|
| Missions | 6 numbered plus the 100-coin star | Adds Koopa Surfin' Switch Star; The Manta Ray's Reward moves to seventh |
| Chests in the Current | 4 chests | The third chest is removed |
| Red coins | Poles required | Balloon Mario, via a Power Flower, can collect them without the poles |
| Pole path on the right | Three poles to jump between | One pole, and an extra platform added on the forward path |
| Through the Jet Stream | Metal Cap | Wario's Power Flower |
| The caged star | Metal plus Vanish, or Vanish alone | Vanish only — Luigi takes the Power Flower from the red block |
| Board Bowser's Sub after the sub leaves | Jump from the poles | Yoshi's flutter kick, Luigi's scuttle or Mario's balloon |
| Water surface | Open water | Black Bricks and Skeeters on the surface |
| Tunnel music | Synths added at the tunnel entrance | Synths added halfway through |
The DS boardwalk change is the one that reshapes a star. On N64 the cage is a two-cap trick with a neat timer interaction; on DS it is a single-character job, because the power-up system no longer stacks that way.
Mistakes this course punishes
- Hunting for the poles before beating Bowser in the Fire Sea. They are not hidden. They do not exist yet.
- Beating the Fire Sea before you wanted to. The sub does not come back, and star select will not respawn it.
- Opening the chests in the wrong order. One wrong lid electrocutes Mario and resets the puzzle from chest one.
- Swimming for the Jet Stream star without the Metal Cap. The water pushes you off it. That is the mission, not bad luck.
- Grabbing the Metal Cap before the Vanish Cap. Do it the other way and the Vanish timer restarts on the Metal grab.
- Taking the Manta's rings by swimming at the Manta. The tail damages you; ride the trail behind it.
- Collecting the fifth Manta ring and diving straight for the star. It spawns above the whirlpool.
- Drifting near the southern exit on a coin run. It pulls you in, and re-entering the course resets every coin.
Quick Action Checklist
- 30 Power Stars opens the basement Big Star Door; the portal at the front of that hallway is the course.
- Take Board Bowser's Sub off the Purple ! Switch blocks while the sub is still there.
- Do Chests in the Current, The Manta Ray's Reward, Through the Jet Stream and Collect the Caps in any order — none of them care about the sub.
- Chest order: clam shell, tunnel entrance, right of the whirlpool, in front of the whirlpool.
- Both five-ring missions reset the counter the instant you miss one. Watch the red number.
- Metal Cap for the Jet Stream star; Vanish first then Metal for the cage.
- Save Pole-Jumping for Red Coins and 100 Coins for after Bowser in the Fire Sea, and do them together.
- 106 coins, six of margin, and both the red coins and the blue coin block are mandatory.
Frequently Asked Questions
How many stars are in Dire, Dire Docks in Super Mario 64?
Why are there no poles in Dire, Dire Docks?
What order do you open the chests in Dire, Dire Docks?
How do you get the star in the cage in Dire, Dire Docks?
How many coins are in Dire, Dire Docks?
Can you still get Board Bowser's Sub after the submarine leaves?
Which Power Star do you have to collect to beat Super Mario 64?
Keep Reading
- Dire, Dire Docks — Super Mario Wiki
- Dire, Dire Docks — Ukikipedia
- RTA Guide: Dire, Dire Docks — Ukikipedia
- Board Bowser's Sub — Super Mario Wiki
- Chests in the Current — Super Mario Wiki
- Pole-Jumping for Red Coins — Super Mario Wiki
- Through the Jet Stream (Dire, Dire Docks) — Super Mario Wiki
- Collect the Caps... / Inside the Cage — Super Mario Wiki
- Bubble ring — Super Mario Wiki
- Manta — Super Mario Wiki
Related Guides
Super Mario 64 Swimming Guide: Tap A, Don't Hold It
Holding A is the slow way to swim in Super Mario 64. Here is the stroke rhythm the code rewards, how the stick steers, how to jump out of the water, what each current does, and the eight seconds of free speed hiding in two clams.
Super Mario 64 Lives and Game Over: What You Actually Lose
A Game Over in Super Mario 64 is a file reload: you keep everything you saved and lose everything you did not. Here is when the game actually writes your file, exactly what a Game Over rolls back, the five courses where a fall is free, and every way to earn a life, from the coin tally to the Monty Mole streak that never runs dry.
Super Mario 64 Music: Every Track and Where It Plays
Super Mario 64 scores 15 courses with seven songs, and only one of them belongs to a single course. Here is which track plays in every course and secret level, the five levels whose music rearranges itself as Mario moves, what triggers the boss music and the jingles, all 36 soundtrack tracks under their 1996 and current names, and where to listen today.
Super Mario 64 Bowser Levels Guide: All 24 Red Coins
Bowser in the Dark World, the Fire Sea and the Sky each hide one Power Star behind eight red coins on the obstacle course in front of the fight. Here is the route through all three, where every red coin sits, and what else the level data holds.
Super Mario 64 Beginner Guide: Your First 30 Power Stars
Super Mario 64 does not gate you on difficulty, it gates you on Power Stars. Here is exactly which doors need what, which stars are fastest to grab, and the route that gets a first-timer from one star to thirty without wandering the castle in circles.
Super Mario 64 120-Star Reward: Yoshi and the Castle Roof
Super Mario 64 does not announce your 120th Power Star. The reward is outside: a cannon grate that stops loading, Yoshi on the castle roof, and a gift that quietly resets the next time you load your file. Here is what 120 stars changes, checked against the wikis and the decompiled code.