Super Mario 64 Hazy Maze Cave Guide: All 7 Stars
Hazy Maze Cave is the only course in Super Mario 64 with another course hidden inside it, and the only one where getting lost is the actual difficulty. Here is every star, both maze exits, and where all 139 coins are.
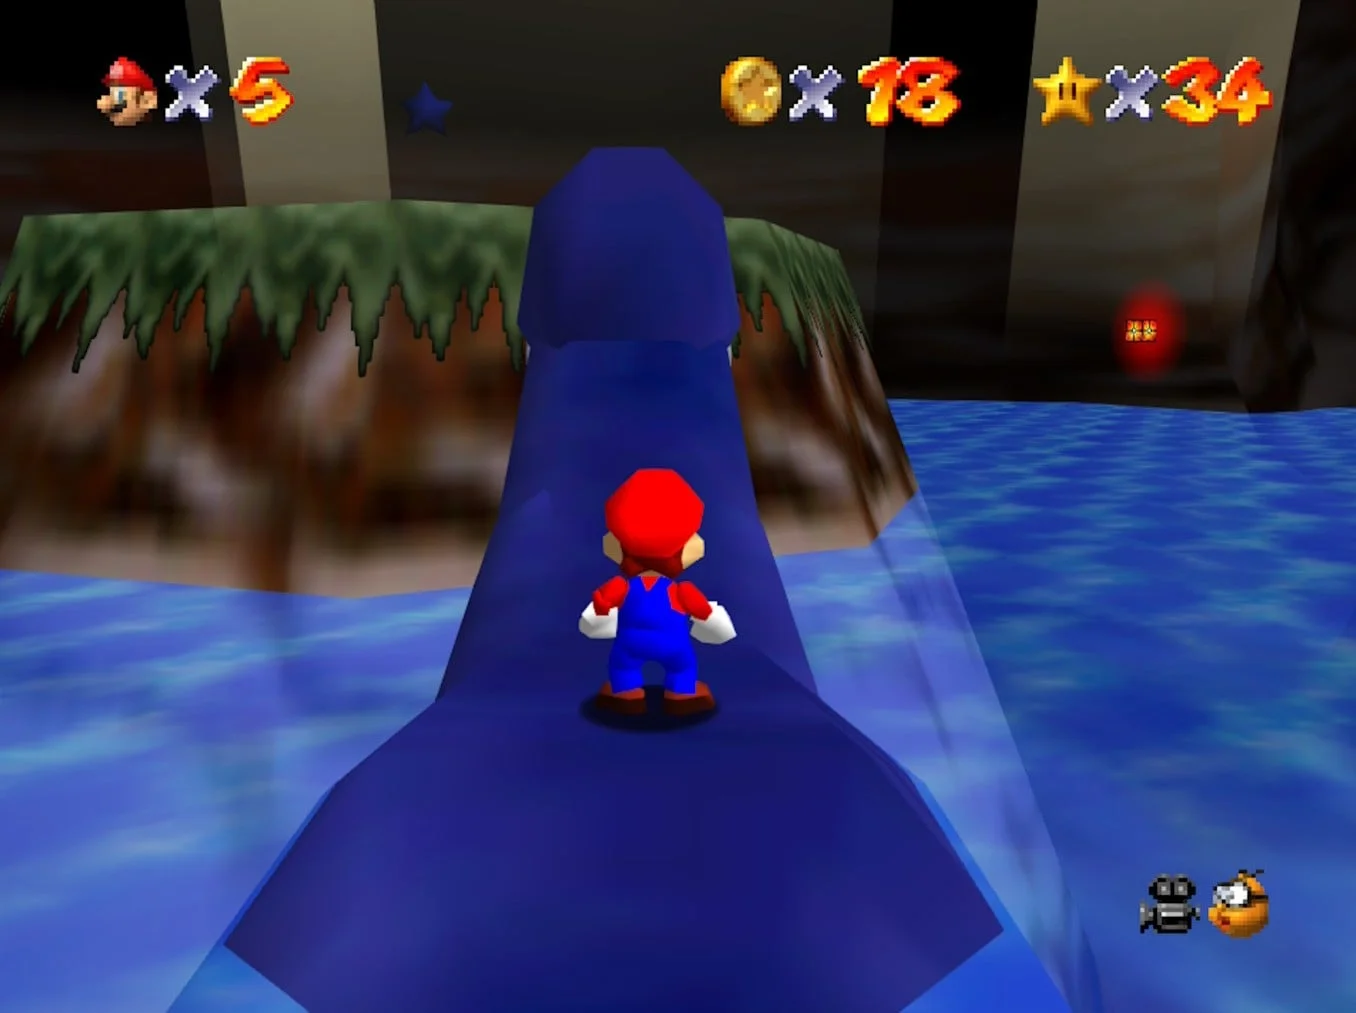
Hazy Maze Cave is the only course in Super Mario 64 that has another course hidden inside it. Ride the plesiosaur across the underground lake, hop off at a set of double doors, and you are one short hallway from the Cavern of the Metal Cap — a Power Star that never appears in Course 6's star select screen, because it is officially a Castle Secret Star and not part of this course at all.
That quirk tells you what kind of level this is. Hazy Maze Cave is the sixth course, it is pitch dark, it is chopped into four areas that barely acknowledge each other, and it is the one place in the game where the difficulty is navigation, not platforming. Six named missions, a 100-coin star, a poison maze, a friendly sea dragon and exactly zero bosses. Here is the entire cave.
The only course with another course inside it
The Metal Cap course being buried in here is not trivia — it is a routing fact. Because the Cavern of the Metal Cap counts as a castle secret star, it does not show up when you pause and look at Hazy Maze Cave's star list. Your Course 6 page will read 7 stars while the cave itself is actually worth 8 star-collecting trips if you count the detour.
There is a second freebie attached to this course. The Toad standing in the basement near the Hazy Maze Cave entrance does not appear until you have at least 12 Power Stars. Talk to him and he hands over a star for nothing. If you come down here at 9 or 10 stars, he is simply not there — that is not a bug, and no, you did not miss him.
Getting in, and the split that decides everything
Hazy Maze Cave lives behind an unmarked door in the castle basement — no star number on it — and the basement opens after you clear Bowser in the Dark World, which is itself gated at 8 stars. Inside that room there is no painting. There is a black pool in the floor. Jump in it.
The starting area has a green cap block and two exits, and picking the wrong one is how people spend twenty minutes wandering:
| Path from the start | What is down there | Stars it serves |
|---|---|---|
| Left (past the long-jump gap) | Rolling rocks room, the elevator, the Underground Lake and Dorrie | Swimming Beast, Metal-Head Mario, Watch for Rolling Rocks |
| Right (past the fire geysers) | Red coin and lift area, plus the door into the Hazy Maze itself | Elevate for 8 Red Coins, both maze stars |
| Down the elevator (from the left path) | The Underground Lake, the fenced gate, and the doors to the Cavern of the Metal Cap | Metal Cap switch, Metal-Head Mario |
Learn that split and the cave stops being a maze. Left is water and rocks, right is coins and gas. There are maps painted on the walls in a few spots that show you the same thing, which is a genuinely unusual piece of 1996 signposting.
The gap on the left path needs a long jump, not a running jump. Run, hold Z, press A. If you are still improvising your jumps at this point, the movement guide is a better use of ten minutes than another death in the pit.
The six missions, one at a time
Six named stars plus the 100-coin star, the standard main-course allotment. None of them is a boss fight — Hazy Maze Cave is one of the eight courses in the game with no boss encounter at all.
Swimming Beast in the Cavern
Take the left path, get past the rolling rocks, through the door and down the elevator, then walk down the ramp into the water. Dorrie is swimming laps in there.
The star sits on a raised island in the middle of the lake, and on the N64 version the island is genuinely too high to reach from the water — Dorrie is not optional. Swim to her, climb onto her back, then ground pound her back to make her lower her neck so you can walk up onto her head. Steering works by facing: Mario loses control for a beat when you first board, then Dorrie moves in whatever direction Mario is pointed. Ride her over to the island, hop off the head, take the star.
The sign near the lake warns that you might become the sea dragon's lunch. Nintendo's own Player's Guide called that bluff in 1996 — Dorrie is completely harmless.
Elevate for 8 Red Coins
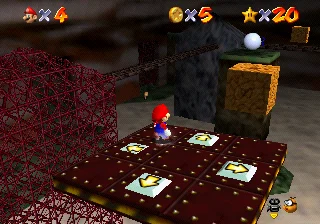
Right path, through the door at the end, into the lift room. Both lifts matter, and that is the whole mission:
- The Work Elevator on the bottom level gets you four of the red coins — three of them are inside blocks you have to break, one sits on a platform.
- The checkerboard lift gets the other four, which are either floating in mid-air or parked on platforms. You reach it by wall-kicking to the nearby pole, or by riding the first lift up to it.
Once all eight are in, the star spawns above the star marker in the middle of the room. This is also the mission speedrunners pair with the 100-coin star, because the coin-dense route runs straight through here.
Metal-Head Mario Can Move!
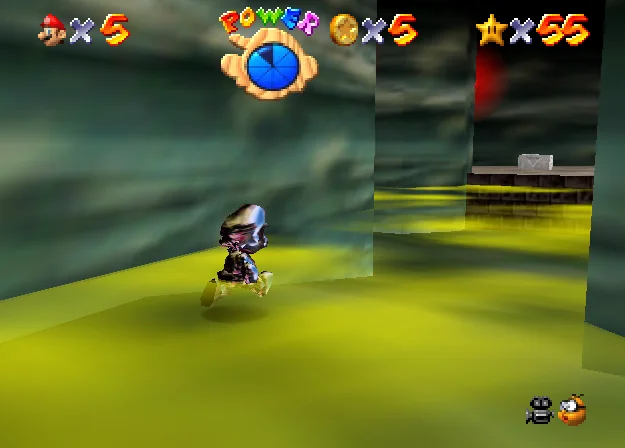
Left path to the Underground Lake again. Smash the green cap block down there, then get into the water fast and walk the lakebed to the purple switch sitting underwater. Metal Mario sinks like an anchor and does not drain his air meter, which is exactly what the switch demands and why the cap timer matters — you get roughly 20 seconds of metal, so grab the cap and go, do not sightsee.
Pressing the switch opens the gate blocking the door into the Abandoned Mine. The star is at the far end of the mine, behind a couple of gaps you cross with long jumps.
Here is the part most walkthroughs skip: you do not actually need the Metal Cap for this star. The switch can be hit from freefall with a well-timed triple jump into a wall kick, kicking at the peak — speedrunners call that strat "Christmas Miracle" — and a side somersault into a ground pound works too. It is documented, it is consistent with practice, and it means this star is reachable before you have ever pressed the green cap switch.
Navigating the Toxic Maze
Right path, into the lift room, slide down the pole, follow the green path to the centre door on the right, and enter the maze through the hole. Everything past that point is covered in the toxic cloud.
Route: take the path straight ahead of you, then the left path, then climb up the second ledge. Through the door on that ledge is a room with an elevator at the far end; ride it up and the star is in the room it delivers you to.
The two things that kill runs in here are Snufits — the floating masked shooters that puff up before firing — and the small holes in the floor that you can drop into and waste ten seconds climbing out of. Snufits die to any attack and drop two coins each.
A-Maze-Ing Emergency Exit
Same entrance, same first two turns — path ahead, then left — but this time climb the first ledge instead of the second. That one-ledge difference is the entire distinction between the fourth and fifth stars of the course, and it is why people swear the maze changed on them.
The elevator in the next room lifts you to an area with a wire net on the ceiling. Hold the jump button to grab it, then crawl across the net and drop onto the far right platform where the star sits. Let go early and you fall into the pit below, which is a full restart of the maze trip, not a quick recovery.
Both maze stars share the same first half. Run the route once, learn the fork, and you can bank Navigating the Toxic Maze and A-Maze-Ing Emergency Exit back to back on consecutive entries.
Watch for Rolling Rocks
The last named star, and the shortest. Left path into the boulder room, then run up the ramp while the rocks come down at you. Just before the door at the top, look right: the star sits on a ledge about 240 units above the floor, and the way up is a double wall kick between the two walls beside the door.
Boulder spawns have a random element, so a rock will occasionally roll straight into your lane on the ascent. Do not fight it — long jumps and jump dives up the ramp give you the speed to reset the approach rather than tanking the hit.
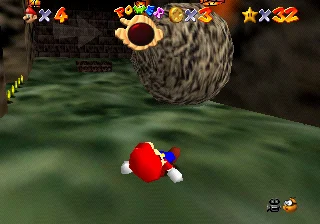
Where the 139 coins actually live
Hazy Maze Cave holds 139 coins, so the 100-coin star leaves you 39 to spare. That sounds generous until you notice how the total is assembled:
| Coin source | Count | Value |
|---|---|---|
| Loose yellow coins | 41 | 41 |
| Yellow coins from enemies | 37 | 37 |
| Red coins | 8 | 16 |
| Blue coins from the one block, inside the toxic maze | 7 | 35 |
| Blue coins from enemies | 2 | 10 |
Forty-five of those coins are blue coins, and 35 of them come out of a single blue coin block — and that block sits inside the toxic maze, not out in the open cave. Skip that block and the two Mr. I's, and your 39-coin cushion evaporates into a deficit. Nintendo knew it too: the Player's Guide named this course's 100-coin star "Blue Coins in the Haze."
The enemy coins are worth targeting rather than avoiding. Scuttlebugs — the striped spiders scattered through the first room and the red coin area — drop three coins each, more than a Goomba's one, and they charge at you anyway. Kill everything on the way through and the red coin lap alone puts you most of the way to 100.
The toxic haze has rules
The cloud in the maze is a damage-over-time zone, not an instant kill, and there are exactly three ways to handle it:
- Do not stand still. The haze only hurts you while you are in it. Keep moving through, and a maze crossing costs a wedge or two of health, not a life.
- Bring metal. Metal Mario is immune to the gas outright, which is what the Metal Cap block near the maze is for. It is also immune to Snufit bullets — they vanish on contact with metal.
- Bank health first. There is a spinning heart on a ledge near the black hole in the boulder room. Run through it before a maze attempt and you enter the gas at full health.
Hazy Maze Cave carries five Metal Cap blocks, more than any other course in the game. That is not decoration — it is Nintendo telling you which power-up this level was designed around.
This cave is the A Button Challenge's home turf
If you have ever heard the phrase "half A press," it came out of this cave. The A Button Challenge is the long-running project to complete Super Mario 64 stars while pressing A as few times as possible, and Hazy Maze Cave has been one of its main battlegrounds for a decade.
The current state, per ukikipedia's tracking: all seven Hazy Maze Cave stars can be collected with 0 A presses. How that happened is the interesting part.
- Elevate for 8 Red Coins was a 0.5 A press star for years, done by building over 1,500 units of negative speed with hyperspeed walking. It went to 0 via scuttlebug raising — repositioning a Scuttlebug and slowly raising it to use as a trampoline — in a TAS completed on 26 June 2016. The raising segment alone took 56 minutes of in-game time. A December 2022 optimisation cut roughly 55 minutes off it.
- Watch for Rolling Rocks was the famous one. pannenkoek2012's commentated "0.5x A Presses" video for it went up on 12 January 2016 and is the reason a generation of players knows what a parallel universe is. That star was finally reduced to 0 A presses in October 2023, by clipping the red coin room's controllable platform out of bounds to ferry Swoops into the star's room and bounce off them.
- Entering the course at all without an A press requires a star dance clip off MIPS's star — and since MIPS only appears at 15 and 50 stars, that trick has exactly two windows per file.
None of this is speedrun strategy. The A Button Challenge is a separate discipline from real-time racing — the speedrun guide is the right starting point for the fast route, and it will tell you to press A constantly.
One version note for those fast routes: the elevator BLJ used in the 100-coin run only exists on unpatched N64 code. The Shindou revision, iQue, 3D All-Stars and the DS remake all killed the backwards long jump. Nintendo Switch Online's N64 app did not.
What the DS remake changes down here
Ukikipedia lists no course-specific differences between the N64 releases for Hazy Maze Cave — the original cartridges, Shindou and 3D All-Stars all run the same cave. Super Mario 64 DS is a different story, because it is a remake:
| Mission | N64 | Super Mario 64 DS |
|---|---|---|
| Swimming Beast in the Cavern | Ride Dorrie to the raised island | Island lowered, but the star is inside a rock — only Wario can punch it open |
| Metal-Head Mario Can Move! | Metal Mario walks the lakebed | Renamed Metal-Head Wario Can Move; Wario is the only one who goes metal |
| Watch for Rolling Rocks | Dodge the rocks, wall kick to the ledge | Destroy the rocks as Wario; Mario wall-kicking to the old spot finds a 1-Up instead |
| Underground Switch Star | Does not exist | Eighth star, a switch star in the main cave |
Wario's cap is available in every mission whether or not you have rescued him — on Dorrie's head in the first mission, on a Goomba near the start in the rest. Luigi can skip the toxic maze outright with a Power Flower, phasing through the grating while invisible. And the Cavern of the Metal Cap is renamed Behind the Waterfall on DS. The full version breakdown covers why DS course lists run to 8 stars each.
Mistakes that cost you a life in here
- Taking the wrong branch at the start. Left for Dorrie, rocks and the lake. Right for red coins and the maze. Every wasted trip in this course starts here.
- Grabbing the Metal Cap and then swimming. Metal Mario sinks. That is the point. Do not panic and mash A when you hit the water — walk.
- Letting go of the wire net early in A-Maze-Ing Emergency Exit. There is a bottomless pit under it and no recovery.
- Standing in the haze to line up a jump. The gas ticks damage the whole time you deliberate. Move first, aim second.
- Chasing 100 coins in a low-ceilinged room. A star that spawns inside a ceiling can end up permanently out of reach — a documented hazard in this course. Past 95 coins, get somewhere with headroom first.
- Ignoring the Scuttlebugs. Three coins each, and they come to you. On a 100-coin lap they are free money.
Quick Action Checklist
- Clear Bowser in the Dark World to open the basement, then find the unmarked door and jump into the black pool.
- Come back at 12 stars if the basement Toad is not there yet — he is a free Power Star.
- Left path for Swimming Beast, Metal-Head Mario and Watch for Rolling Rocks. Right path for the red coins and both maze stars.
- Ground pound Dorrie's back to lower her head, then steer by facing the direction you want to go.
- Ride Dorrie to the double doors for the Cavern of the Metal Cap — it is a castle secret star, so it will not appear in Course 6's list.
- In the toxic maze, take the path ahead then the left path: second ledge for Navigating the Toxic Maze, first ledge for A-Maze-Ing Emergency Exit.
- Wall kick twice between the walls beside the top door for Watch for Rolling Rocks.
- Ground pound the course's one blue coin block, inside the toxic maze, on the 100-coin lap — 45 of the course's 139 coins are blue, which is why Nintendo's Player's Guide called this star Blue Coins in the Haze.
Frequently Asked Questions
How do you unlock Hazy Maze Cave in Super Mario 64?
How do you ride Dorrie in Hazy Maze Cave?
What is the difference between Navigating the Toxic Maze and A-Maze-Ing Emergency Exit?
Do you need the Metal Cap for Metal-Head Mario Can Move!?
How many coins are in Hazy Maze Cave?
Why does the Cavern of the Metal Cap not show in Hazy Maze Cave's star list?
Can all the Hazy Maze Cave stars be done with 0 A presses?
Keep Reading
Related Guides
How to Fly in Super Mario 64: Dive for Speed, Then Climb
Wing Mario can't flap for height. Every bit of height costs speed and every dive buys it back. Here is how takeoff works, the one glide the code holds steady, why the nose lifts on its own, how each flight ends, and the A-button trick that cancels fall damage.
Super Mario 64 Swimming Guide: Tap A, Don't Hold It
Holding A is the slow way to swim in Super Mario 64. Here is the stroke rhythm the code rewards, how the stick steers, how to jump out of the water, what each current does, and the eight seconds of free speed hiding in two clams.
Super Mario 64 Lives and Game Over: What You Actually Lose
A Game Over in Super Mario 64 is a file reload: you keep everything you saved and lose everything you did not. Here is when the game actually writes your file, exactly what a Game Over rolls back, the five courses where a fall is free, and every way to earn a life, from the coin tally to the Monty Mole streak that never runs dry.
Super Mario 64 Music: Every Track and Where It Plays
Super Mario 64 scores 15 courses with seven songs, and only one of them belongs to a single course. Here is which track plays in every course and secret level, the five levels whose music rearranges itself as Mario moves, what triggers the boss music and the jingles, all 36 soundtrack tracks under their 1996 and current names, and where to listen today.
Super Mario 64 Beginner Guide: Your First 30 Power Stars
Super Mario 64 does not gate you on difficulty, it gates you on Power Stars. Here is exactly which doors need what, which stars are fastest to grab, and the route that gets a first-timer from one star to thirty without wandering the castle in circles.
Super Mario 64 Bowser Levels Guide: All 24 Red Coins
Bowser in the Dark World, the Fire Sea and the Sky each hide one Power Star behind eight red coins on the obstacle course in front of the fight. Here is the route through all three, where every red coin sits, and what else the level data holds.