Super Mario 64 Rainbow Ride Guide: All 6 Stars and the Carpet Rules
Rainbow Ride is fifteen chunks of geometry floating in an empty sky, joined by carpets that leave without you. Here is how the magic carpets actually behave, where the eight red coins hide, how to line up the cannon shot, and the warp almost nobody uses.
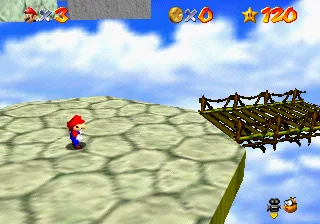
Rainbow Ride does not have a floor, and that is the whole problem.
Every other course in Super Mario 64 gives you ground to fail on. Even Tick Tock Clock, the one everybody nominates as the hard course, is a shaft with walls you can wall kick off when a jump goes wrong. Rainbow Ride is a dozen disconnected chunks of geometry hanging in an empty blue sky, stitched together by carpets that leave without you, and underneath all of it is nothing.
It is the fifteenth and final main course, and it is where a lot of 120-star files quietly die. Six stars, 146 coins, exactly zero cap blocks, and one traversal gimmick that will strand you the first three times you meet it. Here is the whole course.
Getting in: the third-floor niche
Rainbow Ride is not behind a painting, which is why people miss it. Per the Super Mario Wiki you need 50 Power Stars and a cleared Bowser in the Fire Sea to open the Big Star Door onto the castle's third floor, and that floor is a single small round room with the Tick Tock Clock face staring at you from directly opposite the door.
The two courses are in the walls. There is a niche on each side, both sitting above a ledge, so you have to jump up onto the high platform to reach them. The left one warps you to Wing Mario Over the Rainbow — a castle secret star, covered in the secret stars guide. The right one is Rainbow Ride, and its entrance is a hole in the floor of that alcove rather than a canvas you dive into. For anyone counting: the 50-star door only gets you onto this floor. The endless stairs above it still need 70 Power Stars, and the beginner guide walks the gates in order.
One deliberate joke to listen for: the course is scored with "Slider," Koji Kondo's presto bluegrass take on the main theme, shared with Tick Tock Clock, both cap courses, every slide in the game and both Koopa the Quick races. The most lethal course in Super Mario 64 sounds like a victory lap.
The magic carpet is the whole level
The carpets are the only thing in Rainbow Ride you truly have to learn. Three documented rules, and every one of them has cost somebody a life:
- A carpet sits still until you step on it. Then it follows a fixed rail styled like a rainbow. You do not steer it, and you cannot stop it.
- Stay off it too long and it vanishes, respawning back at its original position — while you are standing on a platform in the middle of the sky with no ride home.
- Ride it to the end of its line and it falls into the abyss, then respawns where it started. The carpet is not a destination. It is a countdown.
That turns most of the course into a positioning problem rather than a jumping one, because the obstacles on a carpet's route are static — the carpet is what moves into them. So never stand in the middle: sit on the trailing edge, let the obstacle come to you, hop forward over it and immediately drift back. Riding the leading edge into a wall is how you get swept off the back. And every "climb over this platform" section in the course is really "climb over this platform faster than the carpet's patience," so plan your way back on before you jump off.
Three paths from the spinning platforms
The opening carpet bends around a platform and through a flamethrower, then dumps you at four large spinning platforms with a Lakitu circling overhead. That is the hub, and it is where every route in the course begins.
Three exits:
- Left — the swings. A pole takes you down to the platform below, then it is Fly Guy, seesaws, swings and Falling Blocks.
- Straight ahead — the maze. A moving lift ferries you across to a grey concrete maze holding the course's eight red coins.
- Right — the carpets. A second carpet runs to a fork: the left carpet goes to the Rainbow Cruiser, the right carpet goes to the Big House.
Deal with the Lakitu here, on flat ground. The wiki notes it turns up again at the end of the first carpet's path if you leave it alive, and fighting a Spiny-thrower while standing on a moving rug over open sky is not a fight you want.
The six stars, mission by mission
Six missions on N64, in the order the mission-select board lists them. There is no boss in Rainbow Ride — the level itself is the boss.
Cruiser Crossing the Rainbow
Right carpet from the hub, then left at the fork. The route swings around a spinning platform you have to dodge or be pushed off; its underside doubles as a flamethrower, and there is a 1-Up floating above the top of it. At the end you jump a run of platforms and Falling Blocks onto the deck of the Rainbow Cruiser.
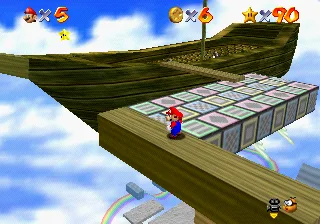
Then the twist: a heavy wind runs through the Rainbow Cruiser and shoves you toward the stern. The star is on the bow. So the entire crossing is uphill against the push, sharing a deck with a couple of Bob-ombs and a Lakitu, with the cannon sitting behind you at the stern. Hold forward, take the wind seriously, and do not try to fight a Bob-omb mid-gust — walk around it. There is a 1-Up on the tip of the bowsprit next to the star, which is the game apologising.
The Big House in the Sky
Right carpet from the hub, then right at the fork. This is the run that punishes hesitation more than anything else in the course. Platforms jut into the carpet's path; you have to climb over each one and get back on the carpet before it gives up on you. An Amp circles one of them, because of course it does.
Inside the Big House is a checkerboard floor, a wooden plank carrying five coins, and a fireplace that fires like a flamethrower on a cycle. The wiki spells out the exact answer: hang at the back of the carpet until the flame goes out, then move to the leading edge. The carpet passes through the building twice; on the second pass it carries you up to the roof, where the star and a ninth 1-Up are waiting.
Coins Amassed in a Maze
The eight red coins. From the spinning platforms, take the moving lift straight ahead, past a Spinning Heart, and it delivers you to the concrete maze.
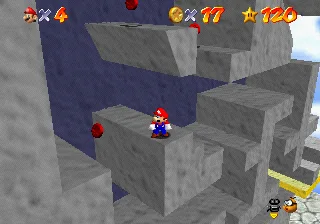
The maze is a vertical block puzzle, not a labyrinth — the coins are on shelves at different heights, and the tools are backflips for the sheer climbs and long jumps for the gaps, with flame throwers tucked into the corners to punish lazy routing. Get the highest coins first. The star spawns at the Star Marker at the bottom of the maze once all eight are banked, so finishing high means a controlled descent rather than a fall.
Do this mission early in your Rainbow Ride career for a reason that has nothing to do with the star: the Bob-omb Buddy who opens the cannon lives on top of the maze, reachable by wall kicking up the back end of it. No cannon, no sixth star.
Swingin' in the Breeze
Left from the hub. Slide down the pole to the platform below, use the seesaw to reach the platform above it, cross the swing, ride a second seesaw into a run of Falling Blocks, then time a jump across the gap so the flamethrower is between cycles. One more swing and one more flamethrower and the star is yours.
Swings are momentum objects — they tilt under you and keep tilting, so run across them rather than stopping to think in the middle. If you fall short of the whole path, there is a yellow block with a 1-Up in it on the big flat platform running underneath this entire route.
Tricky Triangles!
The purest puzzle star in the course. A large platform holds a Purple Switch and a set of yellow pyramid platforms whose pointed tops are useless to stand on.
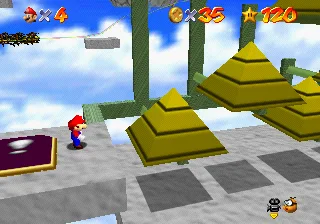
Hit the switch and the pyramids flip upside down for a few seconds, turning into flat-topped steps. Climb them and take the star before the timer expires and they roll back over. Scout the climb before you press anything: improvising the route halfway up is how you end up in the sky with no platform under you.
The wiki also documents a switch-free alternative — reach the floating platform used for "Somewhere Over the Rainbow" and fall off it in a precise way onto this star. It needs the cannon opened first, so it is a curiosity rather than a shortcut.
Somewhere Over the Rainbow
Two jobs, in order.
Job one: open the cannon. Wall kick up the back end of the maze, walk to the top, and talk to the Bob-omb Buddy. If you skipped this during the red coin mission, you are making the maze trip twice.
Job two: aim. Right carpet, left at the fork, onto the Rainbow Cruiser, and climb into the cannon at the stern. You are shooting for a platform floating out in the void, and the aiming cue is built into the sky: fly through the rainbow ring hanging in the air and grab the pole on the platform beyond it. The pole is the safety net — if the arc is roughly right, you will catch it.
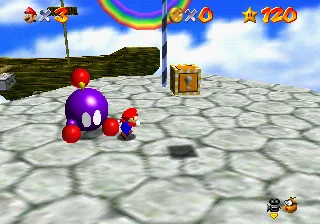
On the platform: a Chuckya and a yellow block. Hit the block to reveal the Power Star. The Chuckya is the actual danger, because of what it does — it charges, picks Mario up, and throws him in a random direction, and every direction here is down. If it grabs you, mash A and swing the Control Stick from the inside to the outside 11 times to break out before the throw. If you would rather not risk it, pick the Chuckya up from behind and throw it: it explodes and pays out five coins.
The warp on top of the maze
Here is the piece of Rainbow Ride most players finish the game without touching. On the very top of the maze — right beside the yellow block holding a 1-Up — sits a warp that sends you to the Big House balcony, and the Super Mario Wiki documents the matching half: a warp on that balcony that sends you back to the maze roof. A two-way link between the two far ends of the course, costing zero carpet rides.
It does not hand you "The Big House in the Sky" — the roof star still comes from the carpet's second pass through the building. What it kills is the worst part of a bad run. Die inside the Big House, or need to get back there for coins, and instead of riding the opening carpet, the second carpet and the right-hand fork carpet all over again, you climb the maze and step into a hole.
The 100-coin star: 146 coins, 46 spare
Rainbow Ride holds 146 coins, so the 100-coin star gives you 46 to waste — comfortable on paper, tying Bob-omb Battlefield and sitting a long way clear of Jolly Roger Bay's brutal four. The 100-coin stars guide has the full course-by-course table.
The margin lies, though, because in most courses a missed coin costs you a walk back. Here it costs you the run. The route that works:
- The maze is the payday. Eight red coins are 16 on their own, and Nintendo's own Player's Guide named this course's 100-coin star "Blue Coins atop the Maze."
- Bank the Big House plank. Five coins on a piece of wood inside the building, on a carpet ride you are taking anyway.
- Throw the Chuckya. Five more coins, and it removes the thing most likely to end the entry.
- Do the cruiser deck on the same trip as the bow star. You are crossing it against the wind regardless.
Two Spinning Hearts keep you alive through all that: one on a large spinning platform at the hub, one at the bottom of the maze under the wall-kick corner. Sprint through them rather than walking — the heart spins in proportion to your speed and heals one sector of the power meter per full rotation while it is turning faster than its idle rate, so a slow walk-through is close to wasted.
The wiki also counts nine 1-Up Mushrooms in Rainbow Ride, scattered across the ship's pole, the bowsprit, a pyramid platform, the Big House roof and the maze. This is a course that hands out extra lives because it expects to take them.
There are no cap blocks in this course
The Super Mario Wiki's course statistics for Rainbow Ride list Caps Found: (none). No Wing Cap, no Metal Cap, no Vanish Cap — the Wing Cap's red blocks only exist in three courses, Bob-omb Battlefield, Lethal Lava Land and Shifting Sand Land, plus one on the castle roof. The cap guide has the full map, and none of it points here.
That is a design statement, not trivia. No flight, no invulnerability window, no way to skip a gap you cannot clear — which makes this the game's cleanest test of the fundamentals in the movement guide. Wall kick for the back of the maze (no wall kick, no Bob-omb Buddy, no cannon), long jump for the maze gaps, backflip for standing-start height on the shelves, dive-recover for the landings you were never going to stick.
Mistakes that drop you into the void
- Standing in the middle of a carpet. Ride the back edge and jump obstacles as they arrive.
- Hopping off for one coin. Stay off too long and the carpet deletes itself and reappears at its start point, not yours.
- Fighting the Chuckya near the platform edge. Grab it from behind or leave it entirely; a random throw over a void is a life.
- Saving the maze for last. The cannon opens from its roof, and everything downstream of the cannon waits on that climb.
- Fighting the camera on a moving carpet. Set the angle before you step on, then leave it alone.
What Super Mario 64 DS changes
Four differences that matter if DS is the version you own:
- A seventh star. "Switch Star of the Manor" is added inside the Big House.
- Anyone can grab anything. Rainbow Ride and Lethal Lava Land are the only two DS courses where any playable character can collect any Power Star.
- The cruiser star moved further out along the bowsprit, and every character solves it differently: Wario needs a Power Flower to beat the wind, Luigi backward-somersaults across from a carpet, Mario floats over as Balloon Mario, and Yoshi alternates running and tongue-grabbing his way out.
- Small trims. One spinning platform loses its flame, one cruiser Bob-omb becomes a Goomba, and Luigi gets a switch-free backward somersault route to the Tricky Triangles star.
Everything in this guide is the N64 original, which is also exactly what you are playing in Super Mario 3D All-Stars and the Nintendo Switch Online N64 app. The full breakdown lives in the version differences post.
Quick Action Checklist
- Get to the third floor with 50 Power Stars and Bowser in the Fire Sea cleared; Rainbow Ride is the right-hand niche, a hole in the floor above a ledge.
- Carpet rules: it moves only when you board it, vanishes if you stay off it too long, and drops into the void at the end of its rail. Ride the trailing edge and hop obstacles as they come to you.
- Deal with the Lakitu at the four spinning platforms before you leave the hub — it follows you to the carpet fork otherwise.
- Hub exits: left = swings, straight ahead = maze lift, right = carpets, then left for the cruiser and right for the Big House.
- Do "Coins Amassed in a Maze" early and wall kick up the back to reach the Bob-omb Buddy who opens the cannon.
- On the Rainbow Cruiser the wind pushes you sternward; the star is on the bow.
- In the Big House, sit at the back of the carpet until the fireplace flame dies, then move to the front; the roof star comes on the carpet's second pass.
- For "Tricky Triangles!", scout the climb before you hit the Purple Switch — the pyramids only stay flipped for a few seconds.
- For "Somewhere Over the Rainbow", fire the cannon through the rainbow ring, grab the pole, then hit the yellow block. Break a Chuckya grab with 11 stick rotations.
- Use the warp on top of the maze to reach the Big House balcony without three carpet rides.
- 146 coins, 46 spare: the maze red coins, the blue coins on the maze roof, the Big House plank and a thrown Chuckya do most of the work.
Frequently Asked Questions
How do you get to Rainbow Ride in Super Mario 64?
How do the magic carpets work in Rainbow Ride?
Where are the 8 red coins in Rainbow Ride?
How do you get the Somewhere Over the Rainbow star?
Is there a Wing Cap in Rainbow Ride?
How many coins are in Rainbow Ride?
What does the warp on top of the Rainbow Ride maze do?
Keep Reading
Related Guides
Super Mario 64 Swimming Guide: Tap A, Don't Hold It
Holding A is the slow way to swim in Super Mario 64. Here is the stroke rhythm the code rewards, how the stick steers, how to jump out of the water, what each current does, and the eight seconds of free speed hiding in two clams.
Super Mario 64 Lives and Game Over: What You Actually Lose
A Game Over in Super Mario 64 is a file reload: you keep everything you saved and lose everything you did not. Here is when the game actually writes your file, exactly what a Game Over rolls back, the five courses where a fall is free, and every way to earn a life, from the coin tally to the Monty Mole streak that never runs dry.
Super Mario 64 Music: Every Track and Where It Plays
Super Mario 64 scores 15 courses with seven songs, and only one of them belongs to a single course. Here is which track plays in every course and secret level, the five levels whose music rearranges itself as Mario moves, what triggers the boss music and the jingles, all 36 soundtrack tracks under their 1996 and current names, and where to listen today.
Super Mario 64 Bowser Levels Guide: All 24 Red Coins
Bowser in the Dark World, the Fire Sea and the Sky each hide one Power Star behind eight red coins on the obstacle course in front of the fight. Here is the route through all three, where every red coin sits, and what else the level data holds.
Super Mario 64 Beginner Guide: Your First 30 Power Stars
Super Mario 64 does not gate you on difficulty, it gates you on Power Stars. Here is exactly which doors need what, which stars are fastest to grab, and the route that gets a first-timer from one star to thirty without wandering the castle in circles.
Super Mario 64 120-Star Reward: Yoshi and the Castle Roof
Super Mario 64 does not announce your 120th Power Star. The reward is outside: a cannon grate that stops loading, Yoshi on the castle roof, and a gift that quietly resets the next time you load your file. Here is what 120 stars changes, checked against the wikis and the decompiled code.