Super Mario 64 Shifting Sand Land Guide: All 7 Stars
Only 74 of Shifting Sand Land's 136 coins are outside the pyramid, and once you step through the pyramid door the game will not let you back into the desert. That single rule reorders the whole course. Here is every star, every kind of sand, the coin table, and the star select that stops Klepto stealing your hat.
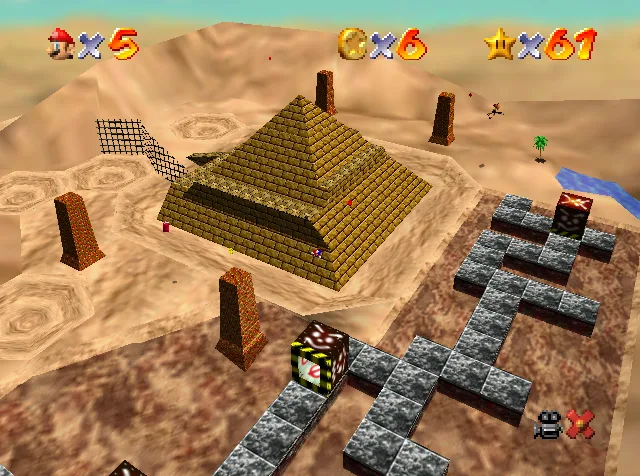
You cannot finish Shifting Sand Land's 100-coin star in the desert — not without a glitch.
Ukikipedia's coin breakdown for course eight splits the total cleanly: 74 coins outside the pyramid, 62 inside, 136 altogether. Seventy-four is not a hundred. And the Super Mario Wiki's layout notes add the rule that makes that arithmetic matter — once you enter the pyramid, you cannot return to the main course. The door is one-way. Every coin you skipped in the sand is gone for that run. (The documented exception is exactly that glitch: Ukikipedia notes the course maximum can be raised with the Breaking-Disappearing Cork Box Glitch, which is how box-cloning runs reach 100 coins without entering the pyramid at all.)
That is the shape of Shifting Sand Land: a desert with a point of no return in the middle of it. Here is every star, every kind of sand, the coin table, and the star select that stops the local bird taking your hat.
Getting in: the wall that is a painting
Shifting Sand Land is not behind a painting you can see. The entrance is disguised as a wall at the end of the hallway to the left of the Lethal Lava Land painting, in the Mushroom Castle basement — you walk at what looks like plain stonework and go straight through it.
The basement itself is gated behind the key Bowser drops after Bowser in the Dark World, which needs 8 Power Stars to reach. The beginner guide runs that unlock order in full.
One piece of course trivia that is actually a navigation aid: the desert plays the Lethal Lava Land theme, and the pyramid interior plays the Hazy Maze Cave theme. If the music changed, you are inside, and inside is one-way.
Three course versions, and the one that saves your cap
Ukikipedia catalogues three versions of the course, selected by which star you pick from the menu. The difference is not cosmetic — one of them removes the game's hat thief and one of them adds hazards.
| Version | Selected from | What changes |
|---|---|---|
| Version 1 | Star 1 | Klepto is carrying the Power Star, so he will not swoop at you. No extra tornadoes. |
| Version 2 | Star 2 or Star 3 | Klepto has no star and starts at the oasis, so he attacks and steals your cap. No extra tornadoes. |
| Version 3 | Stars 4 through 6 | Klepto attacks, and extra tornadoes spawn in certain quicksand areas. |
The practical read, and it is the single most useful thing to know about this course: select star 1 and Klepto cannot take your hat, because his talons are full. The Super Mario Wiki says as much on the mission page — returning to the level on star 1 leaves you free to explore without his threat. Given that going capless doubles one-wedge hits and turns three-wedge hits into five, per the health guide, that is real damage reduction for free.
The one caveat comes from Ukikipedia's RTA notes: on star 1 you can accidentally spawn the Talons star and lose time to it. Runners pick stars 2 or 3 for the 100-coin attempt specifically to dodge the tornadoes, and save Shining Atop the Pyramid for last so a blue star is not forcing the version.
Every kind of sand, and which ones kill
The course is named after the sand and the sand is the hazard, but it is not one substance. The Super Mario Wiki's quicksand and deadly-quicksand pages separate it into types that behave completely differently:
| Sand | Where it is | What it does |
|---|---|---|
| Ordinary sand | Most of the desert floor, yellow | Nothing |
| Mild quicksand | Slightly orange against the yellow sand | Sinks Mario to about the waist and restricts movement and jumping. Survivable — walk out |
| Deadly quicksand | Dark brown, around the pyramid's base and the Tox Box maze | Pulls Mario under immediately. One life, no escape |
| Sink holes | The circular holes in the pale sand | The middle pulls Mario under immediately, same as deadly quicksand |
| The pyramid floor pit | Large sand pit at the centre of the pyramid's interior base | Acts as quicksand, and is deep enough to kill Mario if he stands in it too long |
| Moving sand | Inside the pyramid only | Flows, and pushes Mario along it — it can shove him off a platform |
Two things follow. First, colour is the tell: orange sand slows you, dark brown sand ends you. Second, the tornadoes that Version 3 adds spawn in quicksand areas, which is why the version you select changes how dangerous the same square of ground is.
The seven stars, mission by mission
Six numbered missions plus the 100-coin star. Ukikipedia counts three Wing Cap blocks in this course, and the Super Mario Wiki places them on the stone structure near the start, beside the cannon, and on the pyramid's exterior. Several of these stars are much shorter with wings on.
In the Talons of the Big Bird
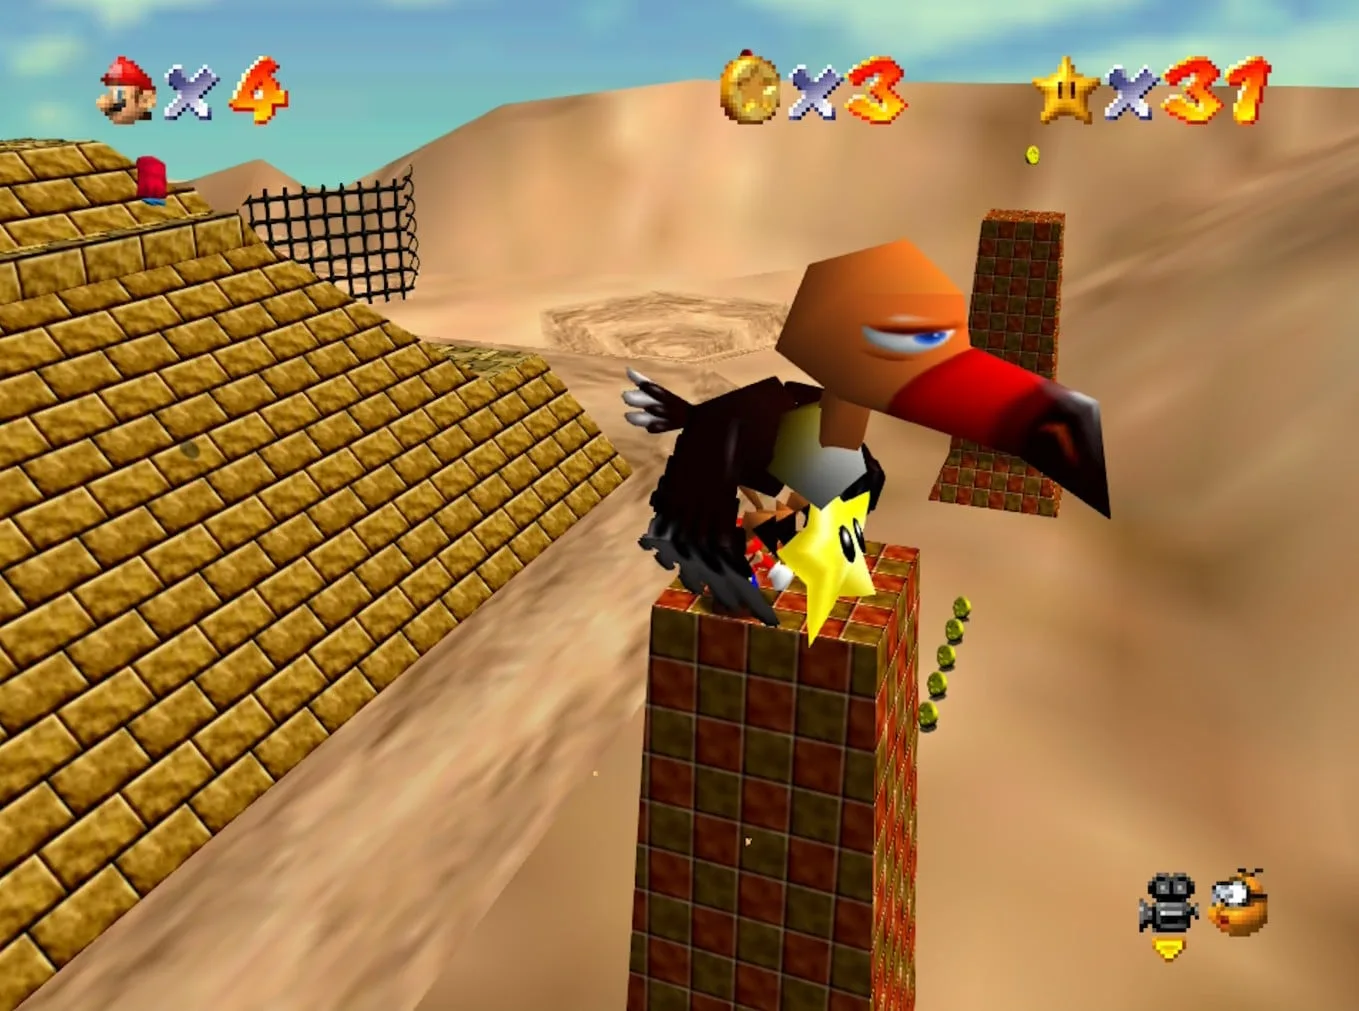
Klepto circles the course with the star in his claws, and the Super Mario Wiki notes he usually flies around the four pillars, especially when he is carrying something. Stand on top of a pillar, wait for him to pass overhead, and jump into him.
The part that costs people a minute: the star does not stay where you hit him. The Super Mario Wiki's mission page puts the landing spot on the west side of the pyramid, between the two pillars — so hit Klepto, then go there rather than scanning the sky. With the Wing Cap unlocked you can skip the pillar entirely and fly into him.
Shining Atop the Pyramid
The star sits in a nook at the very top of the pyramid's exterior. Climb the ring of steps that spiral up the outside; Fly Guys and the pyramid's flame throwers are what may attack you on the way up.
With the Wing Cap you fly straight to it. In the DS version Luigi's backward somersault also reaches the top.
Inside the Ancient Pyramid
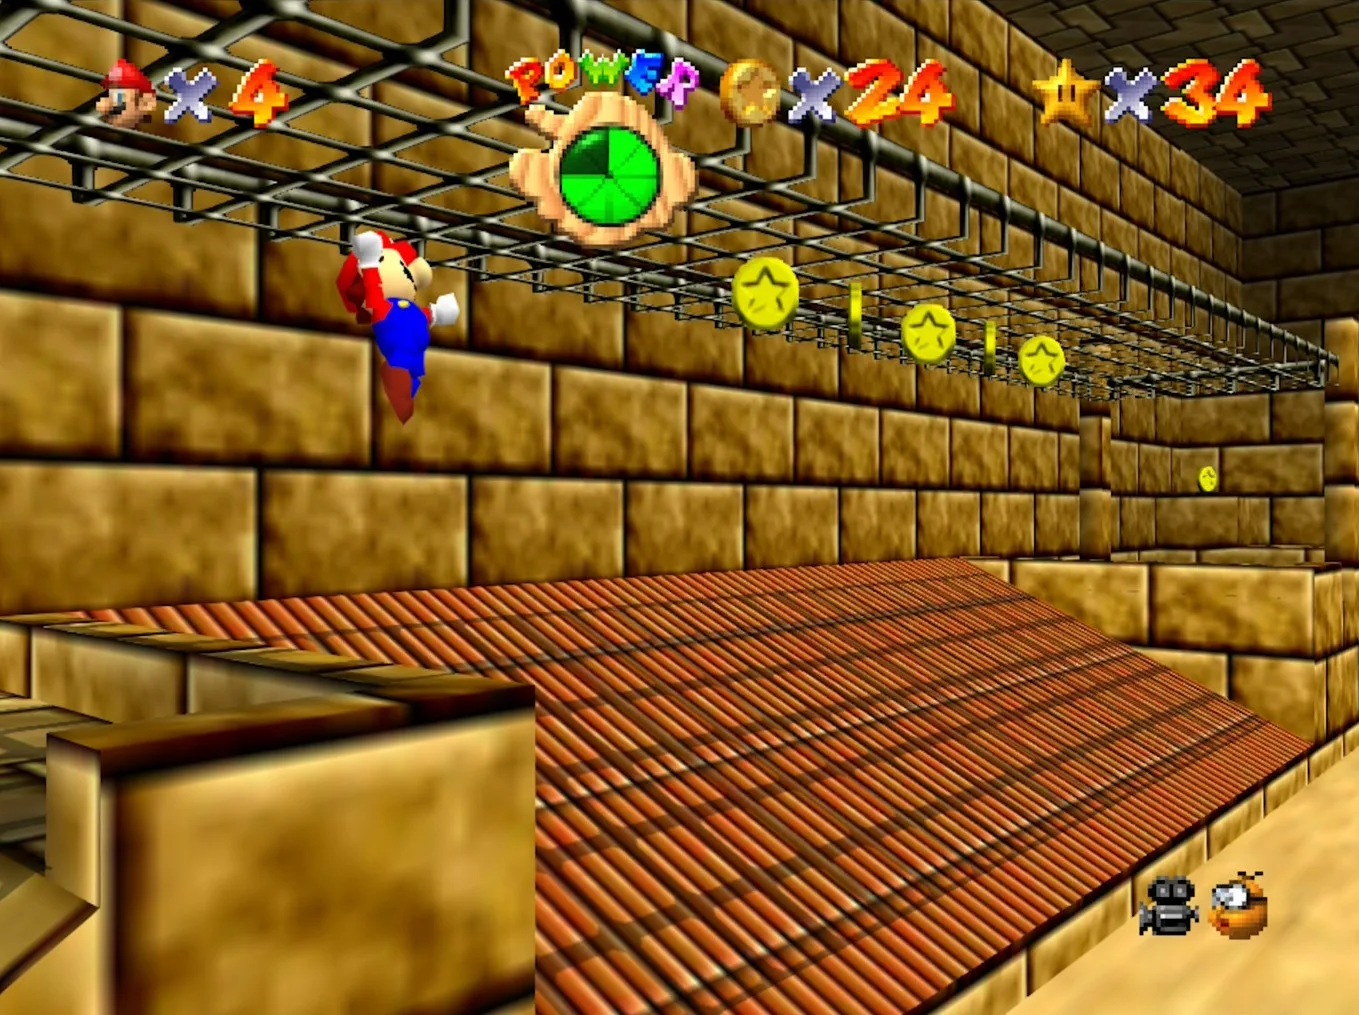
Enter the pyramid at the base, take the right-hand path, and climb. The left path is a 1-Up detour, not the route.
The obstacle order, per the Super Mario Wiki's layout notes, is worth memorising because the pyramid gives you no landmarks:
- A Grindel that blocks an upper and a lower path, but only one at a time depending on where it is.
- Stairs to the next floor, the same Grindel again, and Goombas.
- A pole, then a hanging grate you grab and swing along to cross a slope.
- A rolling Spindel — jump it, or wait it out in the small alcove.
- A Spinning Heart, then the vertically sliding stone slabs that lift you higher. Run through the heart rather than walking, since it heals per rotation and its spin rate is set by your speed.
- A narrow path past flying Amps, another pole, one more Grindel, and a slope to the star.
There is a shortcut. If you have already stood on all four pillars, the pyramid's top is open, and you can drop in from above and long jump from the lift straight to the star.
Stand Tall on the Four Pillars
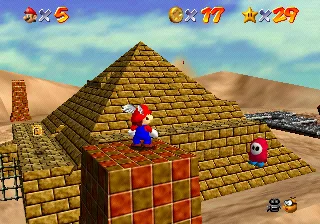
This is the Eyerok mission, and the boss is the easy half.
The pillar step is where people stall, and Ukikipedia's RTA guide explains why: the game only counts a pillar when Mario touches a small cylinder in the very centre of its top face. Clipping the edge, or landing and immediately sliding off, does nothing. Get flat on the middle of each one.
Three pillars are straightforward — the two west of the pyramid and the one in the south-eastern corner. The north-eastern pillar is surrounded by quicksand, and the Super Mario Wiki says reaching it needs the Wing Cap (or, in the DS version, a Shiny Shell or Luigi's backward somersault). That one pillar is the reason the red switch matters here.
With all four touched, the top of the pyramid spins and blows off, opening a secret entrance. Go in and you land on a lift that slides down the centre of the pyramid and stops at a hole; the hole drops into a chamber with a sarcophagus and a set of stone steps. Stand on the steps and they become two enormous hands.
Eyerok's rules — one eye open at a time, three hits per hand — are covered in the boss guide. Go in with a full meter.
Free Flying for 8 Red Coins
Eight red coins, none of them inside the pyramid. Four are on the ground and four are in the air, which is why the mission is named after flying.
| Red coin | Where |
|---|---|
| 1 | Behind your starting position, at the end of a narrow path |
| 2 | In one of the blocks at the stone structure |
| 3 | In the centre of the maze-like paths over the quicksand |
| 4 | In the oasis |
| 5-8 | In the air, one near each corner of the pyramid |
The star appears at the Star Marker on top of the stone structure, the one with the red and yellow blocks on it.
One shortcut for this route: standing under the palm tree beside the oasis warps Mario to the metal platform above the quicksand, next to the cannon and its red block. Grab the oasis red coin, step under the tree, and you arrive at the Wing Cap.
The four aerial coins are what the Wing Cap is for. Without it, Ukikipedia's capless notes confirm the tornadoes and Fly Guys can lift you to all of them — slower, and only worth it as a challenge run.
Star select matters here too. Runners take this on stars 1 to 3 to keep the extra tornadoes out of the course, and Ukikipedia's page flags the trade: star 1 risks accidentally collecting the Talons star, stars 2 and 3 mean Klepto harassing you near the oasis.
Pyramid Puzzle
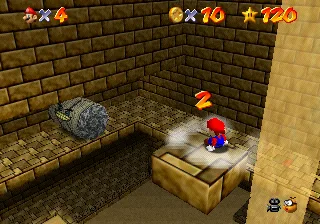
Five secret points, all of them in one place: the sandfall at the top of the pyramid's interior. Climb as if you were doing Inside the Ancient Pyramid (or drop in from the opened top), and when you reach the top of the sandfall, climb down to the small ledge below it with a coin on it.
Touching that first secret starts the counter. The route down, per the Super Mario Wiki:
- The ledge below the top of the sandfall — the one with a coin on it.
- A small platform on the left side of the sandfall.
- The platform on the right side.
- A point inside the stream of moving sand itself.
- A second point further down the same stream.
The star appears at the end of the stream. The Super Mario Wiki's warning about it is the one that costs lives: grab it carelessly and you drop into the quicksand below. Note also that the coins sitting on the secret points are not the objective — the secrets are separate hitboxes, which is how the Coinless Challenge clears this star by jump-kicking over the five coins without touching them.
100 Coins
136 coins, so 36 of margin — a cushion that reads comfortably and is not, because 62 of those coins sit behind a door you cannot walk back out of.
Do the desert first and completely: all four Pokeys, both Crazed Crates, the Fly Guys, the red coins, the pillar tops. Then go in, and take Pyramid Puzzle on the same entry. That is exactly how the speedrun route handles it — Ukikipedia's RTA page lists "Pyramid Puzzle + 100 Coins" as a single segment, with a listed RTA record of 1:46.10 for the pair. The 100-coin star guide has the same margin arithmetic for every other course.
The pyramid is a one-way door
Three rules govern the pyramid, and only one of them is obvious:
- You cannot go back out to the desert. Enter, and the main course is closed for that run.
- Dying inside keeps you inside. Lose a life in the pyramid and you re-enter the level in the pyramid, without repeating the desert — unless the death was a Game Over. That is a genuine kindness, and it means a failed Inside the Ancient Pyramid attempt costs you the climb, not the whole course.
- There is a second entrance and it changes the route. Stand on all four pillars once and the top opens permanently for that mission, turning a long interior climb into a lift ride.
There is also a teleport up there that the game did not intend to be reversible. Standing just to the right of the hole on the pyramid's second floor, at the top of the pole, warps Mario to the top of the hanging metal grate. It is meant to be one-way, but the Super Mario Wiki documents that standing on the slightly higher edge activates it in reverse — the wrong-warp that A Button Challenge runs use to reach Eyerok without jumping. The DS version removed it.
Where the 136 coins live
Ukikipedia's coin table for the course, with the pyramid rows marked. The twelve Goombas straddle both areas:
| Source | Coins |
|---|---|
| Throwing box under the stone building | 3 |
| One coin on top of each of the four pillars | 4 |
| Line of coins between the two pillars behind the pyramid | 5 |
| Line of coins on the pyramid exterior | 5 |
| 12 Goombas (inside and outside) | 12 |
| 3 Fly Guys | 6 |
| 2 Crazed Crates | 10 |
| 2 Bob-ombs | 2 |
| 8 red coins | 16 |
| 4 Pokeys (blue coins) | 20 |
| (Pyramid) 2 coins before the first-floor staircase at the back | 2 |
| (Pyramid) Ring of coins under the first wire grid | 8 |
| (Pyramid) Line of coins under the second wire grid | 5 |
| (Pyramid) 4 coins on the steps after the second wire frame | 4 |
| (Pyramid) 2 pairs of coins on moving steps | 4 |
| (Pyramid) 10 coins at the very top | 10 |
| (Pyramid) 5 coins on the Pyramid Puzzle secrets | 5 |
| (Pyramid) Blue coin block | 15 |
| Total | 136 |
That blue coin block is a piece of trivia with a real consequence. The Super Mario Wiki records it as producing three Blue Coins rather than the usual four, the only block in the N64 game that does — worth 15 coins instead of 20. The DS version quietly raised it to four. If your interior count comes up five short of where you expected, that is why.
The course is also generous with lives: the Super Mario Wiki counts nine 1-Ups, five of them inside the pyramid — including one that only appears after you step on all five platforms over the sand at the pyramid's back.
The enemies worth respecting
Most of the desert is Goombas and Bob-ombs. Three things here are not.
Tox Boxes. The rolling metal boxes in the stone maze have a face on every side but one; the blank side is a square hole, and standing in that hole as the box passes over you is how you survive. The edges of that holed side still crush Mario, so being near the gap is not the same as being in it. A side hit squishes Mario for three wedges of health. The genuinely nasty detail the Super Mario Wiki documents: long jumping into the face of a Tox Box while it is out over the quicksand, off the side of the track, kills Mario instantly and plays the quicksand-fall animation, as though he had sunk. It looks like a collision bug and costs a life all the same. The maze also holds a red coin and the course's only cannon.
Pokeys. Ukikipedia's behaviour notes make them readable rather than random. A Pokey spawns its five segments when Mario comes within 2,000 units and resets to its home position past 2,500. Only killing the head kills the Pokey, a missing segment regrows after 100 frames, and contact costs two wedges. Each Pokey drops a Blue Coin — those four Pokeys are 20 of the course's 136 coins, so on a 100-coin run they are not optional scenery. Their movement has a tell: a Pokey approaches Mario when he is far away and backs off when he gets close, so chasing one walks you in circles. Stand still, let it come, take the head.
Grindels and the Spindel. Both live inside the pyramid and both are mummified Thwomps — the Grindel is the cube, floating up and slamming down and also hopping horizontally back and forth; the Spindel is the cylindrical variant, and it rolls. They are timing obstacles, not fights. The Grindel that blocks the first two paths is doing it on a schedule, so the correct play is to stop moving and read it.
What the A Button Challenge did down here
Ukikipedia's A-press table for the course is short: five of the seven stars need zero A presses, and the other two need one each.
The two that cost a press are Inside the Ancient Pyramid and Pyramid Puzzle, and the reason is a seven-unit measurement. Both are faster entered from the top of the pyramid, but the barriers around the lift are 7 units too high to clear with a dive recover, so Mario has to actually jump out of it. Seven units of geometry is the entire A-press cost of this course.
The rest of Ukikipedia's challenge tables say something about how the course is built. It records the whole course as clearable in zero B presses and zero Z presses, and every star except Stand Tall on the Four Pillars as clearable in the Pacifist Challenge. It also lists Shifting Sand Land as the only course in the game with stars collectible in the One Button Challenge — Talons, Shining Atop the Pyramid and the 100-coin star, all on the B button alone. And it files one unsolved challenge here: causing Eyerok to rise upwards indefinitely.
What Super Mario 64 DS changes
| N64 | Super Mario 64 DS | |
|---|---|---|
| Missions | 6 numbered plus the 100-coin star | Adds the Tox Box Switch Star; Free Flying for 8 Red Coins moves to 7th |
| Mild quicksand | Visibly orange against normal sand | Looks identical to normal sand |
| Blue coin block | 3 Blue Coins | 4 Blue Coins |
| Second-floor teleport | Reversible by standing on the higher edge | Removed |
| Eyerok's chamber | Open hole under the lift | Hole is blocked by a brick you must punch |
| Eyerok's eyes | 3 hits per hand | 2 hits per hand as Wario; Yoshi can slide kick, ground pound or breathe fire |
| North-east pillar | Wing Cap | Wing Cap, a Shiny Shell, or Luigi's backward somersault |
| Tox Boxes | Cannot be defeated | Wario can destroy one by punching from inside it |
The mild-quicksand change is the one that actually alters play. On N64 you can read the danger off the colour of the ground; on DS the harmless-looking sand and the sand that grabs you look the same, and you find out by walking.
Mistakes this course punishes
- Entering the pyramid before sweeping the desert on a 100-coin run. Only 74 coins are out there and the door does not open backwards.
- Standing near the edge of a pillar top. Only the small cylinder in the centre counts. Four near-misses look exactly like a broken game.
- Trying the north-east pillar without wings. It is ringed by quicksand — get the Wing Cap first.
- Selecting a late star to explore. Stars 4 to 6 add tornadoes to the quicksand and leave Klepto free to take your hat. Star 1 does neither.
- Walking through the Spinning Heart in the pyramid. It heals per rotation and the rotation speed is your speed. Run it.
- Grabbing the Pyramid Puzzle star carelessly. It sits at the end of the moving sand with quicksand underneath.
- Chasing Pokeys. They retreat when you close in, and only the head counts. Take the head.
- Long jumping at a Tox Box over the quicksand. That is an instant life loss, not a bump.
Quick Action Checklist
- Enter through the blank wall at the end of the basement hall left of the Lethal Lava Land painting; you need the Bowser in the Dark World key to be in the basement at all.
- Pick star 1 for any exploration run — Klepto holds the star and cannot steal your cap.
- Read the ground by colour: orange sand slows, dark brown sand kills, holes in the pale sand kill.
- Hit Klepto from a pillar top, then collect the star on the west side of the pyramid between the two pillars.
- Touch the centre cylinder of all four pillar tops to open the pyramid's roof; the north-east one needs the Wing Cap.
- Inside the pyramid, take the right path, use the alcove for the Spindel, and run through the Spinning Heart on the fourth level.
- Do the desert's 74 coins before you enter; the remaining 62 are inside and the door is one-way.
- Pair Pyramid Puzzle with the 100-coin run — the five secrets are all on the sandfall at the top.
Frequently Asked Questions
How many stars are in Shifting Sand Land in Super Mario 64?
How do you open the top of the pyramid in Shifting Sand Land?
Can you leave the pyramid in Shifting Sand Land?
Where are the 8 red coins in Shifting Sand Land?
How do you stop Klepto stealing your hat in Shifting Sand Land?
What are the five secrets in Pyramid Puzzle?
How many coins are in Shifting Sand Land?
Keep Reading
Related Guides
Super Mario 64 Swimming Guide: Tap A, Don't Hold It
Holding A is the slow way to swim in Super Mario 64. Here is the stroke rhythm the code rewards, how the stick steers, how to jump out of the water, what each current does, and the eight seconds of free speed hiding in two clams.
Super Mario 64 Lives and Game Over: What You Actually Lose
A Game Over in Super Mario 64 is a file reload: you keep everything you saved and lose everything you did not. Here is when the game actually writes your file, exactly what a Game Over rolls back, the five courses where a fall is free, and every way to earn a life, from the coin tally to the Monty Mole streak that never runs dry.
Super Mario 64 Music: Every Track and Where It Plays
Super Mario 64 scores 15 courses with seven songs, and only one of them belongs to a single course. Here is which track plays in every course and secret level, the five levels whose music rearranges itself as Mario moves, what triggers the boss music and the jingles, all 36 soundtrack tracks under their 1996 and current names, and where to listen today.
Super Mario 64 Bowser Levels Guide: All 24 Red Coins
Bowser in the Dark World, the Fire Sea and the Sky each hide one Power Star behind eight red coins on the obstacle course in front of the fight. Here is the route through all three, where every red coin sits, and what else the level data holds.
Super Mario 64 Beginner Guide: Your First 30 Power Stars
Super Mario 64 does not gate you on difficulty, it gates you on Power Stars. Here is exactly which doors need what, which stars are fastest to grab, and the route that gets a first-timer from one star to thirty without wandering the castle in circles.
Super Mario 64 120-Star Reward: Yoshi and the Castle Roof
Super Mario 64 does not announce your 120th Power Star. The reward is outside: a cannon grate that stops loading, Yoshi on the castle roof, and a gift that quietly resets the next time you load your file. Here is what 120 stars changes, checked against the wikis and the decompiled code.