Baldur's Gate 3 Inspiration: What You Can Actually Reroll
Inspiration can stop paying out without telling you. The pool is shared across the party, it caps at four, and a trigger you hit while full gives you the experience and nothing else. Here is the cap, the exact list of rolls the "Roll Again" button will and will not touch, and the enumerated count of how many inspiration goals bg3.wiki lists for each of the twelve backgrounds.

You are four points into a shared pool of four, you walk into the Emerald Grove, someone in your party trips a background goal, and the game hands you experience and no Inspiration point. Nothing warns you. The notification for the goal still fires.
Two facts drive the rest of the system: the pool is shared across the party, and the cap on it is enforced without telling you. Inspiration is also what the game offers you when a dialogue check fails, which makes leaving the pool parked at four a straightforward waste.
Here is the cap, the exact set of rolls the "Roll Again" button is allowed to touch, and the per-background trigger counts pulled off bg3.wiki's three act pages.
One pool, four points, and a silent overflow
Two rules do most of the work.
Inspiration is shared between all party members. There is not a Shadowheart pool and an Astarion pool. There is one number, and any character can spend from it on any eligible roll.
The party cannot hold more than 4 Inspiration points at any time. If a trigger fires while you are already sitting on four, the character still earns the experience reward attached to that trigger, but no point is added. The trigger is consumed. You do not get it back later.
So a full bar is not a safety net, it is a leak. If you are at four and you are about to do a stretch of the game dense in background goals — an act transition, a big questline, a settlement full of conversations — spend one on something cheap first.

Where the counter actually lives
Top-right corner of the inventory sheet, between camp supplies and gold. That is the readout — not the character sheet, and not the hotbar.
Points are earned by a character completing an action in keeping with their background while that character is in the active party. The bench does not count. If Gale is at camp when you do the Sage-flavoured thing, the Sage trigger does not fire.
Two useful consequences of that wording:
- Duplicate backgrounds double-dip. If two characters in the active party share a background, both earn a point for the same action. Karlach and Halsin are both Outlander; run them together and Outlander triggers pay twice.
- A few triggers count for more than one background. The wiki notes this happens occasionally rather than as a rule, so treat it as a bonus, not a plan.
What the Roll Again button will and will not touch
This is the part worth memorising, because the rule is not "dialogue checks". The rule is the d20 roll menu.
Any roll that surfaces the dice-roll interface can be re-rolled with Inspiration. Any d20 the game rolls in the background cannot, no matter how badly you want it back. Inspiration is the visible hand on the dice; Karmic Dice is the invisible one, and it uses a different eligibility boundary.
| Roll type | Rerollable with Inspiration? |
|---|---|
| Ability check in the d20 roll menu (the usual dialogue check) | Yes |
| Saving throw presented in the d20 roll menu | Yes |
| Attack roll presented in the d20 roll menu | Yes |
| Sleight of Hand to pick a lock or disarm a trap | Yes |
| Attack rolls made in normal combat | No |
| Saving throws made in normal combat | No |
| Automatic skill checks made while exploring | No |
| Sleight of Hand to pickpocket | No |
The roll menu is predominantly but not exclusively a dialogue interface, and the rolls inside it are typically ability checks — but saving throws and attack rolls do show up there, and when they do they are fair game.
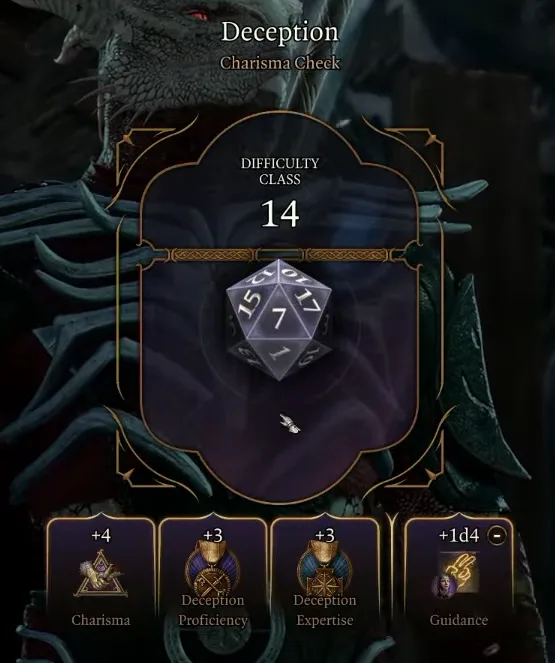
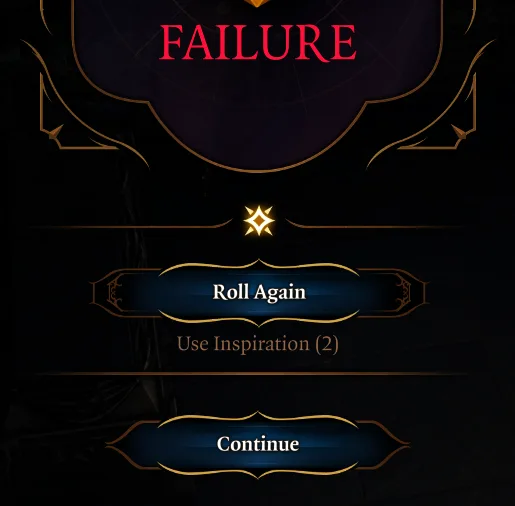
When you fail an eligible roll with a point available, the game offers Roll Again, with the number of points you hold shown in parentheses. Three things about the re-roll:
- Every modifier from the original roll carries over, including advantage and disadvantage and extra dice from Guidance or the Lucky feat. You are not re-rolling naked.
- You can keep going. A failed check can be re-rolled repeatedly until you succeed or the pool empties. Four points on one conversation is legal.
- Failing the re-roll is a real outcome. The point is spent either way.
Spend the point on a failed trap disarm
Fail a Sleight of Hand check to pick a lock or disarm a trap and the game offers you two ways to retry: burn another Trap Disarm Toolkit or set of Thieves' Tools, or spend an Inspiration point.
On a trap disarm those two are not equivalent. Retrying with another Trap Disarm Toolkit causes the trap to trigger on your character. Retrying with Inspiration does not. That is the difference between a re-roll and a re-roll plus whatever the trap does to the person kneeling in front of it. The wiki records that penalty for the toolkit retry specifically; on a plain lock there is no trap attached to set off, so there the choice is only which resource you would rather spend.
The twelve backgrounds and what they actually give you
Each background grants exactly two skill proficiencies and determines which goals earn you Inspiration. Origin characters have theirs locked; custom characters pick at creation and cannot change it once the game starts. Haunted One is reserved for the Dark Urge.
Four of the twelve — Criminal, Entertainer, Guild Artisan and Urchin — are not carried by any of the ten recruitable companions. If you want those triggers you need a custom character, a hireling, or both. Haunted One is a fifth gap you cannot fill at all: no companion, custom character or hireling can take it, so those goals exist only on a Dark Urge run.
| Background | Skill proficiencies | Companions with it |
|---|---|---|
| Acolyte | Insight, Religion | Shadowheart |
| Charlatan | Deception, Sleight of Hand | Astarion |
| Criminal | Deception, Stealth | — |
| Entertainer | Acrobatics, Performance | — |
| Folk Hero | Animal Handling, Survival | Wyll, Minsc |
| Guild Artisan | Insight, Persuasion | — |
| Haunted One | Medicine, Intimidation | The Dark Urge (origin only) |
| Noble | History, Persuasion | Minthara |
| Outlander | Athletics, Survival | Karlach, Halsin |
| Sage | Arcana, History | Gale |
| Soldier | Athletics, Intimidation | Lae'zel, Jaheira |
| Urchin | Sleight of Hand, Stealth | — |
One thing worth flagging for anyone coming from tabletop: Haunted One is the only background in Baldur's Gate 3 whose skill proficiencies differ from its 5e printing, per the wiki's own rule-changes note. The rest are lifted straight from the 2014 Player's Handbook.
How many triggers each background gets
bg3.wiki maintains a per-act inspiration index, and the entries are tagged by background, so this is countable rather than a matter of opinion. Counting every inspiration row on the three act pages gives 482 individual triggers.
One caveat on the Act One column: that page opens with an "Anywhere / Multiple locations" table of 27 entries that are not restricted to Act One. Read the columns as "listed on that page", not "obtainable only in that act".
| Background | Act One page | Act Two page | Act Three page | Total |
|---|---|---|---|---|
| Haunted One | 18 | 17 | 19 | 54 |
| Sage | 15 | 16 | 12 | 43 |
| Urchin | 13 | 14 | 14 | 41 |
| Noble | 13 | 13 | 14 | 40 |
| Outlander | 13 | 15 | 12 | 40 |
| Acolyte | 12 | 13 | 13 | 38 |
| Criminal | 14 | 14 | 10 | 38 |
| Entertainer | 12 | 13 | 13 | 38 |
| Folk Hero | 12 | 13 | 13 | 38 |
| Guild Artisan | 13 | 14 | 11 | 38 |
| Charlatan | 15 | 11 | 11 | 37 |
| Soldier | 10 | 15 | 12 | 37 |
| All backgrounds | 160 | 168 | 154 | 482 |
Haunted One is the outlier by a wide margin at 54, which is a Dark Urge-only benefit stacked on top of an origin that already reshapes the story. The other eleven sit in a 37-to-43 band — close enough that picking a background for its trigger count is not a real decision. Pick it for the two skills.
The experience attached to a trigger scales with how deep into the game it sits. The values on the act pages run like this:
| Page | Lowest experience reward | Highest |
|---|---|---|
| Act One | 20 | 95 |
| Act Two | 50 | 95 |
| Act Three | 75 | 275 |
Only two entries on any of the three pages are worth the top value of 275, and both are Haunted One goals in Act Three, tied to finding the Temple of Bhaal beneath Baldur's Gate and to Sarevok.
The experience is not shared, unless you force it
Inspiration experience does not follow the normal rules. As a rule of thumb, only the character who earns an Inspiration gets the experience from it. The wiki notes the direct consequence: this often leaves some party members with more experience than others.
There is a documented way around it, and it is fiddly enough to be worth stating precisely: the lead character must be alone, the only member of the active party, at the moment the inspiration experience is granted. No companions. The others then pick up that experience when they rejoin.
That is not a routine you want to run for a 20-experience Act One trigger. For a 220 or 275 in Act Three, it is arguably worth the trip back to camp.
Withers sells you eleven of the twelve backgrounds
If nobody in your party has the right background for a trigger you can see coming, you can hire one. Withers offers hirelings after you reach level 3, at 100 gold each, with no more than three recruited at a time.
A hireling's name, class, ability scores and appearance are all editable — but race, subrace, background, body type and voice are not. The background is the fixed part, which is exactly why they work as inspiration keys.
There are twelve hirelings, one per class, and between them they cover eleven backgrounds. Outlander appears twice; Haunted One does not appear at all, because it belongs to the Dark Urge.
| Hireling | Class | Background |
|---|---|---|
| Zenith Feur'sel | Cleric | Acolyte |
| Kree Derryck | Warlock | Charlatan |
| Ver'yll Wenkiir | Ranger | Criminal |
| Brinna Brightsong | Bard | Entertainer |
| Danton | Druid | Folk Hero |
| Jacelyn | Sorcerer | Guild Artisan |
| Kerz | Paladin | Noble |
| Eldra Luthrinn | Barbarian | Outlander |
| Sina'zith | Monk | Outlander |
| Sir Fuzzalump | Wizard | Sage |
| Varanna Sunblossom | Fighter | Soldier |
| Maddala Deadeye | Rogue | Urchin |
Dismissing a hireling sends them back to the fugue plane and you can re-conscript them later, but they return at level 1 with their default name, class, stats and appearance, keeping any items they were carrying. So the cheap loop — hire, swap in for one trigger, dismiss — costs you their level every time you run it. Better to keep one parked and rotate them in.

If you want the full picture on who joins you, when, and who you can lose permanently, that is covered in the Baldur's Gate 3 companion recruitment guide.
You cannot clear a background
Worth knowing before you go hunting for a completionist run: most backgrounds have pairs of mutually exclusive actions that both grant Inspiration, which makes finishing every goal for those backgrounds impossible in a single playthrough.
The cleanest example is Haunted One's Act One pair. Indulge Thine Appetites — follow your Dark Urge — is worth 25 experience. Subdue Thine Appetites — resist it — is worth 25 experience. They are the same fork. You will never bank both on one save.
Some are lost much earlier and much less visibly. The Act Two and Act Three pages both open with a warning that decisions made earlier lock triggers out for good. Both name killing certain characters or letting them die — Alfira, Arabella and Minthara on the Act Two list, Alfira, Oskar Fevras, Counsellor Florrick, Wulbren Bongle and Dame Aylin on the Act Three one — and both name raiding the Emerald Grove or letting the tiefling refugees be expelled. The Act Two page adds the fate of the Grymforge deep gnomes; the Act Three page adds decisions about story items like the Necromancy of Thay and the Githyanki Egg. Those are not inspiration decisions when you make them. They just turn out to be.
For what those choices do to the rest of your run, the approval and romance thresholds are the other half of the ledger — and one Noble inspiration, Penchant for Diplomacy, literally checks for High approval with a companion.
One thing the wiki contradicts itself on
Flagging this rather than picking a side, because both pages are live right now.
bg3.wiki's Character creation page says backgrounds "do not impact dialogue or quests." Its Backgrounds page says the opposite: "Backgrounds also have narrative effects, including options in dialogue and the opinions or attitude of others towards the character," and later that the tabletop background features are "replaced in Baldur's Gate 3 by the specific inspiration conditions and special options in dialogue."
The mechanical half is not in dispute — two skill proficiencies and a set of inspiration goals, both documented and both listed above. The narrative half is genuinely unsettled between the wiki's own pages, so treat any confident claim in either direction, including this site's, with suspicion until Larian's own documentation settles it. Pick your background for the two skills and you cannot be wrong either way.
Quick Action Checklist
- Check the inventory sheet before a big questline. Four points is a leak, not a buffer. Spend one first.
- Look for the Roll Again button, not the check type. If the d20 menu appeared, Inspiration is available. If the game rolled quietly, it is not.
- Spend a point on a failed trap disarm rather than burning a second Trap Disarm Toolkit — the toolkit retry sets the trap off, the Inspiration retry does not.
- Run duplicate backgrounds together when you want points fast. Karlach plus Halsin means Outlander goals pay twice.
- Keep one hireling on the bench rather than hiring and dismissing repeatedly, because a dismissed hireling comes back at level 1.
- Do not chase a background for its trigger count. Eleven of the twelve sit between 37 and 43. Take the two skills you want.
- Stack Guidance before you re-roll. Every modifier from the failed roll carries into the new one, so the buff you were already holding still applies.
Frequently Asked Questions
How many Inspiration points can you hold in Baldur's Gate 3?
Which rolls can Inspiration reroll in Baldur's Gate 3?
How do you get Inspiration points in Baldur's Gate 3?
Can hirelings earn Inspiration in Baldur's Gate 3?
Should you spend Inspiration or another toolkit on a failed trap disarm in Baldur's Gate 3?
Can you complete every background goal in one Baldur's Gate 3 playthrough?
Keep Reading
- BG3 Wiki — the shared pool, the 4-point cap and its silent overflow, the inventory-sheet counter, the d20-roll-menu rule, the excluded roll types, the trap-disarm exception, and the experience-sharing method
- BG3 Wiki — all twelve backgrounds, their two skill proficiencies each, which characters carry them, and the note that Haunted One is the only background whose proficiencies differ from tabletop 5e
- BG3 Wiki — the Act One inspiration index (160 entries, including the 27-entry Anywhere/Multiple locations table), experience values from 20 to 95, and the Indulge/Subdue Thine Appetites pair
- BG3 Wiki — the Act Two inspiration index (168 entries), experience values from 50 to 95, and the Act One decisions that lock triggers out
- BG3 Wiki — the Act Three inspiration index (154 entries), experience values from 75 to 275, and the two 275-experience Haunted One entries
- BG3 Wiki — the twelve hirelings and their fixed backgrounds, the level 3 unlock, 100 gold cost, three-at-a-time limit, and the level 1 reset on re-conscription
- BG3 Wiki — the Character creation page's claim that backgrounds "do not impact dialogue or quests", which its own Backgrounds page contradicts
Related Guides
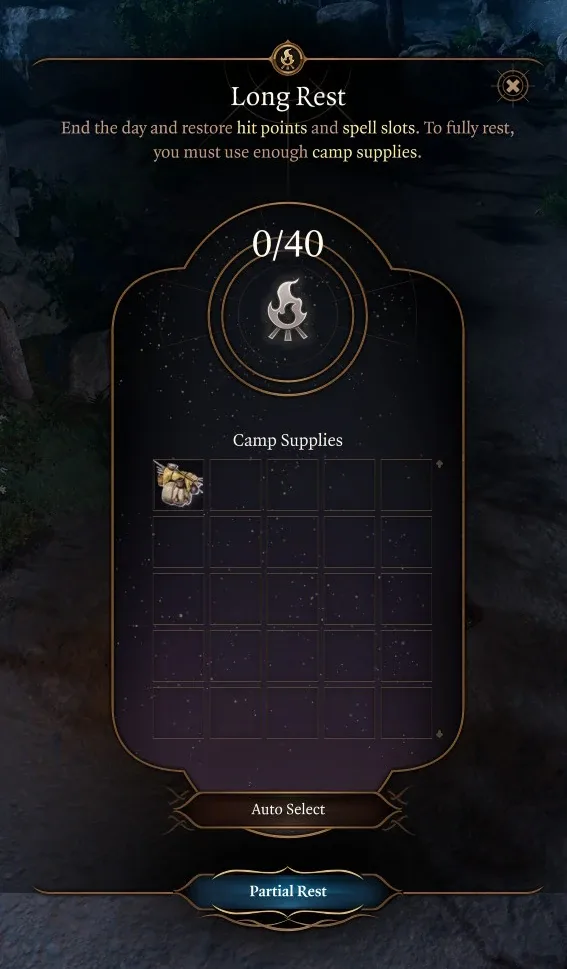
Baldur's Gate 3 Camp Supplies: What to Carry and Sell
A Grilled Steak weighs 3 kilograms and pays 8 Camp Supplies. A Poutine weighs a quarter of a kilogram and pays 20. Both are just "food" in your inventory, and the game never shows you the ratio. Here are the supply-per-kilogram and supply-per-gold numbers from bg3.wiki item data, and the camp chest trick that makes most of the carrying argument moot.
Baldur's Gate 3 Approval: Thresholds and Romance Numbers
The approval bar on a companion's character sheet shows you a category. The scripts behind it check integers, and the two do not line up — Gale's Mystra scene wants 36, Minthara's romance wants 31, and neither number has a band boundary anywhere near it. Here is the threshold table, the per-companion romance numbers the wiki documents, and the things that quietly cost you ten points.
Baldur's Gate 3 Concentration: Why Your Spell Dropped
Baldur's Gate 3 ends concentration in more ways than the tabletop rules do: a natural 1 fails the save whatever your bonus, falling Prone ends it with no roll, and casting a second concentration spell after Haste on yourself costs you both. Here is what breaks it, temporary hit points and Rage included, the gear and feats that hold it, and the spells BG3 stopped making you concentrate on.
Baldur's Gate 3 Stealth: Where You Stand Beats the Roll
Baldur's Gate 3 only rolls a hiding character's Stealth in one of its three obscurity states; the other two decide whether you are found before Dexterity gets a vote. Here is how obscurity and darkvision work, why Fog and Darkness are different tools, what breaks Hiding, and the gear that switches on in the dark.
Baldur's Gate 3 Beginner Guide: What Nobody Tells You
The tutorial teaches you to move and attack. It does not teach you that advantage is worth more than any weapon you will find in Act 1, or that Withers will rebuild your entire character for 100 gold. Here is the actual onboarding.
Baldur's Gate 3 Death Saves: What Actually Kills You
Baldur's Gate 3 keeps the tabletop shape of death saving throws and rewrites the details: no massive-damage deaths, no natural-20 comebacks, and failures that survive stabilising. Here is what kills a Downed character, what stops it, and what each way back from the dead costs.