Minecraft Conduit Guide: Build and Power the Ocean Beacon
A conduit is the ocean version of a beacon — it hands you unlimited underwater breathing, night vision, and faster mining, then punches nearby drowned to death on its own. The catch is the prismarine frame and the nautilus shells. Here is the whole build, block by block.
A conduit is the ocean's answer to a beacon, and it is the single best reason to stop dreading underwater work. Activate one and every player nearby gets unlimited breath, sees in the dark underwater, and mines faster — all at once, forever, with nothing to re-drink. Then it does the thing beacons never could: it hunts. Any drowned, guardian, or elder guardian that drifts within 8 blocks of a fully-built conduit takes damage on a timer until it dies. For anyone who has ever tried to drain an ocean monument and spent the whole time watching their oxygen bar, a conduit changes the entire job.
The build is genuinely cheap compared to a beacon — no boss fight, no 164-block pyramid. The whole cost is 8 nautilus shells, one heart of the sea, and a stack of prismarine. The hard part is that both special ingredients come from fishing and buried treasure, which are RNG. This guide walks the full chain: craft the block, source the shells and the heart, build the frame in the right shape, and understand exactly how the range scales. Every number here is checked against the Minecraft Wiki, because the internet is full of conduit "facts" that are off by several blocks.
What a conduit actually does
A conduit is a single block that, once surrounded by enough prismarine in the right shape, projects the Conduit Power status effect to every player touching water or rain inside a spherical radius. That radius runs from 32 blocks at the minimum frame up to 96 blocks at a full frame. The effect refreshes constantly while you are in range, so it never actually times out — it lasts about 13 seconds after you leave the field, then fades.
Two things make it fundamentally different from a beacon:
- It is an ocean-only power source. Conduit Power only helps you underwater (or in the rain). On dry land it does almost nothing useful.
- It fights for you. A complete conduit deals damage to hostile aquatic mobs on its own. No beacon, no other block in the game, does this.
The conduit also emits a light level of 15 — the maximum in the game — whether it is activated or not, and it does so even on land. So even a naked, un-framed conduit is a decent light source, though that is a wild waste of a heart of the sea.
Step 1: craft the conduit block
The conduit recipe fills a 3x3 grid almost completely:
- Center slot: 1 heart of the sea
- All 8 surrounding slots: nautilus shells
That is 8 nautilus shells + 1 heart of the sea for one conduit. There is no cheaper recipe and no alternative ingredient. One heart of the sea makes exactly one conduit, so if you want multiple conduits — for a big monument drain, say — you need a heart of the sea for each.
The conduit is not renewable in the strict sense: hearts of the sea only come from buried treasure, of which there is a finite (if large) amount per world. Nautilus shells are effectively renewable through fishing and wandering trader trades, so shells are never the bottleneck. The heart is.
Where to find nautilus shells and hearts of the sea
Nautilus shells come from three places:
- Fishing. They are part of the treasure loot pool, so a rod with Luck of the Sea improves your odds. This is the steady, renewable source.
- Drowned. Any drowned holding a nautilus shell drops it when killed. In Java, roughly 3% of naturally-spawned drowned spawn holding one; that shell is a guaranteed drop. Kill enough drowned near a river or ocean and shells pile up.
- Wandering traders. They occasionally sell nautilus shells for emeralds, which is the most reliable non-random way to stockpile the eight you need.
Hearts of the sea come from exactly one place: buried treasure. You find these by getting a buried treasure map, which drops from shipwreck supply chests and ocean ruin chests. Follow the map's red X, dig down, and the loot chest contains exactly one heart of the sea, guaranteed. That is the entire supply line — no fishing, no mob, no trade gives you a heart. If you have not done a treasure hunt yet, the maps and cartography guide covers how buried treasure maps actually work.
So the realistic path is: raid a couple of shipwrecks for a treasure map, dig up the heart, and fish or trade your way to eight shells while you are out there anyway.
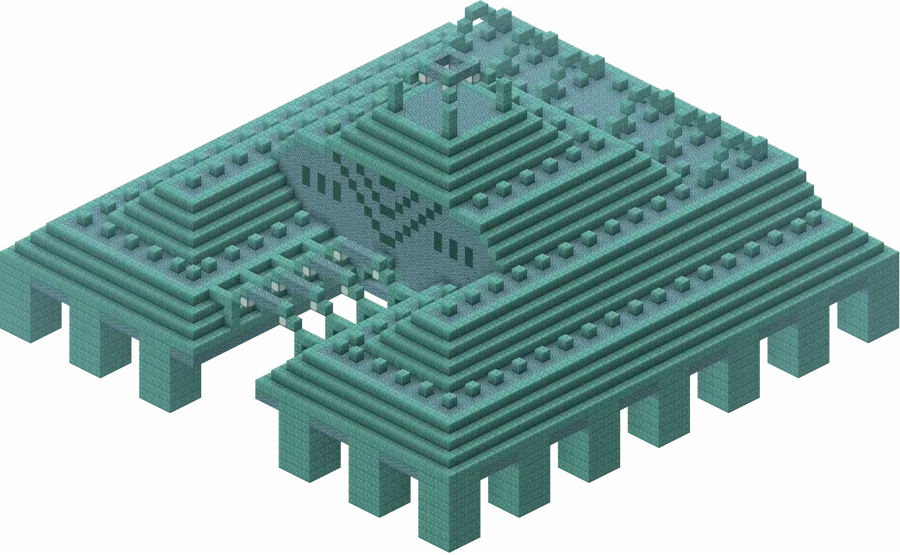
Step 2: build the prismarine frame
Here is where people get it wrong. A conduit does nothing floating in open water. It has to sit inside a water pocket that is itself wrapped in a prismarine frame, and the frame has a very specific geometry.
The setup, from the inside out:
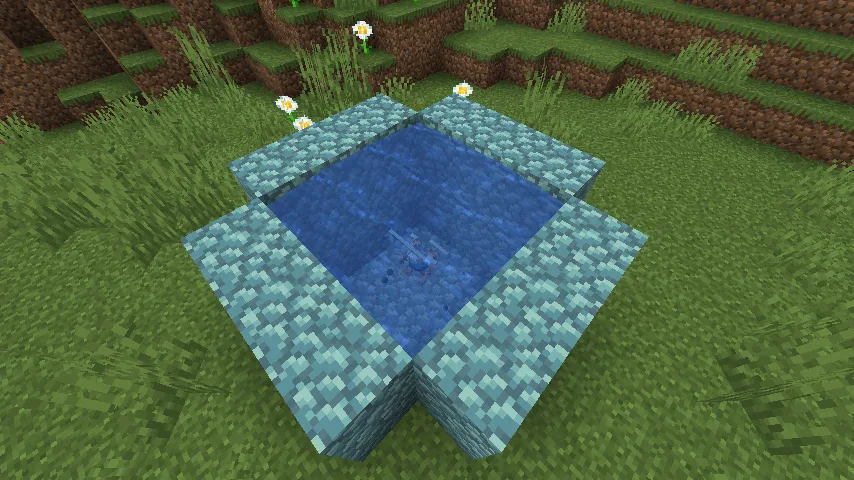
- Water around the conduit. The conduit must be surrounded by water source blocks (or flowing water, or waterlogged blocks) — think of it as sitting inside a 3x3x3 pocket of water.
- The frame. The activation frame is made of three 5x5 open squares, one centered on each axis (X, Y, Z), all intersecting at the conduit. Picture three big square rings crossing at the middle. Only the blocks that form those ring edges count.
The blocks that count toward activation are only these four:
- Prismarine
- Prismarine bricks
- Dark prismarine
- Sea lanterns
Crucially, these must be full blocks. Prismarine slabs, stairs, and walls do not activate a conduit, even though they are made of prismarine — this is by design. And any other block you stuff into that 5x5x5 outer shell (stone, glass, whatever) contributes nothing. Only the four prismarine-family full blocks, sitting on the frame edges, count.
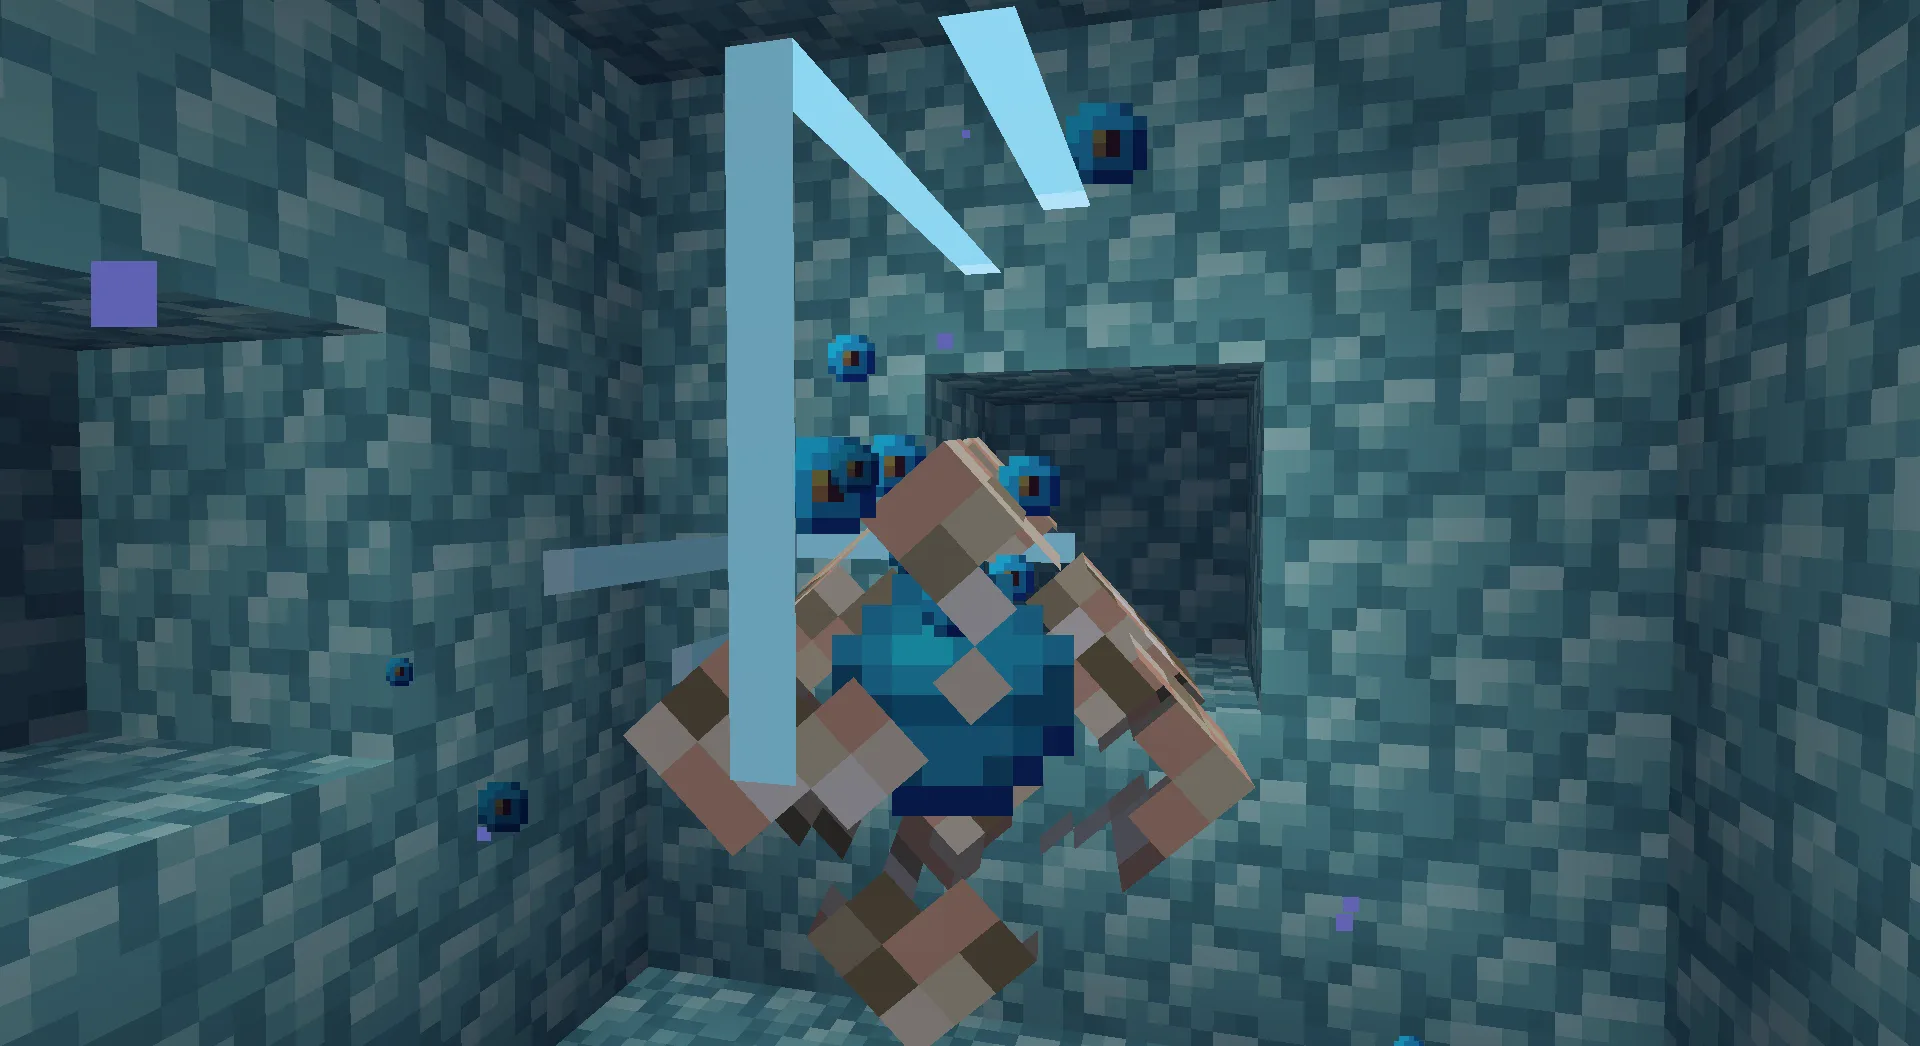
Once the frame hits the minimum block count, the conduit's eye opens and it starts pulsing. Remove any single frame block after that and it deactivates instantly.
The 16-block minimum and the range math
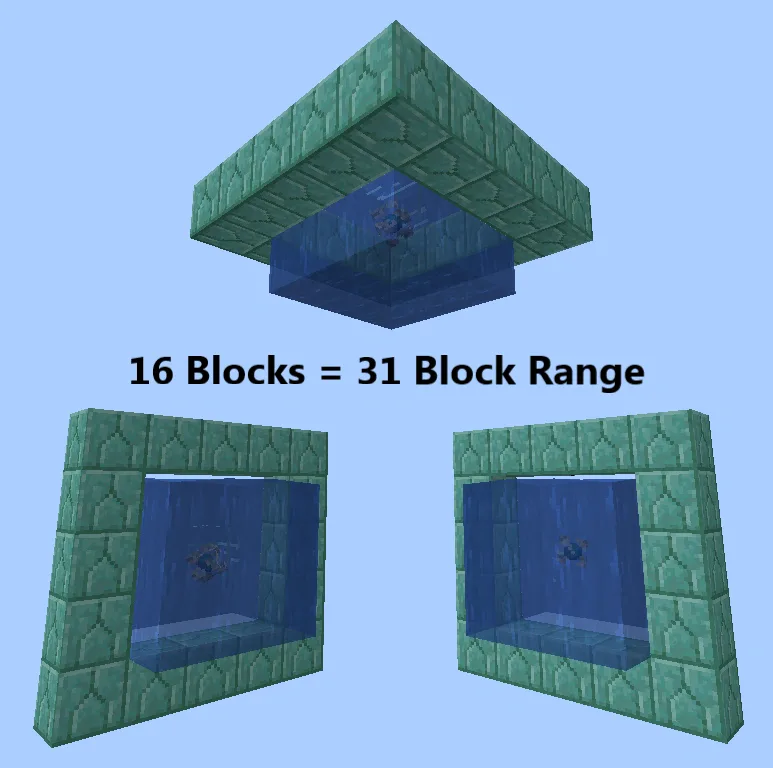
This is the part worth memorizing. A conduit will not turn on until the frame contains at least 16 of the qualifying prismarine blocks. That minimum gives you an effective range of 32 blocks.
From there, the range scales by a clean rule: the effective radius is 16 blocks for every 7 blocks in the frame, rounded down. So more prismarine equals more reach, in steps:
| Frame blocks | Effective range |
|---|---|
| 16 (minimum) | 32 blocks |
| 21 | 48 blocks |
| 28 | 64 blocks |
| 35 | 80 blocks |
| 42 (full frame) | 96 blocks |
The maximum is a complete frame of 42 blocks, giving a 96-block spherical radius. That is the number to aim for if you are draining an ocean monument, because 96 blocks covers most of a monument's footprint from a single well-placed conduit. If you just want to breathe while building a small underwater base, the 16-block minimum is plenty and saves you a lot of prismarine.
Conduit Power: what you actually get
Standing in range of an activated conduit gives you the Conduit Power effect, which is a bundle of three benefits rolled into one:
- Water Breathing. Your breath meter stops draining, so you cannot drown. On Bedrock it even refills your oxygen bar.
- Night Vision (underwater). You can see clearly underwater as if it were daylight. This is the one that makes monument-draining bearable.
- Faster underwater mining. Your mining speed underwater goes up by 16.7% (one sixth) — identical to Haste I.
That mining boost matters more than it sounds. Mining underwater is normally punishingly slow (you dig at a fraction of your land speed unless you have Aqua Affinity and are standing on solid ground). Conduit Power's Haste-equivalent bump takes some of that sting out. If you want the full picture on how underwater mining penalties work and which enchantments fix them, the armor guide covers Aqua Affinity and Respiration, which stack beautifully with a conduit.
One important note: Conduit Power's Night Vision only kicks in underwater, and Conduit Power does not stack with a separately-brewed Water Breathing or Haste potion — the game just applies whichever is stronger. So do not waste potions when you are already inside a conduit field.
The underwater guard dog: mob damage
Here is the feature that makes a conduit better than a beacon for ocean work. A fully-activated conduit — one with the complete 42-block frame — attacks hostile mobs on its own.
The rules:
- It damages any hostile mob (drowned, guardians, elder guardians) within 8 blocks of the conduit.
- The mob has to be in contact with water or rain to be hit.
- It deals 4 health (2 hearts) every 2 seconds to its target.
There is one big caveat straight from the wiki: a conduit only attacks one mob at a time. It is not an area-of-effect turret that melts a whole swarm; it picks a target, chips at it, and moves on. Against a full guardian swarm in a monument, that is not going to save you — you still need to fight. But it is excellent passive pest control for a base, and it will steadily grind down anything that lingers near it. Note that the 8-block attack radius is completely separate from the 32-to-96-block Conduit Power radius; the buff reaches far, the teeth reach 8 blocks.
Java vs Bedrock differences
The core mechanic is identical across editions, but a few details differ:
- Oxygen refill. In Bedrock, Conduit Power actually refills your oxygen bar while underwater; in Java it prevents the bar from draining but the refill behavior differs. Either way, you will not drown.
- Rain behavior. Conduits grant Conduit Power to players in rain (not just water) in both current editions, but this was a Bedrock feature first (added in 1.16.0) before parity.
- Above-water duration. On Bedrock, Conduit Power lingers for 12 seconds above water, during which Night Vision is technically active but does not show the usual borders.
None of these change the build. Craft it the same, frame it the same, and it activates the same in both editions. The differences are minor enough that the same 42-block max frame is the target regardless of what you play.
Conduit tips most players miss
A few things that save real time and prismarine:
- You do not need a full frame to breathe. The 16-block minimum gives you 32 blocks of Conduit Power — enough for almost any small underwater build. Only go to 42 blocks if you want the 96-block range or the mob-attack feature.
- Prismarine comes from the thing you are draining. Ocean monuments are built almost entirely of prismarine, dark prismarine, and sea lanterns. Break down the monument you are clearing and you will have frame material to spare — so bring the conduit block in early and power it off the monument's own walls.
- Slabs and stairs do not count. If your frame will not activate, check that every counting block is a full prismarine-family block, not a slab, stair, or wall.
- Guardian farms love conduits. A conduit near a guardian farm gives you permanent breath and Night Vision while you AFK, and passively picks off stray mobs. If you are eyeing a monument for a farm, read the ocean monument guide first.
- It is a max-brightness light. At light level 15 even on land, a conduit is technically the brightest block in the game — but using one purely for light burns a heart of the sea, so do not.
- One heart, one conduit. Multi-conduit monument drains mean multiple treasure hunts. Plan your heart-of-the-sea supply before you commit to a big underwater project.
Quick Action Checklist
- Raid shipwrecks and ocean ruins for a buried treasure map, then dig up a heart of the sea
- Fish, trade with wandering traders, or kill drowned to collect 8 nautilus shells
- Craft the conduit: 8 nautilus shells around 1 heart of the sea
- Place the conduit in a 3x3x3 water pocket
- Build the frame from three 5x5 squares of prismarine, dark prismarine, prismarine bricks, or sea lanterns
- Use full blocks only — no slabs, stairs, or walls count
- Hit at least 16 frame blocks to activate (32-block range); go to 42 for the full 96-block range
- Complete the full frame if you want the auto-attack on drowned and guardians (4 HP every 2s within 8 blocks)
- Break down the monument's own prismarine to finish the frame on site
Frequently Asked Questions
Keep Reading
Related Guides
Minecraft Ocean Monument Guide: Guardians, Loot & Conduits
An ocean monument is the only place in Minecraft you'll find sponges, three elder guardians that hit you with Mining Fatigue III before you even see them, and the prismarine you need to build a conduit. Here is how to find one, beat it, and walk out with the loot.

Minecraft Name Tags Guide: How to Get, Use & Secret Names
A name tag is the cheapest insurance policy in Minecraft: name a mob and it will never despawn, no matter how far you roam. Recent versions finally let you craft one from a scrap of paper and a metal nugget, so there's no excuse for losing that perfect horse anymore. This guide covers every way to get one, the anvil step people skip, and the hidden names that flip mobs upside down.
Minecraft Map Art Guide: Pixel Art With Maps Explained
Every filled map in Minecraft is a 128x128 grid of pixels, and each pixel copies the color of the block beneath it. Learn to control those colors and you can paint anything from a company logo to a full landscape on your wall. The trick nobody tells you: raising a block one level makes its color brighter, which turns 61 flat colors into 183.

Minecraft Cherry Grove Guide: Wood, Pink Petals, and Mobs
The cherry grove is the prettiest biome in Minecraft and one of the most underrated places to start a world. It's a meadow with pink trees on paper, but it quietly hands you a whole salmon-colored wood set, a renewable decoration block, emeralds in the hills, and bees on the branches.

Minecraft Survival Guide for Beginners — Surviving Your First Days
You have about ten minutes of daylight before the sun sets and the world tries to kill you. Here is exactly what to do with them — punch a tree, build a tool chain, and get a roof over your head before the zombies arrive.

Best Minecraft Enchantments, Ranked — The Ones Worth Your XP
Mending is the enchantment that ends the grind — gear that repairs itself forever. Everything else is a fight over your XP and anvil uses. Here is what actually earns a slot, ranked, with the real max levels.