Minecraft Slime Farm Guide: Slime Chunks, Swamps, Slimeballs
Slimeballs are the one item you can't mine, trade, or craft your way around — sticky pistons, leads, and slime blocks all dead-end at them. Here's how to build a slime farm that buries you in the stuff, whether you go slime-chunk or swamp.

Slimeballs are the item Minecraft refuses to let you shortcut. You can mine for diamonds, trade for emeralds, and barter with piglins for netherite scrap, but there is no ore, no villager deal, and no crafting workaround for a slimeball. It comes from a slime dying, full stop. And the moment you want sticky pistons for a redstone door, leads for hauling animals, or slime blocks for a flying machine, you hit that wall hard. A slime farm is the answer, and the reason it feels like a rite of passage is that slimes have the two most annoying spawn rules in the game bolted onto them at once.
Here is the number that shapes everything below: only about 1 in 10 chunks in your world is a "slime chunk," and in those chunks slimes spawn below Y=40 regardless of light or weather. Everywhere else underground, they simply never appear. So half the battle is not building the farm — it is finding the right dirt to dig in. Everything here is checked against the Minecraft Wiki, because slime tutorials are the single most common place people copy a wrong Y-level and then wonder why they've been staring at an empty room for an hour.
Why you actually need a slime farm
Run down the list of things that dead-end at a slimeball and it gets obvious fast:
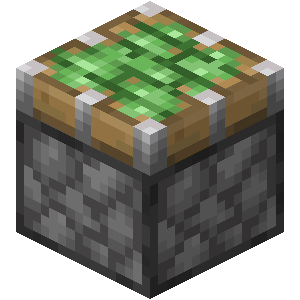
- Sticky pistons — the backbone of nearly every redstone contraption that moves blocks. One slimeball converts a regular piston into a sticky one.
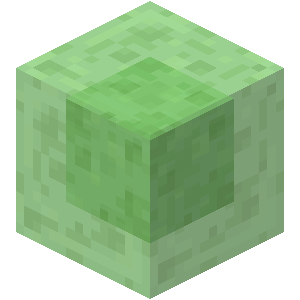
- Slime blocks — nine slimeballs each, and the core of flying machines, bounce pads, and honey/slime bubble-column tech.
- Leads — for dragging animals and mobs around. Each recipe eats a slimeball.
- Magma cream — slimeball plus blaze powder, the key ingredient in Fire Resistance potions.
None of that is optional if you are building past the campsite stage. And unlike the iron farm, which hijacks a mob you can find anywhere, a slime farm forces you to solve a location problem first. That is the part worth getting right before you place a single block.

The two ways slimes spawn
Slimes are unusual because they spawn under two completely separate rule sets. Most farms commit to one. Pick based on what your world actually gives you.
Slime chunks: the underground route
A slime chunk is a specific 16x16 column determined by your world seed. About one tenth of all chunks qualify. In Java Edition, which chunks are slime chunks is derived from the world seed; in Bedrock Edition, slime chunks sit at the same coordinates in every world. Inside one, slimes spawn below Y=40, at any light level, in any weather — the light-proofing rule that governs zombies and creepers does not apply here.
The catch is finding one. Two reliable methods:
- Seed + a chunk finder. If you know your world seed (Java: type
/seedin a world you own), plug it into a slime-chunk mapping tool and it draws you a map of every slime chunk. This is the fast way. - Dig and test. Get below Y=40, light up a large flat area completely so nothing else can spawn, then wait at night. If slimes appear, you are in a slime chunk. If nothing shows after several minutes, move over a chunk and try again. Press F3 (Java) to read your exact chunk boundaries.
Slime-chunk farms run day or night and don't care about the moon, which makes them the more consistent of the two once built.
Swamps: the surface route
The other path skips slime chunks entirely. Slimes also spawn naturally in swamp biomes under these exact conditions:
- Y-level 51 to 69, inclusive.
- Light level 7 or less — so it has to be dark, meaning night or a shaded/covered platform.
- Most often on a full moon, and never on a new moon. The game literally checks the moon's brightness against a random roll, so swamp output swings wildly with the lunar cycle.
That moon dependency is the swamp farm's blessing and curse. On a full moon a swamp platform can out-produce a mediocre slime-chunk farm; on a new moon it produces nothing at all. If you can sleep through to skip toward full moons, great — otherwise expect uneven yields.
How slimes split (and why it matters)
This is the mechanic that makes slime farm design different from a normal mob grinder. Slimes come in three sizes, and the big ones do not drop anything useful directly — they split when killed:
- Large slime (16 HP) splits into 2 to 4 medium slimes on death.
- Medium slime (4 HP) splits into 2 to 4 small slimes on death.
- Small slime (1 HP) is the end of the line — and the only size that drops slimeballs: 0 to 2 per small slime in Java Edition without Looting.
So a single large slime can cascade into a small swarm of tiny slimes, each one a potential 0-2 slimeballs. That is great for yield but brutal for farm design, because large slimes need 3x3x3 of open space to spawn at all. Your spawn floor has to be tall and wide enough to let the big ones appear, and your kill system has to handle a crowd that multiplies as it dies rather than a tidy single-file line of zombies.
Building a slime-chunk farm
Once you have confirmed a slime chunk, the build is conceptually simple: create the biggest, flattest, most exclusively-valid spawn space you can, and remove every competing spawn point around it.
The blueprint most people land on:
- Hollow out the slime chunk below Y=40. Dig out several layers, ideally the full chunk, leaving open flat floors. More floor area equals more spawn attempts. Because large slimes need a 3x3x3 pocket, keep at least 3 blocks of headroom.
- Light-proof everything you are not farming. Slimes ignore light, but zombies, skeletons, and creepers do not. If you flood the surrounding caves and non-slime chunks with light, hostile mobs stop spawning there and the game's mob cap gets spent almost entirely on your slimes. This step is the difference between a trickle and a torrent.
- Leave the spawn floors dark or lit — it doesn't matter for slimes — but keep them clear of slabs, carpets, and half-blocks, which block spawning.
- Funnel slimes to a central kill point. Because slimes hop, water streams and sloped floors nudge them toward a drop or a kill zone.
Light-proofing the surrounding area is the step nobody wants to do and the one that actually makes the farm work. A slime-chunk farm in a heavily-caved area with the caves left dark will feel broken even when it is built perfectly.
Building a swamp farm
If you never found a workable slime chunk, or you just have a swamp on your doorstep, build up instead of down. The idea is a dark platform between Y=51 and Y=69, sitting over swamp biome, that catches the natural swamp spawns.
- Build a large flat platform in the 51-69 band, over swamp. The bigger the footprint, the more spawns.
- Keep it dark — light level 7 or less. Roof it over or build at night; any brighter and swamp slimes won't spawn.
- Light-proof or block the rest of the local area so the mob cap funnels toward your platform.
- Accept the moon tax. Full-moon nights are gangbusters; new-moon nights are dead. Sleeping to advance the moon phase helps if your world allows it.
Swamp farms are less work to find a spot for (any swamp works) but more inconsistent in output than a dialed-in slime chunk. Many players build both and lean on whichever the moon favors.
The kill and collection setup
Slimes are easy to kill but multiply as they die, so the collection design has to expect volume. A few things that hold true regardless of which spawn method you chose:
- Fall damage works, but tune the height. Large and medium slimes take fall damage like most mobs, but you want the small slimes to survive the drop just enough to be finished off — or take fall damage all the way to death if you only care about the slimeballs. Test your drop height against small slimes specifically.
- A soft-kill floor plus a sword is the simplest first build. Drop slimes into a 1-block gap and hit them; you keep the XP and the slimeballs, and you never fight the split mechanic. Great for a first farm.
- Hoppers under the kill zone into a chest. Standard collection. The redstone basics guide covers the hopper-and-chest wiring if you need a refresher.
- Mind the split multiplication. One large slime becomes up to four mediums, each becoming up to four smalls — potentially 16 small slimes from one spawn. Give your kill chamber room to breathe or it will jam.
Common reasons your slime farm is dead
Before you rip it apart, work through this:
- Wrong chunk. The single most common failure. Re-verify the slime chunk with a seed map or a dig-and-wait test. Being one chunk off means zero slimes, forever.
- Wrong Y-level. Slime chunks only produce below Y=40. Swamp spawns only happen Y=51 to 69. Mixing these up is the classic mistake.
- Surrounding caves left dark. Hostile mobs are eating your mob cap. Light-proof the area aggressively.
- Swamp farm on a new moon. It is not broken — slimes never spawn on a new moon. Wait or sleep toward a full moon.
- Spawn floor too short. Large slimes need a 3x3x3 pocket. Low ceilings quietly cap you to nothing.
- You are standing too close or too far. Mobs need you within spawning range but at least 24 blocks away to spawn, and they despawn beyond 128. Build an AFK spot in the sweet spot.
- Non-full blocks on the floor. Slabs, carpets, and stairs block spawns. Keep spawn floors full solid blocks.
What to do with a mountain of slimeballs
Once it is running, slimeballs stop being a bottleneck and start being a foundation:
- Craft sticky pistons in bulk for the block-moving contraptions in our redstone contraptions guide.
- Mass-produce slime blocks for flying machines, bounce pads, and mob-launcher tech — nine slimeballs each, so a full farm makes this trivial.
- Keep a stack of leads on hand so relocating animals and setting up breeders stops being a chore.
- Feed magma cream production for the Fire Resistance potions in the potion brewing guide before any Nether or End run.
A slime farm is one of those builds that unlocks a whole category of play. The moment slimeballs are free, redstone stops being rationed and flying machines go from "someday" to "this weekend." It is more finicky to set up than an iron or mob farm, but there is genuinely no other way to get the stuff — and that is exactly why it is worth the dig.
Quick Action Checklist
- Decide your route: slime chunk (below Y=40, any light, any moon) or swamp platform (Y 51-69, light level 7 or less, moon-dependent)
- For slime chunks: find one via your world seed + a chunk map, or dig-and-wait test below Y=40
- Hollow out a large flat spawn area with at least 3 blocks of headroom so large slimes can spawn
- Light-proof every surrounding cave and non-slime chunk so hostile mobs don't eat your mob cap
- For swamps: build a dark platform in the Y 51-69 band and expect full-moon spikes, new-moon dead nights
- Remember the split chain: large -> 2-4 medium -> 2-4 small, and only small slimes drop 0-2 slimeballs
- Add a soft-kill floor or tuned drop, with hoppers feeding a collection chest
- Build an AFK spot 24-128 blocks from the spawn floor
- Convert the slimeballs into sticky pistons, slime blocks, leads, and magma cream
Frequently Asked Questions
How do you find a slime chunk in Minecraft?
At what Y-level do slimes spawn?
Do slimes only spawn on a full moon?
Why do only small slimes drop slimeballs?
What are slimeballs used for in Minecraft?
Keep Reading
Related Guides
Minecraft Iron Farm Guide: Build an Iron Golem Farm
An iron golem drops 3 to 5 iron ingots every single time it dies, guaranteed, and your villagers will manufacture them for free if you set the scene right. Here is how to weaponize the panic mechanic into a farm that buries you in iron.
Minecraft Spawner Guide: Mechanics, XP Farms, and Real Rates
A monster spawner is not a magic mob faucet. It is a timer with a hard mob cap, a spherical activation radius, and a spawn volume that is shaped differently in Java and Bedrock. Learn the actual numbers and you stop building farms that quietly run at half rate.
Minecraft Automatic Farms: Observer and Piston Designs
Observer-and-piston farms look identical in every tutorial and perform nothing alike. The difference is growth math, edition-specific observer timing, and whether the chunk is even loaded. Here are the numbers behind the builds.
Minecraft Music Discs: Every Disc and How to Get It
Twelve of the 22 music discs come from a creeper killed by a skeleton or one of its variants. The other ten come from ten different places, and eight of those are a structure. Here is every disc, its composer, its length, its odds, and the comparator value it puts out — including the seven signal levels that two different discs now share.
Minecraft Survival Guide for Beginners: Your First Days
You have about ten minutes of daylight before the sun sets and the world tries to kill you. Here is exactly what to do with them — punch a tree, build a tool chain, and get a roof over your head before the zombies arrive.

Best Minecraft Enchantments, Ranked — The Ones Worth Your XP
Mending is the enchantment that ends the grind — gear that repairs itself forever. Everything else is a fight over your XP and anvil uses. Here is what actually earns a slot, ranked, with the real max levels.