Redstone Basics: A Beginner's Guide to Minecraft's Wiring
Redstone is Minecraft's electricity, and most beginners bounce off it because nobody explains the one rule that makes it click: signal strength. Learn that, learn five components, and you can build doors, traps, and farms.
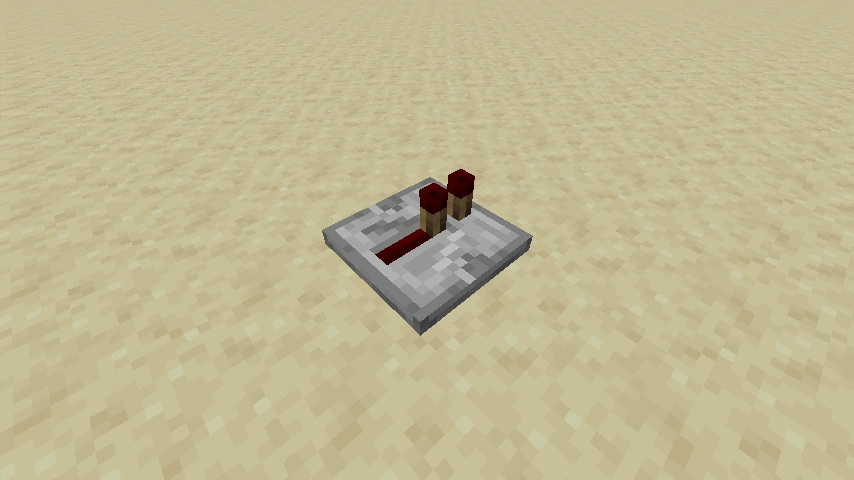
Redstone is Minecraft's electricity, and most beginners bounce off it hard. Not because it is genuinely difficult, but because the tutorials skip the one rule that makes everything else make sense: signal strength. Once you understand that a redstone signal is a number from 1 to 15 that fades as it travels, every component on the list stops being mysterious. They are all just ways to create, carry, boost, delay, or react to that number.
So we are going to teach signal strength first, then walk through exactly five components — the ones that do 90% of the work — and finish with three contraptions you can build tonight. This is not a redstone-computer course. This is "open the door without touching it and farm food while you sleep" level, which is where the fun actually is.
The one rule: signal strength
A redstone signal has a strength: an integer from 1 to 15. A power source outputs a full signal of 15. As that signal travels along redstone dust, it drops by 1 for every block it crosses. So after 15 blocks of dust, the signal hits 0 and dies — your wire goes dark and whatever is at the end does nothing.
That is the whole foundation. Everything in redstone is downstream of this:
- Power sources start a signal at strength 15 (some, like comparators, can output less).
- Wire (dust) carries it and loses 1 strength per block.
- A signal of any strength from 1 to 15 is enough to "power" most components — a lamp lights, a door opens, a piston extends. For those, 1 is as good as 15.
- But because dust fades, you need a way to refresh a long signal. That is what a repeater is for.
Memorize this and you have already cleared the hurdle most beginners never get past: a redstone signal is a number that starts at 15 and loses 1 per block of dust, dying after 15 blocks. Every component manipulates that number.
Power sources and inputs
You need something to start a signal. These are your switches and triggers:
| Source | Behavior | Use it for |
|---|---|---|
| Lever | Toggles on/off and stays | Manual switches, permanent on/off |
| Button | Pulses on briefly, then off | Doors, one-shot triggers (stone vs wood pulse lengths differ) |
| Pressure plate | On while something stands on it | Auto doors, mob traps, walkways |
| Redstone torch | Always on (strength 15), inverts its attached block's signal | Constant power and NOT logic |
| Redstone block | A solid block that is always on | Permanent power source you can place anywhere |
| Daylight sensor | Outputs based on time of day | Automatic lights, day/night logic |
The lever is your training-wheels switch — flip it, the signal turns on, flip it again, off. The button gives a short pulse, perfect for opening a door that should swing shut on its own. The redstone torch is special: it is always on, but it turns off when the block it is attached to is powered, which makes it the basic inverter (NOT gate) of redstone logic.
Redstone dust, the wiring
Redstone dust is the wire that connects a source to a component. You place it on the ground and it auto-connects to adjacent dust, forming lines and corners. Remember the rule: every block of dust the signal travels drops its strength by 1, fading to zero after 15 blocks.
A few dust facts that trip people up:
- Dust powers the block it sits on and components directly next to it. Whether it powers a solid block it runs into depends on geometry — this is the "quasi-connectivity" rabbit hole you do not need yet.
- Dust can climb blocks: run it up the side of a one-block step and it continues, so you can route signals vertically with a staircase of blocks.
- To send a signal farther than 15 blocks, you break the line with a repeater to reset it to full strength (next section).
Repeaters: extend and delay
The repeater does two jobs, and both are essential:
- It boosts the signal back to 15. As long as a signal of strength 1 or higher enters the back, the repeater outputs a full 15 out the front. Drop a repeater every ~15 blocks and your wire can run as far as you want.
- It adds delay. A repeater has a built-in 1-tick delay, and you can right-click it to increase that to 2, 3, or 4 ticks. Chaining repeaters lets you time a signal — open a door a moment after a plate is pressed, or stagger lights.
The repeater is also a diode: it only lets the signal flow one direction (back to front), so it doubles as a way to stop signals from feeding backward into your circuit. The little arrow on top shows the direction. When a beginner's contraption misfires, a wrong-way repeater is the usual culprit.
Comparators, the confusing one
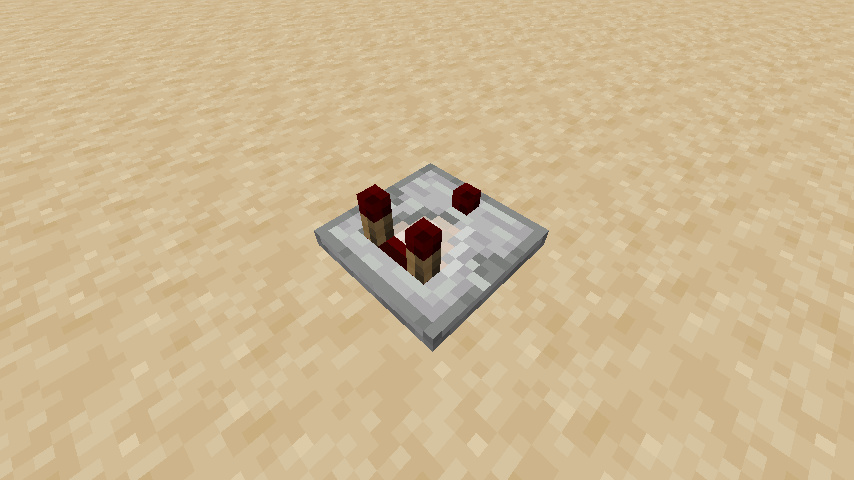
The comparator is the component everyone finds intimidating, so here is the plain-English version. Unlike a repeater (which always outputs a full 15), a comparator passes through the same signal strength that enters its back. It also has two superpowers:
- It reads containers. Point a comparator at a chest, furnace, hopper, or barrel and it outputs a signal proportional to how full that container is. This is how you detect "is the furnace done smelting" or "is this storage system full."
- It has two modes. The front torch unlit = comparison mode (output stays at the back signal unless a stronger signal hits the side, which shuts it off). Front torch lit = subtraction mode (it subtracts the side input from the back input). Right-click to toggle.
You do not need the comparator for your first few builds. But the moment you want an automatic farm that knows when a container is full, or item-sorting, the comparator is the tool. File it under "the thing that makes automation smart."
Outputs: pistons, doors, and dispensers
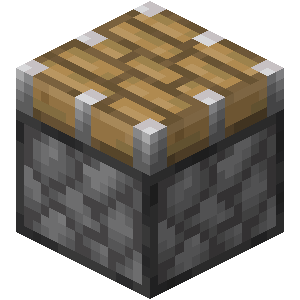
Signals are useless without something to do. The main outputs:
- Piston — Pushes the block in front of it when powered, retracts when the power stops. A piston can push up to 12 blocks. A sticky piston also pulls its block back when it retracts. Pistons are the muscle behind hidden doors, drawbridges, flying machines, and most moving builds.
- Doors, trapdoors, fence gates — Open when powered. Wire a pressure plate or button to one and you have an automatic door.
- Redstone lamp — Lights up when powered. Wire it to a daylight sensor for automatic outdoor lighting, or a lever for an indoor switch.
- Dispenser / Dropper — A dispenser shoots out or uses whatever is inside it (arrows, water buckets, fireworks) when pulsed; a dropper just ejects items. These power traps, auto-farms, and contraptions that need to deliver items.
- Note block, hopper, TNT — Sound, item transport, and the explosive output, respectively.

Your first three builds
Theory is nothing without a contraption. Build these in order — each adds one idea.
1. The lever-and-lamp (signal in, output out). Place a redstone lamp, run a short line of dust from it to a lever on a block. Flip the lever; the lamp lights. Congratulations, you built a circuit. This teaches input to output through wire.
2. The pressure-plate door (automatic trigger). Place an iron door (iron doors only open with redstone, unlike wooden ones). Put a pressure plate in front of it on a block that connects to the door. Step on the plate; the door opens. Step off; it closes. Now you have automation with no manual switch — the world triggers it for you.
3. The piston "hidden block" toggle (moving parts). Place a sticky piston facing up with a block on its face. Run dust from a lever to the piston. Flip the lever and the piston pushes the block up; flip it back and the sticky piston pulls it down. This is the seed of every hidden door and trap in the game.
The fastest way to learn redstone is to break things on purpose. Build the pressure-plate door, then add a repeater between the plate and the door and watch the delay. Swap the repeater for a comparator. Reverse it. You learn more from one broken contraption than from ten diagrams.
Once these click, you are ready for the real payoffs: automatic crop and mob farms that feed your survival base, and item sorters that organize your loot while you do something else.
Java vs Bedrock quirks
Redstone is one of the areas where the two editions genuinely diverge, so know which you are on:
- Quasi-connectivity exists in Java but not Bedrock. Certain components (pistons, dispensers, droppers) can be powered by a redstone signal in the block diagonally above, which enables some Java-only contraptions and breaks some Bedrock tutorials. As a beginner you will mostly notice that some YouTube builds "do not work" on the wrong edition.
- Tick and update behavior differs in subtle timing-sensitive builds. Your door and lamp circuits work identically; advanced 0-tick and instant-wire tricks often do not port.
- Wiring direction and dust connection rendering can look slightly different, but the signal-strength rule (15, minus 1 per block) is identical on both.
Bottom line for beginners: the fundamentals here work on both editions. The differences only bite once you copy a niche contraption built for the other edition.
Quick Action Checklist
Learn redstone in this order and it will stick:
- Memorize the rule: signal strength is 1 to 15, dust loses 1 per block, dies after 15
- Build the lever-and-lamp to see input feed an output
- Build the pressure-plate iron door for hands-free automation
- Add a repeater to a wire to extend range past 15 blocks and to add delay
- Build a sticky-piston block toggle to understand moving parts
- Learn the redstone torch as your inverter (NOT gate)
- Save comparators for when you want container-reading automation
- Check whether a tutorial is Java or Bedrock before you copy a contraption
Frequently Asked Questions
How does redstone work in Minecraft?
What is signal strength in redstone?
What does a redstone repeater do?
What is the difference between a repeater and a comparator?
What is the easiest first redstone build?
Is redstone different on Java and Bedrock?
Keep Reading
Related Guides
Minecraft Rails and Minecarts Guide: Powered Rail Spacing
Everyone quotes the same minecart number — 8 blocks per second — and everyone quotes it slightly wrong. The cap is per axis, the spacing between powered rails has four different right answers depending on what is in the cart, and the gold bill for a track swings by a factor of ten based on whether you're sitting in it. Here are the actual figures.
Minecraft Crafter Guide: Auto-Crafting Without a Single Mod
The Crafter is the block that finally killed the 'just install a mod' answer to vanilla auto-crafting — and it's also the least intuitive redstone block Mojang has shipped. Here's the recipe, the slot-disabling trick everyone skips, the comparator rule that isn't the chest rule, and the hopper math that caps every build you'll make.
Minecraft Command Blocks Guide for Beginners
Command blocks are the cheat code Minecraft hands you on purpose — a block that runs any command, on a button press or on a loop, with no mods. Most beginners never touch them because the wiki makes them look terrifying. They aren't. Here's how to get one, what the three colors actually do, and three builds you can make in five minutes.
How to Make a Saddle in Minecraft: Recipe and Loot Odds
Saddles have been craftable since June 2025: three leather and one iron ingot. Here is the recipe and what it really costs, every chest, trade and mob drop that still gives one with Java and Bedrock odds, the five chests that stopped, all eleven mobs it fits, and how shears take it back.

Minecraft Survival Guide for Beginners: Your First Days
You have about ten minutes of daylight before the sun sets and the world tries to kill you. Here is exactly what to do with them — punch a tree, build a tool chain, and get a roof over your head before the zombies arrive.

Best Minecraft Enchantments, Ranked — The Ones Worth Your XP
Mending is the enchantment that ends the grind — gear that repairs itself forever. Everything else is a fight over your XP and anvil uses. Here is what actually earns a slot, ranked, with the real max levels.