Super Mario 64 Big Boo's Haunt Guide: All 6 Stars and the Star-Select Trap
Big Boo's Haunt loads as two different buildings depending on which star you select, which is why the basement merry-go-round is empty for half the players who go looking for it. Here is every star, the bookshelf order, and the coin table that makes the 100-coin run work.
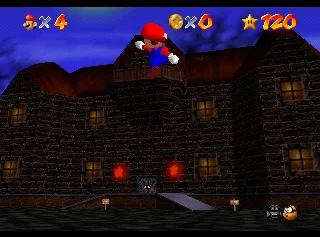
Big Boo's Haunt is not the same building twice, and nothing in the game tells you so.
Select star 1 from the mission board and the mansion's grand staircase is sunk into the floor, every Boo you punch stops play to deliver a taunt, and the merry-go-round in the basement is empty. Select stars 2 through 6 and the staircase is already standing and the merry-go-round is full of ghosts. Ukikipedia catalogues those as two distinct course versions, and that is the whole reason the basement can be a silent, ghost-free room when you arrive to fight in it.
That is course five. Six stars, 151 coins, the same ghost fought three times, one giant eyeball, and — per the Super Mario Wiki's own course statistics — no cannon, no warp and not a single Spinning Heart in the entire building. Here is the whole mansion.
The course you load depends on the star you pick
This is the piece of Big Boo's Haunt worth learning before anything else, because two of the six stars will not appear if you enter on the wrong one.
| Version | Selected from | What changes |
|---|---|---|
| Version 1 | Star 1 only | The lobby staircase is embedded in the floor and rises when Big Boo dies. Killing each Boo opens a text box first. |
| Version 2 | Stars 2 through 6, after Go on a Ghost Hunt is cleared | The staircase is already built, and Boos are present at the basement merry-go-round. |
Two consequences fall straight out of that:
- Star 1 must be selected to get Go on a Ghost Hunt. It is the only entry that spawns the first-floor ghost hunt.
- Stars 2 through 6 must be selected for the merry-go-round star to spawn at all. Enter on star 1 and the portraits down there never produce ghosts.
Ukikipedia's RTA guide adds a third: do not select star 1 for the 100-coin run, because every Boo you kill on that version throws a text box, and 55 of the course's coins come off Boos. Two more entries from the same page, for anyone timing this: the 120-star route runs Ghost Hunt, then red coins plus 100 coins together, then Eye to Eye, the merry-go-round, the balcony and the books — and the left-hand door into the house has a slightly faster opening animation than the right, which is the kind of detail that tells you exactly how picked-over this course is.
Getting in: the courtyard Boo and the birdcage
Big Boo's Haunt is not behind a painting. It is behind a ghost.
Go out to the castle courtyard with at least 12 Power Stars — the Boos out there do not spawn below that number, so an 11-star visit finds an empty lawn and that is not a bug. Beat the Boo carrying the cage, and it drops a birdcage on the grass. Walk up to it and your character shrinks down and steps inside. The 1996 Player's Guide also called the mansion Big Boo's Mansion and the cage a carousel, if you are cross-referencing old print.
The 12-star gate is shared with two free Toad stars elsewhere in the castle, and the beginner guide walks those gates in order. The courtyard itself is catalogued in the secret stars guide.
The sign outside the house sets the tone better than any walkthrough can: you do not stand a ghost of a chance in there, and if you walk out you have earned a Ghoul Medal.
How the mansion is stacked
There are two buildings on the grounds, and the smaller one is not decoration. The main haunted house has three floors. Off to the side is a wooden shack — Prima's 1999 strategy guide called it the House of Fun — and its elevator is the route down to the basement. Scuttlebugs patrol the grounds between them.
First floor, left to right: the Mad Piano room, a library, a dungeon, a room with a collapsing bridge, and a room with a black pit and some platforms. Fall in the pit and you land in the merry-go-round below. Only this floor is open during the first mission; the staircase to floor two appears once the Boos and Big Boo are down.
Second floor has the same number of rooms plus the course's Star Marker. Second door from the left is the flying-book library, whose far end connects into the first room on the left, where a Power Star sits. The third room has a wire-frame grate floor above the dungeon. The fourth has caskets that rear up as you approach. The fifth has a bookcase full of Bookends and a large tilting platform that dumps you into the merry-go-round if you loiter on it. Behind that room is a blue block; above it, on a ledge, the door to floor three.
Third floor is a small hall with two doors: one to the balcony, one to the secret room holding Big Mr. I.
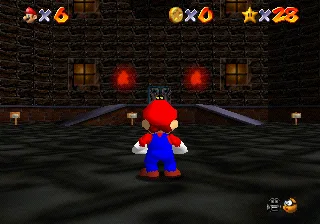
The six stars, mission by mission
Six missions on N64 plus the 100-coin star. Four of the six end in a fight — Big Boo three separate times, Big Mr. I once — which the Super Mario Wiki records as the most star-bearing enemy encounters of any course in the game.
Go on a Ghost Hunt
Kill the five Boos on the first floor, then Big Boo. Where the five are:
- Two in the back entrance room or the second door on the left. You can grab the nearby Vanish Cap and walk in through the portrait, or simply wait for them to drift out to you.
- One in the left room at the back.
- One in the right room at the back.
- One either through the door across the falling bridge, or the door to the right of the lobby.
Every kill on this version prints the same line — ghosts do not die, can you get out of here alive — and the last one announces Big Boo as the master of mischief and the tower of terror before he materialises in the lobby. He takes three hits. The star then appears on the second floor as the staircase rises; Ukikipedia measures it at 281 units above the floor, which is why a dive-recover barely reaches it.
Ride Big Boo's Merry-Go-Round
Version 2 only. From the start, go into the shack on the left. The first room holds a Mr. I and an elevator down to a water-filled hallway. Follow the hall, through the door, down a second hall, and the door at the end is the merry-go-round.
Enter through either side door and Boos start pouring out of one of the wall portraits in pairs. You fight them standing on a large spinning platform, and a second portrait behaves like a flamethrower while you do it. Clear them all, Big Boo appears, three hits, and he drops the star as the carousel grinds to a halt.
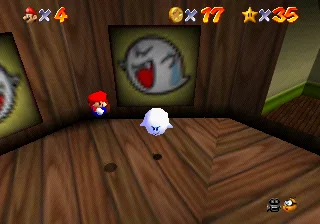
Secret of the Haunted Books
Second floor, second door from the left, into the library. Bookends launch off the shelves at you the whole way through. At the far end a bookcase blocks the path with three books sticking out, and this is the one genuine puzzle in the course.
Punch them in order: top, then bottom, then centre. Get it wrong and a Bookend attacks you and the code resets from the start. Ukikipedia describes the same solution as high, low, middle — and notes the highest book is reachable by dive-recovering, so no wall is required. Behind the moved bookcase, a door leads through to the Power Star.
There is an N64-only shortcut here: with well-timed jumps you can reach that Power Star from the room on the far left of the second floor without solving the bookshelf at all. The DS remake seals it behind a glass panel.
Seek the 8 Red Coins
None of the eight are outside the house or in the merry-go-round area — that alone saves a lap of the grounds. On N64:
| # | Where |
|---|---|
| 1 | Behind the Mad Piano, first room on the left, floor 1 |
| 2–3 | Second room on the left, floor 1 — one on top of each bookcase |
| 4 | On a platform through the far-right door, floor 1 |
| 5 | First left room on floor 2, across the room |
| 6–7 | First right room on floor 2, under two of the caskets |
| 8 | Across the tilting platform in the far-right room, floor 2 |
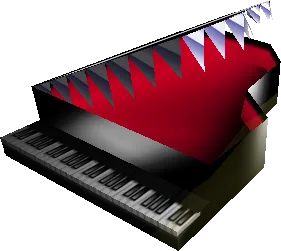
The star spawns at the Star Marker on the second floor. The Mad Piano guarding coin 1 sits still until you come close, then chases and bites for three wedges of health.
Do not try to fight it. The 1996 Player's Guide told readers that with a lot of effort they could beat the piano; the Super Mario Wiki flags that line as an error. The Mad Piano cannot be defeated. Take the coin from behind it and get out of range.
Big Boo's Balcony
Get to the far-right room of the second floor and wall kick up to the door above the entrance. Through the double doors beside the attic is the balcony, and Big Boo is waiting on it — three hits again.
The star does not drop at your feet. It appears on top of the roof, and the gap between balcony and roof is crossed with a long jump, then a climb. Worth knowing: Big Boo is physically on that balcony from the moment you load the course in any mission, and can be seen trailing Mario a short distance from up there.
Eye to Eye in the Secret Room
The course's Vanish Cap star, and a hard timer.
Enter the far-right room on floor 2 and cross to the door on the opposite side, dodging the Bookends and the tilting platform. Behind that door is the blue block. Grab the Vanish Cap, get back out, jump to the door above in the previous room, climb to floor three and step through the large Boo portrait — all inside the cap's 20 seconds. Miss the window and you make the whole trip again.
Inside is Big Mr. I, roughly twice the size of a normal Mr. I. You do not attack him. Run tight circles around him until he spins himself dizzy, shrinks and pops, and the star appears. One detail worth knowing before you go in: Big Mr. I can see Mario even while the Vanish Cap is on, so being translucent buys you a portrait to walk through, not stealth.
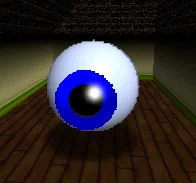
Hitting a ghost that vanishes when you look at it
Every Boo in this course, Big Boo included, turns invisible when Mario looks at it and solid again when he turns away. Since Big Boo can only be damaged while visible, the fight is a geometry problem, not a reflex one.
The Super Mario Wiki spells out the two attacks that work: ground pound him from above, or punch him from the side. Charging him face-first is how you swing through empty air.
Three more things that decide these fights:
- He gets smaller and faster with every hit. Hit three is the one that needs real timing.
- His health resets if you leave the area before finishing him. Backing out of the room to heal costs you the whole fight.
- A hit from him takes three wedges of health, the same as a casket landing on you or the Mad Piano biting.
The boss guide covers how the pattern repeats across the rest of the game. Both of this course's bosses belong to the short list of Super Mario 64 bosses with no dialogue and no boss theme of their own — Big Boo, Big Mr. I, Big Bully and Chill Bully.
Where the 151 coins actually live
Big Boo's Haunt holds 151 coins, leaving 51 spare for the 100-coin star, and there is no known infinite-coin glitch in here, so 151 is a hard ceiling. Ukikipedia's breakdown:
| Source | Coins |
|---|---|
| Yellow exclamation block behind the mansion | 10 |
| Two cork boxes near the shed | 6 |
| Crazy Box outside | 5 |
| Three Scuttlebugs on the grounds | 9 |
| Eight red coins | 16 |
| Blue coin block in the attic | 20 |
| Eleven Boos | 55 |
| Three Mr. I's | 15 |
| Three Bookends | 15 |
Two numbers there change how you play the course. 105 of the 151 coins are blue coins — 21 of them, which Ukikipedia records as the most in any course — and 85 of those come out of enemies. This is a course where killing things is the coin route, not a distraction from it. Nintendo's Player's Guide named the 100-coin star "Beat the Boos!" for exactly that reason.
The other number: 30 coins are outside the mansion entirely, in the block behind the house, the cork boxes, the Crazy Box and the Scuttlebugs. Scuttlebugs pay three coins each, more than a Goomba's one, and they charge you anyway.
One trap in the Bookend line. Only three Bookends in the course drop a blue coin when destroyed. The books flying around the second-floor library are a separate, unlimited set that never opens its mouth — farming those is time you do not get back. The full course-by-course margin table is in the 100-coin stars guide.
The course hands you almost nothing
Read the Super Mario Wiki's statistics block for Big Boo's Haunt and the absences do the talking:
- Cannons: none.
- Warps: none.
- Spinning Heart: none. Caskets and Big Boo take three wedges a hit and Bookends take two, and there is no heart anywhere in the course to run through afterwards.
- 1-Up Mushrooms: two. One sitting on top of the shack, one in a block on the roof of the house. Rainbow Ride carries nine.
- Caps: three Vanish Cap blocks, and nothing else. No Wing Cap, no Metal Cap.
No heart and no cannon in a course whose enemies mostly hit for two or three wedges is the design telling you to fight carefully rather than fast.
What the A Button Challenge did in here
Ukikipedia lists all seven Big Boo's Haunt stars as collectable in 0 A presses, and the time costs are the story:
| Star | A presses | Minutes |
|---|---|---|
| Go on a Ghost Hunt | 0 | 1 |
| Ride Big Boo's Merry-Go-Round | 0 | 3 |
| Secret of the Haunted Books | 0 | under 1 |
| Seek the 8 Red Coins | 0 | 2 |
| Big Boo's Balcony | 0 | 33 |
| Eye to Eye in the Secret Room | 0 | 123 |
| 100 coins | 0 | 2 |
Two hours for one star, because reaching the third floor without pressing A means importing your own platforms. For Big Boo's Balcony, pannenkoek2012 raised three Scuttlebugs for 13 hours to park them in a vertical parallel universe, manoeuvred them into the mansion, snapped them onto the second-floor library and then raised them another eight minutes to separate their heights enough to bounce between. Eye to Eye is the same setup plus the Vanish Cap's 20-second clock, which forces the internal floor-2-to-floor-3 route instead of the detour over the roof.
The merry-go-round star sits 357 units above the floor and was the hold-out: after out-of-bounds approaches failed, the solution became Scuttlebug raising, with a newer method that raises for two minutes and uses a hat-in-hand glitch with the Crazy Box instead of the old three-to-ten-hour raise.
The most quotable entry is the Pacifist Challenge, though. Two stars here can be taken without harming anything in isolation — Secret of the Haunted Books and Seek the 8 Red Coins — but neither counts in a full-game run, because you cannot enter Big Boo's Haunt without killing a Boo in the courtyard. The door charges an entry fee. None of this is race strategy; the speedrun guide is the place to start for the fast route.
What Super Mario 64 DS changes
The remake moves more here than in most courses:
| N64 | Super Mario 64 DS | |
|---|---|---|
| Unlock | 12 Power Stars | 15 Power Stars and Goomboss Battle cleared |
| Stars | 6 | 7 — adds Switch Star in the Basement, behind a Black Brick |
| Coins | 151 | 160 |
| Cap block | Blue (Vanish Cap) | Red — the Vanish Cap is gone; Luigi's Power Flower does the phasing |
| Red coins | Two under caskets | One under a casket; the other floats near the lobby ceiling |
| Books shortcut | Reachable from the far-left room | Sealed behind a glass panel |
Two structural changes stand out. Yoshi cannot play this course at all — he can neither defeat nor eat Boos — and the Super Mario Wiki records it as the only main course closed to him. And Eye to Eye in the Secret Room becomes Luigi-only, which is consistent: Big Mr. I sees through Mario's invisibility but not Luigi's.
The mansion also holds the Luigi portrait leading to Big Boo Battle, which makes it the one course in the remake containing a level you must clear to unlock another character. Everything above the DS table is the N64 original, which is also what runs in Super Mario 3D All-Stars and the Nintendo Switch Online N64 app — see the version differences post.
Mistakes that cost you a life in here
- Hunting the merry-go-round ghosts on star 1. They only exist on the version loaded by stars 2 through 6.
- Rushing Big Boo head-on. He is intangible while you look at him. Ground pound from above or punch from the side.
- Leaving the room mid-fight. His health resets to full.
- Standing on the tilting platform to think. It drops you to the basement, and the climb back is through the shack.
- Grabbing the Vanish Cap before you know the route to the attic. Twenty seconds is not enough to improvise a staircase.
- Guessing at the bookshelf. A wrong punch resets the code and spawns a Bookend on you. Top, bottom, centre.
- Skipping the grounds on a 100-coin lap. Thirty coins sit outside the house, and there is no Spinning Heart inside it to bail you out.
Quick Action Checklist
- Reach 12 Power Stars, beat the courtyard Boo, and step into the birdcage it drops.
- Select star 1 for Go on a Ghost Hunt; select stars 2 to 6 for anything involving the merry-go-round, and for the 100-coin run.
- Five Boos on the first floor, then Big Boo in the lobby, then the staircase rises.
- Take the shack on the left and its elevator down to the basement merry-go-round.
- Bookshelf order is top, bottom, centre — a wrong punch resets it.
- All eight red coins are inside the house; two sit under caskets, one behind the Mad Piano, which cannot be killed.
- Wall kick up in the far-right second-floor room for the balcony, then long jump the gap to the roof for the star.
- Blue block first, then the attic Boo portrait, inside 20 seconds; circle Big Mr. I until he pops.
- On the coin lap, kill everything: 105 of the 151 coins are blue, and 85 of those come off Boos, Mr. I's and the three real Bookends.
Frequently Asked Questions
How do you unlock Big Boo's Haunt in Super Mario 64?
Why are there no Boos in Big Boo's Haunt's merry-go-round?
What order do you hit the books in Secret of the Haunted Books?
Where are the 8 red coins in Big Boo's Haunt?
How do you beat Big Boo in Super Mario 64?
How many coins are in Big Boo's Haunt?
Can you kill the Mad Piano?
Can all the Big Boo's Haunt stars be done with 0 A presses?
Keep Reading
Related Guides
Super Mario 64 Lives and Game Over: What You Actually Lose
A Game Over in Super Mario 64 is a file reload: you keep everything you saved and lose everything you did not. Here is when the game actually writes your file, exactly what a Game Over rolls back, the five courses where a fall is free, and every way to earn a life, from the coin tally to the Monty Mole streak that never runs dry.
Super Mario 64 Music: Every Track and Where It Plays
Super Mario 64 scores 15 courses with seven songs, and only one of them belongs to a single course. Here is which track plays in every course and secret level, the five levels whose music rearranges itself as Mario moves, what triggers the boss music and the jingles, all 36 soundtrack tracks under their 1996 and current names, and where to listen today.
Super Mario 64 Bowser Levels Guide: All 24 Red Coins
Bowser in the Dark World, the Fire Sea and the Sky each hide one Power Star behind eight red coins on the obstacle course in front of the fight. Here is the route through all three, where every red coin sits, and what else the level data holds.
Super Mario 64 120-Star Reward: Yoshi and the Castle Roof
Super Mario 64 does not announce your 120th Power Star. The reward is outside: a cannon grate that stops loading, Yoshi on the castle roof, and a gift that quietly resets the next time you load your file. Here is what 120 stars changes, checked against the wikis and the decompiled code.
Super Mario 64 Beginner Guide: Your First 30 Power Stars
Super Mario 64 does not gate you on difficulty, it gates you on Power Stars. Here is exactly which doors need what, which stars are fastest to grab, and the route that gets a first-timer from one star to thirty without wandering the castle in circles.
Super Mario 64 Snowman's Land Guide: All 7 Stars
Snowman's Land looks like the throwaway snow level, and the wiki record on it backs that read up in one specific way: it is the only one of the game's 15 main courses with no Blue Coins at all. What it does have is two freezing ponds that hurt you in two different ways, an enemy species that appears nowhere else in the game, and a cap-stealing snowman nobody warns you about. Here is every star, the full 127-coin breakdown, and the course's last remaining gap in this vertical.