Super Mario 64 Whomp's Fortress Guide: All 7 Stars
Whomp's Fortress is the second course in Super Mario 64, and your star selection swaps out the building itself. The Whomp King and the tower occupy the same spot at the top of the fortress, and which one is standing there depends entirely on the star you picked from the menu. Here is the mission list for both games, the three course versions and what loads in each, the full 141-coin breakdown, the ten-coin Whomp drop, and all four 1-Ups.
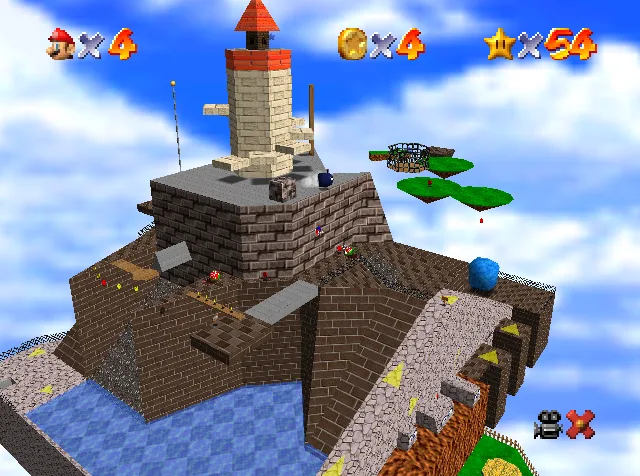
Whomp's Fortress is the second course in Super Mario 64, and the building at the top of it is not a fixed thing. The Whomp King and the tower you climb in mission 2 sit at the same coordinates at the top of the fortress — Ukikipedia's object table puts both at (0, 3584, 0) — and only one of them is ever loaded at a time. Which one you get is decided before you enter, by the star you highlight in the mission menu.
The Bob-omb Battlefield guide covered that star-selection mechanic swapping out an NPC and a shell. Here it swaps out the building. This is the course map: every star in both games, what each version loads, all 141 coins, the Whomp drop that is double what the ground pound alone gives, and the four 1-Ups.
The second painting, and the one star it costs
Per the Super Mario Wiki, Whomp's Fortress is entered through a painting in the northeast room on the ground floor of the Mushroom Castle, and the star door into that room needs one Power Star — the beginner guide has the full castle gating. It is not the cheapest star door, though: the Wiki's ★ door list puts four of the eight at zero stars — Bob-omb Battlefield, Hazy Maze Cave, Snowman's Land and Tiny-Huge Island — and The Princess's Secret Slide shares the one-star tier with this one.
Ukikipedia adds a note that matters for anyone routing a run: because Bob-omb Battlefield is effectively gated behind the Wing Cap for its own faster stars, Whomp's Fortress is often the first course completed in a run even though it is second in the list.
The layout is one climb with a split. You start in a field with flower beds, a Piranha Plant, the Star Marker and the tree Hoot sleeps in. Up the ramp are Moving Bars that shove you off the ledge, then receding platforms over gaps, then two Thwomps guarding a staircase. At the top of those stairs the path forks: down a ramp to a pool of water, the Bob-omb Buddy and the cannon, and a small area with a Blue Coin Block — or right, up past the Piranha Plants, the falling bridge, the rotating bridge and the two Whomps, to the top of the fortress.
Every star, in order, N64 and DS
The N64 original has seven stars here: six named missions plus the 100-coin star, which Nintendo's Super Mario 64 Player's Guide names "Whomps and Flowers." Super Mario 64 DS has eight. Unlike Bob-omb Battlefield, where the DS remake cut a mission and reshuffled the order around two new ones, Whomp's Fortress keeps all six original missions in their original slots and simply appends one.
| # | Mission (N64) | # | Mission (DS) |
|---|---|---|---|
| 1 | Chip Off Whomp's Block | 1 | Chip Off Whomp's Block |
| 2 | To the Top of the Fortress | 2 | To the Top of the Fortress |
| 3 | Shoot into the Wild Blue | 3 | Shoot into the Wild Blue |
| 4 | Red Coins on the Floating Isle | 4 | Red Coins on the Floating Isle |
| 5 | Fall onto the Caged Island | 5 | Fall onto the Caged Island |
| 6 | Blast Away the Wall | 6 | Blast Away the Wall |
| — | 100 coins ("Whomps and Flowers") | 7 | Switch Star of the Fortress |
| 8 | 100 coins |
"Switch Star of the Fortress" is DS-exclusive and lives on ground the N64 course does not have: a path around the back of the fortress. Hit the Star Switch hidden under a Brick between two pillars, then run to the far end of that path before the timer expires, or the Star vanishes and you press the switch again.
The fortress is not there on mission 1
Ukikipedia documents three versions of this course, selected the same way Bob-omb Battlefield's are — by which star you highlight before entering. The difference is how much of the building is at stake.
| Version | Selected by | What is loaded |
|---|---|---|
| 1 | Star 1 | The Whomp King at the top. No tower, no tower platforms, no Bullet Bill Blaster, no falling plank, no Hoot, no Bob-omb Buddy |
| 2 | Star 2 | The tower, its extending platforms, the breakable block inside it, the Bullet Bill Blaster and the falling plank. Still no Hoot and no Bob-omb Buddy, so the cannon stays shut |
| 3 | Stars 3–6 | Everything in Version 2, plus Hoot in the tree by the start and the Bob-omb Buddy who opens the cannon |
Ukikipedia's course-object table marks each of those objects individually — the tower, its platform spawner, the Bullet Bill Blaster and the falling plank are all flagged only in stars 2–6; Hoot and the Bob-omb Buddy are flagged only in stars 3–6; the Whomp King is flagged only in star 1.
Read that as a routing rule rather than trivia. A 100-coin attempt belongs on Star 3 or later. On Star 1 you lose the tower, the falling plank you knock over to reach the floating isles, Hoot, and the cannon — which is most of the upper half of the coin map. On Star 2 you get the building back but still have no Hoot and no cannon. Only from Star 3 is the whole course loaded at once.
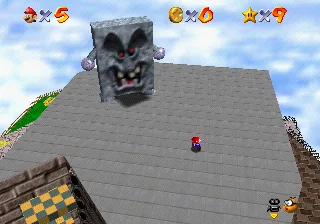
The boss guide already has the Whomp King fight — bait the belly flop, sidestep, three ground pounds on his exposed back — and that is not being repeated here. The course-level fact is the one above: he and the tower are mutually exclusive, so "Chip Off Whomp's Block" and "To the Top of the Fortress" are not two routes up the same building. They are two different buildings.
One detail from the Super Mario Wiki that is easy to miss on mission 1: the Lakitu Bros. open the mission by explaining that walking slowly lets you sneak past enemies, and the course is built to test it. The Piranha Plants on the climb are asleep — Ukikipedia's object table carries a separate "sleeping bubble" object for each of the three — and they wake if you move too fast. Ukikipedia lists Piranha Plant contact damage at three wedges, the same heavy-contact tier the health guide documents, and per its object page the Piranha Plant appears in this course and nowhere else in the N64 original — the fire-spitting plants in Tiny-Huge Island and Bowser in the Sky are a separate Fire Piranha Plant object.
Hoot the owl, and the two stars he is for
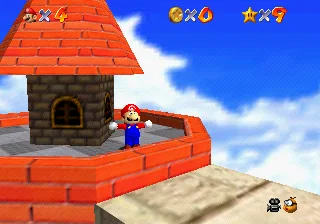
Hoot sleeps in the single tree next to where you enter. Climb the tree and he wakes up, complains about it being daylight, and offers a flight; you hold A (B on DS) to keep hold of his talons and release to drop. Per the Super Mario Wiki, hang on too long and he tells you to lay off the pasta and drops you — which, depending on where you are, can cost a life.
The scheduling is the part worth memorising: Hoot is present on missions 3–6 only (3–7 on DS). On missions 1 and 2 the tree is just a tree.
He is the intended tool for "Fall onto the Caged Island," where the Star sits on a floating isle wrapped in a steel fence and the mission name is the instruction — you are meant to come in from above. The Super Mario Wiki lists two alternatives that work: the cannon, once the Bob-omb Buddy opens it, or a long jump from the top of the fortress. Hoot also gets you to the two floating-isle Red Coins in mission 4, which are otherwise reached by knocking over the wooden beam at the fortress's top.
The single cannon, and the two missions that do not need it
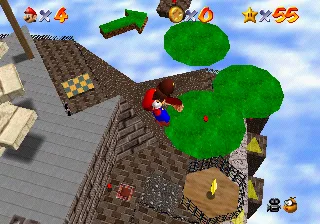
The Super Mario Wiki's course statistics give Whomp's Fortress one cannon. Bob-omb Battlefield has six. Two of this course's six missions are named after using it, and neither one actually requires it.
"Shoot into the Wild Blue." The Star is on a floating platform across the water basin near the cannon, under a ring of coins, with poles on the platform that a cannon shot latches onto. Per the Super Mario Wiki, a Side Somersault into a Wall Kick off the nearby brick wall reaches the platform without the cannon, as does jumping from the ledge above and steering back with a mid-air kick. On DS, Yoshi's flutter kick does it from above.
"Blast Away the Wall." The Star is embedded in the corner of the wall next to the rotating bridge and the sleeping Piranha Plant, and the intended solution is to fire yourself into that corner from the cannon. The Super Mario Wiki notes the Star juts out of the corner far enough that a precise ledge grab collects it with no cannon at all in the N64 version — the trick RTA runners call the cannonless — and that this does not work on DS, because the remake plays an animation of the Star emerging from the wall. Ukikipedia's object table shows why the aim matters: there are two blastable corners here, one with a Star inside and one with nothing.
Also, on N64 specifically, hitting a destructible wall costs you one wedge of health, with small fall damage on top if you connect high up. DS removed that.
Where the 141 coins are
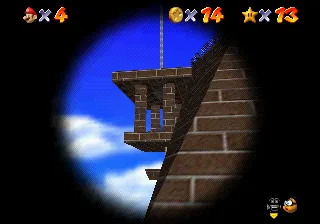
Both the Super Mario Wiki and Ukikipedia put the course total at 141 coins without glitches. Here is Ukikipedia's itemisation.
| Where | Coins |
|---|---|
| The two throwable cork boxes | 6 |
| Coins around the flower near the start | 8 |
| Line of coins near the beginning | 5 |
| Line of coins on the bridge past the falling bridge | 5 |
| Coins around the rotating plank | 4 |
| Ring of coins on the floating isle | 8 |
| Arrow of coins on the floating arrow | 8 |
| Line of coins on the slope leading from the water | 5 |
| Ring of coins in the water | 8 |
| Line of coins near the Bob-omb Buddy | 5 |
| Ring of coins above the "Shoot into the Wild Blue" Star | 8 |
| 2 Whomps | 20 |
| 8 Red Coins | 16 |
| Blue Coin Block (4 blue coins) | 20 |
| 3 Piranha Plants (blue coins) | 15 |
The static rows come to 6 + 8 + 5 + 5 + 4 + 8 + 8 + 5 + 8 + 5 + 8 = 70, which matches the yellow-coin figure in Ukikipedia's own course infobox exactly. Add the 20 from the Whomps, 16 from the eight Red Coins at two each, 20 from the Blue Coin Block's four blue coins at five each, and 15 from the three Piranha Plants, and 70 + 20 + 16 + 20 + 15 = 141.
That leaves 41 spare on a 100-coin run, which puts Whomp's Fortress ninth of the fifteen courses by margin — the 100-coin stars guide has the full ranking. Forty-one is workable, not generous, and the next section covers ten coins that are easy to leave on the floor.
A Whomp is worth ten coins, not five
Ground-pound a Whomp and five coins pop out. Do it in that order and five is all you ever get, because the enemy is worth ten.
Per the Super Mario Wiki's Whomp entry, landing on the back of a downed Whomp releases a coin, up to five times, and ground-pounding it while it lies flat defeats it and releases five more. Ukikipedia's object data agrees from the other direction: its Whomp page lists a coin value of 5 for the ground pound, and separately notes that while the Whomp is down, standing on it and then moving off spawns a coin.
Ten coins per Whomp, two Whomps, twenty coins — which is precisely the "2 Whomps" row in the coin table above, and it only adds up if you take the landing coins first.
The order is the whole trick: bait the slam, land on its back and step off five times, and only then ground-pound it. Pound first and the Whomp is deleted along with the five coins you never took. On a course with 41 coins of slack, throwing away ten is a quarter of your margin.
The Whomp in the open: what its detection actually is
Ukikipedia's behaviour notes give the Whomp real numbers rather than vibes, and they explain why it feels like it lunges out of nowhere:
- It patrols a fixed path 700 units long in this course, walking at 3 units per frame.
- It notices you if you are within 45 degrees of its facing angle and within 1,500 units, and then accelerates to 9 units per frame — triple its patrol speed — to close.
- Inside 300 units it stops and slams.
- After the slam it lies flat for 100 frames if it missed you, and only 30 frames if it squashed you.
That last line is the useful one. Getting crushed does not just cost you three wedges of health, per the health guide's squish tier — it also cuts your window to climb on its back and pound it to under a third. Sidestep the slam and you get the full window; eat it and you are scrambling.
The two Thwomps on the staircase are the same idea without the patrol: they drop when you get under them and they are not defeated the same way. Walk, do not sprint.
All eight Red Coins
"Red Coins on the Floating Isle" is the fourth mission, the Bob-omb Buddy at the start reads out the locations, and the Star spawns at the base of the fortress once you have all eight. Six of them are on the climb; two are not.
| # | N64 location | Needs |
|---|---|---|
| 1 | Above the middle Moving Bar | Timing the bar |
| 2 | Above the second Thwomp | Standing on the Thwomp |
| 3 | Behind the second sleeping Piranha Plant | Walking slowly |
| 4 | On the narrow ledge beside the collapsing bridge | Nothing |
| 5 | On the rotating bridge, among the regular coins | Nothing |
| 6 | On the slope directly below the rotating bridge | Nothing |
| 7–8 | On the floating platforms above the fortress | Hoot, or knocking the wooden beam over |
Super Mario 64 DS moves exactly one of them: the slope coin (#6) is replaced by a Red Coin on the new path around the rear of the fortress. Everything else stays put, which is why a DS walkthrough and an N64 walkthrough agree here in a way they do not in Bob-omb Battlefield.
Four 1-Ups, four different triggers
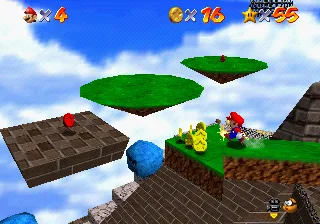
The Super Mario Wiki's statistics list four 1-Up Mushrooms in this course, and no two of them are collected the same way.
| # | Type | Where and how |
|---|---|---|
| 1 | Homing | At the top of the giant pole — it chases you once it appears |
| 2 | Static | Hidden inside the tower; punch the wall at the back to reach it |
| 3 | Triggered | Appears after you collect the coins above the spinning bridge |
| 4 | Butterfly | Punch one of the butterflies in the bush nearest the Star Marker |
The tower one is worth its own line, because it exists only in course Versions 2 and 3 — Ukikipedia flags that 1-Up object as only in stars 2–6, same as the tower that houses it.
The Metal Cap and the corner warp
Whomp's Fortress carries one Metal Cap block and no Wing Cap or Vanish Cap block, per both wikis' statistics. The cap guide covers the green switch in the Cavern of the Metal Cap that has to be pressed before any green block in the game turns solid.
Next to that block is one of the course's genuinely hidden features. The Super Mario Wiki's statistics say you can stand in the corner near the green block to warp above the platform with the giant pole — and Ukikipedia's object table lists two Teleporter objects on the course, consistent with a two-ended warp rather than a one-way shortcut. It skips a real chunk of the climb.
What Super Mario 64 DS changes
| Change | Detail |
|---|---|
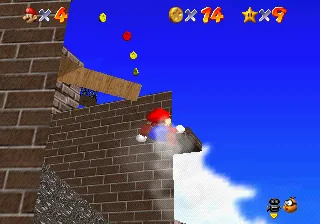
| An eighth star | "Switch Star of the Fortress" is added as mission 7; the 100-coin star becomes mission 8. The original six keep their numbers |
| A whole new ground ring | Platforms circle the base of the fortress, reached by jumping the fence near the start or long-jumping the fence by the cannon. They hold the Star Switch, the Star Sphere, more Piranha Plants, another Turtle Cannon and a Brick with a Super Mushroom |
| The coin total jumps | 141 on N64, 213 on DS, almost entirely because of that new area — which makes the 100-coin star substantially easier |
| New enemies at the base | Goombas appear in the starting field and the cannon area in the DS version only |
| One Red Coin relocates | The slope coin below the rotating bridge moves to the new rear path |
| The cannonless is gone | "Blast Away the Wall" plays an animation of the Star emerging, so the precise ledge grab that works on N64 does not work here |
| The wall stops hurting | Hitting a destructible wall costs one wedge of health on N64 and none on DS |
| Hoot works more shifts | He is available on missions 3–7 here, and the remake also puts him in Cool, Cool Mountain, Snowman's Land, Tall, Tall Mountain and the huge side of Tiny-Huge Island |
The version differences post covers the N64-versus-DS split across the whole game.
Mistakes this course punishes
- Running a 100-coin attempt on Star 1 or Star 2. Version 1 has no tower, no falling plank, no Hoot and no cannon; Version 2 still has no Hoot and no cannon. Select Star 3 or later.
- Ground-pounding a Whomp immediately. You forfeit up to five coins per Whomp. Land on its back and step off first.
- Sprinting past the Piranha Plants. They are asleep until you move fast near them, and contact costs three wedges.
- Taking the Whomp's slam. Beyond the damage, a successful squish cuts its downed window from 100 frames to 30.
- Climbing the tree on mission 1 or 2 expecting Hoot. He is only loaded on missions 3–6.
- Aiming the cannon at the wrong corner. Two corners are destructible; only one has a Star in it.
Quick Action Checklist
- Open the one-star door on the ground floor's northeast side; the Whomp's Fortress painting is in the room behind it.
- Take "Chip Off Whomp's Block" first — the Whomp King only loads on Star 1, and the tower only loads on Stars 2–6.
- Walk, do not run, past the three sleeping Piranha Plants and the two Thwomps.
- On every Whomp: bait the slam, land on its back and step off five times, then ground-pound for five more coins.
- Select Star 3 or later for a coin run so Hoot, the Bob-omb Buddy and the cannon are all loaded.
- Use Hoot for the caged island and the two floating-isle Red Coins; the wooden beam at the top is the no-owl alternative.
- Skip the climb with the corner warp beside the Metal Cap block.
- On N64, the cannon is optional for both cannon missions — a Side Somersault into a Wall Kick reaches the wild-blue platform, and a precise ledge grab collects the wall Star.
Frequently Asked Questions
How many stars are in Whomp's Fortress in Super Mario 64?
Why is there no tower in Whomp's Fortress on the first mission?
How many coins are in Whomp's Fortress?
How do you get 10 coins from a Whomp in Super Mario 64?
Do you need the cannon for Blast Away the Wall?
Keep Reading
- Whomp's Fortress — Super Mario Wiki
- Whomp's Fortress — Ukikipedia
- Chip Off Whomp's Block — Super Mario Wiki
- To the Top of the Fortress — Super Mario Wiki
- Shoot into the Wild Blue — Super Mario Wiki
- Red Coins on the Floating Isle — Super Mario Wiki
- Fall onto the Caged Island — Super Mario Wiki
- Blast Away the Wall — Super Mario Wiki
- Switch Star of the Fortress — Super Mario Wiki
- Whomp — Super Mario Wiki
- Whomp object data — Ukikipedia
- Piranha Plant object data — Ukikipedia
- Hoot — Super Mario Wiki
- Whomp King — Super Mario Wiki
Related Guides
Super Mario 64 Swimming Guide: Tap A, Don't Hold It
Holding A is the slow way to swim in Super Mario 64. Here is the stroke rhythm the code rewards, how the stick steers, how to jump out of the water, what each current does, and the eight seconds of free speed hiding in two clams.
Super Mario 64 Lives and Game Over: What You Actually Lose
A Game Over in Super Mario 64 is a file reload: you keep everything you saved and lose everything you did not. Here is when the game actually writes your file, exactly what a Game Over rolls back, the five courses where a fall is free, and every way to earn a life, from the coin tally to the Monty Mole streak that never runs dry.
Super Mario 64 Music: Every Track and Where It Plays
Super Mario 64 scores 15 courses with seven songs, and only one of them belongs to a single course. Here is which track plays in every course and secret level, the five levels whose music rearranges itself as Mario moves, what triggers the boss music and the jingles, all 36 soundtrack tracks under their 1996 and current names, and where to listen today.
Super Mario 64 Bowser Levels Guide: All 24 Red Coins
Bowser in the Dark World, the Fire Sea and the Sky each hide one Power Star behind eight red coins on the obstacle course in front of the fight. Here is the route through all three, where every red coin sits, and what else the level data holds.
Super Mario 64 Beginner Guide: Your First 30 Power Stars
Super Mario 64 does not gate you on difficulty, it gates you on Power Stars. Here is exactly which doors need what, which stars are fastest to grab, and the route that gets a first-timer from one star to thirty without wandering the castle in circles.
Super Mario 64 120-Star Reward: Yoshi and the Castle Roof
Super Mario 64 does not announce your 120th Power Star. The reward is outside: a cannon grate that stops loading, Yoshi on the castle roof, and a gift that quietly resets the next time you load your file. Here is what 120 stars changes, checked against the wikis and the decompiled code.