Tetris Wall Kicks Explained: SRS Kick Tables, ARS, and NES
Your I piece did not glitch. It jumped two columns left because test 2 of its kick table says to, and the game ran that test before it ran the one you wanted. Here is what every modern Tetris is actually checking when you press rotate.
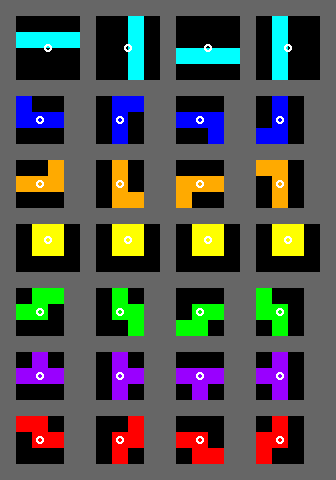
Your stack is nine rows high, the I piece is sitting flat against the right wall, you press rotate, and the thing teleports two columns to the left and lands on top of your well. Nothing lagged. The game did not misread your input. What happened is that the second entry in the I piece kick table is a two-cell shift to the left, the game tested it before it tested anything else useful, it fit, and that was that.
Every modern Tetris is running a short, fixed checklist every time you press rotate. Learning that checklist is the difference between a spin you can set up on purpose and a spin you tell your friends was random.
This matters more than most mechanics because the answer is genuinely different depending on which Tetris you are playing. Guideline games — Tetris Effect: Connected, TETR.IO, Jstris, Puyo Puyo Tetris, tetris.com — use the Super Rotation System. Tetris: The Grand Master uses ARS, which behaves nothing like it. NES Tetris and Game Boy Tetris use the Nintendo Rotation System, which has no wall kicks at all. Advice that is correct in one is nonsense in the others.
What a wall kick actually is
When you rotate a piece into a space occupied by your stack or by a wall, an old Tetris simply refuses. A modern one tries again somewhere else. The game shifts the rotated piece by a small offset and re-tests; if that fits, the piece snaps there and the rotation succeeds.
The critical detail, and the one that trips people up, is that the alternative positions are not chosen by proximity or by what would be most useful. They are a hard-coded, ordered list. The first position that fits wins, even if the third position in the list was the one you wanted. That is why the same input can produce two different results on two boards that look nearly identical to you.
Each list is keyed to a pair: the orientation you are leaving and the orientation you are entering. Four rotation states, two directions out of each, means eight distinct kick lists per piece.
The five tests that decide everything
The Super Rotation System is the Tetris Guideline standard, and it is younger than most people assume. BPS gave the S, Z and I pieces their third and fourth rotation states in Tetris 2 + BomBliss in 1991. Tetris Battle Gaiden changed the T, L and J pieces to spawn flat-side first in 1993. Wall kicks, and SRS as a named system, did not show up until Tetris Worlds in 2001.
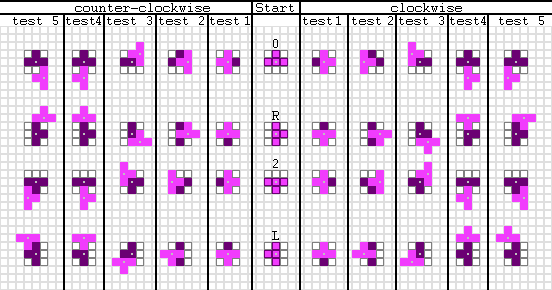
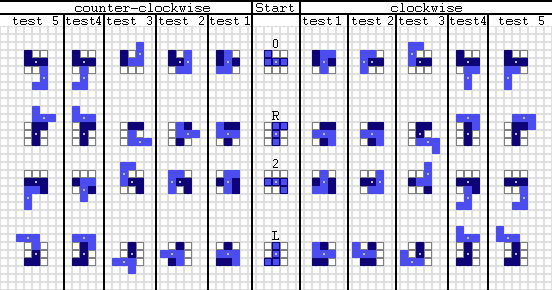
The rules, in the order the game applies them:
- Rotation states are named 0 (spawn), R (one clockwise from spawn), L (one counterclockwise from spawn) and 2 (two rotations from spawn, either direction).
- Five positions are tested in sequence, including the plain unshifted rotation as test 1. If none of the five fit, the rotation is cancelled entirely — the piece does not move at all.
- Offsets are written as (x, y) with positive x rightwards and positive y upwards. So (-1, -2) means one cell left and two cells down.
- The J, L, S, T and Z pieces all share one kick table. The I piece has its own. The O piece cannot kick, ever.
That is the whole engine. Everything below is just reading the tables.
The JLSTZ table and the two rows that matter
Here is the full shared table for J, L, S, T and Z:
| Rotation | Test 1 | Test 2 | Test 3 | Test 4 | Test 5 |
|---|---|---|---|---|---|
| 0 to R | (0, 0) | (-1, 0) | (-1, +1) | (0, -2) | (-1, -2) |
| R to 0 | (0, 0) | (+1, 0) | (+1, -1) | (0, +2) | (+1, +2) |
| R to 2 | (0, 0) | (+1, 0) | (+1, -1) | (0, +2) | (+1, +2) |
| 2 to R | (0, 0) | (-1, 0) | (-1, +1) | (0, -2) | (-1, -2) |
| 2 to L | (0, 0) | (+1, 0) | (+1, +1) | (0, -2) | (+1, -2) |
| L to 2 | (0, 0) | (-1, 0) | (-1, -1) | (0, +2) | (-1, +2) |
| L to 0 | (0, 0) | (-1, 0) | (-1, -1) | (0, +2) | (-1, +2) |
| 0 to L | (0, 0) | (+1, 0) | (+1, +1) | (0, -2) | (+1, -2) |
You do not have to memorise sixteen lines of that. Two patterns carry almost all of the practical weight.
First: tests 4 and 5 drop the piece two rows whenever you rotate from a horizontal state into a vertical one. Every 0-to-R, 2-to-R, 2-to-L and 0-to-L row ends in a pair of kicks with y of -2. That single fact is why the T-spin triple exists. You park a horizontal T above a three-tall notch, rotate it into a vertical state, tests 1 through 3 fail against the tower, and test 4 or 5 yanks the piece two rows straight down into the slot. It is not a trick the developers stumbled into — it is written in the table. Our T-spin guide covers the setups that exploit it.
Second: SRS has no gentle kicks. There is no test that moves a piece straight up without also moving it sideways, no floor kick, and — this is the one that catches people — no test that moves a piece down by exactly one row. Down two, yes. Down one, never. If you are eyeing a gap and thinking the piece will settle one row lower after you rotate, it will not.
The tables are also mirror-symmetric for these five pieces: swap J for L, S for Z and clockwise for counterclockwise, and you get the same y values with the x signs flipped. Learn clockwise properly and the rest is free.
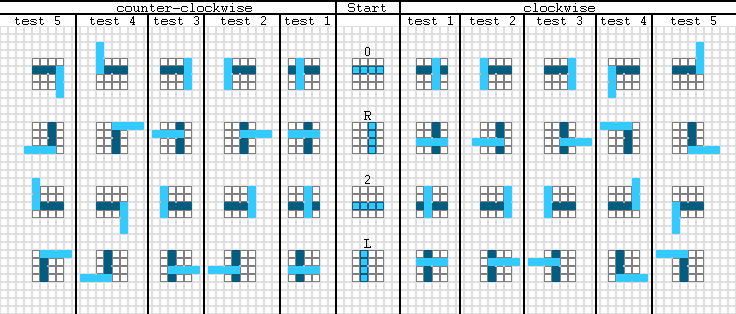
The I piece has its own table, and it is not symmetric
| Rotation | Test 1 | Test 2 | Test 3 | Test 4 | Test 5 |
|---|---|---|---|---|---|
| 0 to R | (0, 0) | (-2, 0) | (+1, 0) | (-2, -1) | (+1, +2) |
| R to 0 | (0, 0) | (+2, 0) | (-1, 0) | (+2, +1) | (-1, -2) |
| R to 2 | (0, 0) | (-1, 0) | (+2, 0) | (-1, +2) | (+2, -1) |
| 2 to R | (0, 0) | (+1, 0) | (-2, 0) | (+1, -2) | (-2, +1) |
| 2 to L | (0, 0) | (+2, 0) | (-1, 0) | (+2, +1) | (-1, -2) |
| L to 2 | (0, 0) | (-2, 0) | (+1, 0) | (-2, -1) | (+1, +2) |
| L to 0 | (0, 0) | (+1, 0) | (-2, 0) | (+1, -2) | (-2, +1) |
| 0 to L | (0, 0) | (-1, 0) | (+2, 0) | (-1, +2) | (+2, -1) |
Look at 0 to R. Test 2 is two cells left, and it is checked before the one-cell-right option in test 3. That is your teleport, and now you know it was deterministic all along.
The I piece is the only tetromino whose kicks are not mirror-symmetric. Flip the board and the piece, and the equivalent rotation does not produce the equivalent result — there are placements reachable on one side of the field that are simply impossible on the other. The classic version of this is trying to seat a vertical I next to the right wall over a tall stack: from the horizontal spawn state the piece wants to kick left, and players end up rotating three times to land where one rotation should have put them.
This was annoying enough that it kept getting fixed. Arika, forced to ship a Guideline-compliant rotation system in Tetris The Grand Master 3 Terror-Instinct and TGM Ace, kept the JLSTZ table byte-for-byte and rewrote the I table so that horizontal-to-vertical kicks are symmetric about the y-axis. TETR.IO does the same thing in its default rotation system, mirroring the left-side tables instead of the right.
Why the O piece wobbles
The O piece never rotates and never kicks, so it looks like a piece the system ignores. It is not — it needs an offset to stay still.
The Tetris Company did not actually store the eight kick lists shown above. It stored five offset values per rotation state, and derives kick translations by subtracting one state's offsets from another's. Those offsets are defined relative to what the spec calls true rotation, where the centre of rotation always sits on one of the four minoes making up the piece — including for the I and O pieces, whose visual centre is on a gridline intersection instead.
For the O piece that means true rotation would swing it around a corner mino and visibly shift the piece every time you tapped rotate. Its first offset value exists purely to cancel that wobble out. When you press rotate on an O and nothing happens, that "nothing" is a correction the game is applying every frame you ask for it.
Spawn orientation is half the system
Kick tables get all the attention, but SRS also dictates where and how pieces arrive, and that shapes what kicks you will need:
- Every tetromino spawns horizontally and fully above the visible playfield. The I and O spawn centrally; the other three-wide pieces lean left.
- J, L and T spawn flat-side first, nub upward.
- In Tetris Worlds pieces spawned in rows 22 and 23 (row 22 for the I). Later Guideline games generally spawn one row lower.
- The J, L, S, T and Z pieces spawn floating — not touching the bottom of their own bounding box.
That last point has a consequence you have definitely felt. If an unrotated piece lands on perfectly flat ground, its bounding box is now partly below the surface, so rotating it requires an upward kick. And every upward kick in the SRS table also shifts the piece a column sideways. For S and Z specifically this produces the single most confusing behaviour in the game: once the piece is resting on flat ground, a clockwise rotation with a kick lands where a counterclockwise rotation without a kick would have, and vice versa. Rotate the same S piece in mid-air and on the floor and you get two different columns from the same button. That is not you misplaying. That is the spawn geometry.
The fix is boring and effective: rotate before the piece lands, not after. That is also half of what finesse is really training.
ARS: three tests and no mercy
Tetris: The Grand Master and its descendants use the Arika Rotation System, which grew out of Sega's 1988 arcade rotation. ARS actually pioneered wall kicks — before SRS existed — and its version is brutally simple. Up to three positions are tried, in this order:
- Basic rotation.
- One space right of basic rotation.
- One space left of basic rotation.
That is it. No vertical component at all. Alongside that:
- The I piece never kicks in TGM, TGM2 The Absolute, TAP and Sakura Tetris.
- S, Z and I have two rotation states rather than four.
- T, L and J point their nub downward in the initial stance, and pieces are kept level within their bounding box, so a piece resting on flat ground can always rotate — the exact problem SRS creates for itself.
- L, J and T refuse to rotate in specific configurations where a particular cell is occupied, a deliberate restriction rather than a side effect.
TGM3 Terror-Instinct loosened things: the I piece gained wall kicks (one right, two right, or left), and both the I and T pieces gained floor kicks that shove the piece one or two cells upward. Those come with hard limits — a floor kick can only happen once per piece for the I, never in mid-air, and rotating a piece after it has floor-kicked permanently sets its lock delay to zero. You get the rescue, and you pay for it immediately.
The whole design points one direction: ARS is built for high-gravity survival, where pieces slam to the floor instantly and you need rotation to work on the ground rather than in the air. SRS is built for versus play, where two-row kicks let you build spin setups on purpose. Neither is wrong. They are answering different questions.
ARS games also give you the Initial Rotation System — hold a rotation button during the entry delay and the piece spawns already rotated. Tetris Effect: Connected has IRS too, with a Type A setting that carries the held rotation across consecutive pieces and a Type B that only reads the button during the few frames of entry delay.
NRS: the NES system with no kicks at all
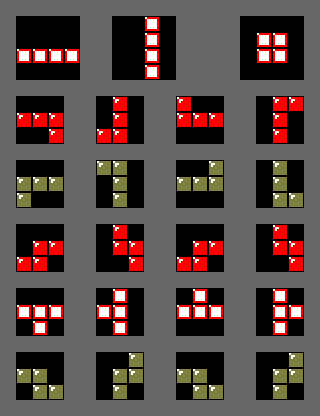
The Nintendo Rotation System comes in two variants. The right-handed version runs NES Tetris and Tetris & Dr. Mario, with pieces entering so that their highest block sits on row 20. The left-handed version runs Game Boy Tetris, entering on row 17.
Both are wallkickless. Rotate into an occupied cell and the rotation is simply refused. There is no second attempt, no offset list, no rescue. Games using NRS also generally have no lock delay, so the piece commits the instant it lands.
If you have come to classic Tetris from a Guideline game, this is the adjustment that hurts. There are no T-spins in NES Tetris. There is no wiggling a piece into a tuck under an overhang. A hole you create is a hole you dig out the slow way, and the entire skill ceiling moves into input speed instead — which is why NES play evolved around DAS, hypertapping and rolling rather than around spin setups. We covered that whole arms race in the NES DAS guide.
180 spins, SRS-X, and what TETR.IO changed
Guideline SRS defines eight rotations per piece, and all eight are 90-degree turns. There is no 180-degree rotation in the Guideline, which is why Tetris Effect: Connected has no 180 button no matter how long you stare at the controls.
Unofficial clients ignored that years ago. TETR.IO, Jstris and Worldwide Combos all offer a dedicated 180 key, commonly bound to A by default, and it does two things: it cuts a keypress out of any placement that needs a half-turn, and it opens placements that two separate 90s cannot reach.
TETR.IO is the useful case study because its changes are documented and dated:
- 180 kicks arrived in 0.6.0-pre0. The table is deliberately conservative — built to resist abusable spins — but it is generous with L and J tucks, which is why TETR.IO downstacking looks different from Guideline downstacking.
- SRS-X landed in Alpha 2.0.0 as an optional table that only a room host or a solo custom game can enable. It offers the stronger NullpoMino and Heboris style 180s; every other kick is identical to SRS.
- SRS+ became the default in Alpha 5.0.0. It is SRS with the I piece asymmetry removed, mirroring the left-side kick tables so both walls behave the same.
The practical warning: a tuck you drill on TETR.IO may not exist in the next game you open. If you are grinding muscle memory, check which rotation system your client is running before you spend a month on it.
What this actually changes about how you play
- Rotation direction picks the table. Clockwise and counterclockwise into the same final orientation run completely different kick lists. If a spin will not go, try the other direction before you decide it is impossible.
- Hunt for the two-row kicks. Any horizontal-to-vertical rotation in SRS carries two tests with y of -2. Setups that leave a three-tall slot are setups that let you cash those in.
- Stop expecting a one-row drop. SRS never tests down-one. Build shapes the table can actually solve.
- Pre-rotate S and Z. Rotating them on flat ground pulls in an upward kick that flips which column they land in.
- Give the I piece room. Rotate it before it is boxed in against a wall, especially on the right, or accept the extra rotations.
- Know your client. SRS, SRS+, SRS-X, ARS and NRS are five different games wearing the same falling blocks.
If you want the layer underneath all of this, stacking fundamentals covers the surfaces that make kicks worth having in the first place, and the rest of our coverage lives on the Tetris coverage hub.
Quick Action Checklist
- Remember the count: five tests in SRS, three in ARS, zero in NES Tetris.
- Test 1 is always the plain rotation — a kick only happens after it fails.
- If all five tests fail in SRS, the piece does not move at all. Nothing partial happens.
- Learn the clockwise JLSTZ rows; the counterclockwise ones are their mirror.
- The y of -2 kicks only appear when rotating from a horizontal state into a vertical one.
- Never plan around a one-row downward kick. It does not exist in SRS.
- Expect the I piece to kick two columns left from spawn state, and rotate early to avoid it.
- The O piece cannot kick, so never save it for a tight spot.
- In ARS, the I piece does not kick at all before TGM3, and floor kicks are one-shot.
- Before drilling any spin, confirm whether your game runs SRS, SRS+, SRS-X, ARS or NRS.
Frequently Asked Questions
Why does my I piece jump two columns left when I rotate it near a wall?
Are there wall kicks in NES Tetris?
Can you 180 spin in official Tetris games?
What is the difference between SRS and SRS+ in TETR.IO?
Why does my S piece land in a different column when I rotate it on the floor?
Keep Reading
- Hard Drop Tetris Wiki — SRS wall kick data, offset system, and spawn rules
- Hard Drop Tetris Wiki — ARS rotation, three-test kicks, and TGM3 floor kicks
- Hard Drop Tetris Wiki — Nintendo Rotation System (NES and Game Boy variants)
- Hard Drop Tetris Wiki — 180 rotations and the Initial Rotation System
- TETR.IO Wiki — 180 kicks, SRS-X, and SRS+ rotation changes
Related Guides
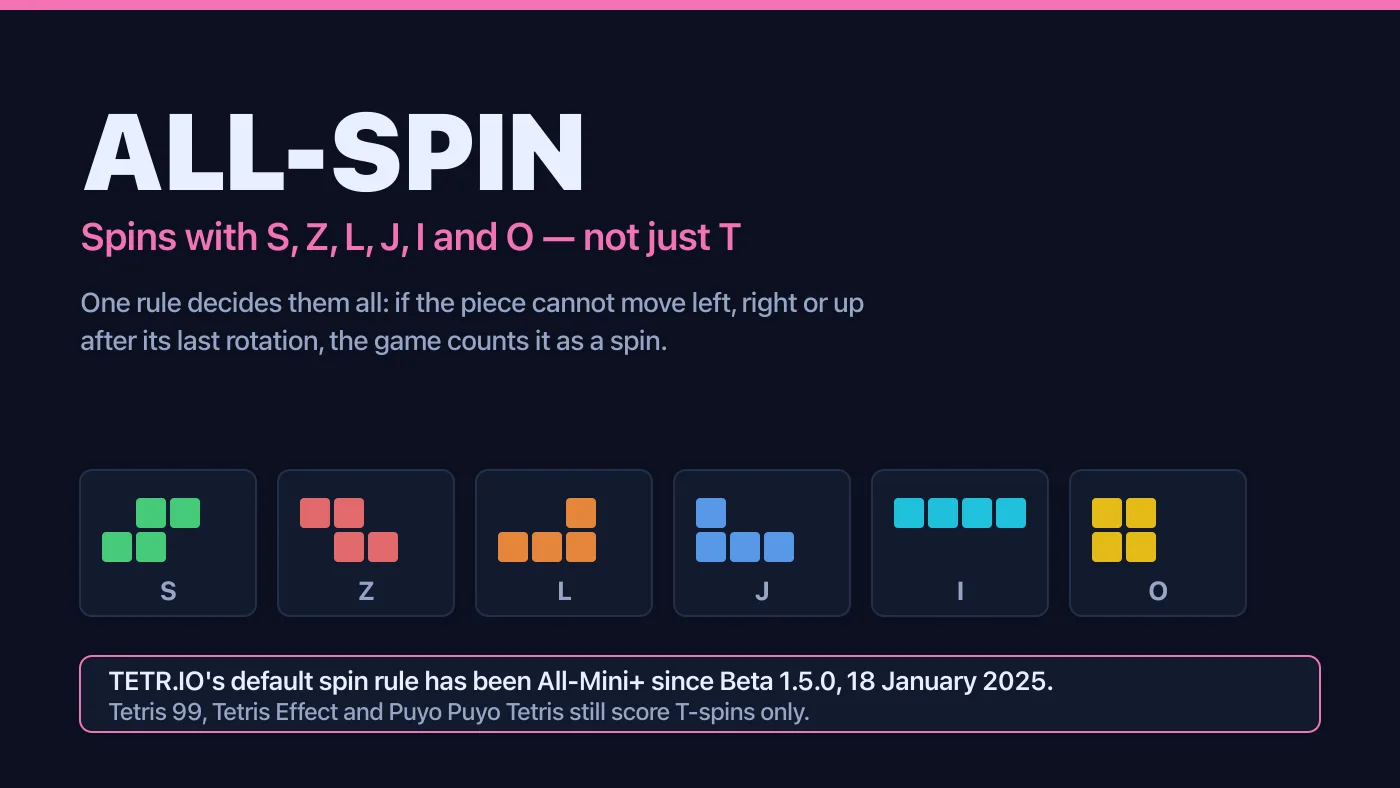
Tetris All-Spin Explained: S, Z, L, J and I Spins
A Z piece rotated into a slot nothing else reaches is either a scored spin or an ordinary Double, and which one it is has nothing to do with you. It is a setting, and most Tetris games have it switched off.
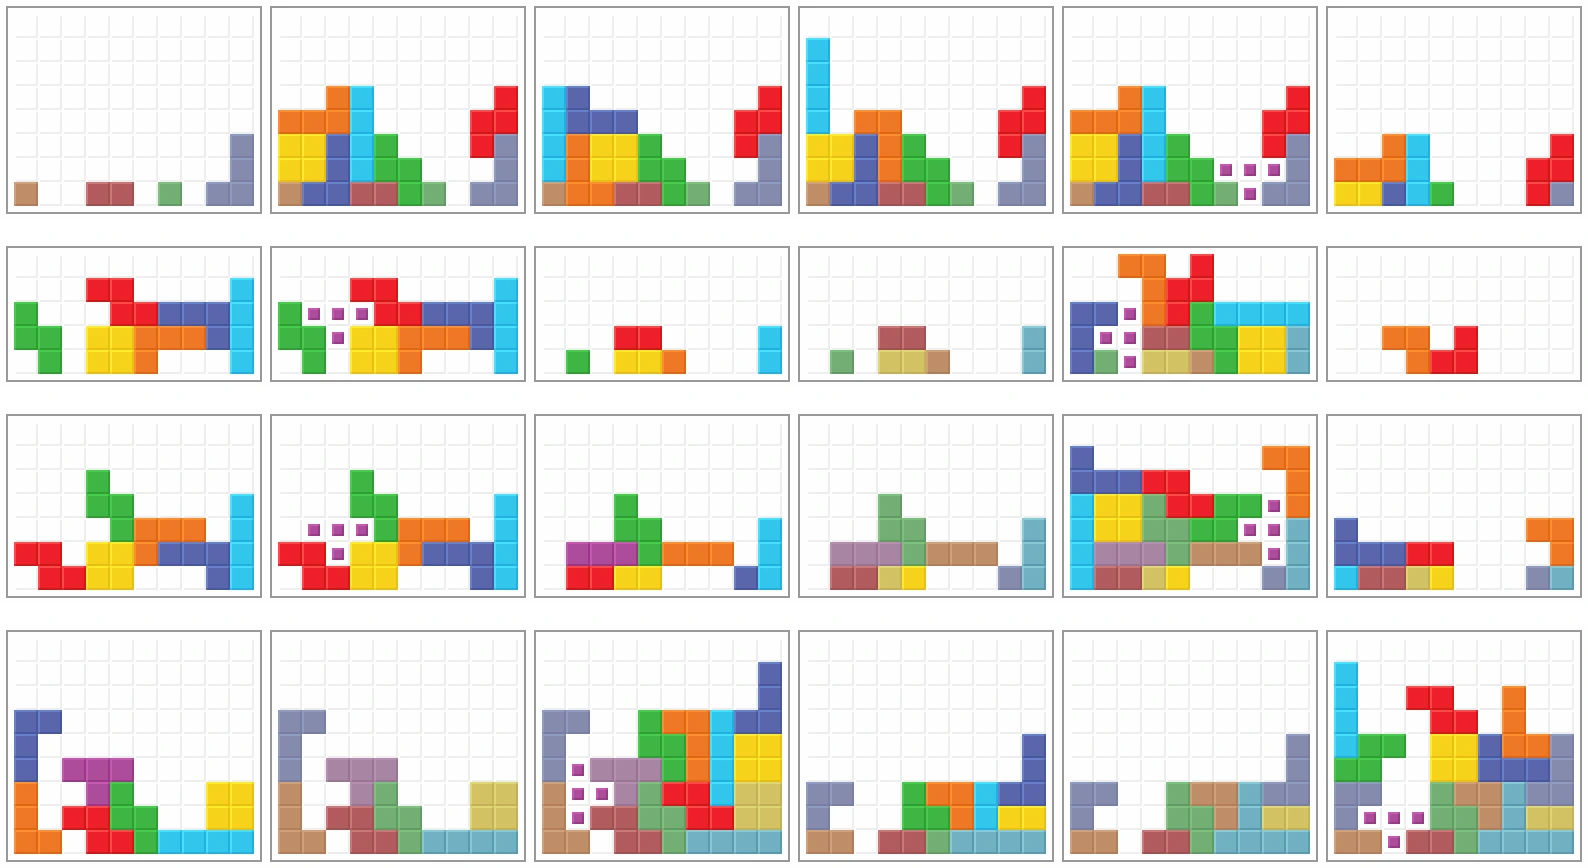
Tetris Openers: TKI-3, DT Cannon and Albatross
Your first seven pieces decide which opener is even legal. Memorising one build and forcing it every game is why your opening dies half the time. Here is the actual decision tree, from the I-piece TKI family down to the SZT bags nobody wants.
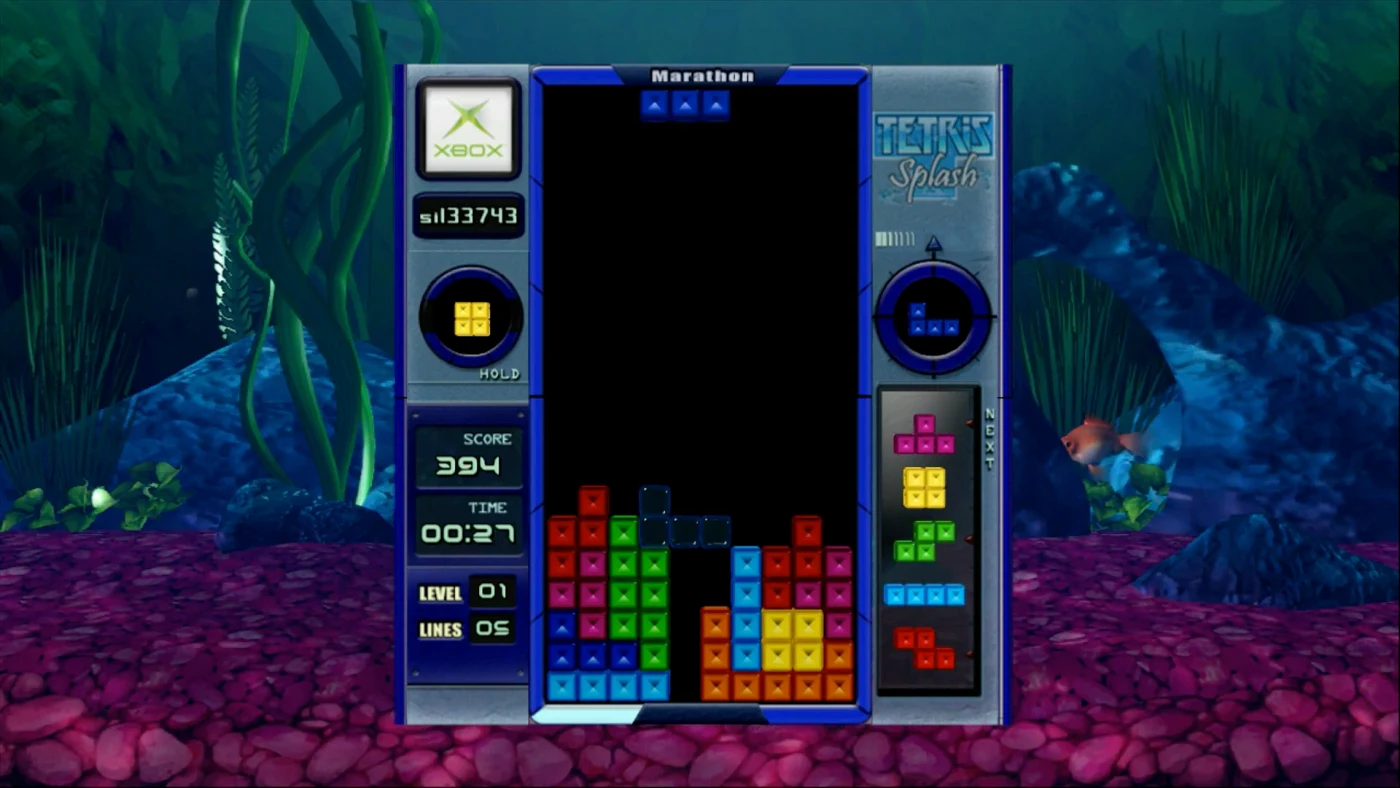
Tetris Gravity and Lock Delay Explained: The Speed Curve, the 15-Move Limit, and 20G
Every modern Tetris game runs on three clocks you never see: gravity, lock delay, and entry delay. All three are published numbers, and they explain exactly why level 15 feels like a different game than level 5.
The Tetris T-Spin Guide: Detection, Setups, and Damage
A T-spin double sends the same 4 garbage rows as a Tetris while using half the rows. That is the whole argument. Here is how the game decides what counts, and the setups that let you do it on purpose.
Tetris Stacking Fundamentals: Build a Board That Wins
Most players do not lose to speed. They lose to a board they built themselves three minutes earlier. Here is how stacking actually works in modern Guideline Tetris, and the habits that stop you from burying your own well.
Tetris Guideline Explained: Rules, Versions, Exceptions
Every guide on this site says "modern Guideline Tetris" as background and moves on. Here is what that word is actually short for: a yearly document, four known revisions, an indispensable list and a recommended one, a trademarked theme song, and at least four officially licensed games that break it anyway.