The Witcher 3 Alchemy Guide: Oils, Potions, Decoctions and Toxicity
Alchemy is the single most under-used system in The Witcher 3, and it is also the one that turns Death March from a wall into a routine. Here is what every oil, potion, decoction and bomb actually does, with the numbers.

There is a version of The Witcher 3 where you kill a leshen by rolling behind it and mashing fast attack for four minutes. There is another where the same leshen dies in forty seconds because you spent ninety seconds beforehand coating a silver sword in relict oil, drinking Thunderbolt, and popping an Ekimmara decoction so every hit refunds health. Same fight, same level, wildly different game.
Alchemy is the system CD Projekt built the combat around and then, bizarrely, never forced anyone to engage with. It also holds the deepest set of numbers in the game, most of them buried two menus deep behind vague tooltips. So here they are in the open: what each category does, what it costs in toxicity, and where your points should go.
Toxicity is a resource not a punishment
Every potion and decoction you drink adds to a Toxicity meter under your health bar that drains back down over time. Cross your overdose threshold and Geralt takes poison damage, his health bar turns sickly green, and his face starts looking like a Nilfgaardian interrogation went badly.
Here is the part people miss: several of the best abilities in the tree only fire while toxicity is above zero. Killing Spree gives you escalating critical hit chance for the rest of a fight for every enemy you kill, but only if toxicity is currently non-zero. Delayed Recovery keeps potion effects running as long as toxicity stays high, and at level 3 your potions do not expire until toxicity falls back to 55% of your maximum on the next-gen version. Toxicity is not a tax on drinking. It is the state your build wants to live in.
Two abilities widen the runway. Heightened Tolerance raises the overdose threshold, which since the 4.0 next-gen update of December 2022 starts at 50% and climbs to 60%, 70% and 80% across its three ranks. Acquired Tolerance raises your maximum toxicity pool by 0.5 for every alchemy formula you know, whether or not you have ever brewed it. That second one is why hoovering up every recipe scroll from every alchemist merchant matters even when the recipe looks useless. A hundred known formulas is fifty extra points of headroom.
The important distinction, and it trips up a lot of theorycrafting: decoctions apply what the game treats as a toxicity offset rather than normal toxicity. It does not drain on its own, and Delayed Recovery ignores it entirely. Decoction toxicity is rent you pay for the whole 30 minutes.
Oils are the best damage in the game
If you only adopt one habit from this guide, adopt this one. Oils are free, permanent, and multiplicative.
| Oil tier | Damage bonus | Hits before it wears off |
|---|---|---|
| Basic | +10% | 20 |
| Enhanced | +25% | 40 |
| Superior | +50% | 60 |
Craft an oil once and it is yours forever. Oils are never consumed and never need replenishing. A +50% attack bonus for zero ongoing resource cost has no equivalent anywhere else in the game.

The Alchemy tree turns oils from a damage buff into a full defensive package. Protective Coating adds flat damage reduction against the exact monster type the applied oil targets, 5% per rank up to 15% at the next-gen level cap, and it stacks directly on top of whatever resistance your armour already provides. Poisoned Blades gives each hit a chance to poison, scaling from 5% to 15%, with better odds on higher oil tiers. Hunter Instinct adds up to 100% critical hit damage against the oiled enemy type while your Adrenaline is maxed.
And then there is Fixative, which is quietly one of the best three-point investments in the game. Level 1 adds 33% more charges. Level 2 adds 67% and, since the next-gen update, lets you keep two different oils on a sword at once. Level 3 means your oils never wear off at all and you can stack three simultaneously. Take Fixative and the entire maintenance problem disappears; you oil a blade once and forget it exists.
Pair this with the armour discussion in our Witcher 3 witcher gear guide, because Protective Coating on a Ursine set that already resists monster damage produces resistance numbers that look like a bug report.
The potions worth a consumable slot
You have limited quick-slots and limited toxicity. Most of the 20-odd potions in the game are situational. These are the ones that earn permanent residence, listed at Superior tier since that is where you will end up:
- Superior Swallow — 80 Vitality regeneration over 20 seconds, and damage does not interrupt the regen. Five charges, 20 toxicity. In New Game Plus that jumps to 150 regeneration. This is your panic button on Blood and Broken Bones and Death March, where meditation no longer heals you.
- Superior Thunderbolt — +35% attack power for 90 seconds at 25 toxicity, and it grants a flat 100% critical hit chance during storms. Yes, that means waiting for weather is a legitimate strategy.
- Superior Petri's Philter — +25% Sign intensity for 90 seconds, and Signs always apply their special effects. If you are running anything sign-flavoured this is non-negotiable.
- Superior Blizzard — every kill slows time by 40% for 12 seconds, and with three Adrenaline points banked your actions stop draining Stamina during the slow. 20 toxicity, four charges.
- Superior Golden Oriole — 180 seconds during which poisons heal you instead of hurting you. Take it into anything with a venom attack and a whole enemy mechanic inverts.
- Superior White Raffard's Decoction — a full instant heal plus a brief window of damage immunity. Three charges, 25 toxicity. It is a get-out-of-death card, not a sustain tool.
- Superior Tawny Owl — +10% Stamina regeneration in combat and it never expires at night. The sign-caster's fuel tank.
Note the toxicity numbers. At 20 to 25 apiece you can comfortably run three potions inside a base pool before Heightened Tolerance even matters, and that pool grows every time you learn a new formula.
Decoctions turn a build into a machine
Decoctions are the endgame. They are brewed like potions but require a relic-class mutagen harvested from a rare monster, they last a full 30 minutes, they only store one charge, and since patch 4.0 each one costs 50 toxicity instead of the old 70. That is a huge quality-of-life change: two decoctions used to eat almost your entire pool, and now they are genuinely stackable.

The ones that reshape how you play:
- Ekimmara decoction — 10% life leech on damage dealt. Crucially the damage does not have to come from your sword, so bleeding and burning ticks feed you too. Set a pack of bandits on fire with Igni and you heal from all of them at once.
- Ekhidna decoction — any action that consumes Stamina heals 10% of your Vitality. Dodging, rolling and casting all become heals. It does not work with Whirl, so do not build around that combo.
- Water hag decoction — +50% damage while at maximum health. Unusually it boosts damage, not attack power, which means it also scales bombs and sign damage. Pair it with a heal-heavy setup and the "at full health" condition is easier to maintain than it sounds.
- Archgriffin decoction — strong attacks consume all your Stamina and shave 5% off the target's Vitality after normal damage. Useless against trash, devastating against enormous health pools. This is a boss-fight tool.
- Katakan decoction — a flat +10% critical hit chance, doubled from 5% by the next-gen update. Boring, universally correct.
- Troll decoction — Vitality regeneration in and out of combat, with the next-gen version granting 20 regeneration per enemy killed during a fight.
- Basilisk decoction — the odd one out. It costs only 40 toxicity, lasts 96 minutes rather than 30, and buffs a randomly chosen Sign's intensity at dusk and dawn.
- Nekker warrior decoction — mounts never panic and mounted combat damage goes up 50%. Niche, but it is the only way to make fighting from Roach anything other than a comedy sketch.
Ekimmara plus Water hag is the classic pairing: you leech back to full, and at full health you hit 50% harder. Ekhidna plus Archgriffin is the other famous one, since Archgriffin dumps your Stamina and Ekhidna pays you Vitality for spending it. If you want the mutation-level version of this conversation, the Witcher 3 build guide covers how these slot into full endgame archetypes.
Bombs are not a beginner trap
Bombs get written off because their base damage is unimpressive. Then you put three points into Pyrotechnics, which adds a flat +150 damage to every bomb — including bombs that normally deal no damage at all — and suddenly a utility item is a nuke. Efficiency adds up to five extra bombs per slot and Cluster Bombs splits each detonation into as many as six explosive fragments.
The utility bombs are the real argument, though:
- Dimeritium Bomb releases dimeritium slivers that block magic and monsters' magical abilities for 15 seconds. Against mages and teleporting enemies this is the entire fight.
- Moon Dust scatters silver splinters that stop monsters transforming or regenerating for 20 seconds. Werewolves and vampires become normal enemies.
- Northern Wind freezes enemies for 8 seconds, and frozen enemies take extra damage from your follow-ups.
- Devil's Puffball sprays a poison cloud, which combos beautifully with Golden Oriole active since the poison cannot hurt you back.
- Samum stuns everything in range and buys you a free opener.

There is also a hard mechanical reason to carry bombs: only three of them destroy monster nests. Dancing Star, Grapeshot and Samum. If you want a region to stop respawning nekkers, you need one of those in your bag.
Meditation alcohol and never running dry
Potions and bombs are not consumables in the way most RPGs mean it. Meditate for at least an hour with any strong alcohol in your inventory and every potion and bomb refills to full. The game picks the cheapest qualifying alcohol you are carrying, with Alcohest as the default, so buying Alcohest in bulk from any herbalist is effectively buying infinite potions. Alcohest is also a required ingredient for every enhanced potion, which makes it the single most valuable stack in your inventory.
Oils, as covered, never need replenishing at all.
The practical loop: fast travel to a herbalist, buy every Alcohest and every unknown formula they carry, meditate, move on. Two minutes of shopping funds an entire region.
The Alchemy tree ranked
Point costs below are branch-investment requirements on the next-gen version, meaning the number of points you need in Alchemy before the row unlocks.
Take first, always:
- Fixative (12 points in branch) — oils that never expire and stack up to three at once.
- Refreshment (6 points) — every potion dose heals 10% to 30% of maximum Vitality as it goes down. On difficulties where meditation does not heal, this converts your buffs into sustain.
- Protective Coating (6 points) — free damage reduction on a habit you already have.
Take second:
- Acquired Tolerance — more toxicity headroom the more of the game you have collected.
- Delayed Recovery (12 points) — keeps potions running long past their listed duration.
- Pyrotechnics (6 points) — the bomb payoff skill.
Take if the build wants it:
- Side Effects (18 points) — each potion has a scaling chance, 20% per rank, to trigger a second randomly chosen potion's effect for free with no extra toxicity. Chaotic, but free value.
- Hunter Instinct (18 points) — big crit damage, gated behind maxed Adrenaline.
- Killing Spree — escalating crit chance per kill while toxicity is above zero, up to 50% per kill at rank 5.
Skip unless you are specialising: Efficiency and Cluster Bombs are excellent for a dedicated bomb build and dead weight otherwise. Steady Aim, which slows time a further 50% while aiming, was cut to a single rank in the next-gen update and is a fine cheap pickup.
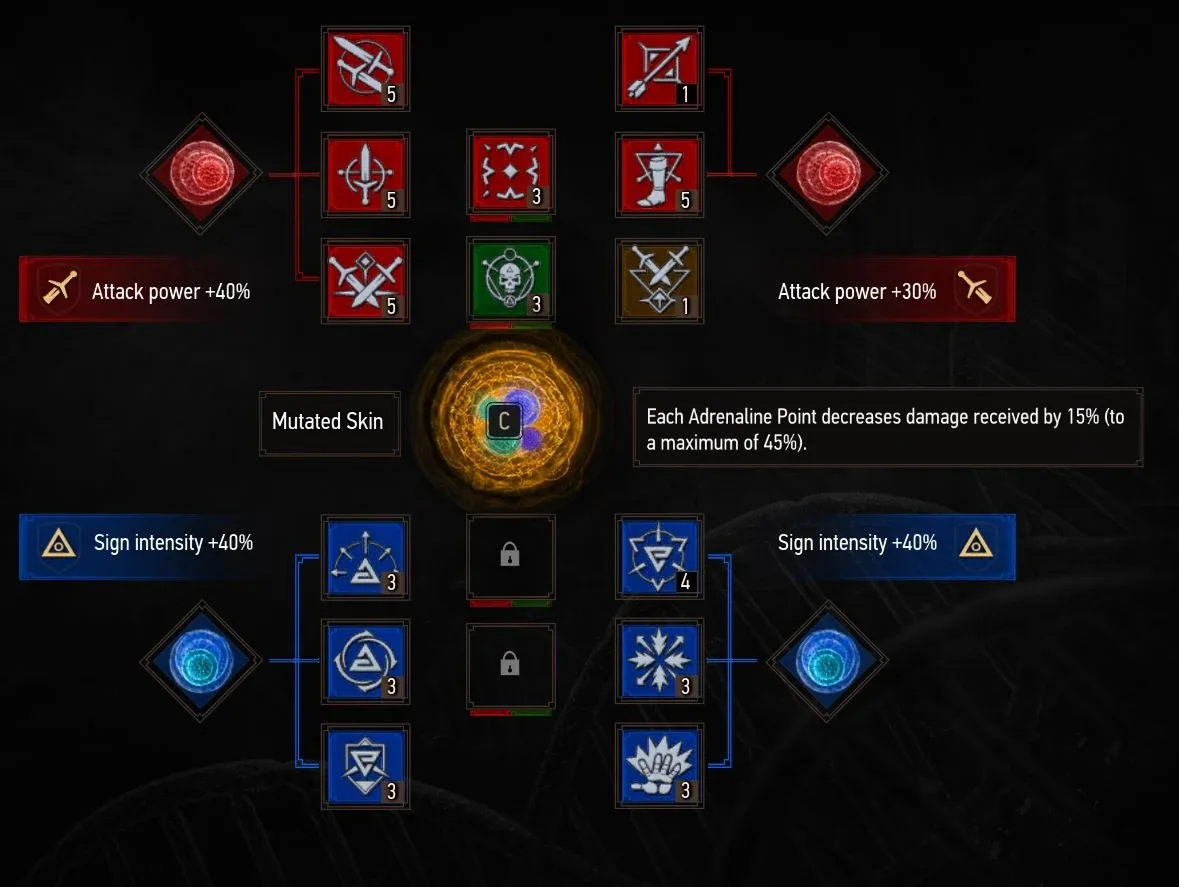
Remember that unlocking an ability does nothing until you slot it, and that grouping abilities by colour beside a matching mutagen multiplies that mutagen's bonus. That mechanic is explained in the Witcher 3 beginner guide, and green Alchemy abilities obey it exactly like red and blue.
Farming ingredients without losing a weekend
Most alchemy ingredients are herbs you walk past constantly. Celandine, Verbena, Ribleaf, Berbercane fruit and Blowball are everywhere in Velen and Skellige, and every herbalist restocks them. Do not go on dedicated herb runs; harvest whatever highlights while you are riding somewhere.
The real bottleneck is relic mutagens for decoctions, which only drop from rare and named monsters once Mutation is unlocked. No farming route fixes that. Contracts do, because contract targets are precisely the high-tier monsters that carry them.
The other bottleneck is money for formulas. Sell trophies, armour you will never wear, and your pile of junk swords. Never sell monster parts or alcohol. And since you are already sitting in an inn buying Alcohest, the innkeeper almost certainly plays cards — our Witcher 3 Gwent guide explains how to take their crowns.
Quick Action Checklist
- Apply the correct oil before every fight. Basic +10%, enhanced +25%, superior +50%, lasting 20, 40 and 60 hits respectively.
- Rush Fixative. At level 3 oils never wear off and three can be stacked on one blade.
- Keep Superior Swallow, Thunderbolt and Petri's Philter in your quick-slots at 20 to 25 toxicity each.
- Run two decoctions once you have the mutagens. Ekimmara plus Water hag is the safest general-purpose pairing at 50 toxicity each.
- Buy every unknown formula you see. Each one is +0.5 maximum toxicity with Acquired Tolerance.
- Carry Alcohest in bulk. Meditating an hour with alcohol refills every potion and bomb.
- Keep Dancing Star, Grapeshot or Samum on you for monster nests. No other bomb destroys them.
- Take Pyrotechnics before you write bombs off, since it adds +150 flat damage to every one of them.
- Live above zero toxicity. Killing Spree and Delayed Recovery both need it.
Frequently Asked Questions
What is the best decoction in The Witcher 3?
How much damage do oils add in The Witcher 3?
What happens if toxicity gets too high in The Witcher 3?
Which Alchemy skill should I take first in The Witcher 3?
How do you refill potions in The Witcher 3?
Are bombs worth using in The Witcher 3?
What is the difference between potions and decoctions in The Witcher 3?
Does the Basilisk decoction work differently from the others?
Keep Reading
Related Guides

The Witcher 3 Remastered Skill Tree: What Unlocks What
CD PROJEKT RED described the Remastered skill overhaul in three bullet points and has published no skill list. The Witcher wiki has since filled in all four trees. Here is how unlocking works now, what every skill needs and does at rank 1 and rank 3, and which old skills are gone.

The Witcher 3 Monster Weaknesses: Oil, Sign and Bomb
The bestiary sorts every monster in the game into eleven classes, and each class has an oil, a sign and a bomb that gut it. Learn the eleven and you stop losing fights you should win.

The Witcher 3 Beginner's Guide: Your First 20 Hours
Most people who bounce off The Witcher 3 do it in White Orchard, and it is almost always the same three reasons: they never learned Quen, they never applied an oil, and they treated the skill tree like a shopping list. Here is the fix.
The Witcher 3 Console Commands: How to Enable Them
Type additem('Aerondight',1) into a hidden text box and Geralt is holding one of the best swords in the game before he has left White Orchard. CD Projekt Red has never put that box in a menu, never written a support article about it, and never published a full list of what it accepts. Here is how to open it, what to type, and what nobody can quite agree it costs you.

The Witcher 3 Crafting Guide: Diagrams, Craftsmen and Gear
Crafting in The Witcher 3 is not one system, it is three tiers, four craftsman ranks and a diagram supply that is deliberately capped by your level. Here is who can actually make what, where the one Grandmaster in the game is hiding, and whether any of the 49 Relic-tier diagrams are worth the trip.
The Witcher 3 General Skills: Which Ones Deserve a Slot
Two red mutagens on the same character panel, three slots each, and one reads +40% Attack power while the other reads +30%. The difference is a single brown icon. Here is the full General tree, the exact price of slotting one, and the four abilities that pay it back.