The Witcher 3 Beginner's Guide: Your First 20 Hours
Most people who bounce off The Witcher 3 do it in White Orchard, and it is almost always the same three reasons: they never learned Quen, they never applied an oil, and they treated the skill tree like a shopping list. Here is the fix.

A griffin killed me eleven times in White Orchard. Not because the fight is hard, but because I was playing The Witcher 3 like it was Skyrim with better writing: mash the light attack, roll when the health bar looks scary, ignore the little menus. The twelfth attempt I put Quen up, coated my silver sword in hybrid oil, and the fight lasted ninety seconds.
That is the whole beginner problem in one anecdote. The Witcher 3 hands you a full witcher's toolkit in the prologue, then never insists you use it. The game will happily let you brute-force forty hours with a steel sword and a bad attitude, and it will feel bad the entire time. This guide is the set of things I wish someone had shouted at me before I left White Orchard.
Pick your difficulty like you mean it
The four difficulties are not cosmetic. Pulled from the game's own scripts, here is what actually changes:
| Difficulty | Enemy health | Enemy damage | XP gain |
|---|---|---|---|
| Just the Story! | -50% | +0% | 100% |
| Story and Sword! | +10% | +40% | 100% |
| Blood and Broken Bones! | +20% | +130% | 90% |
| Death March! | +80% | +230% | 80% |
Two things jump out. First, enemy damage scales far harder than enemy health, which means higher difficulties do not turn fights into slogs, they turn them into fights you lose in three hits. Second, there is a hidden rule that matters more than any of those numbers: on Blood and Broken Bones and Death March, meditation no longer restores your health. On the two lower difficulties you can meditate an hour and walk away topped off. Above that, healing means Swallow potions, food, and regeneration stats.
My honest recommendation for a first playthrough: Blood and Broken Bones. It is the difficulty where the systems in this guide become mandatory rather than optional, and where a witcher preparing for a contract feels like the point of the game rather than a menu you skip. If you have never played an action RPG, Story and Sword is not a failure state. You can change difficulty from the options menu at any point, so there is no wrong first pick.
Quen is not optional
Quen is the shield sign. It absorbs damage totaling a percentage of your maximum Vitality, and it is the single most load-bearing button in the game. Cast it before every fight. Recast it the moment it pops. If you take one thing from this article, take that.
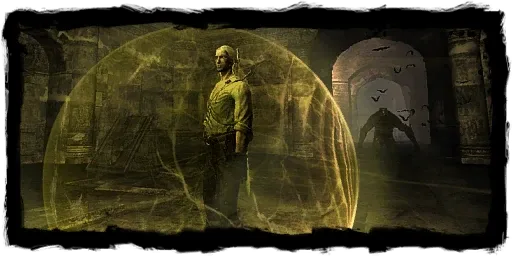
Two early Sign-tree abilities make it dramatically better:
- Exploding Shield costs zero points to unlock. At level 1 the shield shoves opponents back when it breaks; at level 2 it also deals damage; at level 3 it adds a knockdown chance. That turns your panic button into a crowd-control tool.
- Active Shield is the alternate Quen mode, and it needs 6 points invested in the Signs branch before the row opens. Hold the sign button and Geralt maintains a bubble that converts absorbed damage into Vitality. At level 3 maintaining it costs no Stamina at all, though blocked hits still drain some. You cannot run while holding it, only walk.
Active Shield is, functionally, a heal that runs on getting punched. Against a pack of drowners it is close to unfair. Note that since Patch 4.0, the next-gen update from December 14, 2022, Quen no longer strips existing negative effects like poison. Instead the effect drains your shield.
The other four signs earn their keep too. Igni is your damage and, with the Melt Armor ability, permanently strips up to 45% of an enemy's armor. Yrden slows enemies inside its circle and is flatly required against wraiths, which are otherwise near-immune. Aard staggers and knocks down, opening finishers. Axii charms one enemy out of the fight and, with Delusion, opens extra dialogue options that occasionally hand you experience or skip a fight.
The alchemy you actually need early
You do not need to become an alchemist. You need three habits.
Oils. Coat your blade with the oil matching the enemy type. A basic oil adds +10% attack power against that type, enhanced +25%, superior +50%, and that bonus is multiplicative on top of everything else. Hanged Man's Venom is the steel-sword oil for humans; beast oil works on both blades; every other oil is silver-only. Oils wear off after a set number of hits, tracked by a counter under your Toxicity meter, and you can reapply mid-fight from the inventory. Craft an oil once and the formula stays with you forever.
Potions before boss fights. Swallow for regeneration, Thunderbolt for attack power, Cat for pitch-black caves. Potions and bombs are not consumables in the traditional sense: they refill automatically when you meditate for at least an hour, as long as you have alcohol in your inventory. The game burns the cheapest qualifying alcohol you are carrying first — Alcohest (base price 10) before Dwarven Spirit (20), with White Gull (100) last — so a stack of cheap Alcohest or Dwarven Spirit keeps you topped up and your White Gull is never touched. That order comes from the game's own refill function (it picks the lowest-priced alcohol in your inventory), which the Witcher Wiki's Guide to Alchemy spells out; the wiki's Meditation page lists the order the other way round and is wrong.
Read the bestiary. Every monster entry lists its weaknesses. It is not flavor text.
Places of Power are free skill points
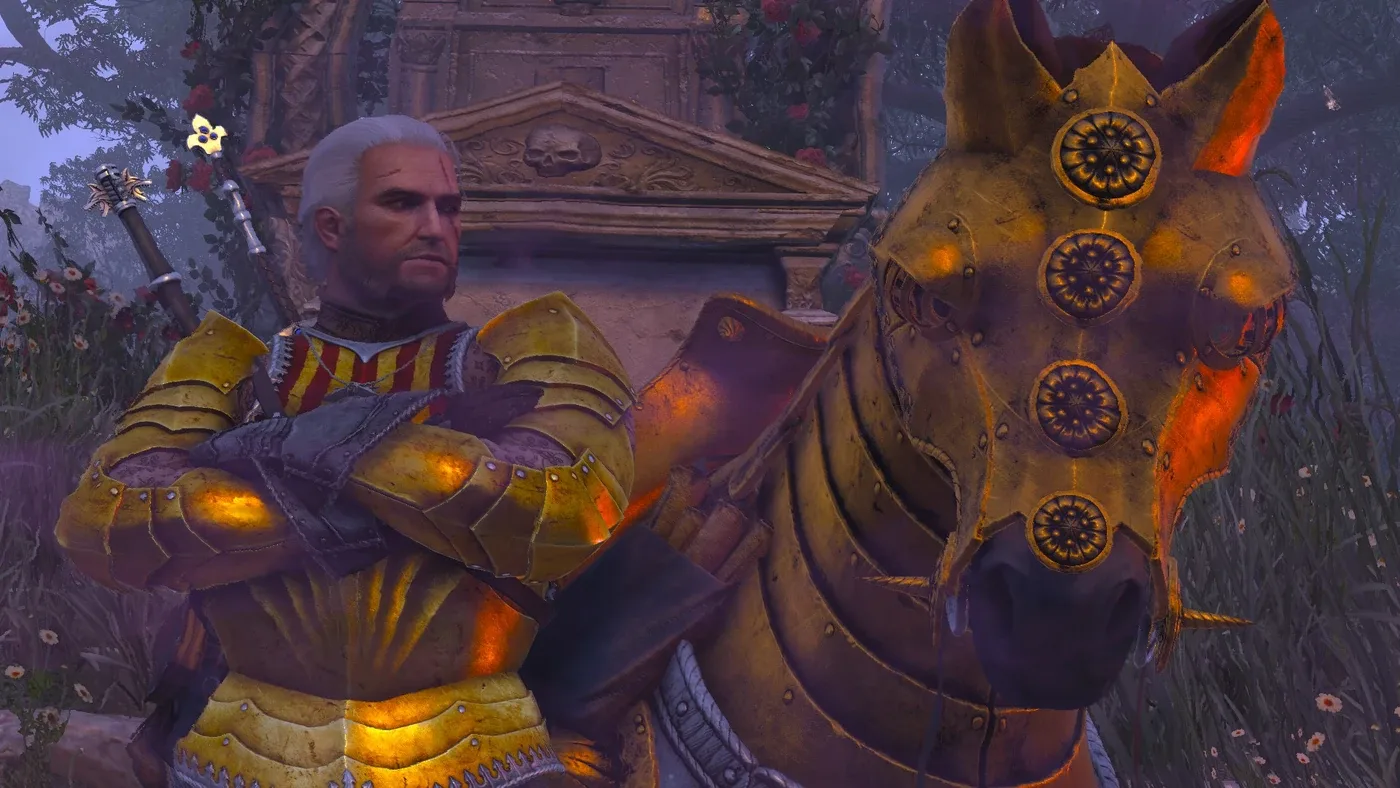
Scattered across the map are glowing magical sites called Places of Power. Activating one for the first time grants a permanent skill point, on top of a temporary buff to the sign it is tied to. Each site is bound to one of the five signs and boosts that sign's intensity when you draw from it.
This matters because skill points in The Witcher 3 are finite. You get one per level, and Places of Power are one of the only other sources. White Orchard alone has six of them, and they are all reachable in the starter zone before you ever set foot in Velen. Velen and Novigrad share eight more, Skellige has nine.
Sweep them. It is the highest return-per-minute activity available to a new player, and the buff on top means you can walk into a contract with your Igni already boosted.
The ability slot rule nobody explains
This is the system that quietly ruins new builds. Unlocking an ability in the skill tree does nothing until you drag it into one of the twelve activation slots on the character panel. At the start only one slot is open. They unlock as you level, and all twelve are available by level 30.
Next to those slots are four diamond-shaped mutagen sockets, unlocked at levels 4, 9, 16 and 28. Each socket sits next to a group of three ability slots, and here is the rule:
Every ability placed next to a mutagen of the same colour increases that mutagen's bonus by 100%. Fill all three matching slots and the bonus goes up by 300%.
Red is Combat and gives attack power. Blue is Signs and gives sign intensity. Green is Alchemy and gives Vitality. A Greater blue mutagen gives +10% sign intensity on its own and +40% with three blue abilities beside it. Mismatched colours are not penalised, they simply do nothing for the mutagen.
The practical takeaway: do not scatter one point into everything. Pick two branches, group your abilities by colour, and match the mutagens. A focused level-20 build outperforms a level-30 build that spread itself thin. If you have already made a mess of it, merchants sell a Potion of Clearance that refunds every ability point.
For a full breakdown of the three build archetypes and how mutations change everything at endgame, see the Witcher 3 build guide.
Side quests are the good part
The Witcher 3's reputation is built on its side content, and this is not a "well, it's optional but nice" situation. The Bloody Baron questline, the Novigrad witch hunts, the Skellige succession, and the Hearts of Stone expansion are better written than most games' entire main plots. Several are also the primary source of witcher gear diagrams via the Scavenger Hunt quests.
A practical exploration rule: question marks on the map are mostly loot piles and can be ignored guilt-free. Notice-board contracts and named side quests are where the writing lives. Do the contracts near your level, take the ones two or three levels above you if you are confident, and do not stress about missing content, because there is more of it than any one playthrough can hold.
Gwent deserves ten minutes
The in-game card game is genuinely good, and it is the one minigame worth learning properly. The rules are short: a coin toss decides who starts, both players draw 10 cards and may discard up to two once for a redraw, and matches are best of three rounds decided by total unit Strength. Passing ends your turn permanently for that round, which makes card economy the whole game. Losing a round costs you a gem; losing both loses the match. A draw costs both players a gem, unless you are playing Nilfgaard, whose faction ability wins ties outright.
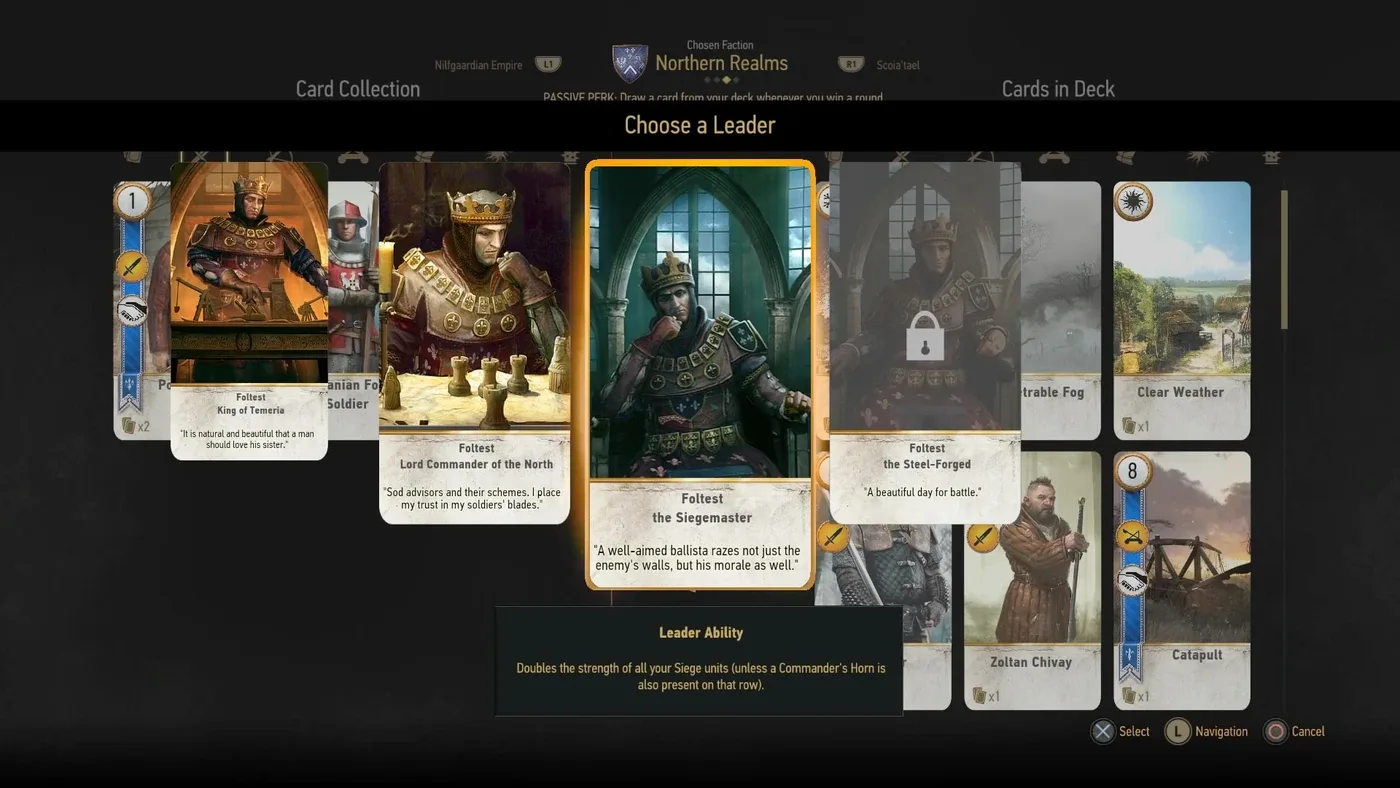
Four factions ship in the base game, plus Skellige added in Blood and Wine. Northern Realms draws an extra card whenever it wins a round, which is the most forgiving ability for a new player. Buy cards from every innkeeper and merchant you meet, because some strong ones become permanently unavailable once quests move on.
Mistakes that cost new players hours
- Selling monster parts. You will need them for potions, oils and gear crafting. Sell trophies and jewellery instead.
- Ignoring armour weight class. Light armour boosts stamina regeneration and fast-attack playstyles, heavy soaks hits. Pick one and build into it rather than wearing whatever has the highest number.
- Hoarding potions. They restock on meditation. Drink them.
- Overlevelling by grinding. Enemies far below your level give almost nothing, and the game's pacing assumes you are roughly level-matched to the main quest.
- Skipping the tutorial prompts on the loading screens. They are the only place several systems are explained at all.
- Not upgrading witcher gear. The school sets scale through enhanced, superior, mastercrafted and grandmaster tiers. A base Griffin chestpiece at level 30 is dead weight. The full breakdown lives in our Witcher 3 witcher gear guide.
Quick Action Checklist
- Start on Blood and Broken Bones unless you want a pure story run, and remember meditation will not heal you there.
- Cast Quen before every fight, and take Exploding Shield early since it costs zero points to unlock.
- Craft and apply the correct oil for every enemy type. Basic +10%, enhanced +25%, superior +50%.
- Carry Alcohest or Dwarven Spirit so meditation refills your potions and bombs — the game uses the cheapest alcohol first, so White Gull is safe.
- Clear all six White Orchard Places of Power before leaving for Velen. Each is a permanent skill point.
- Drag unlocked abilities into activation slots, and group them by colour next to matching mutagens for the +300% bonus.
- Do the notice-board contracts and named side quests. Skip the anonymous map question marks if you are short on time.
- Buy Gwent cards from every merchant. Northern Realms is the friendliest starter deck.
- Keep monster parts. Sell trophies.
Frequently Asked Questions
What difficulty should a Witcher 3 beginner play on?
Which sign should I upgrade first in The Witcher 3?
How do Places of Power work in The Witcher 3?
Why are my Witcher 3 skills not doing anything?
Do potions run out permanently in The Witcher 3?
Keep Reading
- Witcher Wiki — difficulty levels and enemy scaling values
- Witcher Wiki — ability branches, activation slots and mutagen rules
- Witcher Wiki — Places of Power locations and skill point rewards
- Witcher Wiki — Guide to Alchemy: meditation refills use the cheapest alcohol first (Alcohest before Dwarven spirit, White Gull last)
Related Guides

The Witcher 3 Monster Weaknesses: Oil, Sign and Bomb
The bestiary sorts every monster in the game into eleven classes, and each class has an oil, a sign and a bomb that gut it. Learn the eleven and you stop losing fights you should win.
The Witcher 3 Best Side Quests: The Ones You Should Never Skip
The Witcher 3 buries some of its finest writing under a map full of question marks and notice-board scraps. These are the side quests that earn the game its reputation, the ones with real choices and real fallout, and the two you can permanently lock yourself out of.
The Witcher 3 Alchemy Guide: Oils, Potions, Decoctions and Toxicity
Alchemy is the single most under-used system in The Witcher 3, and it is also the one that turns Death March from a wall into a routine. Here is what every oil, potion, decoction and bomb actually does, with the numbers.

The Witcher 3 Gwent Guide: How to Actually Win
Gwent is not a coin-flip and the AI is not cheating. You are losing because you dump your whole hand into round one, chase strength instead of card advantage, and never learned what a spy actually does. Here is the fix.

The Witcher 3 Remastered PC Requirements: All Six Tiers
CD PROJEKT RED's Remastered patch notes carry a six-column PC spec table, from a GTX 1660 at 1080p on Low up to an RTX 5080 for path tracing at 4K. Here is every tier, which upscaler your graphics card actually gets, why CDPR's own storage figures disagree, and the PC settings its patches and support pages have touched since launch.

The Witcher 3 Fist Fights: Every Circuit and Brawl Master
Skellige's fistfighting champion is a bear, the Champion of Champions is a rock troll, and before the troll will fight you at all you have to lose a fight to a ghost on purpose. Here is every fistfighting circuit opponent across Velen, Novigrad, Skellige and Toussaint, what each one pays, and the single loss that makes Brawl Master unobtainable.