The Witcher 3 General Skills: Which Ones Deserve a Slot
Two red mutagens on the same character panel, three slots each, and one reads +40% Attack power while the other reads +30%. The difference is a single brown icon. Here is the full General tree, the exact price of slotting one, and the four abilities that pay it back.
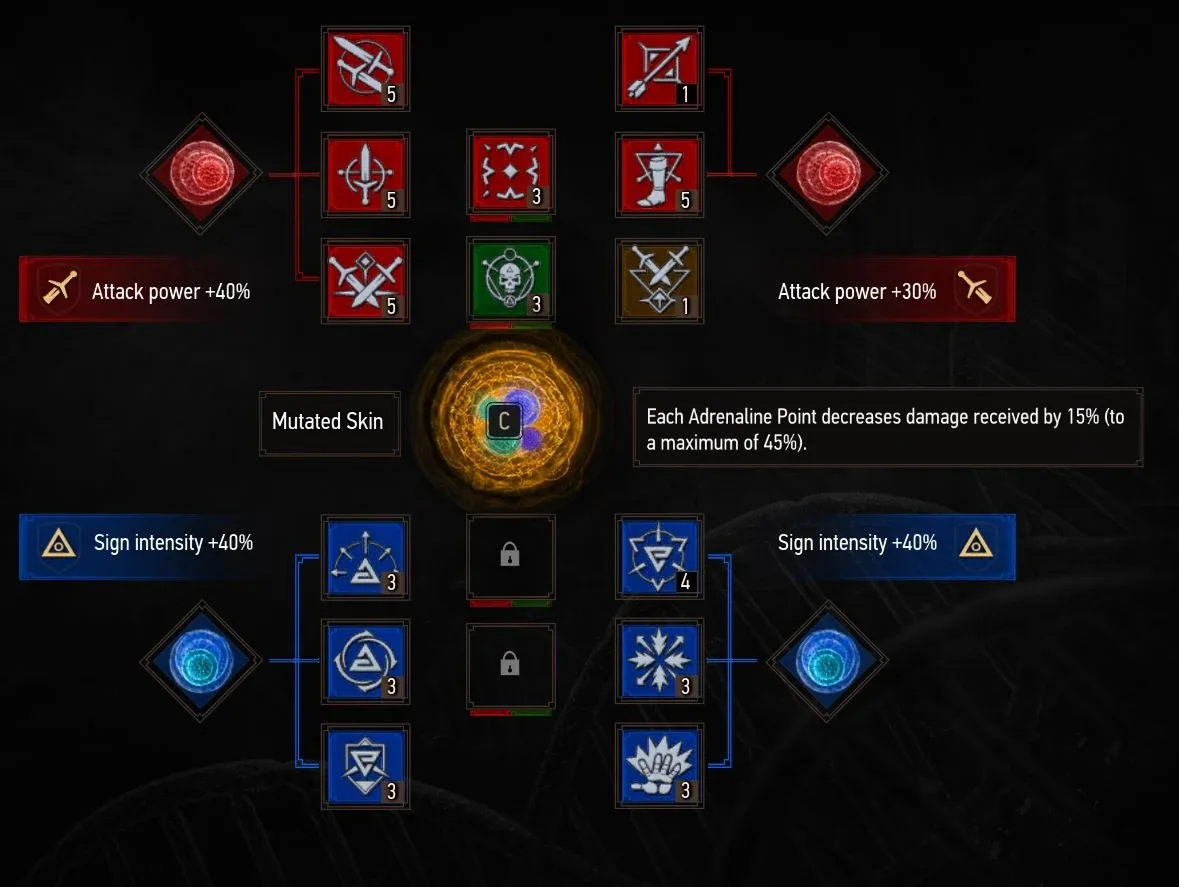
Look at the character panel above. Two red mutagens, three ability slots wired to each, identical tier. The left group reads Attack power +40%. The right group reads +30%.
The difference is one icon. The left group holds three red Combat abilities. The right group holds two red abilities and one brown General ability — and brown does not count for anything.
That screenshot is the entire argument of this article. The General tree is the branch with no colour, which makes it the only part of the skill system that charges you rent for showing up. Our build guide covers what to do with Combat, Signs and Alchemy. This one covers the twenty abilities sitting in the fourth tab, what each of them is actually worth, and the exact price you pay for slotting one.
The branch mutagens do not see
The Witcher 3 sorts abilities into four branches marked by colour: Combat (red), Signs (blue), Alchemy (green) and General (brown). You get twelve activation slots, arranged as four groups of three, and every group has a diamond-shaped mutagen socket beside it. The sockets unlock at levels 4, 9, 16 and 28; the twelfth ability slot opens at level 30. Blood and Wine adds four more on top of those twelve — the centre column in the screenshot above — released one at a time by the Strengthened Synapses mutation at 2, 4, 8 and 12 mutations researched.
The colour rule is where the money is. From the wiki's mutagens page: each ability placed in a slot connected to a mutagen of the same colour increases that mutagen's bonus by 100%, so filling all three matching slots raises it by 300%. Abilities whose colour does not match "neither increase nor decrease it."
The abilities page then states the exception in a single parenthetical: this rule does not apply to the General abilities (brown).
So a brown skill is not free. It costs you one increment of whatever mutagen sits in that group. On greater mutagens, that increment is a real number:
| Mutagen in the group | Base bonus | All three slots matching | What one brown slot costs |
|---|---|---|---|
| Greater red mutagen | +10% Attack Power | +40% Attack Power | 10% Attack Power |
| Greater blue mutagen | +10% Sign intensity | +40% Sign intensity | 10% Sign intensity |
| Greater green mutagen | +150 Vitality | +600 Vitality | 150 Vitality |
That is the +40% to +30% gap in the screenshot, rendered as a rule. Every General ability in this guide has to beat that number to be worth one of the twelve.
One exception, and it is sitting in the same screenshot. The four centre slots that Strengthened Synapses unlocks are, in the wiki's words, not linked in any way and so provide no mutagen bonus at all — which means they cannot forfeit one either. What is allowed in them is decided by the colour of the mutation you have active rather than by the slot, so treat them as a separate question; our Blood and Wine guide has the mutation tree.
In exchange for the colour penalty, the General tree drops the branch gating. Combat, Sign and Alchemy abilities past the second row need a set number of points banked in their own branch before the row opens, and the wiki records that requirement as a tier on each ability — Undying is tier Level 2, Killing Spree tier Level 4. Six General abilities have their own wiki page (Sun and Stars, Metabolism Boosts, Gourmet, Cat School Techniques, Metabolic Control and Strong Back) and all six read tier None. The Gourmet entry says the quiet part out loud: the skill costs one point, can be unlocked at any time, and is therefore a live candidate for the first point you ever spend.
All twenty General abilities
Effects below are the wiki's current descriptions, which reflect the next-gen 4.0 build of the game. The verdicts are mine.
| Ability | What it does | Verdict |
|---|---|---|
| Sun and Stars | +10 Vitality per second out of combat during the day, +1 Stamina per second in combat at night | Strong before you have potions, fades after |
| Steady Shot | Crossbow bolts deal 25% more damage | Crossbow builds only |
| Metabolism Boosts | Adrenaline Points are consumed to cut potion Toxicity by 33% each; does not affect decoctions | Core alchemy pick |
| Gorged on Power | A Place of Power bonus lasts indefinitely, but only one can be active at a time | Best raw value in the tree |
| Survival Instinct | Increases maximum Vitality by 15% | Reworked in 4.0, see below |
| Rage Management | When Stamina is too low, Signs can be cast using Adrenaline Points | Insurance for sign builds |
| Trick Shot | One extra bolt before you must reload | Crossbow builds only |
| Gourmet | Eating food regenerates Vitality for 20 minutes | One point, no prerequisite, unlockable at any time |
| Cat School Techniques | Each piece of light armour: +25% critical hit damage, +5% fast attack | Light armour engine |
| Adrenaline Burst | +5% Adrenaline generation, and Signs now generate Adrenaline Points | Enables adrenaline builds |
| Advanced Pyrotechnics | Bomb explosion damage generates 0.1 Adrenaline Points | Niche, bombs only |
| In Combat's Fires | You ignore bomb and special bolt effects | Lets you detonate at your own feet |
| Griffin School Techniques | Each piece of medium armour: +5% Sign intensity, +5% Stamina regeneration | Medium armour engine |
| Focus | Adrenaline Points increase both weapon damage and Sign intensity | Good, but no published number |
| Battle Frenzy | Battle Trance now increases critical hit chance by 8% per Adrenaline Point | Crit builds |
| Heavy Artillery | Bomb damage is tripled, but bombs per slot are halved; no effect on bombs that deal no damage | Bomb builds only |
| Bear School Techniques | Each piece of heavy armour: +5% maximum Vitality, +5% strong attack damage | Heavy armour engine |
| Metabolic Control | Increases maximum Toxicity by 30 points | Decoction stacking |
| Strong Back | Maximum inventory weight increased by 60 | Convenience, priced in combat |
| Attack is the Best Defense | Parries 0.1, counterattacks 0.4, dodges 0.3, rolls 0.2 Adrenaline Points, at most once every 5 seconds | Adrenaline engine for defensive play |
Two of those deserve their own footnote. Metabolism Boosts is the one that changes how alchemy feels: the wiki notes that with all three Adrenaline Points available, potion Toxicity is reduced to zero, and it records a bug where the skill does not actually spend the Adrenaline, letting you drink your whole potion belt in one go. Metabolic Control stacks with the Alchemy tree's Acquired Tolerance to push Geralt to four simultaneous decoctions, which is the gate the alchemy guide build is built around.
Strong Back is the honest disappointment. It is a genuinely useful +60 carry weight — combined with Beauclair saddlebags and the fiend decoction the wiki puts the ceiling at 250 — but it is a menu convenience occupying a slot that costs 10% Attack Power.
The three School Techniques and what a full set pays
Armour in The Witcher 3 comes in light, medium and heavy, and consists of four pieces: chest, gauntlets, trousers and boots. Three General abilities read that weight class and pay out per piece. Four pieces is the maximum, because swords are not armour.
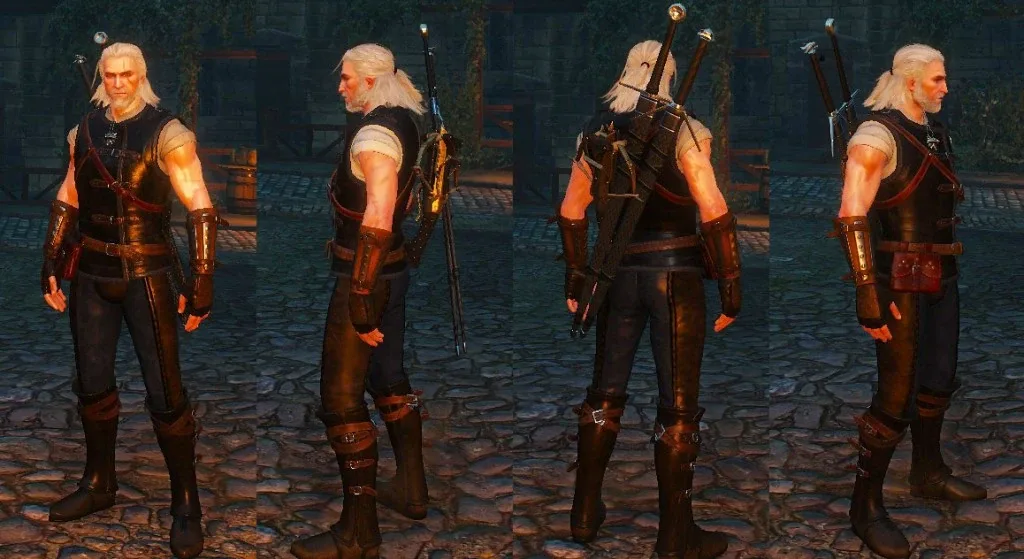
| Ability | Armour weight | Per piece | Full four-piece set |
|---|---|---|---|
| Cat School Techniques | Light | +25% critical hit damage, +5% fast attack damage | +100% critical hit damage, +20% fast attack damage |
| Griffin School Techniques | Medium | +5% Sign intensity, +5% Stamina regeneration | +20% Sign intensity, +20% Stamina regeneration |
| Bear School Techniques | Heavy | +5% maximum Vitality, +5% strong attack damage | +20% maximum Vitality, +20% strong attack damage |
Compare those totals against the table further up. A full medium set with Griffin School Techniques is +20% Sign intensity from one slot, against the 10% Sign intensity that slot would have handed a greater blue mutagen. It is a straight doubling, and it is the clearest case in the tree for accepting the colour penalty.
Cat's +100% critical hit damage looks even better and comes with a caveat the wiki is explicit about: like most stat boosts, it reads base damage only and ignores your other multipliers, so it does not literally double a fully buffed crit. It still pairs naturally with crit chance — the wiki's own tip points at Killing Spree over in the Alchemy tree, and Battle Frenzy does the same job from inside this one.
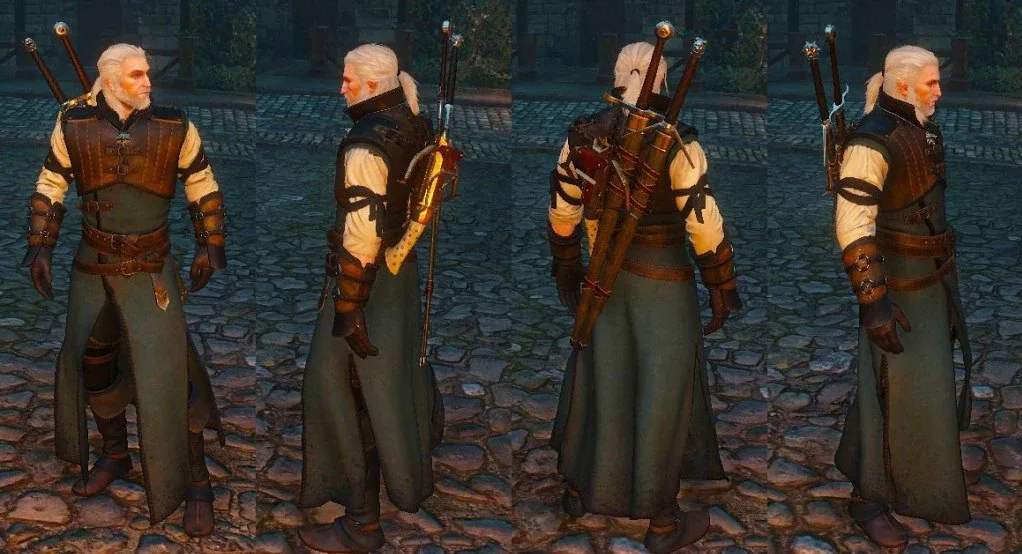
Three things stop this from being as simple as "wear the matching set":
- Mixing weights splits the payout. Two light pieces and two heavy pieces means Cat School Techniques counts two, not four. Pick a weight and commit to it, which is the same conclusion the witcher gear guide reaches from the set-bonus side.
- Hearts of Stone lets you cheat the weight class entirely. The Levity glyphword makes every equipped armour item count as light, Balance makes it medium and Heft makes it heavy. Our Hearts of Stone guide has the runewright's price list.
- The bonus is on your armour, not your school. Any light armour feeds Cat School Techniques. Cat School Gear is simply the largest concentration of it.
Gorged on Power and the thirty free ability points

Places of Power are the second source of ability points in the game, and the wiki's tally is exact: one point per Place of Power, thirty in total.
| Region | Places of Power |
|---|---|
| White Orchard | 6 |
| Velen and Novigrad | 8 |
| Skellige | 9 |
| Kaer Morhen | 1 |
| Through Time and Space (missable) | 1 |
| Toussaint (Blood and Wine) | 5 |
Each one is tied to one of the five Signs and boosts that Sign's intensity when you draw from it. Normally that buff is temporary. Gorged on Power makes it last indefinitely, with the restriction that only one such bonus can be active at a time — so you pick a Sign and keep it lit permanently instead of topping up at a rock before every contract.
Two practical notes. Like every ability in the game, it only works while it is sitting in an activation slot; unlocking it in the tree does nothing on its own. And the wiki records that ability points from Places of Power carry into New Game Plus while the places themselves reset, so a New Game Plus run can bank another thirty.
What Patch 4.0 changed in this tree
One real change, and one that looks like a change and is not.
Survival Instinct was a flat +500 maximum Vitality before the next-gen update. It is now +15% of your maximum Vitality. That is a scaling rewrite rather than a straight nerf, and the arithmetic is easy: 15% only overtakes a flat 500 once your maximum Vitality passes 3,333. Below that line the old version was stronger, above it the new one keeps growing while the flat number would have stopped mattering.
Heavy Artillery reads differently in the current game — "bomb damage is tripled, but the number of bombs in slots is decreased by half" — and the wiki notes the pre-4.0 wording was "+200% damage, slots decreased by 50%." Those are the same two numbers. Nothing was buffed; the text was tidied. Worth saying plainly, because a rewritten description is exactly the kind of thing that turns into a false patch note.
Which ones actually earn a slot
The rule this whole article reduces to: a brown ability has to beat 10% Attack Power, 10% Sign intensity, or 150 Vitality, because that is what its slot would have been worth to a greater mutagen.
By that standard, four clear it comfortably.
The School Technique matching your armour. +20% of a stat from a single slot against 10% from the mutagen increment you gave up. This is the least arguable pick in the tree.
Gorged on Power. A permanent Sign intensity buff for one slot, and the thirty points that come with sweeping the rocks are the reason you can afford to experiment at all.
Metabolism Boosts, on any build that drinks. Zero-cost potions is not a percentage, it is a different relationship with the Toxicity bar, and Toxicity is the real constraint on the alchemy build.
Gourmet, early. One point, no prerequisite, twenty real-time minutes of Vitality regeneration from meat you loot off pigs. On Blood and Broken Bones and Death March, where meditation no longer restores health, that is your healing budget until Swallow is reliable — see the beginner guide for the difficulty table behind that.
Everything else is conditional. Steady Shot and Trick Shot are dead weight unless you are actually shooting things. Advanced Pyrotechnics and Heavy Artillery want a bomb build to exist first. Battle Frenzy, Adrenaline Burst and Attack is the Best Defense form a coherent adrenaline package, but that is three of your twelve slots and two full mutagen groups compromised, so take them as a set or not at all. Strong Back is the one I would slot last and unslot first.
Quick Action Checklist
- Count the cost before you slot brown. One General ability in a mutagen group forfeits that group's increment: 10% Attack Power, 10% Sign intensity or 150 Vitality on greater mutagens.
- Group your brown skills together. Concentrating them in one mutagen group wrecks one bonus instead of spreading damage across four.
- Spend your first point on Gourmet if you are starting on Blood and Broken Bones or Death March. It costs one point and has no prerequisite.
- Pick an armour weight and take the School Technique that matches it. Four pieces of one weight, not a mixed loadout.
- Use Levity, Balance or Heft from Hearts of Stone if you want the wrong-weight set to feed the right School Technique.
- Sweep Places of Power for the thirty ability points, then slot Gorged on Power to keep one Sign buff lit permanently.
- Take Metabolic Control alongside Acquired Tolerance if you want four decoctions running at once.
- Treat Steady Shot, Trick Shot, Advanced Pyrotechnics and Heavy Artillery as build-conditional. They do nothing for a sword-and-signs Geralt.
- Remember Survival Instinct is percentage-based since 4.0. It is worth less than the old flat 500 until your maximum Vitality clears 3,333.
Frequently Asked Questions
Do General abilities count toward mutagen bonuses in The Witcher 3?
What are the best General skills in The Witcher 3?
What does Cat School Techniques do in The Witcher 3?
How many ability points can you get in The Witcher 3?
What does Gorged on Power do in The Witcher 3?
Did Patch 4.0 change Survival Instinct in The Witcher 3?
How many ability slots does Geralt have in The Witcher 3?
Keep Reading
- Witcher Wiki — the full General branch table with every ability description
- Witcher Wiki — branch colours, the General exception to mutagen matching, slot counts and ability point sources
- Witcher Wiki — colour matching maths and greater mutagen values
- Witcher Wiki — Strengthened Synapses, the four extra centre slots and why they carry no mutagen bonus
- Witcher Wiki — per-piece numbers, full-set totals and the base-damage caveat
- Witcher Wiki — every Witcher 3 Place of Power by region and the New Game Plus reset
- Witcher Wiki — one-point cost, no prerequisite, and the 20 real-time minute duration
- Witcher Wiki — zero Toxicity at three Adrenaline Points, and the unspent-Adrenaline bug
- Witcher Wiki — +30 Toxicity and the four-decoction ceiling with Acquired Tolerance
- Witcher Wiki — +60 carry weight and the 250 ceiling with saddlebags and fiend decoction
- Witcher Wiki — the 3:00 to 22:00 daylight window and why it does not work while meditating
- Witcher Wiki — light, medium and heavy classes, the four armour pieces, and the Levity, Balance and Heft glyphwords
Related Guides
The Witcher 3 Console Commands: How to Enable Them
Type additem('Aerondight',1) into a hidden text box and Geralt is holding one of the best swords in the game before he has left White Orchard. CD Projekt Red has never put that box in a menu, never written a support article about it, and never published a full list of what it accepts. Here is how to open it, what to type, and what nobody can quite agree it costs you.
The Witcher 3 Crafting Guide: Diagrams, Craftsmen and Gear
Crafting in The Witcher 3 is not one system, it is three tiers, four craftsman ranks and a diagram supply that is deliberately capped by your level. Here is who can actually make what, where the one Grandmaster in the game is hiding, and whether any of the 49 Relic-tier diagrams are worth the trip.
The Witcher 3 Runestones and Glyphs: What Every Upgrade Slot Is Worth
Two greater runestones sit side by side in the same shop. Both say five percent. One costs 440 crowns and the other 980. Here is the full stat table, the crafting maths behind that gap, and which slots are worth filling.
The Witcher 3 Alchemy Guide: Oils, Potions, Decoctions and Toxicity
Alchemy is the single most under-used system in The Witcher 3, and it is also the one that turns Death March from a wall into a routine. Here is what every oil, potion, decoction and bomb actually does, with the numbers.

The Witcher 3 Beginner's Guide: Your First 20 Hours
Most people who bounce off The Witcher 3 do it in White Orchard, and it is almost always the same three reasons: they never learned Quen, they never applied an oil, and they treated the skill tree like a shopping list. Here is the fix.

The Witcher 3 Remastered Settings: Bard's Ballad, Loot, Map
Remastered lets you switch off item weight, durability and Geralt's need to breathe underwater, and that is only the Bard's Ballad preset. Here are the new gameplay, interface, accessibility and control options, where each one lives in the menus, which ones stay off until you find them, and what the 19 October Switch 2 patch changed.