A Link to the Past Death Guide: Every Respawn Point
A Game Over in A Link to the Past does not cost you a rupee, a bomb, an arrow or a small key. It costs you position, four escort quests, and a number the credits will read back to you at the end. Here is the whole death routine, read off the code that runs it.
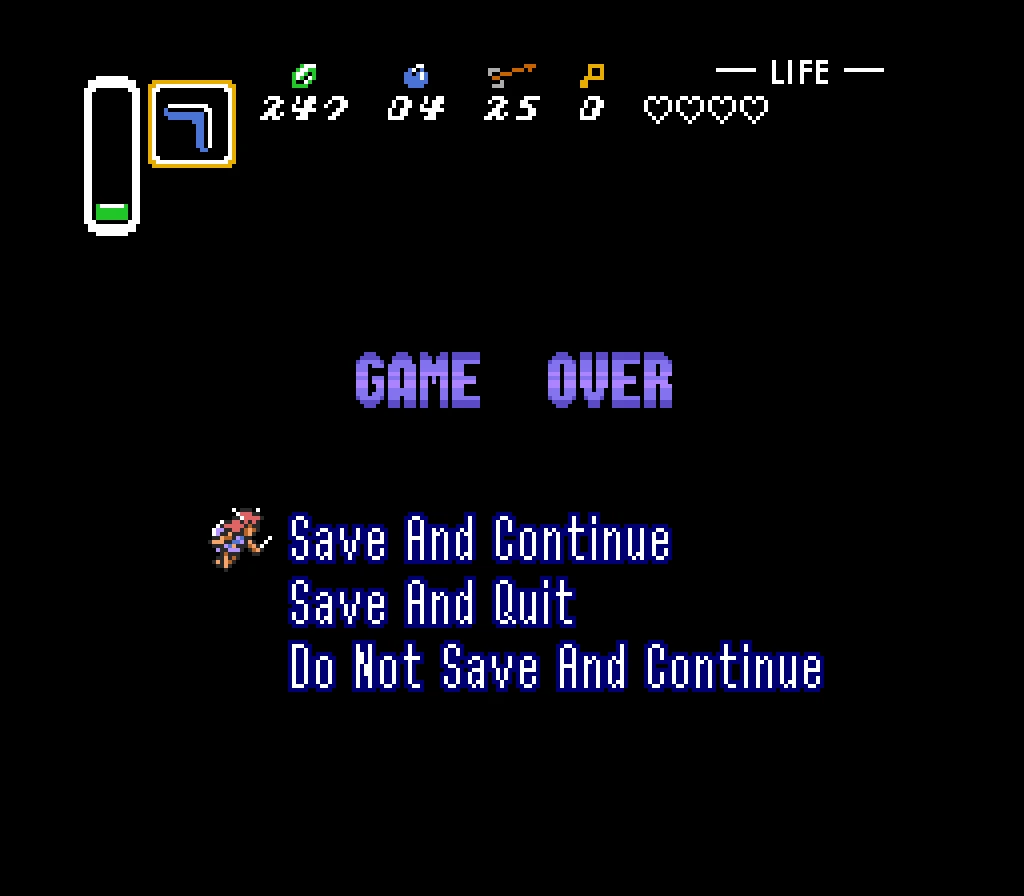
Dying in this game is cheap. Not free — cheap. The routine that runs when your life meter empties does not touch your rupees, your bombs, your arrows, your small keys or a single opened chest. It restores some of your hearts, moves you somewhere specific, and quietly increments a number.
The interesting part is the "somewhere specific". A Link to the Past keeps a byte in save RAM that means where Link starts, seven possible values live in it, and the story keeps rewriting it as you play. That byte is why dying in the sewers puts you somewhere different from dying on Death Mountain, and why the game sometimes stops to ask you where you would like to wake up.
Here is the whole thing, read off the disassembly and the zelda3 decompilation rather than off memory.
The Game Over menu, and what each option writes
The lettering drops, the fountain theme starts, and you get three lines with a fairy for a cursor. Zelda Wiki quotes them in order as Save And Continue, Save And Quit, and Do Not Save And Continue, and the selection code cycles a counter 0 to 2 with left and right, wrapping at both ends.
| Option | Writes your file to SRAM | What happens next |
|---|---|---|
| Save And Continue | Yes | Your file is saved, then you respawn |
| Save And Quit | Yes | Your file is saved, then you go back to the file select |
| Do Not Save And Continue | No | You respawn with everything intact in memory, but the cartridge still holds your last save |
The third option is the one worth understanding. It does not roll you back and it does not undo the death — your inventory and your flags are exactly what they were the instant you died. What it skips is the write. If you pick it and then reset the console, you lose everything since your last actual save. It is not an undo button; it is a do not commit button.
One more wrinkle in the same routine: neither saving option writes anything until you have made story progress. Both save calls sit behind the same gate on the progress indicator being non-zero, so a death in the opening bed-and-storm sequence, before your uncle hands over his sword, never reaches the write at all. On that path the two continue options do not respawn you either — they copy the file back out of SRAM into working memory, which is the game reloading rather than putting you back on your feet.
How many hearts you come back with
You do not come back at full health, and you do not come back at half either. The game indexes a 21-byte table by your heart capacity, and hands you whatever it finds. The disassembly holds it at ROM $4F4AC; the zelda3 decompilation calls it kHealthAfterDeath and carries the identical 21 bytes.
Health in this game is stored in eighths of a heart, so every value in that table divides cleanly:
| Heart containers | Hearts on respawn |
|---|---|
| 3 to 4 | 3 |
| 5 to 6 | 4 |
| 7 to 8 | 5 |
| 9 to 10 | 6 |
| 11 to 13 | 7 |
| 14 to 16 | 8 |
| 17 to 19 | 9 |
| 20 | 10 |
Read the top and the bottom of that table together. At three hearts — the whole opening of the game — a Game Over restores you to full. At a maxed-out twenty, it restores you to exactly half. And there is a dip in between: at nineteen containers you come back with nine hearts, which is less than half, because the table holds 9 flat across 17, 18 and 19 before the single 10 at the cap.
So the death penalty scales against you as you collect. The 24 Pieces of Heart make you harder to kill and simultaneously make each Game Over more expensive in absolute hearts.
The same routine sets your health from that table and does nothing to your magic meter. Whatever magic you had when you died is what you wake up with.
Where the game puts you back
Four rules, checked in this order, decide whether you get a fixed destination or a question.
- Died inside a real dungeon? You respawn at that dungeon's entrance. The check is whether the current palace index is anything other than $FF, so caves, houses and shops do not count as dungeons here — dying in a plain cave sends you back outside instead.
- Died anywhere in the Dark World? You go to the Pyramid. More on that below.
- Not yet delivered Zelda to the Sanctuary? The starting-point byte alone decides, with no prompt. The progress indicator has to have reached 2 — the value the game writes when Zelda finishes speaking to the priest — before the prompt is available at all.
- Anything else? The game shows the start-location prompt.
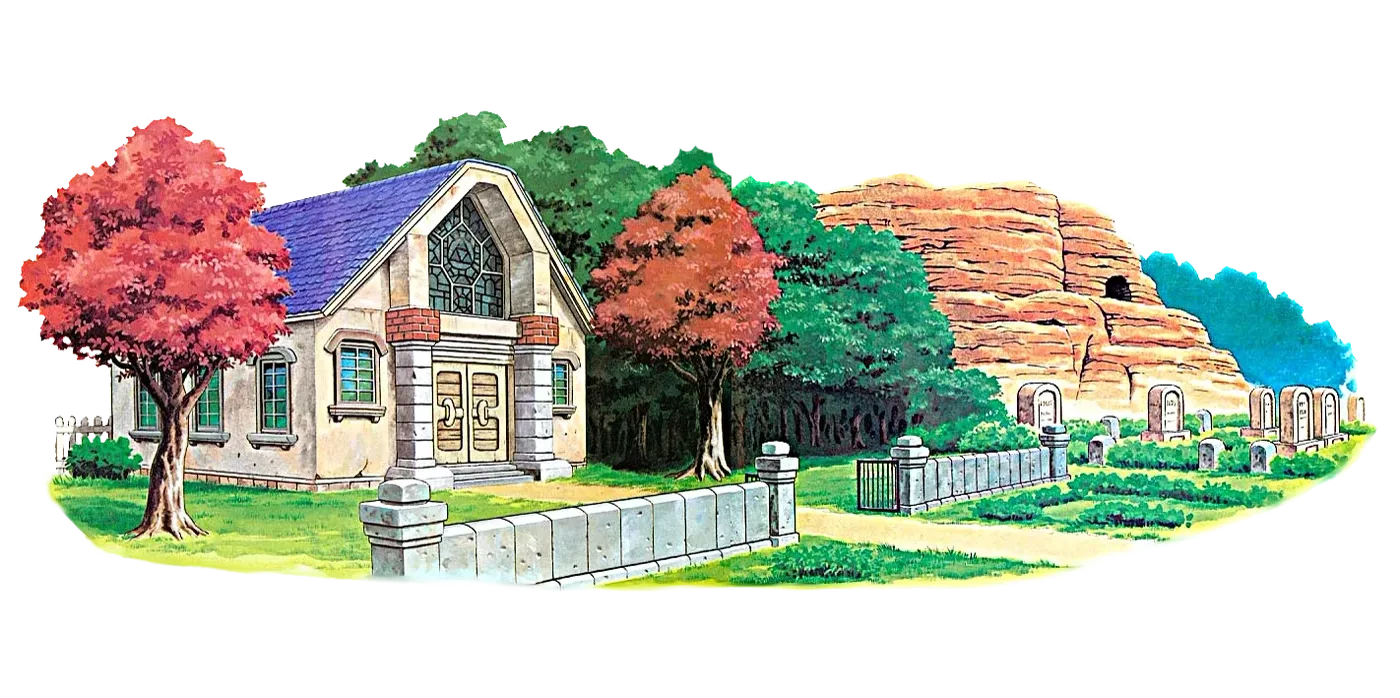
Rule 1 is the one that matters most in practice, and it is more generous than it looks. The routine flushes the current room's state into the save data before it moves you, so opened chests stay open, and the small keys in your hand are copied into that dungeon's own key slot on the way past. Hyrule Castle is special-cased in that copy — its palace index is folded into the Sewers slot rather than getting one of its own. You lose the walk back from the entrance. That is why the death routine leaves the small key economy exactly where it was.
There is one deliberate exception to the prompt, and the disassembly's author annotated it directly. If you die while walking the lost Old Man across Death Mountain, starting-point value 5 is enforced regardless of your progress, and you wake up in the cave where you first met him rather than back at the bottom of the mountain. That is a dedicated respawn room for a two-screen walk.
All seven starting points
The byte at $7EF3C8 holds one of seven values, and each one maps to a room, a set of camera bounds and a music track in a table the dungeon loader reads. The story writes to it at fixed moments:
| Value | Where it puts you | What sets it |
|---|---|---|
| 0 | Link's House | The file's starting state, and the first option in the prompt |
| 1 | The Sanctuary | Zelda speaking to the priest; later, the Old Man handing over the Magic Mirror |
| 2 | Inside Hyrule Castle | Zelda becoming your follower in her cell |
| 3 | The secret passage under the castle garden | Your uncle giving you the sword and shield |
| 4 | Inside Hyrule Castle, past the mantle | Dashing the movable mantle open with Zelda in tow |
| 5 | The cave where you meet the Old Man | The Old Man becoming your follower on Death Mountain |
| 6 | The Mountain Cave | Nothing in the story writes it; it only arrives via the prompt |
Values 2, 3 and 4 exist purely to checkpoint the rescue sequence. Once Zelda is at the Sanctuary the byte lands on 1 and stops moving for the rest of the game, except for the temporary detour to 5 during the Old Man escort.
The prompt itself offers Link's House, the Sanctuary and the Mountain Cave — values 0, 1 and 6, in that order, from a three-byte table. The code picks between two different versions of the prompt message depending on whether you are carrying the Magic Mirror.
Dying in the Dark World means the Pyramid
There is no negotiation here. If the Dark World flag is set when you die outdoors, the death routine overwrites your room index with $20 and sends you there. Zelda Wiki describes the destination as the top of the Pyramid — the landmark the Dark World is laid out around.
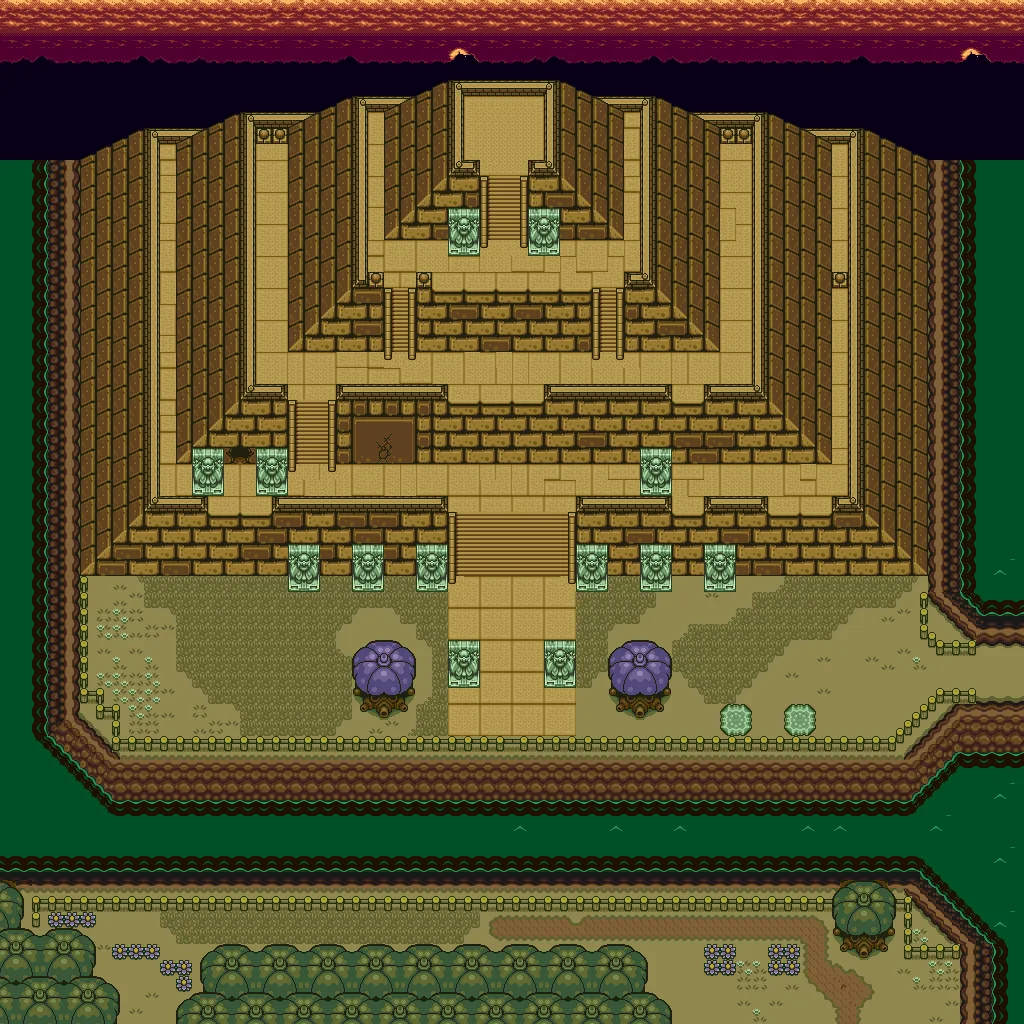
The routine also has a safety hatch for the period before Agahnim goes down. If your progress indicator is below 3 — the value the game sets once you are hunting crystals — dying clears the Dark World flag outright and, if you do not own the Moon Pearl, forces you out of bunny form on the way. Before the crystals, a death cannot leave you stranded on the wrong side of the map in a body that cannot hold a sword.
The four escorts a death cancels
The tagalong byte at $7EF3CC records who is walking behind you. On death the routine compares it against four specific values and zeroes it if it matches any of them. In the original disassembly that is a run of four CMP instructions, and the decompilation lists the same four numbers.
| Tagalong | Value | Survives a Game Over |
|---|---|---|
| Princess Zelda | 1 | Yes |
| The Old Man | 4 | Yes |
| The missing dwarf, Dark World and Light World | 7 and 8 | Yes |
| The Thief's Chest | 12 | Yes |
| The maiden who is really Blind | 6 | No |
| The middle-aged man who opens the chest | 9 | No |
| Kiki the monkey | 10 | No |
| The Super Bomb | 13 | No |
Those bottom four are the real cost of a Game Over, and two of them cost actual rupees. Kiki is the monkey in the Dark Palace grounds: 10 rupees to make him follow, 100 more to make him open the palace door, and Zelda Wiki notes he already abandons you if you so much as take a hit while he is following. The Super Bomb is worse. It is a 100-rupee purchase from the Dark World Bomb Shop, it is carried rather than held in your inventory, and the wall it exists for is the cracked one on the second level of the Pyramid of Power, behind which sit the Master Sword upgrade and the Silver Arrows. A death anywhere on that walk sends you back to the shop with 100 fewer rupees.
The maiden entry is the game's own joke on you. The figure following you through Thieves' Town is Blind wearing her shape, and it is leading him under the patch of light that reveals him — so a death mid-escort simply resets the walk.
A bottled fairy is worth exactly seven hearts
If any of your four bottles holds a fairy when your life meter empties, the death sequence branches before the Game Over lettering finishes. The revival routine sets the heart-refill counter to 56 — and since a heart is 8 units, that is 7 hearts, exactly, no matter how big your life meter is.

Three details the bottles guide does not spell out, all of them consequences of where that branch sits in the sequence:
- The bottles are scanned in order. The routine walks bottle 1 to bottle 4 and takes the first fairy it finds, emptying that bottle. If you are hoarding fairies, the leftmost one goes first.
- You never see the menu. The revival jumps straight past the Game Over options, so no save happens. A fairy revive does not write your file.
- Seven is a fixed number, not a fraction. At twenty hearts a fairy gives you less than a Game Over would have, in exchange for not moving you. At seven containers or fewer it is a full heal that also keeps you where you are standing.
That third point is the one to hold on to at the top end. Going into Ganon's Tower with twenty hearts, the fairy hands back seven where the Game Over menu would have handed back ten — you are trading three hearts for not being teleported to the door. Still the better deal. But it is not a full heal, and the damage numbers that put you on the floor will not have changed while you were down.
The game has been counting
A Game Over adds one to a counter at $7EF403, and the increment happens before the routine reads which of the three options you picked — so all three of them count, including Do Not Save And Continue. The zelda3 port only changes that under an optional bug-fix flag; the original cartridge counts them all.
It is not unconditional, though, and this is the part the counter's reputation gets wrong. The increment sits behind a test on $7EF405, the postgame death total, and only runs while that word still holds the $FFFF it is initialised to. $7EF405 is written once, when you beat the game. After that the running counter is frozen, and dying on a finished file adds nothing to it.
There is a second, stranger set of counters underneath it. The game keeps a per-area death tally in save RAM starting at $7EF3E7, and moves the running counter into the current area's slot when you clear a dungeon boss, plus twice during the Zelda rescue. Zelda Wiki notes that a death count is shown beside the save file once you have finished the game, but the per-area split has one home: the ending credits. That scroll prints fourteen figures off a fourteen-entry table — thirteen of them locations, and the last one the total, which the ending routine builds by summing the tally into $7EF405. The slot the SRAM map calls Hyrule Castle 2 is zeroed before the scroll starts and never printed. Each figure is clamped to 999 on the display.
So the file that has been quietly counting reads the whole ledger back to you over the credits. Which is a very 1991 way to end a game.
Quick Action Checklist
- Pick Save And Continue unless you have a specific reason not to — the other continue option leaves your progress uncommitted on the cartridge.
- Expect half your hearts back at twenty containers, and more than half at any total below fourteen.
- Keep a fairy bottled before any Dark World dungeon: seven hearts and no lost position, at the cost of one bottle slot.
- Fill bottle 1 last if you are storing more than one fairy — the revival routine takes the leftmost one.
- Never carry the Super Bomb, Kiki, the Thieves' Town maiden or the chest-opener through a fight you are not sure of. A death cancels all four.
- Dying in a dungeon is close to free: keys, chests and room state all survive, and you restart at the entrance.
Frequently Asked Questions
What do you lose when you die in A Link to the Past?
How many hearts do you get back after a Game Over in A Link to the Past?
Where do you respawn after dying in A Link to the Past?
How many hearts does a bottled fairy restore in A Link to the Past?
Does Do Not Save And Continue undo a death in A Link to the Past?
Keep Reading
- Zelda Wiki — Game Over, quoting the three A Link to the Past menu lines, the dungeon-entrance respawn, the Link's House / Sanctuary / Mountain Cave choice, the Pyramid respawn in the Dark World, the seven-heart fairy revival, and the death breakdown shown during the credits
- ALttP disassembly — Module_Death: the three-option menu handler, the health-after-death table lookup, the four tagalong values cleared on death, the small keys written back to the dungeon slot, the Dark World override to room $20, and the death-counter increment gated on $7EF405 still holding $FFFF
- ALttP disassembly — Module_LoadGame and Dungeon_LoadStartingPoint: the seven starting-point rooms, the location-menu table of 0/1/6, the Magic Mirror check that picks the prompt message, and the annotation explaining that starting point 5 is enforced for deaths during the Old Man escort
- ALttP disassembly SRAM map — $3C5 progress indicator values, $3C8 starting-entrance values with the Link's House / Sanctuary / Mountain Cave abbreviations, the $3CC tagalong list naming Blind's maiden, the middle-aged man, Kiki and the Super Bomb, the $3E7 per-dungeon death totals, and the $403 running counter versus the $405 postgame total initialised to $FFFF
- zelda3 decompilation — kHealthAfterDeath (the same 21 bytes as the ROM table), Death_Func15, GameOver_SaveAndOrContinue, and GameOver_InitializeRevivalFairy setting the heart filler to 56
- zelda3 decompilation — SavePalaceDeaths, which files the running death counter into the per-area tally at $7EF3E7, and the starting-point loader
- zelda3 decompilation — the credits routine and its fourteen-entry table, printing thirteen per-location death counts plus the total, each clamped to 999, with the Hyrule Castle 2 slot zeroed and skipped
- Zelda Wiki — Kiki, giving the 10-rupee follow fee, the 100-rupee door fee at the Dark Palace, and the note that he abandons Link if Link is hurt while he follows
- Zelda Wiki — Super Bomb, giving the 100-rupee Bomb Shop price, the carried-not-held behaviour, and the cracked wall on the second level of the Pyramid of Power it exists to break
- Zelda Wiki — Blind the Thief, confirming that the Maiden Link escorts in Thieves' Town is Blind in disguise and that the patch of light reveals him
- zelda3 decompilation — the load path that decides between loading a room directly and raising the start-location prompt, including the Dark World branch to room 32
Related Guides

A Link to the Past Crystal Switches: One Byte, Whole Dungeon
A Link to the Past does not track its orange and blue Switch Fence panels room by room. One RAM byte, shared by the entire dungeon, decides whether every crystal switch and every panel in it is up or down — including the ones in rooms you have not opened yet. Here is the exact byte, what it will and will not respond to, and why it resets the second you walk back through the door.
A Link to the Past I-Frames: 58 Frames After a Hit
One byte at $031F runs the mercy window. It gets loaded with 58 after an enemy touches you, and while it is counting down, contact damage, projectile trails, electric shocks, your own bombs and the spike tiles all skip their damage check. Here is what that buys you, and where it quietly runs out.
A Link to the Past Movement Speed: When Dashing Is Slower
A Link to the Past does not simulate movement. It looks it up. One byte picks your speed, the byte divided by sixteen is your pixels per frame, and every surface and every held item swaps the byte for a worse one. Here is the table, and the arithmetic that says the Pegasus Shoes are a loss under four and a half tiles.
A Link to the Past Enemy Drops: All 7 Prize Packs Explained
Zoras pay out bombs on every single kill. Wizzrobes drop hearts. A Keese drops nothing in the Light World and pulls the best table in the game in the Dark World. Here is the entire drop system, out of the ROM.
A Link to the Past Beginner Guide: Your First Ten Hours
A Link to the Past hands you a sword and a rainstorm and then says almost nothing else. Here is the route, the combat, and the item order that turn a confusing first hour into a game you can actually finish.
A Link to the Past Damage Guide: Every Weapon Number and What Your Mail Really Does
The Golden Sword spin attack deals exactly what a Golden Sword swing deals. The Magic Hammer hits as hard as a Tempered Sword. And the Blue Mail does nothing whatsoever about a Beamos. Here are the real numbers, out of the ROM.