ALTTPR Boss Shuffle: Which Bosses Can Land Where
Boss shuffle moves thirteen fights around the A Link to the Past Randomizer and leaves three alone. Here is how Simple, Full and Random deal the bosses, which slots turn which bosses away, what each boss asks for in a sword seed, and how the compass tells you who is waiting.
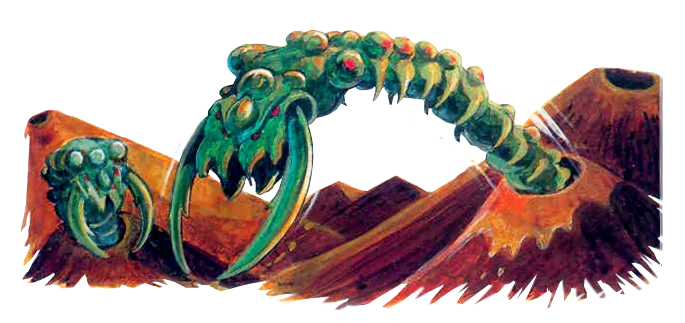
Turn on boss shuffle in the A Link to the Past Randomizer and Trinexx can be waiting at the end of Eastern Palace. None of Eastern Palace's own rules change. Its boss room still wants a bow, a light source and the Big Key. Now it also wants the Fire Rod and the Ice Rod, because Trinexx brings that rule with him.
That is the whole setting in miniature: bosses move, their rules move with them, and each dungeon keeps its own locks. Our ALTTPR beginner guide gives boss shuffle one sentence. This guide covers how the three shuffle modes deal the bosses, which slots turn which bosses away, what each boss asks for in a normal sword seed, and how to find out who is behind the door before you open it.
The sources are the kinds our Inverted, Retro and Swordless guides used: the options page and update notes on alttpr.com, and the generator's source code on GitHub. Boss shuffle adds one more. The generator chooses the bosses itself, then hands its list to a separate program, Enemizer, which rewrites the ROM. The generator downloads a prebuilt Enemizer from a fork of the project, pinned in its composer.json. When this guide says "the logic", it means the No Glitches rules a seed is filled against, in the Open and Standard rule files.
What boss shuffle moves
Thirteen slots are in play. Ten are the dungeon bosses from Eastern Palace to Turtle Rock. The other three are the refights inside Ganon's Tower, which the spoiler log calls Ganons Tower Basement, Middle and Top. In the original game those three hold a second Armos Knights, Lanmolas and Moldorm.
Three fights never move. The options page leaves out both Agahnims and Ganon, and the code backs it up: it assigns the two Agahnim fights after the shuffle has finished, and every slot's placement check refuses Agahnim, his rematch and Ganon.
Two things stay with the dungeon rather than the boss:
- The prize. A dungeon's pendant or crystal is tied to clearing that dungeon, and the logic counts it as cleared when you can reach the boss room and beat whatever is in it.
- The dungeon's own requirements. Big Keys, small keys, light sources and the items the dungeon's rooms demand all stay where they were. There is a table of them further down.
Simple, Full and Random deal the bosses differently
The options page lists four values: None, Simple, Full and Random. Here is what each one puts in the deck.
| Setting | What gets dealt | Repeats | Does every boss appear? |
|---|---|---|---|
| None | The original layout | Armos Knights, Lanmolas and Moldorm twice, as in the original game | Yes |
| Simple | The same 13 bosses the original game uses, in new slots | Armos Knights, Lanmolas and Moldorm twice each | Yes |
| Full | All ten dungeon bosses once, plus a second copy of three bosses picked at random | Three different bosses, twice each | Yes |
| Random | Each slot rolled on its own | Any number | No. Some bosses may not appear at all |
Simple and Full shuffle a 13-card deck and deal it slot by slot. If a slot refuses the boss on top, that boss goes to the bottom of the deck and the next one is tried. The code fills the pickiest slots first: the top of Ganon's Tower, its middle, Tower of Hera and Skull Woods, then the other dungeons, with Ganon's Tower Basement last.
Random works differently. For each slot it draws from the full boss list until it hits a boss that slot accepts, so every allowed boss is equally likely. In a sword seed that is a 1-in-10 chance per boss in an unrestricted slot and 1 in 5 at Tower of Hera.
You may meet the setting without choosing it. The site's Daily Challenge rolls its own settings, and the weights in the generator's config give boss shuffle a 20% chance on any day: Random 10, Simple 5 and Full 5, out of 100. The Beginner preset leaves it off.
Four slots turn bosses away
Most slots take anything. Four do not.
| Slot | Refuses | Can get |
|---|---|---|
| Tower of Hera | Armos Knights, Lanmolas, Arrghus, Blind, Trinexx | Moldorm, Helmasaur King, Mothula, Kholdstare, Vitreous |
| Ganon's Tower Top | Armos Knights, Lanmolas, Arrghus, Blind, Trinexx | Moldorm, Helmasaur King, Mothula, Kholdstare, Vitreous |
| Ganon's Tower Middle | Blind | The other nine |
| Skull Woods | Trinexx | The other nine |
| The other nine slots | Nothing | All ten |
Tower of Hera and the top of Ganon's Tower are the two Moldorm arenas, and Enemizer's own source bars the same five bosses from both. Both files carry a note on Lanmolas; the Tower of Hera one says Lanmolas is "still broken" there and "will spawn on top left after first cycle".
Swordless adds one more rule: Kholdstare stays in Ice Palace and is refused everywhere else, so a Swordless seed deals 12 slots, not 13. Inverted adds none. Its Tower of Hera, Skull Woods and Ganon's Tower rule files are built on the Standard ones, so the same bans apply.
The boss brings its rule with it
The generator keeps one rule per boss, and a dungeon only counts as cleared when that rule passes. Here are the ten shuffled bosses read for a sword seed. How each fight actually plays is in our boss guide; this table is only what the logic accepts.
Magic is counted in bars. Your meter is one bar, Half Magic makes it two, and each bottle adds one more refill of whatever your meter holds, on Normal item functionality. Two bars is Half Magic or one bottle; three is Half Magic and a bottle, or two bottles; four is Half Magic and a bottle, or three bottles. "A bow" means either Progressive Bow, plus the Rupee Quiver on Retro.
| Boss | Advanced placement accepts | Basic placement also wants |
|---|---|---|
| Armos Knights | Any sword, the Hammer, a bow, either Boomerang, the Fire Rod or Ice Rod with four bars, or the Cane of Somaria or Byrna with two | Nothing more |
| Lanmolas | Any sword, the Hammer, a bow, the Fire Rod, the Ice Rod, or the Cane of Somaria or Byrna | Nothing more |
| Moldorm | Any sword or the Hammer | Nothing more |
| Helmasaur King | Any sword or a bow. The rule's mask clause takes bombs or the Hammer, and the logic always counts bombs | The Master Sword or a bow |
| Arrghus | The Hookshot, plus any sword, the Hammer, or the Fire Rod or Ice Rod backed by two bars or a bow | The Master Sword |
| Mothula | Any sword, the Hammer, the Fire Rod or either Cane with two bars, or a Golden Bee | The Master Sword, or the Fire Rod with two bars |
| Blind | Any sword, the Hammer, or either Cane | A sword plus the Cape or the Cane of Byrna |
| Kholdstare | A melt (the Fire Rod, or Bombos with a sword), plus any sword, the Hammer, or the Fire Rod with three bars | The Master Sword, the Fire Rod with three bars, or Bombos, a sword and the Fire Rod with two bars |
| Vitreous | Any sword, the Hammer or a bow | The Master Sword or a bow |
| Trinexx | The Fire Rod and the Ice Rod, plus the Tempered Sword, the Hammer, the Master Sword with two bars, or the Fighter's Sword with four | The Tempered Sword, or the Master Sword with two bars |
The Golden Bee route needs the Bug-Catching Net, a bottle, and either the Pegasus Boots or a sword with Quake. Our bottles guide covers where the bee lives.
Read down the Advanced column and the pattern is plain. Any sword satisfies seven of the ten. The other three each carry an item into whatever dungeon they land in:
- Trinexx wants the Fire Rod and the Ice Rod.
- Arrghus wants the Hookshot.
- Kholdstare wants a melt: the Fire Rod, or Bombos with a sword.
Moldorm takes only a sword or the Hammer. On Basic placement, seven of the ten add a second test on top, most often the Master Sword.
The dungeon keeps its own locks
Moving a boss changes one term in a dungeon's rule. The rest of the boss room's requirements belong to the dungeon. This is what each boss room asks for besides the boss, in the same No Glitches logic:
| Dungeon | Original boss | Boss room asks for, boss aside |
|---|---|---|
| Eastern Palace | Armos Knights | A bow, the Lamp (or the Fire Rod on Advanced), the Big Key |
| Desert Palace | Lanmolas | A glove (or the Mirror from the Mire), the Lamp or Fire Rod, the Big Key, a small key |
| Tower of Hera | Moldorm | The Big Key |
| Palace of Darkness | Helmasaur King | The Hammer, the Lamp, a bow, the Big Key, six small keys |
| Swamp Palace | Arrghus | The Hookshot, the Hammer, a small key |
| Skull Woods | Mothula | The Fire Rod, the Moon Pearl, a sword (not in Swordless), three small keys |
| Thieves' Town | Blind | The Big Key, a small key |
| Ice Palace | Kholdstare | The Hammer, a glove, the Big Key, two small keys (or one and the Cane of Somaria on Advanced) |
| Misery Mire | Vitreous | The Cane of Somaria, the Lamp, the Big Key |
| Turtle Rock | Trinexx | The Cane of Somaria, the Lamp, the Big Key, four small keys |
Getting into each dungeon is a separate rule, and that does not change either. Ice Palace still wants a melt at the door even when Kholdstare is somewhere else.
So a shuffle can add a requirement or take one away. Send Arrghus elsewhere and Swamp Palace still wants the Hookshot, because its own boss-room rule names it. Send Trinexx elsewhere and Turtle Rock no longer needs the Ice Rod: no dungeon or overworld rule in the Open and Standard files mentions the Ice Rod at all, so in a sword seed the only place it is required is wherever Trinexx ends up. On Random, that can be nowhere. Turtle Rock's own rules still name the Fire Rod, but only for the two Roller Room chests.
Ganon's Tower's refights guard seven chests
Ganon's Tower holds 27 item locations, and its three shuffled bosses gate seven of them.
| Refight | What its rule gates |
|---|---|
| Basement | The Big Key Chest and the two Big Key Room chests |
| Middle | The two Mini Helmasaur Room chests, the Pre-Moldorm Chest and the Moldorm Chest |
| Top | The Moldorm Chest, and with it the way to Agahnim's rematch |
The middle and top slots both have to pass for the Moldorm Chest. Since Trinexx is allowed in the Basement and Middle, a shuffled tower can ask for both rods before its Big Key Room or its upper floors. The top slot draws from the same five-boss list as Tower of Hera.
The compass tells you who is waiting
You do not have to walk in blind. The v31.0.10 update notes say boss icons now appear on the dungeon map to show the dungeon's boss, but only once you have that dungeon's compass. The base ROM patch's routine for it reads the first sprite in the dungeon's boss room and matches it against a list of boss IDs, so the icon shows whoever was shuffled in, not whoever lived there in 1991. In the original game the compass already marked where the boss was, as our small keys guide covers. The randomizer makes it say who.
That is worth acting on for the three item-carrying bosses. A Kholdstare icon in a dungeon you planned to clear means bringing the Fire Rod, or Bombos and a sword. If your seed comes with a spoiler log, its Bosses section names all 13 shuffled slots plus both Agahnim fights and Ganon.
Enemy shuffle, damage and health
Boss shuffle goes through Enemizer together with three other settings: enemy shuffle, enemy damage and enemy health. The options page describes what each one does; the code shows what they do to the logic.
Enemy shuffle. Shuffled randomizes enemies with some limits: rooms where you must kill everything never get enemies that need a specific weapon, tile rooms and bush enemies are left alone, and Thieves can be killed. Random also shuffles bush enemies and their spawn chance, scrambles tile-room patterns, and gives Thieves a 50% chance of being killable.
Enemy damage. Shuffled swaps damage between enemy types. The options page's example has Octoroks hitting for eight hearts and Ganon for one, and it says mail upgrades still reduce damage as expected. Random rolls the damage for each mail level separately, so a mail upgrade can make a hit worse.
Enemy health. This is the one that changes the logic. With any setting other than Default, bombs and the Cane of Byrna stop counting as ways to clear a room of enemies. That touches the five Mini Moldorm Cave checks, the Big Key Chest in Desert Palace and the Hyrule Castle checks that ask for a weapon. At the doors of Agahnim's Tower and Misery Mire, where the check expects more enemies and bombs never counted, the Cane of Byrna drops out too. What still counts is a sword, a bow, the Hammer, the Fire Rod or the Cane of Somaria. The v31.0.4 update notes added these checks.
The options page and the Enemizer source disagree on the ranges. The source is build 6.0.32, both in Zarby89's repository and in the fork the generator downloads its Enemizer from, and the two give the same ranges:
| Setting | Options page | Enemizer 6.0.32 source |
|---|---|---|
| Easy | 1 to 4 HP | 1 to 3 HP |
| Hard | 2 to 15 HP | 2 to 24 HP |
| Expert | 2 to 30 HP | 4 to 49 HP |
Bosses are spared either way. The health routine skips a list of sprites that covers every boss on the list above, plus both Agahnim fights and Ganon. The generator also leaves Enemizer's separate boss-health, boss-damage and boss-behaviour randomizers switched off, so boss shuffle moves the fights without changing their health.
The Daily Challenge weights keep all three rare: they give enemy shuffle a 10% chance, enemy damage 7% and enemy health 8%. Everything else we have written about the game is on the A Link to the Past coverage hub.
Quick Action Checklist
- Expect 13 shuffled slots (12 in Swordless). Both Agahnims and Ganon never move.
- Know your mode. Simple uses the original 13 bosses, Full uses all ten plus three random repeats, and Random can repeat or skip any boss.
- Learn the short list for Hera and the top of Ganon's Tower: Moldorm, Helmasaur King, Mothula, Kholdstare and Vitreous.
- Remember the two single bans. No Trinexx in Skull Woods, no Blind in Ganon's Tower Middle.
- Treat the rods, the Hookshot and Bombos as boss keys. Wherever they land, Trinexx needs both rods, Arrghus the Hookshot, and Kholdstare the Fire Rod or Bombos with a sword.
- Do not assume a dungeon got easier. Its own Big Key, keys, light source and items stay put. One exception is Turtle Rock, which stops needing the Ice Rod once Trinexx moves out.
- Grab compasses. A compass puts the shuffled boss's icon on that dungeon's map.
- Bring a real weapon on randomized enemy health. Bombs and the Cane of Byrna stop counting for kill rooms.
Frequently Asked Questions
What does boss shuffle do in the A Link to the Past Randomizer?
What is the difference between Simple, Full and Random boss shuffle in ALTTPR?
Which bosses can appear in Tower of Hera with ALTTPR boss shuffle?
Can Trinexx appear in Skull Woods in ALTTPR?
How do you find out which boss is in a dungeon in ALTTPR?
Does enemy health randomization change boss health in ALTTPR?
Keep Reading
- ALttP VT Randomizer — Game Options: the four Boss Shuffle values (None, Simple, Full, Random) and the Enemy Shuffle, Enemy Damage and Enemy Health descriptions
- ALttP VT Randomizer — Updates: v31.0.10 (boss icons on the dungeon map with the compass) and v31.0.4 (kill-room checks when enemy health is not Default)
- VT randomizer source — placeBosses: the 13 slots filled most restrictive first, the Simple, Full and Random decks, and the two Agahnim fights assigned after the shuffle
- VT randomizer source — the per-boss rules, with their Basic-placement clauses
- VT randomizer source — the default canPlaceBoss check refusing Agahnim, his rematch and Ganon
- VT randomizer source — Tower of Hera: the five refused bosses and the boss-room rule
- VT randomizer source — Skull Woods: Trinexx refused, and the boss-room rule (Fire Rod, Moon Pearl, a sword, three keys)
- VT randomizer source — Ganon's Tower: the top, middle and basement placement checks, the 27 item locations and the chests each refight gates
- VT randomizer source — the Inverted Tower of Hera class extending the Standard one
- VT randomizer source — Eastern Palace boss room: a bow, the Lamp or (Advanced) the Fire Rod, the Big Key
- VT randomizer source — Desert Palace boss room and the Big Key Chest kill check
- VT randomizer source — Palace of Darkness boss room: Hammer, Lamp, a bow, the Big Key, six keys
- VT randomizer source — Swamp Palace boss room: Hookshot, Hammer, a small key
- VT randomizer source — Thieves' Town boss room: the Big Key and a small key
- VT randomizer source — Ice Palace: the melt at the entrance and the boss-room rule
- VT randomizer source — Misery Mire boss room, and the 8-enemy kill check at its entrance
- VT randomizer source — Turtle Rock boss room: Cane of Somaria, Lamp, the Big Key, four keys, and no Ice Rod
- VT randomizer source — the five Mini Moldorm Cave checks and their kill check
- VT randomizer source — Agahnim's Tower entrance and its 8-enemy kill check
- VT randomizer source — the Standard escape checks and canKillEscapeThings
- VT randomizer source — the Open-state Hyrule Castle checks that use canKillMostThings
- VT randomizer source — canExtendMagic, canMeltThings, canGetGoodBee, canBombThings, and canKillMostThings and canKillEscapeThings dropping bombs and the Cane of Byrna when enemy health is not Default
- VT randomizer source — the Enemizer options file: the manual boss list handed to it, the enemy health mapping, killable Thieves, and boss health, damage and behaviour randomization left off
- VT randomizer source — composer.json pinning the prebuilt Enemizer binaries (z3/enemizer_linux and z3/enemizer_osx 6.1.0.180) downloaded from the cassidoxa and tcprescott Enimizer forks
- Enimizer fork at the linux-build-0.1.0 release the generator downloads — build 6.0.32, with the same enemy HP ranges and boss skip list as Zarby89 Enemizer
- VT randomizer source — the spoiler log Bosses section (Ganons Tower Basement, Middle and Top)
- VT randomizer source — the Beginner preset (boss shuffle off) and the Daily Challenge weights
- VT randomizer source — the alttp:dailies command rolling Daily Challenge settings from those weights
- Enemizer source — Tower of Hera disallowed bosses, with the comment that Lanmolas is still broken there
- Enemizer source — the top of Ganon's Tower (the gt-moldorm room) with the same disallowed bosses
- Enemizer source (build 6.0.32) — Randomize_Sprites_HP: the HP ranges per setting and the boss sprites it skips
- Enemizer source — the RandomizeEnemyHPType order (Easy, Medium, Hard, Patty) the generator maps its settings onto
- z3randomizer base ROM patch — DoDungeonMapBossIcon reading the boss room's first sprite and matching it to the boss ID list
- Zelda Wiki — Compass: in A Link to the Past it shows the floor and room of the dungeon boss
- zelda3 decompilation — sprite routine names used to identify the boss sprite IDs on the Enemizer skip list
Related Guides
ALTTPR Swordless Mode: Hammer, Medallion Pads and Ganon
Swordless takes every sword out of the A Link to the Past Randomizer and then rewires the game so a seed can still be finished. The Magic Hammer inherits three of the sword's jobs, medallions only fire on their emblem pads, and Ganon wants the Hammer and the silver arrows. Here is what changes, gate by gate and boss by boss.
ALTTPR Retro Mode: Rupee Arrows, Keys and Take-Any Caves
In Retro every arrow has a price, small keys sit on shop shelves, and five ordinary caves hide an old man with a free gift. Here is what the A Link to the Past Randomizer actually changes, where the quiver is sold, and the shortcut its logic takes with your wallet.
ALTTPR Inverted Mode: What Flips and How to Route It
Inverted starts you in the Dark World and turns the Moon Pearl, the Magic Mirror, the portals and the flute around. Here is what the A Link to the Past Randomizer actually changes, the eleven overworld checks open on an empty inventory, and the routes its logic accepts into the Light World.
A Link to the Past Randomizer: The Beginner Guide to ALTTPR
The randomizer does not change the map, the enemies, or the music. It empties 216 item locations and refills them from a shuffled pool, and suddenly a 1991 game you have beaten nine times is a route-finding puzzle you have never played.
A Link to the Past Beginner Guide: Your First Ten Hours
A Link to the Past hands you a sword and a rainstorm and then says almost nothing else. Here is the route, the combat, and the item order that turn a confusing first hour into a game you can actually finish.
A Link to the Past Damage Guide: Every Weapon Number and What Your Mail Really Does
The Golden Sword spin attack deals exactly what a Golden Sword swing deals. The Magic Hammer hits as hard as a Tempered Sword. And the Blue Mail does nothing whatsoever about a Beamos. Here are the real numbers, out of the ROM.