ALTTPR Swordless Mode: Hammer, Medallion Pads and Ganon
Swordless takes every sword out of the A Link to the Past Randomizer and then rewires the game so a seed can still be finished. The Magic Hammer inherits three of the sword's jobs, medallions only fire on their emblem pads, and Ganon wants the Hammer and the silver arrows. Here is what changes, gate by gate and boss by boss.
A Link to the Past has a swordless speedrun category, and its rules let you leave Ganon alive. The Major Glitches All Dungeons (Swordless) board on speedrun.com says Ganon "does not need to be killed", because killing him without a sword is "not possible". On the original cartridge, that holds up.
The A Link to the Past Randomizer's Swordless mode does not give you that exit. It takes the swords out of the item pool and then patches the game so a seed can still be finished: the Magic Hammer picks up three of the sword's jobs, two curtains start the game already open, and the medallions get pads to stand on. Our ALTTPR beginner guide never reaches the Swords setting, and the Inverted and Retro guides cover world states. Swordless is a weapon setting, so it sits on top of a world state rather than replacing one.
Most of what follows comes from three places, the same kinds those guides used. One is alttpr.com: the options page and the update notes. One is the generator's source code on GitHub, which holds the logic rules a seed is filled against. The last is the base ROM patch the generator applies, which is where the game itself gets changed. When this guide says "the logic", it means those No Glitches rules for the Open and Standard world states. Inverted keeps its own rule files, and its Ganon rule is worded differently, so check it separately.
What Swordless changes
The options page lists four values for the Swords setting: Randomized, Assured, Vanilla and Swordless. Randomized shuffles all four Progressive Swords into the game. Swordless, in the page's words, removes all swords from the game and replaces them with 20 rupees.
| Randomized swords | Swordless | |
|---|---|---|
| Swords | Four Progressive Swords in the item pool | None. Each one becomes a 20-rupee pickup |
| Bows | Two Progressive Bows on the Normal pool; Hard and Expert stop at the plain Bow | Both bows, silver arrows included, on Normal, Hard and Expert |
| Agahnim's Tower door | The Master Sword, or the Cape | The Hammer, or the Cape |
| Curtains in Agahnim's Tower and Skull Woods | Cut with a sword | Already open |
| Ether and Bombos tablets | The Book of Mudora and the Master Sword | The Book of Mudora and the Hammer |
| Medallions | Cast with a sword | Only on their emblem pads: the Misery Mire and Turtle Rock doors, and three pads in Ice Palace |
| Ganon | A Master Sword or better and a fire source, plus silvers and the Tempered Sword on Basic placement | The Hammer, the silver arrows and a fire source, on either placement |
Under the hood, the generator flips one switch in its ROM writer. Swordless turns on three flags in the base patch, one that lets the Hammer hurt Ganon, one that limits medallions to their pads and one that lets the Hammer read tablets, and it pre-opens the two curtains in the starting save data. The same save data writes 0xFF into the sword slot, a value the patch's file-select code labels as swordless.
The item pool changes in two directions. Every sword the pool would have held becomes a 20-rupee pickup. The bows go the other way: the options page says both Progressive Bows are always in the pool, and if a pool would still come up short of silver arrows, the generator adds a Silver Arrows upgrade as a progression item. On Retro, the take-any cave that would hold a sword holds 300 rupees instead.
The Hammer takes over from the sword
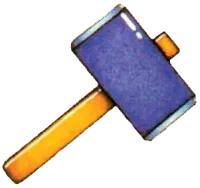
If one item defines a Swordless seed, it is the Magic Hammer. It does three of the sword's jobs outright.
- Agahnim's Tower. The options page says the bat barrier outside the tower can be broken with the Hammer. The logic's entry rule swaps the Master Sword for the Hammer: the Cape or the Hammer, plus something that kills most enemies. The Hammer counts for that second part too, so it opens the door on its own.
- The Ether and Bombos tablets. Both want the Book of Mudora and the Hammer. In the base patch, the tablet check reads the Hammer as if it were the Master Sword. You still have to reach each tablet the usual way. The Ether tablet's rule includes whatever gets you to Tower of Hera, and the Bombos tablet is a Mirror trip from the south Dark World.
- Ganon. The options page says Ganon can be damaged with the Hammer, and the logic will not count him as beatable without it. That gets its own section below.
It also carries a lot of the boss list. Moldorm has no other answer in Swordless, Trinexx needs it on top of both rods, and most of the other bosses list it as one option. Get the Hammer early.
Two curtains start the seed already open
Agahnim's Tower and Skull Woods each have a curtain that would normally need a sword. The options page says both are already open in Swordless. The generator handles it in the starting save data: Swordless calls one routine, documented in the source as setting the curtains open in swordless, and it marks both curtain rooms as already opened before you load the file.
The logic follows suit. In a seed with swords, the rule for Skull Woods' boss asks for a sword on top of the Fire Rod, the Moon Pearl, three small keys and whatever beats the boss. Swordless drops the sword from that list and keeps the rest, so Skull Woods still wants the Fire Rod.
Medallions only work on their pads

The options page sets out the rule. Medallions can only be used to open Misery Mire and Turtle Rock, or to progress through Ice Palace, and they only work where their emblems indicate.
The base patch makes that literal. Its medallion check lets a cast through in five spots:
| Where | What the patch checks |
|---|---|
| The Misery Mire entrance | You are on the entrance trigger, holding the medallion the seed picked for Mire, and the door is not open yet |
| The Turtle Rock entrance | The same, with Turtle Rock's medallion |
| Three rooms in Ice Palace | You are standing on a pad the patch draws with the Bombos emblem. Its comments label the rooms freezor1, freezor2 and kholdstare |
Anywhere else, the patch hands the game your sword slot, which holds no sword, and the cast does not happen. No medallion is a weapon you can fire wherever you like any more.
The medallion each door wants is drawn at random when the seed is generated: one of Ether, Bombos or Quake for Misery Mire, and another draw for Turtle Rock. In Swordless, the logic asks only for that medallion at the door.
Ice Palace is where the pads matter. The logic needs a way to melt things before it lets you into the dungeon: the Fire Rod, or Bombos. In a sword seed, Bombos only counts with a sword. In Swordless it counts on its own, and a comment in the generator says that melt check should only be used where the Bombos pads are. One of the three pads is in Kholdstare's room. With boss shuffle on, Swordless pins Kholdstare to Ice Palace and keeps him out of every other boss slot, including the three in Ganon's Tower.
Agahnim falls to the Hammer or the Net
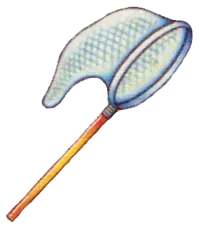
Agahnim's fight is a reflection fight: he throws magic, and you hit it back. Zelda Wiki's Bug Net page says the net can knock his blasts back at him, though Link swings it slower than a Spin Attack, so the timing is tighter.
The logic uses both items. To clear Agahnim's Tower in Swordless, it wants the tower's two small keys, the Lamp, and either the Hammer or the Bug-Catching Net. The second Agahnim, at the top of Ganon's Tower, takes a sword, the Hammer or the Net in every mode.
If the Hammer is late, the Net and the Cape can stand in for it at the first Agahnim. The tower door still wants a weapon the logic trusts against its enemies: the Hammer, a bow, the Fire Rod, the Cane of Somaria, or the Cane of Byrna backed by extra magic. Bombs do not count at this door.
What each boss asks for without a sword
The generator keeps one rule per boss, and with boss shuffle on, a boss takes its rule to whatever dungeon it lands in. Below are all twelve entries in its boss list, read for a Swordless seed, with the two Agahnim fights sharing a row. How each fight actually plays is in our boss guide. This table is only what the generator will accept.
Two notes on the wording. "A bow" means either Progressive Bow; on Retro it also needs the Rupee Quiver. Magic is counted in bars: your meter is one bar, Half Magic makes it two, and each bottle adds one more refill of whatever your meter holds. Two bars is Half Magic or one bottle. Three is Half Magic and a bottle, or two bottles. Four is Half Magic and a bottle, or three bottles. That is on Normal item functionality. On Hard and Expert, the options page has potions refilling 50% and 25% of the meter, and the logic counts bottles for less.
| Boss | What the logic accepts in Swordless | Extra on Basic placement |
|---|---|---|
| Armos Knights | The Hammer, a bow, either Boomerang, the Fire Rod or Ice Rod with four bars, or the Cane of Somaria or Byrna with two | None |
| Lanmolas | The Hammer, a bow, the Fire Rod, the Ice Rod, the Cane of Somaria or the Cane of Byrna | None |
| Moldorm | The Hammer | None |
| Agahnim, both fights | The Hammer or the Bug-Catching Net | None |
| Helmasaur King | A bow, with bombs or the Hammer for the mask | None |
| Arrghus | The Hookshot, plus the Hammer, or the Fire Rod or Ice Rod backed by two bars or a bow | None. The Basic sword clause is waived |
| Mothula | The Hammer; the Fire Rod, Cane of Somaria or Cane of Byrna with two bars; or a Golden Bee | The Fire Rod with two bars |
| Blind | The Hammer, the Cane of Somaria or the Cane of Byrna | None. The Basic sword clause is waived |
| Kholdstare | A melt (the Fire Rod, or Bombos on its pad), plus the Hammer, the Fire Rod with three bars, or the Fire Rod and Bombos with two | The Fire Rod with three bars, or the Fire Rod and Bombos with two |
| Vitreous | The Hammer or a bow | A bow |
| Trinexx | The Fire Rod, the Ice Rod and the Hammer | None. The Basic sword clause is waived |
Three rows deserve a second look. Moldorm takes a sword or the Hammer and nothing else, so in Swordless the Hammer is the whole answer, at Tower of Hera or wherever boss shuffle sends him. Helmasaur King needs a bow on both placements, because his rule's damage clause lists only swords and arrows. And Mothula's Golden Bee route gets narrower: the generator's bee rule wants the Net, a bottle, and either the Pegasus Boots or a sword with Quake, so in Swordless it is the Boots or nothing. Our bottles guide covers where the Golden Bee comes from.
Ganon needs the Hammer, the silvers and a fire source
Start with why the speedrun rule is right about the original game. When Link swings the Hammer, the game's hit check throws the swing away before it reaches any sprite numbered 0xD6 or higher, and Ganon's two sprite entries are 0xD6 and 0xD7. The zelda3 decompilation shows that check line for line.
The randomizer's base patch hooks that exact instruction, under a comment that reads Hammerable Ganon. With that flag set, which Swordless does, the cut-off moves to 0xD8 and Ganon falls inside the range the Hammer can hit. A Hammer hit is then worked out like any other. The decompilation files it under damage class 3, the same class as a Tempered Sword slash, and our damage guide covers that class from the vanilla side.
The logic still wants more than the Hammer. A comment in the generator's world setup reads "In swordless mode silvers are 100% required", and the Ganon rule follows it on both item placements. It asks for:
- The Hammer.
- The silver arrows, meaning both Progressive Bows, or a bow plus the Silver Arrows upgrade.
- The Lamp or the Fire Rod, for the torches. The v31.0.4 update notes record this fire-source requirement being added for Swordless.
- The usual endgame: the Moon Pearl, whatever the goal itself demands (seven crystals on the default Defeat Ganon goal), and Agahnim's second defeat unless the goal is Fast Ganon or Ganonhunt.
That is stricter than a sword seed on Advanced placement, where the Retro guide's Ganon rows show the logic asking for no bow at all. In Swordless, any goal that ends at Ganon needs the silvers.
The pool is built to cover it. Both Progressive Bows are always in it. On Hard and Expert, which stop at the plain Bow in a sword seed, the options page lists silver arrows as the maximum bow in Swordless, and the v31.0.3 notes fixed a bug that left them out of Swordless seeds on Hard-or-harder pools. If you still reach Ganon without them, read his phase-three line. When you lack the silvers, the generator rewrites it to ask whether you found the arrows in a named region, the region where a bow sits, or in "My tower" if that bow is in Ganon's Tower. The v31.2.1 notes are the latest fix to that hint.
Basic placement still checks your health
Basic item placement holds dungeons back until you look ready, and in a sword seed part of looking ready is the sword. Palace of Darkness, Swamp Palace, Skull Woods and Thieves' Town want any sword, plus hearts and a bottle. Ice Palace, Misery Mire, Turtle Rock and Ganon's Tower want the Master Sword, plus more hearts and either two bottles or a mail upgrade.
Swordless deletes the sword half of each of those checks and keeps the rest. The generator still waits on your hearts and bottles before it sends you into the Dark World dungeons on Basic. The boss rules work the same way. Arrghus, Blind and Trinexx lose their Basic sword clauses outright. Mothula, Kholdstare and Vitreous keep a Basic extra, and it becomes the Fire Rod with magic or a bow.
Everything else we have written about the game, including the vanilla item locations a Swordless router still leans on, is on the A Link to the Past coverage hub. The vanilla swordless category and its records are in our speedrun guide.
Quick Action Checklist
- Hunt the Magic Hammer first. It opens Agahnim's Tower, reads both tablets, beats Moldorm and finishes the Trinexx rule, and Ganon's rule names it.
- Use the Cape and the Net if the Hammer is late. The Cape gets you past the barrier as long as you also carry a weapon the logic trusts at the door, and the Net handles Agahnim.
- Bring the Book of Mudora and the Hammer to both tablets.
- Learn the five medallion spots: the Misery Mire door, the Turtle Rock door, and three Bombos pads in Ice Palace. Nowhere else.
- Bring the Fire Rod or Bombos to Ice Palace. Either one gets you in; Bombos only works on its pads.
- Expect Kholdstare in Ice Palace even with boss shuffle on.
- Carry a bow to Helmasaur King. In Swordless his rule wants arrows on both placements.
- Do not walk into Ganon short. The logic wants the Hammer, both bows or a bow plus the silver upgrade, and the Lamp or the Fire Rod.
- Read Ganon's phase-three line if you arrive without silvers. It names a region where a bow sits.
- On Basic, keep your hearts and bottles up. The generator still checks them before the Dark World dungeons.
Frequently Asked Questions
What is Swordless mode in the A Link to the Past Randomizer?
How do you beat Ganon in ALTTPR Swordless?
How do you get into Agahnim's Tower without a sword in ALTTPR?
Where can you use medallions in ALTTPR Swordless?
How do you read the Ether and Bombos tablets in ALTTPR Swordless?
Which bosses need the Hammer in ALTTPR Swordless?
Keep Reading
- speedrun.com API — Major Glitches subcategories: the All Dungeons (Swordless) rules, which ban obtaining a sword and excuse Ganon because he cannot be killed without one
- ALttP VT Randomizer — Game Options: the four Swords values, the Swordless list (swords become 20 rupees, Hammer damages Ganon, both bows in the pool, Hammer breaks the barrier, curtains open, Hammer and Book read the tablets, medallions only on their emblems), the item pool and item functionality tables
- ALttP VT Randomizer — Updates: v31.0.4 (fire source added to the Swordless Ganon rule), v31.0.3 (silver arrows restored to Swordless on Hard-plus pools), v31.2.1 (Ganon silvers hint fix)
- VT randomizer source — swords swapped for 20 rupees and the Silver Arrows top-up in Swordless, Kholdstare pinned to Ice Palace in boss shuffle, the Retro take-any sword becoming 300 rupees, the random medallion per door, and the Ganon phase-three silvers hint
- VT randomizer source — "In swordless mode silvers are 100% required" (requireBetterBow) and the setSwordlessMode call
- VT randomizer source — setSwordlessMode: the Hammer-Ganon, swordless-medallion and Hammer-tablet flags, plus the swordless curtains
- VT randomizer source — starting save data: the sword slot set to 0xFF in Swordless, and setSwordlessCurtains, which marks the Agahnim's Tower and Skull Woods curtain rooms as opened
- VT randomizer source — the twelve boss rules, with their Swordless and Basic-placement clauses
- VT randomizer source — canPlaceBoss refusing Kholdstare outside Ice Palace in Swordless
- VT randomizer source — canMeltThings (Bombos counts without a sword in Swordless, with the comment tying it to the Bombos pads), canExtendMagic, canKillMostThings and canGetGoodBee
- VT randomizer source — Agahnim's Tower entry (Cape or Hammer in Swordless) and completion (two keys, the Lamp, and the Hammer or the Bug-Catching Net)
- VT randomizer source — the Ganon rule: silvers, then the Hammer with the Lamp or the Fire Rod in Swordless, plus the Moon Pearl, crystals and Agahnim 2
- VT randomizer source — the Ether Tablet: Book of Mudora plus the Master Sword, or the Hammer in Swordless, plus Tower of Hera access
- VT randomizer source — the Bombos Tablet: Book of Mudora plus the Master Sword, or the Hammer in Swordless, plus the Mirror from the south Dark World
- VT randomizer source — the Skull Woods boss rule (Fire Rod, three keys, and a sword unless Swordless) and the Basic-placement entry check
- VT randomizer source — Ice Palace entry: a melt, plus the Basic-placement check with its sword clause waived in Swordless
- VT randomizer source — the Misery Mire medallion door, which needs no sword in Swordless
- VT randomizer source — the Turtle Rock medallion door, which needs no sword in Swordless
- VT randomizer source — a Basic-placement dungeon entry check (sword, hearts and a bottle) with the sword clause waived in Swordless
- z3randomizer base ROM patch — the HammerableGanon, AllowSwordlessMedallionUse and AllowHammerTablets flags
- z3randomizer base ROM patch — CheckMedallionSword (the Misery Mire and Turtle Rock triggers and the freezor1, freezor2 and kholdstare pads), CheckTabletSword and CheckGanonHammerDamage (the 0xD6 cut-off moved to 0xD8)
- z3randomizer base ROM patch — the Hammerable Ganon hook on the original hit check, and the Swordless Mode medallion and tablet hooks
- z3randomizer base ROM patch — the three Ice Palace rooms that get a Bombos emblem platform
- z3randomizer base ROM patch — the file-select comment identifying a sword value of 0xFF as swordless
- zelda3 decompilation — Sprite_CheckDamageFromLink ignoring Hammer hits on sprites 0xD6 and up, and Sprite_CalculateSwordDamage filing the Hammer under damage class 3 alongside the Tempered Sword slash
- zelda3 decompilation — the sprite routine table, where Ganon's handler Sprite_D6_Ganon fills the 0xD6 and 0xD7 slots ahead of Sprite_D8_Heart
- Zelda Wiki (Fandom) — Bug Net: in A Link to the Past it can reflect Agahnim's magic blasts back at him, with a slower spin than the Spin Attack
Related Guides
ALTTPR Retro Mode: Rupee Arrows, Keys and Take-Any Caves
In Retro every arrow has a price, small keys sit on shop shelves, and five ordinary caves hide an old man with a free gift. Here is what the A Link to the Past Randomizer actually changes, where the quiver is sold, and the shortcut its logic takes with your wallet.
ALTTPR Inverted Mode: What Flips and How to Route It
Inverted starts you in the Dark World and turns the Moon Pearl, the Magic Mirror, the portals and the flute around. Here is what the A Link to the Past Randomizer actually changes, the eleven overworld checks open on an empty inventory, and the routes its logic accepts into the Light World.
A Link to the Past Randomizer: The Beginner Guide to ALTTPR
The randomizer does not change the map, the enemies, or the music. It empties 216 item locations and refills them from a shuffled pool, and suddenly a 1991 game you have beaten nine times is a route-finding puzzle you have never played.
A Link to the Past Damage Guide: Every Weapon Number and What Your Mail Really Does
The Golden Sword spin attack deals exactly what a Golden Sword swing deals. The Magic Hammer hits as hard as a Tempered Sword. And the Blue Mail does nothing whatsoever about a Beamos. Here are the real numbers, out of the ROM.
A Link to the Past Beginner Guide: Your First Ten Hours
A Link to the Past hands you a sword and a rainstorm and then says almost nothing else. Here is the route, the combat, and the item order that turn a confusing first hour into a game you can actually finish.
A Link to the Past Boss Guide: Every Boss and How to Kill It
A Link to the Past has thirteen boss fights and almost every one is an item check in disguise. Here is what beats each of them — including the one weapon without which Ganon literally cannot die.