ALTTPR Hard and Expert: Item Pool and Functionality
Hard and Expert are two separate settings in the A Link to the Past Randomizer, not one. Item Pool caps what you can keep, Item Functionality changes how items behave, and neither one removes an item from the seed. Here is what each takes away, what the base ROM quietly keeps, and where the logic stops matching what you are holding.
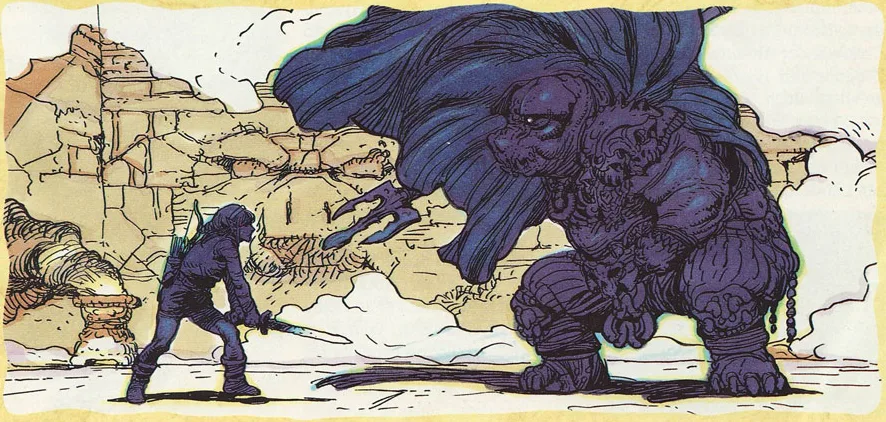
On an Expert seed of the A Link to the Past Randomizer, the most health you can ever have is eight hearts, you never get out of the Green Mail, and on default enemy damage Ganon's body hits for eight hearts in the Green Mail. That is the whole bar, gone in one touch. Most of what Expert does is quieter than that, and a fair amount of it is not on the options page.
Our ALTTPR beginner guide never gets to the Difficulty section of the settings screen, and the Swordless and Retro guides only touch it where it changes their own rules. This guide covers what Hard and Expert take away, what the game quietly keeps, and where the generator's logic stops matching what you are actually holding.
The sources are the same kinds our other ALTTPR guides use: the alttpr.com options page, its update notes and its live settings list; the generator's public source on GitHub; and the base ROM patch the generator applies, z3randomizer, which is where the game itself gets changed. The live site does not run the public source byte for byte, so read code-level details as the public build's behaviour. Entrance-shuffle seeds are built by a separate Python program, as our entrance shuffle guide explains, and this guide does not cover that program's own handling of these settings.
Two settings, not one
The settings screen's Difficulty section has two dropdowns for items, and both offer Normal, Hard and Expert:
- Item Pool decides how far each upgrade goes: health, mail, swords, shields, bows and capacity.
- Item Functionality decides how items behave: potions, the Bug-Catching Net, the Magic Powder, the Cape, the Cane of Byrna, the boomerangs, the Hookshot and the silver arrows.
They used to be a single setting. The v31 update notes record "Difficulty split into Item Pool and Item Functionality", and the two dials can now be set separately. A Normal pool with Hard functionality is a legal seed, and so is the reverse.
On the live site, only one preset turns either dial up. Nightmare sets both to Expert, alongside Swordless, Inverted, Insanity entrance shuffle, Random boss and enemy shuffle and Expert enemy health. Because it uses entrance shuffle, a Nightmare seed comes from the Python program, and the generator-code details below describe seeds without entrance shuffle. Enemy Health also has Hard and Expert values, but it is a different setting; our boss shuffle guide covers it.
Hard and Expert, side by side
These are the options page's own tables. First the item pool:
| Item Pool | Normal | Hard | Expert |
|---|---|---|---|
| Maximum health | 20 | 14 | 8 |
| Heart Containers | 11 | 7 | 3 |
| Pieces of Heart | 24 | 16 | 8 |
| Maximum mail | Red | Green | Green |
| Maximum sword | Gold | Tempered | Master |
| Maximum shield | Mirror | Fire | Fighter's |
| Maximum bow | Silver | Normal | Normal |
| Maximum bow, Swordless | Silver | Silver | Silver |
| Arrow and bomb capacity upgrades | 7 | 0 | 0 |
Then item functionality:
| Item Functionality | Normal | Hard | Expert |
|---|---|---|---|
| Potion magic refill | 100% | 50% | 25% |
| Potion heart refill | 20 | 7 | 4 |
| Bug-Catching Net catches fairies | Yes | No | No |
| Magic Powder on a Bubble gives | Fairy | Heart | Heart |
| Cape magic drain | Normal | 2x | 2x |
| Cane of Byrna makes you invincible | Yes | No | No |
| Boomerangs stun | Yes | No | No |
| Hookshot stuns | Yes | Yes | No |
| Silver arrows work only in Ganon's room | No | Yes | Yes |
The rest of this guide is what those rows mean in play, and what sits behind them.
The seed still holds every item
Here is the part the tables do not say. A Hard or Expert pool does not take items out of the seed. All four Progressive Swords, both Progressive Mails, all three Progressive Shields, both Progressive Bows, ten boss Heart Containers and 24 Pieces of Heart are still placed. The generator writes the caps into the ROM instead.
The base patch handles progressive items when you pick them up. It compares your current sword, shield or mail with the cap, and once you are at the cap it hands you the replacement item, which is 20 rupees. Bows work the same way. Hearts use a separate counting table: on Hard, the seventh boss Heart Container you pick up and every one after it pays 20 rupees, and so does every Piece of Heart after your sixteenth. Expert stops at two and eight. It is whichever ones you pick up first, not particular checks. The one Heart Container in the pool that is not a boss heart is not counted, which is how the options page gets to seven and three.
On a seed with swords in it, that turns this many checks into 20 rupees:
| Item in the seed | Hard | Expert |
|---|---|---|
| Progressive Sword (4) | 1 | 2 |
| Progressive Mail (2) | 2 | 2 |
| Progressive Shield (3) | 1 | 2 |
| Progressive Bow (2) | 1 | 1 |
| Boss Heart Container (10) | 4 | 8 |
| Piece of Heart (24) | 8 | 16 |
| Total | 17 | 31 |
Swordless is the exception for bows. The generator keeps the bow cap at two there, so the silver arrows survive on every pool, and its swords are already 20 rupees.
Fourteen hearts, or eight
The health caps are simple arithmetic. You start with three hearts, each Heart Container adds one and every four Pieces of Heart add one more. Normal is 3 + 11 + 6 = 20, Hard is 3 + 7 + 4 = 14 and Expert is 3 + 3 + 2 = 8.
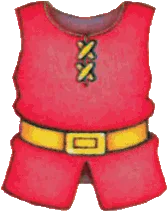
The mail cap is what makes those numbers bite. Both pools stop at the Green Mail, and our damage guide has the table the game uses for hits on Link. We checked the rows that matter against the zelda3 decompilation. On default enemy damage, in the Green Mail:
- Ganon's body hits for eight hearts. Both of his sprite entries use the top damage class. On Expert that is your entire maximum health. On Hard, two touches is 16, two more than you can ever have.
- Four-heart hits come from two classes. One of them covers Wizzrobes, Freezors, Sluggulas, Lynels and the Laser Eyes of Turtle Rock. On Expert, two four-heart hits from full health is all eight hearts.
On Normal, the Red Mail cuts Ganon's touch to three hearts, and the four-heart class above to one (the other four-heart class only drops to two). On Hard and Expert, the Red Mail is one of the checks paying out 20 rupees.
Ganon goes down to the sword
The Maximum Bow row says Normal for both pools: in a seed with swords, there are no silver arrows on Hard or Expert. The first Progressive Bow gives you the Bow, and the second pays 20 rupees.
That does not make Ganon unbeatable. It makes him a sword fight. The ALttP Speedrunning Wiki's damage tables, whose damage values match the zelda3 decompilation's, give Ganon zero damage from the Fighter's Sword and from Master Sword slashes, 4 from a Master Sword spin attack or a Tempered Sword slash, and 8 from a Tempered Sword spin. His last phase has 96 HP, and in that phase both torches in the room have to be lit before he can be hurt.
| Pool | Best sword | Last phase without silver arrows |
|---|---|---|
| Hard | Tempered Sword | 24 slashes, or 12 spin attacks |
| Expert | Master Sword | 24 spin attacks; plain slashes do nothing |
The logic agrees, as long as you are on Advanced item placement. The public source's Ganon rule for the Open and Standard world states asks for no bow at all on Advanced: the Master Sword plus the Lamp, or the Master Sword plus the Fire Rod with enough magic. Our speedrun guide covers the same silverless kill from the vanilla side. Basic placement is different, and it gets its own section further down.
When the silver arrows are missing, Ganon's third-phase line normally names where a bow is. The v31.0.4 notes say that on the Hard, Expert and Crowd Control pools, that hint instead tells you the silver arrows were never obtainable.
Shields and the Laser Bridge
Hard stops at the Fire Shield, the second of three. Expert stops at the Fighter's Shield. Neither pool lets you keep the Mirror Shield, which Zelda Wiki describes as able to stop beams such as the Laser Eyes'.
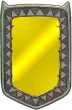
The logic knows about this one. On Basic placement, the four Eye Bridge chests on Turtle Rock's Laser Bridge ask for the Cape, the Cane of Byrna or a laser-blocking shield, and the public source only counts the shield when the pool's shield cap is three. On Hard and Expert, the bridge is the Cape or Byrna. Advanced placement asks for none of them.
Expert also changes one shop. The Dark World shop that sells the Red Shield, the generator's name for the Fire Shield, for 500 rupees loses it: the generator puts a 20-rupee pickup in that slot. The v31.0.11 notes say shops now account for the Hard pool and stop you buying shields it does not allow.
No capacity upgrades at all
On a Normal pool, the Capacity Upgrade fairy at Lake Hylia sells seven bomb upgrades and seven arrow upgrades at 100 rupees each, and the logic expects the Flippers to reach her. On Hard and Expert, the generator empties that shop. You play the whole seed at the starting capacity, which the base patch sets at 10 bombs and 30 arrows, the same as the original game.
That is a change from older builds. The v30.3 notes had Hard selling two +5 upgrades and one +10 at 200 rupees each. The current options page and the public source both give Hard none, so a guide that mentions the 200-rupee upgrades is describing v30.3. Retro on a Hard or Expert pool also loses 15 small keys instead of 10; our Retro guide covers the rest of that mode.
Potions, fairies and the drop tables

Item Functionality is where the sustain goes:
- Potions refill less. A Red Potion restores 7 hearts on Hard and 4 on Expert. A Green Potion restores half the magic meter on Hard and a quarter on Expert. A Blue Potion does both. On Expert, a Red Potion still refills half of your maximum health.
- The net cannot catch fairies. Bees can still be caught. When the generator fills a bottle at random, Hard and Expert remove the fairy from the list of possible contents.
- The Magic Powder turns a Bubble into a heart, not a fairy.
- The drop tables lose their fairy and their full magic refills. This one is not on the options page. When the generator writes the drop tables, it swaps every fairy for a heart and every full magic refill for a small one. That covers the seven prize packs and a handful of fixed prizes, among them the pull trees, the fish you save and the drop from an enemy killed while stunned. The v30 update notes say the same about the prize packs: "Hard+ mode no longer has Fairies or Full magic's available in the prize packs."
Add those up and there is no way left to carry a fairy. On Normal, a bottled fairy revives you for seven hearts when your life meter empties, as our death guide and bottles guide explain. On Hard and Expert functionality, a bottle is a potion or a bee.
The Cape and Byrna, except in four rooms
The headline changes are blunt. The Cape drains magic twice as fast. In the ROM, its timer goes from one point every 4 frames to one every 2, or from 8 to 4 with Half Magic. By the arithmetic in our magic guide, a full meter lasts about four seconds instead of about eight and a half. The Cane of Byrna still circles you and still costs the same magic, but it stops making you invincible.
Then the base patch makes an exception. Its hard-mode code checks which room you are in, and in four rooms it keeps both items at their normal behaviour:
| Room | Byrna in Hard or Expert | Cape in Hard or Expert |
|---|---|---|
| The spike room in Ice Palace | Still makes you invincible | Normal drain |
| The spike room in Misery Mire | Still makes you invincible | Normal drain |
| The Laser Bridge in Turtle Rock | Still makes you invincible | Normal drain |
| The Spike Cave on Dark World Death Mountain | Still makes you invincible | Normal drain |
The code's comments name three of those rooms and call the fourth only "Room in Misery Mire". We matched its room number to the Mire spike room using the door data in the Door Randomizer's source. The exception is old: the VT8.26 update notes gave the Spike Cave and the Mire spike room normal Cape and Byrna magic use, and VT8.27 added "default magic usage" for the Ice Palace spike room, the Turtle Rock laser bridge and Blind's room. Blind's room survives in today's patch only in Byrna's magic-cost check, and the current generator writes the same Byrna cost inside and outside those rooms, so it changes nothing.
These rooms matter because the logic sends you through them with these items. The Spike Cave chest, which holds the Cane of Byrna in the original game, needs the Moon Pearl, the Hammer and a glove, plus either the Cane of Byrna on its own or the Cape with two bars of magic. With Byrna's protection gone, that first option would mean walking spikes unprotected. The room exception keeps it working. One quirk in the public source: the Spike Cave check counts your magic without the Hard or Expert potion discount, unlike the boss and Ganon checks in the next section.
Stuns and silver arrows
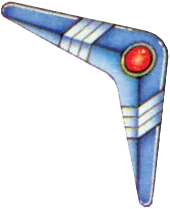
Hard functionality stops both boomerangs stunning enemies. Expert stops the Hookshot as well. In the base patch both run through one flag byte, with one bit for the Hookshot and one for the boomerangs. Hard sets only the Hookshot bit and Expert sets neither.
The silver arrow row only matters when the pool has silver arrows to give: Hard or Expert functionality on a Normal pool, or on a Swordless seed. On those seeds, the silver arrows only work in Ganon's room. Two fixes in the update notes cover this: v31.0.5 stopped the silver arrows being equipped as soon as you picked them up on Hard and Expert functionality, and v31.2.1 fixed a bow-tracking bug that kept them from working on Ganon with Expert functionality.
How the logic counts your magic
The generator counts magic in bars. Your meter is one bar, Half Magic makes it two, and each bottle adds a refill of whatever the meter holds. Our boss shuffle and Swordless guides use the same convention for Normal functionality. On Hard and Expert, the public source scales each bottle by the potion's magic refill, so a bottle counts as half a refill on Hard and a quarter on Expert. Four bottles is the most the pool holds.
| The logic asks for | Normal | Hard | Expert |
|---|---|---|---|
| 2 bars | Half Magic, or 1 bottle | Half Magic, or 2 bottles | Half Magic, or 4 bottles |
| 3 bars | Half Magic and 1 bottle, or 2 bottles | Half Magic and 1 bottle, or 4 bottles | Half Magic and 2 bottles |
| 4 bars | Half Magic and 1 bottle, or 3 bottles | Half Magic and 2 bottles | Half Magic and 4 bottles |
Three places this changes a route:
- Ganon's torches. With the Master Sword, the logic accepts the Fire Rod in place of the Lamp only with three bars. On Expert functionality without Half Magic you can never reach three, so the logic needs the Lamp. With the Tempered Sword it asks for two bars.
- Armos Knights with a rod. The Fire Rod or Ice Rod counts with four bars. Hard and Expert never reach four without Half Magic, so until you find it, the rods stop counting against Armos Knights.
- Kholdstare on Basic placement. Without the Master Sword, the Fire Rod route asks for three bars, or two with Bombos as well. On Expert, three bars means Half Magic and two bottles.
What the logic does not know
The potion discount and the Laser Bridge shield rule show the logic reading these settings. The caps from the item pool are a different story. The logic counts the items you have picked up. It does not know the base ROM has turned some of them into 20 rupees.
On Advanced placement that hardly matters. When the generator places progression items, it only counts on other progression items, and on Advanced only two of the four swords are progression, which fits inside even Expert's cap. No rule on Advanced reads your hearts or your mail. Both Progressive Bows are progression items, but outside Swordless no Advanced rule in the public source asks for the silver arrows.
Basic placement adds the mail, a third sword and the rest of the hearts to the progression pool, and its rules lean on them. In the public source:
- Ganon wants the silver arrows and the Tempered Sword. On Hard and Expert the second bow pays rupees, and on Expert so does the third sword. You can still win with the sword, as above, but that is not the route the logic counted.
- Ice Palace, Misery Mire, Turtle Rock and Ganon's Tower want the Master Sword, 12 hearts (your starting three count, because the generator treats them as three boss Heart Containers you already hold), and two bottles or a mail upgrade. Hard can reach 12 real hearts, but the logic adds up heart items, so it can pass the check while some of those items paid out rupees. Expert tops out at eight, so on Expert this check can only pass by counting heart items that paid out rupees. On both pools it may count a mail upgrade you never got.
- Palace of Darkness, Swamp Palace, Skull Woods and Thieves' Town want a sword, 7 hearts counted the same way and a bottle. Both pools can reach seven real hearts, but here too the count can include heart items that paid out rupees.
The items these checks count are all in the world, so you can still pass them. What changes is what passing them means: on Hard and Expert, Basic's promise to wait until you look ready is measured in heart items, not hearts.
The dropdown has a fourth option, Crowd Control. The options page does not document it. In the public source it removes the Bug-Catching Net, Half Magic, the Cane of Byrna and the Cape from the pool. It caps you at the Blue Mail, no shield, the plain Bow, one boss Heart Container and 20 Pieces of Heart, and leaves swords and item functionality alone. The randomizer page forces Advanced placement with it, and picking an entrance shuffle switches it to Expert.
Everything else we have written about the game is on the A Link to the Past coverage hub. For the vanilla drop tables these settings rewrite, see the enemy drops guide.
Quick Action Checklist
- Set the two dials on purpose. Item Pool caps what you keep; Item Functionality changes how items behave. Nightmare is the only live preset that touches either, and it is a Swordless, entrance-shuffle seed.
- Count the 20-rupee checks. On a seed with swords, Hard turns 17 of the seed's items into rupees and Expert turns 31, so the spoiler log lists swords, mail and hearts you will never benefit from.
- Plan the Ganon fight around the sword. No silver arrows on Hard or Expert unless the seed is Swordless: 24 Tempered slashes or 24 Master Sword spins in his last phase.
- Respect Ganon's touch. On default enemy damage it is eight hearts in the Green Mail, which is all of Expert's health.
- Bring the Lamp on Expert functionality. With the Master Sword and no Half Magic, the logic will not light Ganon's torches with the Fire Rod.
- Don't plan around fairies. No net catches, no prize-pack fairies, no fairy from a powdered Bubble.
- Use the Cape and Byrna where the ROM still helps. Both keep their normal behaviour in the Ice Palace and Misery Mire spike rooms, the Laser Bridge and the Spike Cave.
- On Basic placement, read health checks as item counts. On Hard and Expert they can pass on heart items that paid out rupees.
Frequently Asked Questions
What is the difference between Item Pool and Item Functionality in ALTTPR?
What does the Hard item pool remove in ALTTPR?
Can you beat Ganon without silver arrows on ALTTPR Hard or Expert?
Does the Cane of Byrna still protect you on ALTTPR Hard?
Can you get fairies on ALTTPR Hard or Expert?
How much do potions heal on ALTTPR Hard and Expert?
Keep Reading
- A Link to the Past coverage hub
- ALTTPR beginner guide
- ALTTPR Swordless mode guide
- ALTTPR Retro mode guide
- ALTTPR boss shuffle guide
- ALTTPR entrance shuffle guide
- A Link to the Past damage guide
- A Link to the Past speedrun guide
- A Link to the Past magic guide
- A Link to the Past death guide
- A Link to the Past bottles guide
- A Link to the Past enemy drops guide
- ALttP VT Randomizer — Game Options: the Item Pool table (health, containers, pieces, mail, sword, shield, bow, capacity upgrades) and the Item Functionality table, plus the Retro key removal on Hard and Expert
- ALttP VT Randomizer — Updates: v31 (Difficulty split into Item Pool and Item Functionality), v31.0.4 (Ganon silver-arrow hint on Hard, Expert and Crowd Control pools), v31.0.5 (silvers no longer equipped on pickup), v31.0.11 (shops respect the Hard pool), v31.2.1 (Expert functionality bow fix), v30.3 (old Hard capacity upgrades), v30 (no prize-pack fairies or full magic), VT8.29 (Byrna protection), VT8.27 and VT8.26 (room magic exceptions)
- ALttP VT Randomizer — live settings list: Item Pool and Item Functionality options and the Nightmare preset
- VT randomizer source — World.php: the per-pool caps, the per-functionality ROM values (Cape timers, Byrna, potion fills, fairies, stuns, silvers), the 20-rupee replacements, the bottle-contents list and the drop-table fairy and full-magic swap
- VT randomizer source — Randomizer.php: the three pre-collected boss Heart Containers that stand for your starting hearts, progression vs nice items by placement, the emptied Capacity Upgrade shop, the Expert Red Shield swap and the Ganon silver-arrow hint
- VT randomizer source — ItemCollection.php: magic bars scaled by potion refill, laser-blocking shields and health counting
- VT randomizer source — the Open and Standard Ganon rule (no bow on Advanced; silvers and the Tempered Sword on Basic)
- VT randomizer source — Turtle Rock: the Laser Bridge chests and the shield-cap check
- VT randomizer source — the Spike Cave rule
- VT randomizer source — Misery Mire: the Basic-placement sword, health, bottle and mail check
- VT randomizer source — boss rules, including the magic-bar requirements for Armos Knights and Kholdstare
- VT randomizer source — the assumed fill: progression items placed by logic, nice items placed afterwards
- z3randomizer base patch — hardmode.asm: the four rooms that keep Byrna invincibility and normal Cape drain, and the Hookshot and boomerang stun flag
- z3randomizer base patch — newitems.asm: progressive item caps and the item substitution counter
- z3randomizer base patch — tables.asm: the cap, replacement, potion refill, stun and silver-arrow settings
- z3randomizer base patch — initsramtable.asm: starting capacity of 10 bombs and 30 arrows
- ALttP Door Randomizer — Doors.py: room 0xB3 is the Misery Mire spike room
- zelda3 decompilation — sprite.c: Ganon's bump damage class and the damage-to-Link table by mail
- ALttP Speedrunning Wiki — Ganon: contact damage by mail, the 96 HP last phase and the torches
- ALttP Speedrunning Wiki — sprite damage table: Ganon's damage from each sword class and the silver arrows
- Zelda Wiki — Mirror Shield: stops beams such as those fired by Laser Eyes
Related Guides
ALTTPR Entrance Shuffle: What Each Setting Moves
Entrance shuffle rewires the doors, caves and holes of the A Link to the Past Randomizer and leaves the screen edges alone. Here is what each of the five settings mixes, what never moves, why Ganon's Tower and the Pyramid are always in play, and how the hints change to help you find your way.
ALTTPR Boss Shuffle: Which Bosses Can Land Where
Boss shuffle moves thirteen fights around the A Link to the Past Randomizer and leaves three alone. Here is how Simple, Full and Random deal the bosses, which slots turn which bosses away, what each boss asks for in a sword seed, and how the compass tells you who is waiting.
ALTTPR Swordless Mode: Hammer, Medallion Pads and Ganon
Swordless takes every sword out of the A Link to the Past Randomizer and then rewires the game so a seed can still be finished. The Magic Hammer inherits three of the sword's jobs, medallions only fire on their emblem pads, and Ganon wants the Hammer and the silver arrows. Here is what changes, gate by gate and boss by boss.
ALTTPR Retro Mode: Rupee Arrows, Keys and Take-Any Caves
In Retro every arrow has a price, small keys sit on shop shelves, and five ordinary caves hide an old man with a free gift. Here is what the A Link to the Past Randomizer actually changes, where the quiver is sold, and the shortcut its logic takes with your wallet.
A Link to the Past Beginner Guide: Your First Ten Hours
A Link to the Past hands you a sword and a rainstorm and then says almost nothing else. Here is the route, the combat, and the item order that turn a confusing first hour into a game you can actually finish.
ALTTPR Inverted Mode: What Flips and How to Route It
Inverted starts you in the Dark World and turns the Moon Pearl, the Magic Mirror, the portals and the flute around. Here is what the A Link to the Past Randomizer actually changes, the eleven overworld checks open on an empty inventory, and the routes its logic accepts into the Light World.