Ocarina of Time Jabu-Jabu's Belly Walkthrough: Every Room
Inside Jabu-Jabu's Belly is the third dungeon in Ocarina of Time and the odd one out: no map-and-compass hunt for its own sake, and an escort mission where the person you're escorting can drown. Here is how to actually get in (it takes a diving contest and a message in a bottle), the full route through the Fork in the Guts, the Big Octo fight, and every phase of the Barinade boss fight, including the scripted invulnerability window partway through.
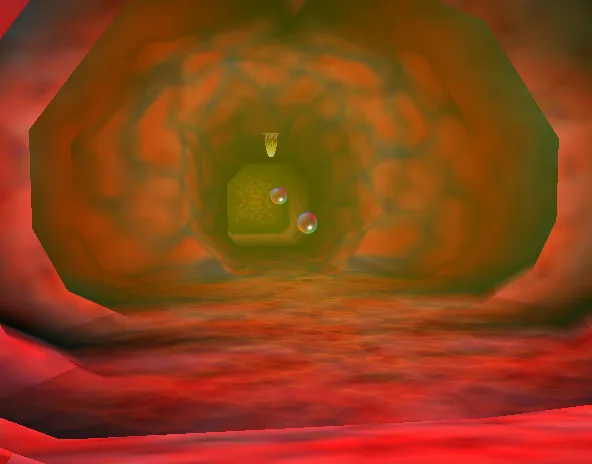
Every dungeon in Ocarina of Time up to this point has been a straightforward lock-and-key exercise. Jabu-Jabu's Belly breaks the pattern before you even reach the door: you don't walk in, you get swallowed, and the "key" is a fish in a bottle. Once inside, the dungeon runs an escort quest through Princess Ruto: several doors and chests are gated specifically by her weight, or by leaving her behind, not by anything Link can do alone.
It's also short by the standards of what comes after it — three treasure chests total, no Small Key, no Boss Key. Barinade, the boss, is a genuine three-phase fight with a scripted invulnerability window partway through — it isn't a missed hit, it's the fight working as designed. Here's the whole route, plus the fight in full.
Jabu-Jabu's Belly at a glance
| Location | Zora's Fountain, inside Lord Jabu-Jabu himself |
| Age | Child Link only — the Boomerang can't be used as an adult |
| Entry requirement | Silver Scale (Diving Game), Ruto's letter, and a bottled Fish |
| Mini-boss | Big Octo |
| Boss | Barinade, "Bio-electric Anemone" |
| Dungeon item | Boomerang |
| Reward | Zora's Sapphire (Spiritual Stone of Water), Heart Container |
| Also inside | Dungeon Map, Compass, 4 Gold Skulltulas |
| Small Keys / Boss Key | None of either |
That last row matters because this dungeon genuinely has no keys of any kind — Zelda Wiki's item list for the whole dungeon names only the Boomerang and four Golden Skull Tokens. Every locked door in here opens to a switch, a Pressure Plate, or a cleared room instead.
Getting in: a diving contest and a message in a bottle
You don't just walk up to Lord Jabu-Jabu. Getting inside takes three separate steps, done in order, at Zora's Domain and Lake Hylia:
- Win the Diving Game at Zora's Domain — collect every Blue Rupee underwater before the timer runs out. The reward is the Silver Scale, which takes Link's dive depth from 3 meters to 6. Zelda Wiki states this outright: the Silver Scale "is required to enter Inside Jabu-Jabu's Belly," because the next step is out of reach without it.
- Dive to the bottom of Lake Hylia via the shortcut down from Zora's Domain. Sitting on the lakebed is a bottle with a letter inside, signed by Princess Ruto, saying she's been swallowed by Jabu-Jabu and needs rescuing.
- Show the letter to King Zora, who's been blocking the path to Zora's Fountain. He reads it, grants passage, and tells you to keep the bottle it came in. That's the bottle you use next; you don't need to already own a spare Empty Bottle for this.
With that bottle, scoop up a small Fish from the pond in Zora's Domain (or buy one for 200 Rupees at the Zora Shop or the Kakariko Medicine Shop if you'd rather not fish for it). Carry the bottled Fish to Zora's Fountain and drop it in front of Lord Jabu-Jabu. He swallows the fish, and you along with it.
The Entrance and the Elevator Room
The Entrance is Jabu-Jabu's mouth: a short hall with a small pool. A barrier of organic tissue blocks the way forward until you hit a switch hanging from the ceiling with your Slingshot, which retracts it and opens into the Elevator Room.
The Elevator Room is the dungeon's hub, spanning both Floor 1 and Basement 1 and named for the organic elevator that connects them. From the Entrance, it branches three more ways: north toward a room full of Yuck Holes, east toward the Boss Arena (blocked for now), and west — which you can't reach at all until you ride the elevator up from deep inside Basement 1 much later. On the Basement 1 side, a side chamber across a pool holds a Business Scrub selling five Deku Nuts for 20 Rupees.
Finding Ruto in the Yuck Hole room
North of the Elevator Room is a chamber pocked with Yuck Holes — sinkholes that drop you a floor. This is where you meet Princess Ruto, mid-tantrum: she denies asking for help, orders you to leave, then promptly walks into a Yuck Hole and falls to Basement 1 by accident. Drop through the easternmost Yuck Hole yourself to follow her down.
On Basement 1, Ruto explains what's actually going on — she lost her Spiritual Stone of Water somewhere inside Jabu-Jabu and won't leave without it — and, still complaining, agrees to let Link carry her while she searches. From here, carry her back up through the Elevator Room (via the elevator on the Basement 1 side) and into the Yuck Hole room again, then head north into the Fork in the Guts.
The Fork in the Guts: three tentacles, three chests
The Fork in the Guts is a six-way junction, and every branch off it is gated by either Ruto's weight or her absence:
- East room: the floor switch here needs Link and Ruto's combined weight to press — Navi even flags it as too heavy for Link alone. Clear the room's enemies and a chest opens holding the Boomerang.
- West room: the opposite trick — a Pressure Plate that only stays down if you leave Ruto behind on it while you go in alone. Inside is the Red Tail, one of three color-coded Parasitic Tentacles infesting the dungeon; kill it and a chest holds the Dungeon Map. Its death also clears the Red Slimy Things blocking the fork's two northern branches.
- Northwest room: a 40-second timed room full of Shaboms. Kill every one before the clock runs out or you get knocked back to the start of the room with a Heart of damage (and Ruto resets to the Yuck Hole room). Clear it in time and the chest holds the Compass.
- Northeast room: the Blue Tentacle. Killing it clears the Blue Slimy Thing blocking the fork's north branch. No chest here.
- North room: the Green Tentacle, guarded by a swarm of Biri. Clearing it is what actually matters — it's the last thing standing between you and the rest of Basement 1.
Kill the Red, Blue and Green Tentacles in that order (their color-matched Slimy Things are what's physically blocking your path, so there's no skipping ahead) and carry Ruto back down the westernmost Yuck Hole in the room above. That drops you into a new stretch of Basement 1 you haven't seen yet.
The Big Octo fight and the Zora's Sapphire
West of the Yuck Hole drop is a chamber with a raised central platform. Throw Ruto up onto it. She spots her Spiritual Stone of Water sitting there and grabs it — and the platform immediately rises, carrying her up out of sight. It then descends again, and this time it's carrying the mini-boss: Big Octo.
Big Octo circles the platform's edge, and the fight is a chase: run the same circle it does until you're on its tail, then hit it with the Boomerang to stun it and spin it around, exposing its only weak point on its back. Get a hit in before it recovers and starts moving again. (If you're playing the original N64 cartridge rather than the 3DS remake, a jump-slash with a Deku Stick does enough damage to end the fight in one hit — worth knowing if you're stick-farming beforehand.)
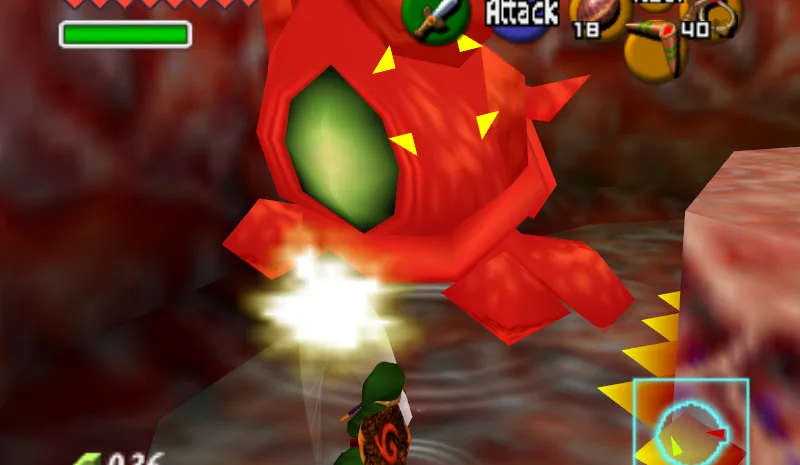
Beating Big Octo lowers the room's large organic elevator. Ride it up — this is your route to Floor 1's previously-inaccessible western branch, and from here on you're heading for the boss.
Back through Floor 1 to the Boss Arena
The elevator surfaces in a room with three Pots for a quick top-off. South of it is a chamber with two Jigglies — stun them to use as stepping stones across to the east side, then head back through the door to reach a ledge overlooking the Elevator Room from above.
Jump onto that ledge and it lowers permanently, creating a bridge to the room on the Elevator Room's east side — the one leading to the Boss Arena. That room has two ramps down into a shallow central pool, with a webbed wall you can climb to a translucent membrane near the ceiling. Behind it is a switch hanging from above; hit it with the Boomerang to dissolve the organic barrier blocking the Boss Arena door.
Barinade: all three phases of the fight
Barinade is a parasite that has rooted itself into Jabu-Jabu's own digestive tract, and the fight runs in three distinct phases.
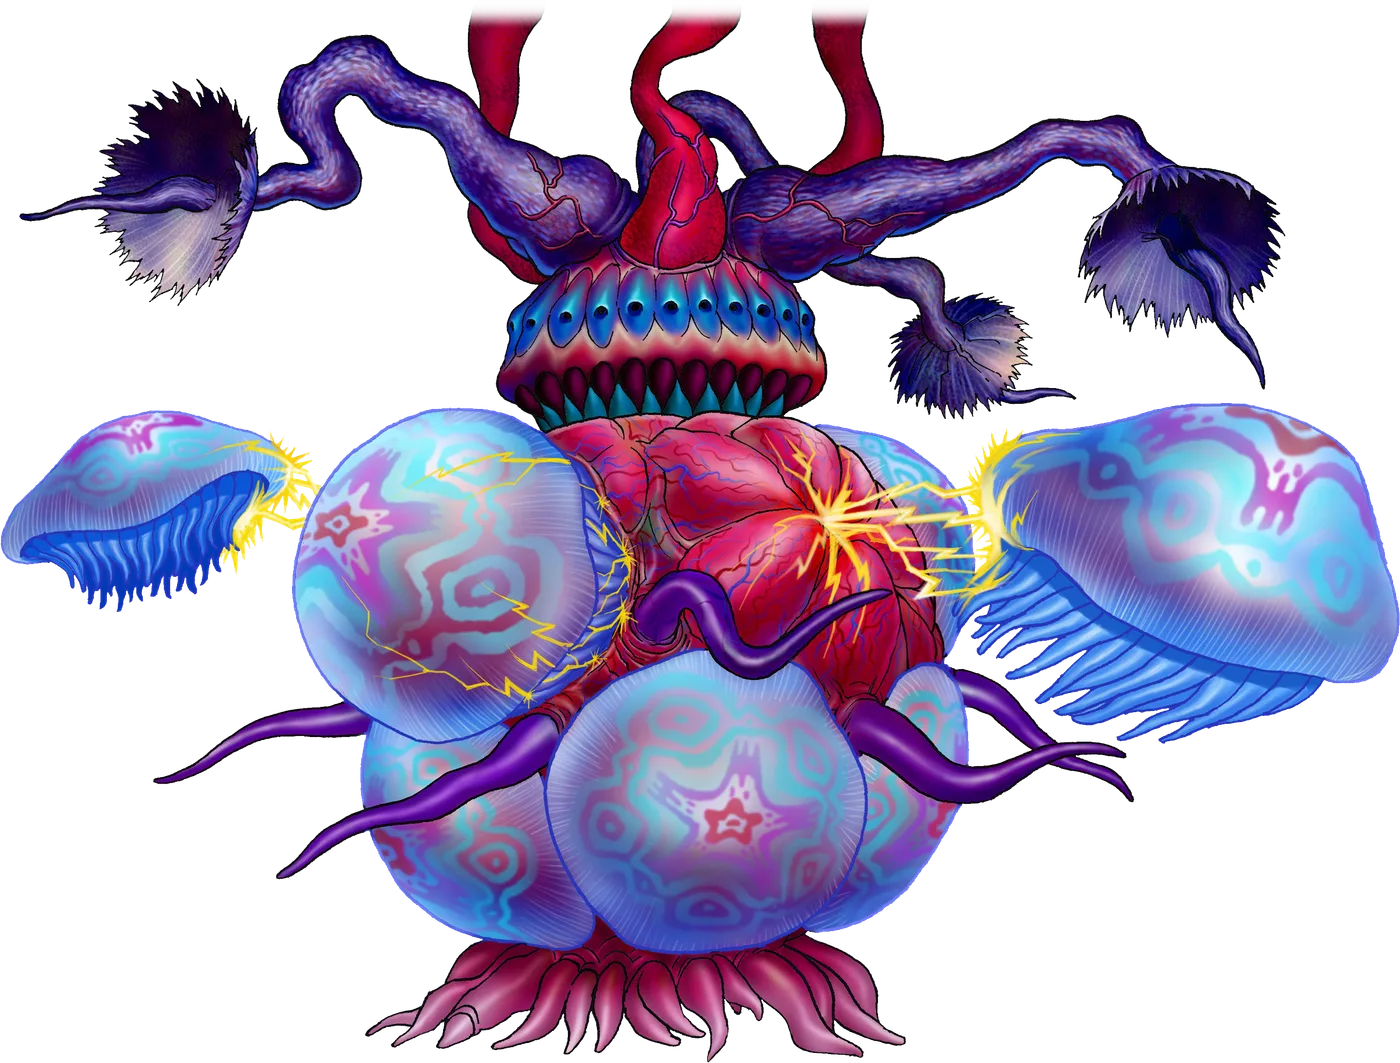
Phase 1 — cut it loose. Barinade hangs from the ceiling by three tendrils. In the 3DS remake they're color-matched to the Blue, Green and Red Tentacles you already killed in the Fork in the Guts; on the original N64 cartridge all three tendrils are simply red, so don't expect the color cue there. Boomerang each one to sever it.
Phase 2 — ten Bari, in two waves of five. With its tendrils cut, Barinade channels electricity through its tentacles and flings five of its ten shielding Bari out around the room in a spinning pattern. While they're loose, Boomerang or Deku Nut them to destroy them (they don't split into Biri the way normal Bari do), or hit Barinade's now-exposed body directly with the Boomerang to stun it. Either one opens a window — go in with the Kokiri Sword while it's stunned. After that exchange, Barinade regroups its remaining Bari into a tight ring and charges around the room trying to body-check you with the shield; it alternates between powering the shield (untouchable) and focusing fire on you directly (Bari vulnerable again). Repeat until all ten Bari are gone.
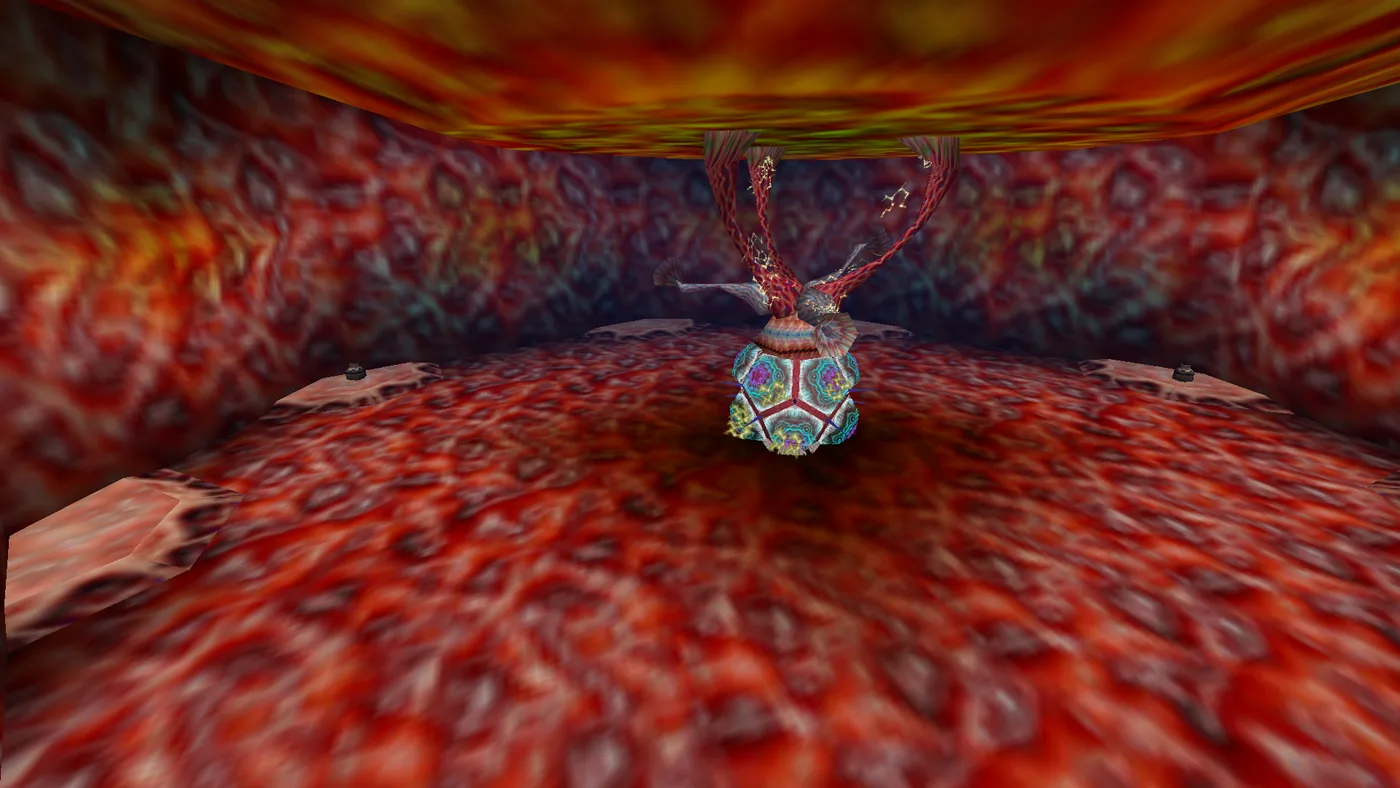
Phase 3 — the spin, the stun, and the burrow. With no Bari left, Barinade spins around the arena with its body fully exposed, firing electricity as it goes. Boomerang it mid-spin to knock it down. While grounded it's still shooting arcs at you but is open to sword hits — get damage in. Eventually it burrows into the floor to recover, briefly invulnerable while its tentacles keep attacking; this is not a bug and not a missed hit, it's a scripted recovery phase, so back off and dodge rather than wasting swings on it. It resurfaces and resumes spinning. Enough cumulative damage across these cycles and Barinade grows fleshy welts and explodes, leaving a Heart Container behind.
Ruto is waiting by a blue warp point nearby — mildly annoyed you took so long — and stepping into it hands you the Zora's Sapphire, the third Spiritual Stone.
Every chest, in one table
| Chest | Contents | Where |
|---|---|---|
| Fork in the Guts | Boomerang | East room, after clearing enemies with the switch pressed by Link and Ruto's combined weight |
| Fork in the Guts | Dungeon Map | West room, after killing the Red Tail |
| Fork in the Guts | Compass | Northwest room, after clearing the 40-second Shabom room in time |
Three chests, full stop — this dungeon does not hide extra loot behind side puzzles the way Dodongo's Cavern or the Deku Tree do. What you see in the Fork in the Guts is everything.
All four Gold Skulltulas
| # | Area | How to reach it |
|---|---|---|
| 1 | Floor 1 | Along the webbed wall in the room east of the Elevator Room — reachable once the bridge from the western branch lowers, after Big Octo |
| 2 | Basement 1 | Above a ledge along the northern wall in the room directly beneath the Yuck Holes |
| 3 | Basement 1 | Above the high ledge along the northwestern wall in that same room beneath the Yuck Holes |
| 4 | Basement 1 | Along the webbed wall beside the pool, in the eastern hall off the Elevator Room's Basement 1 side |
All four are reachable on your first run through as a child — nothing here needs a hookshot-class item or a return trip, which puts Jabu-Jabu's Belly in a smaller group than Dodongo's Cavern, where two of five tokens are locked out until you're an adult.
What changes in Master Quest
Master Quest doesn't just re-skin this dungeon, it changes what Ruto is for. Per Zelda Wiki's summary: she's needed to hit only a single switch, instead of gating half the route the way she does in the normal version. Beyond that:
- Ceiling switches shaped like uvulas are replaced with cow-head switches mounted on walls.
- Lizalfos and Like Likes are added to several rooms; Business Scrubs are removed entirely.
- The Parasitic Tentacles are spread more evenly through the dungeon and appear in larger numbers.
- One optional room hides invisible Keese guarding an extra Gold Skulltula; a second optional room, with only three Tailpasarans, hides another.
- The Dungeon Map, Compass and Boomerang chests swap rooms and arrive earlier — the room that held the Boomerang in the standard version now holds the Compass, and vice versa.
- Bombchus get used for entirely new puzzles that don't exist in the normal quest.
Quick Action Checklist
- Win the Diving Game at Zora's Domain for the Silver Scale before you try to enter — without it you physically can't reach the letter at the bottom of Lake Hylia.
- Show Ruto's letter to King Zora — he keeps the letter and hands you the empty bottle it came in.
- Bottle a Fish from the Zora's Domain pond (or buy one for 200 Rupees) and drop it in front of Lord Jabu-Jabu to get swallowed.
- In the Fork in the Guts, clear the Red, Blue and Green Tentacle rooms — in the 3DS remake, their colors match the tendrils holding Barinade to the ceiling later (all three tendrils are red on the original N64 cartridge).
- Throw Ruto onto the central platform in the western Basement 1 room to trigger the Big Octo fight.
- Boomerang Big Octo's circling body to stun and spin it, then hit the exposed weak point on its back.
- Against Barinade: cut the three tendrils, clear both waves of five Bari, then stun its exposed spin with the Boomerang and sword it while it's down — the burrow phase is scripted invulnerability, not a missed hit.
- All four Gold Skulltulas are reachable as a child on your first pass; there's no reason to plan a return trip like there is for Dodongo's Cavern.
Frequently Asked Questions
How do you get into Inside Jabu-Jabu's Belly in Ocarina of Time?
How do you beat Big Octo inside Jabu-Jabu's Belly?
How many Gold Skulltulas are in Jabu-Jabu's Belly?
Where is the Boomerang in Ocarina of Time?
How do you beat Barinade in Ocarina of Time?
Are there Small Keys or a Boss Key in Jabu-Jabu's Belly?
Keep Reading
- Zelda Wiki — Inside Jabu-Jabu's Belly: dungeon overview, item list, and the Master Quest summary of changes
- Zelda Wiki — Entrance: the ceiling switch and Master Quest Cow layout
- Zelda Wiki — Floor 1: the Fork in the Guts branches, all three normal-quest chests, and the post-Big Octo western route to the Boss Arena
- Zelda Wiki — Basement 1: the Yuck Hole room, the Big Octo chamber, and all three of that floor's Gold Skulltula locations
- Zelda Wiki — Fork in the Guts: the combined-weight switch, the Pressure Plate, and the three Parasitic Tentacle rooms
- Zelda Wiki — Boss Arena: where Barinade is fought and Ruto's warp point out
- Zelda Wiki — Barinade: the full three-phase fight, the ten-Bari shield mechanic, and the burrow recovery phase
- Zelda Wiki — Big Octo: the circling chase pattern, the back weak point, and the N64 one-hit Deku Stick kill
- Zelda Wiki — Silver Scale: the Diving Game reward that is required to enter Inside Jabu-Jabu's Belly
- Zelda Wiki — Princess Ruto: the letter-in-a-bottle setup at Lake Hylia and her role inside the dungeon
Related Guides
Ocarina of Time Ice Cavern Walkthrough: Every Room
Skip the Ice Cavern and the Water Temple becomes uncrossable — the Iron Boots live nowhere else in the game. It's also a genuinely strange dungeon: per Zelda Wiki, it's tied with the Gerudo Training Ground as the smallest in Ocarina of Time, and every room but the mini-boss chamber connects by open hallway instead of a door. Here's the room-by-room route: the Ice Scythe hub and its five Silver Rupees, all three Gold Skulltulas, the White Wolfos fight, and the underwater shortcut on the way out.
Ocarina of Time Dodongo's Cavern Walkthrough: Every Room
Dodongo's Cavern is one enormous lock with a giant dead Dodongo for a keyhole, and the entire dungeon is you gathering the means to open its mouth. Here is the route through the Entrance, Eastern, Western and Northern Rooms, every chest, the Bomb Bag, all five Gold Skulltulas — two of which child Link cannot reach on the way through — and the King Dodongo fight.
Ocarina of Time Deku Tree Walkthrough: Every Room
Inside the Deku Tree is the first dungeon in Ocarina of Time and the game's own tutorial, teaching doors, vines and switches in about twenty minutes. It is also easy to half-explore, because several of its rewards sit behind puzzle steps the game never spells out. Here is every chest, all four Gold Skulltulas (one of which needs an item you don't have yet), and the fastest way through Gohma.
Ocarina of Time Bottom of the Well: Lens of Truth Guide
The Lens of Truth sits at the bottom of a Kakariko well that is full of water for the entire first act. Here is how you empty it: the time loop that unlocks the well, the six-step run to the Lens chest, and the ten other things buried down there.
Ocarina of Time Dungeon Order: The Full Route, Explained
Ocarina of Time looks like an open adventure and plays like a corridor. Eight required dungeons, three side dungeons, and exactly one place where the game genuinely lets you pick. Here is the whole route with the reasons behind each lock.
Ocarina of Time Ganon's Castle: All 6 Barrier Trials
Ganon's Castle is six short dungeons wrapped around one locked spindle, and the Medallions you spent the whole game collecting are not what opens it. Here is what each barrier room actually asks for, the one trial that has to come first, and the climb to the organ.