Ocarina of Time Ganon's Castle: All 6 Barrier Trials
Ganon's Castle is six short dungeons wrapped around one locked spindle, and the Medallions you spent the whole game collecting are not what opens it. Here is what each barrier room actually asks for, the one trial that has to come first, and the climb to the organ.
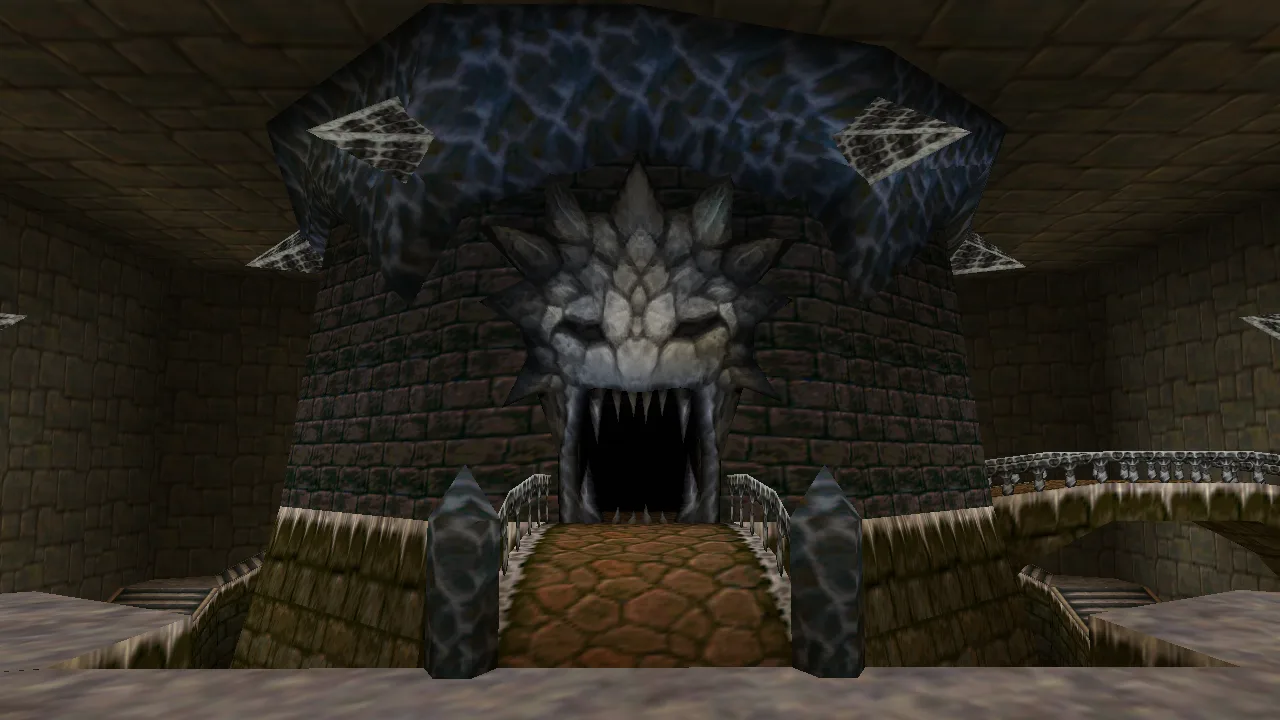
Every other dungeon in Ocarina of Time hands you a new item and then asks you to use it. Ganon's Castle does the opposite. It hands you almost nothing and asks for everything you already own — the Hover Boots, the Iron Boots, the Longshot, the Megaton Hammer, the Lens of Truth, the Mirror Shield, Din's Fire, Fire Arrows and a bottle. It is a final exam with six question papers.
The shape of it is deceptively simple: one round room, six doors, a sealed spindle in the middle. Here is what is actually behind each door, the ordering constraint the game never tells you about, and where the Boss Key hides.
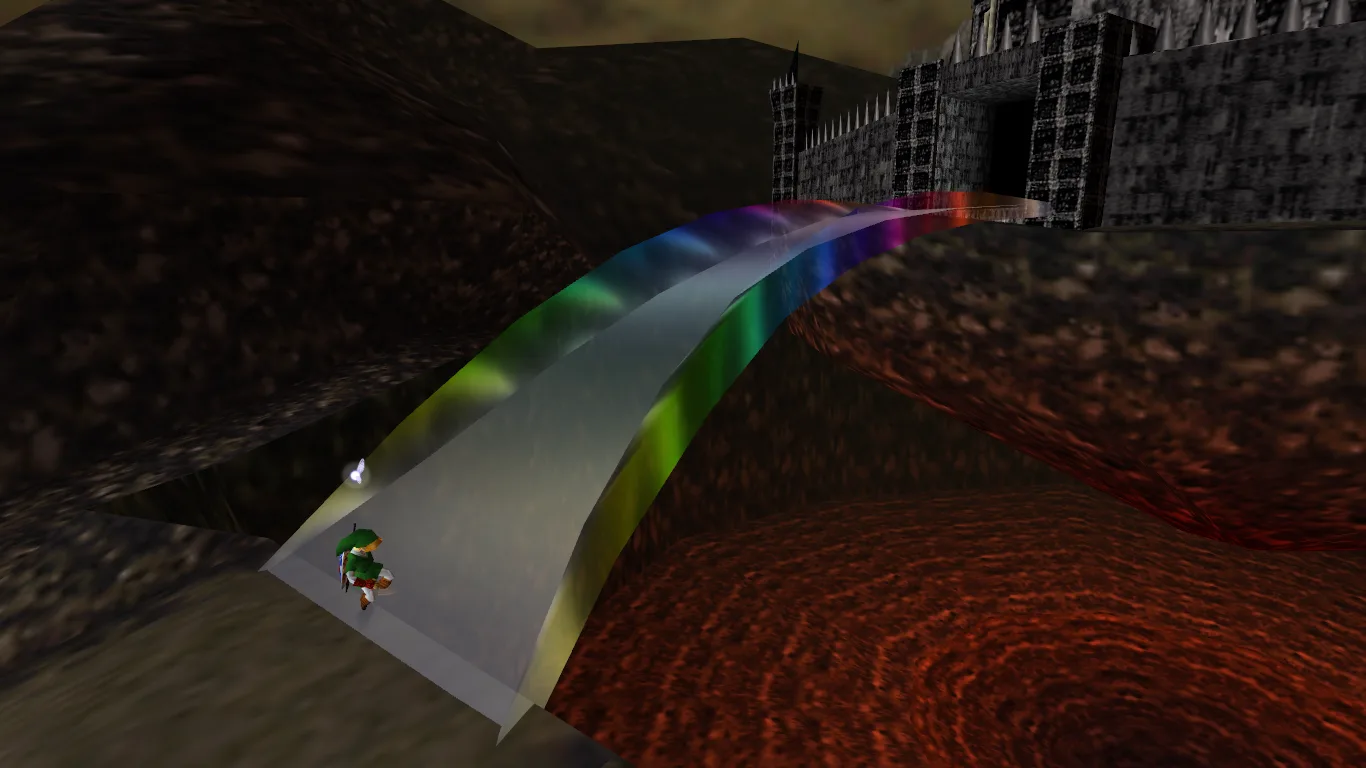
Ganon's Castle at a glance
| Detail | What it is |
|---|---|
| Location | Where Hyrule Castle stood, over a lake of lava |
| Entry requirement | All six Sages awakened; the Sages conjure the Rainbow Bridge |
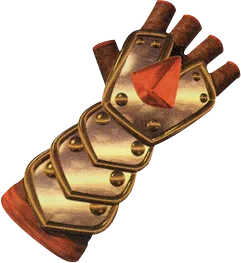
| Dungeon item | Golden Gauntlets |
| Small Keys | Two in the original, both in the Light route |
| Boss Key | A chest inside Ganon's Tower, not in any barrier room |
| Bosses | Ganondorf, then Ganon |
| Escape timer | Three minutes after Ganondorf falls |
Zelda Wiki's infobox lists exactly one dungeon item for the whole castle: the Golden Gauntlets. Everything else the castle asks for, you walked in carrying.
The Medallions are the label, not the key
Rauru's line when you reach the gates is "the castle's keep, which is known as Ganon's Tower, is protected by six evil barriers. Bring down the six barriers, and save Princess Zelda!" — and the six Medallions do not bring them down.
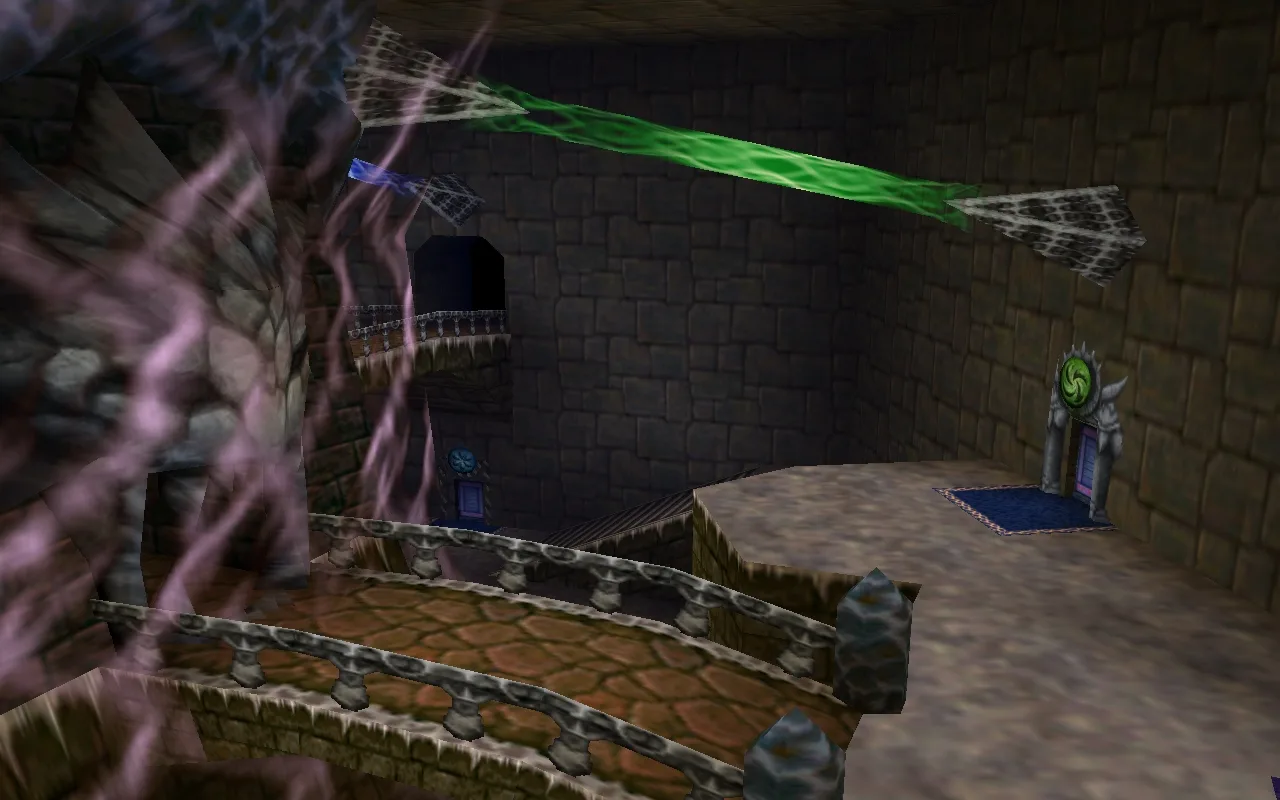
What the Medallions do is two things. They awaken the six Sages, and the Sages are what conjure the Rainbow Bridge that lets you reach the front door at all. And each Medallion's emblem is carved above one of the six doors, telling you which route is which. That is the whole job.
The thing that actually dispels a barrier is a Light Arrow. Zelda Wiki's page for the Fire Barrier states it plainly: it "can be dispelled by shooting a Light Arrow into its main body at the end of the Fire Room." Fandom's Zelda Wiki says the same for all six — "at the end of each room lies the source of the barrier's energy, requiring Light Arrows to destroy them" — and Thonky's walkthrough puts it in route terms: reach the end of each area, shoot the orb with a Light Arrow, and after all six orbs are gone the seal around the central spindle disappears.
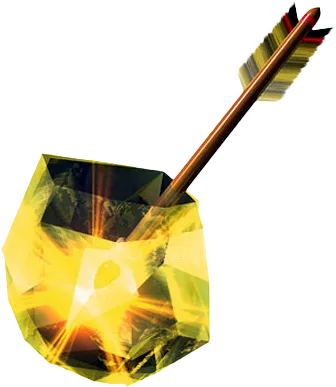
Zelda hands you the Light Arrows in the Temple of Time once every Sage is awake, so you will always have them by the time you cross the bridge. Two practical notes on them, both from Zelda Wiki's Light Arrow page:
- Zelda Wiki lists them as required to remove the seal on the castle's upper levels.
- Fired at an ordinary enemy they deal no more damage than a plain arrow — but an ordinary enemy killed with one drops 50 Rupees. That is a wallet, not a strategy, and it is a real reason not to spend your last arrows on Keese.
You need at least six arrows to leave the castle, one per barrier, plus whatever Ganondorf costs you. The Horseback Archery Range prize that pushes your quiver to 50 is worth exactly this much and no more.
The order is not free: Shadow goes first
The six doors open in any order you like — with one hard dependency running through them.
The Golden Gauntlets sit in a chest at the end of the Shadow route. Two of the other five routes need them:
- The Fire route has a Monolith in it. You lift and throw it, and it becomes the platform you stand on to reach a Silver Rupee. No Gauntlets, no rupee, no open door.
- The Light route's entrance is blocked by a second Monolith. You cannot even get in the door.
Zelda Wiki's Monolith page enumerates the set: there are three Monoliths in Hyrule, one inside the Fire trial, one blocking the Light trial, and one covering the Great Fairy of Courage's fountain on the road outside. All three want Golden Gauntlets.
So the real routing is Shadow, then everything else. Thonky's walkthrough gives the same advice for the same reason.
What each barrier actually wants
Two of the six routes are named after an element they do not use. Zelda Wiki explains why: the Forest and Water barriers are built around wind and ice rather than forest and water, because in the game's development the corresponding temples were wind- and ice-themed. The Water rooms are essentially a compressed Ice Cavern. The Forest Room is a leftover from a build in which the Forest Medallion was the Wind Medallion — the prototype text is documented on The Cutting Room Floor.
| Barrier | What it actually is | Gated by | What it hands you |
|---|---|---|---|
| Shadow | Disappearing blocks and invisible walkways over a chasm | Lens of Truth, Fire Arrows, Megaton Hammer, Longshot | Golden Gauntlets |
| Forest | Wind: Silver Rupees over bottomless pits, ringed by fans | Hover Boots, Iron Boots, Song of Time, Din's Fire, Fire Arrows | Nothing |
| Water | Ice: a timed sliding-block puzzle and red ice | An empty bottle for Blue Fire, Megaton Hammer | Nothing |
| Fire | Silver Rupees across a lava room on collapsing platforms | Goron Tunic, Hover Boots, Golden Gauntlets, Longshot | Nothing |
| Light | Illusions: fake chests, a timed rupee room, a fake barrier room | Golden Gauntlets, Lens of Truth, Zelda's Lullaby, Longshot | Two Small Keys |
| Spirit | Blade traps, a Bombchu switch, a light-beam puzzle | Bombs, Fire Arrows, Mirror Shield, Longshot (Bombchus are supplied inside) | Nothing |
Zelda Wiki lists the six counterclockwise as Forest, Water, Shadow, Fire, Light, Spirit. That is their physical arrangement around the room, not a recommended order.
Shadow: invisible paths and the Golden Gauntlets
The chest immediately on your left holds a Blue Rupee, which is the castle's running joke about chests. Past a Green Bubble and a Like Like, you light a torch with a Fire Arrow to summon a run of temporary blocks and jump the chasm before they vanish.
From the centre platform, the route stops being about jumping and starts being about the Lens of Truth. An invisible path runs off the left side of the small stone platform with the dark square on it; at the end of it is a rusted floor switch that only the Megaton Hammer triggers, and that switch opens the bars on the door.
Then it is Fire Arrow on the torch by that door, another set of temporary blocks, a second switch you simply stand on, and a large chest you pull yourself to with the Longshot. That is the Golden Gauntlets. A second invisible path near the chest — Lens again — leads to the barrier room.
The detour nobody should skip
With the Gauntlets in hand, walk back out. On the road to the castle, past the boulders, is a Monolith at the end of the dirt path. Lift it, go in, stand on the Triforce tile, and play Zelda's Lullaby. The Great Fairy of Courage halves every point of damage you take for the rest of the game.
It is a there-and-back detour from the central room, and it applies to Ganondorf, Ganon, and the whole tower climb. The Great Fairy guide has the other five fountains and the magic upgrades.
Forest: a wind room with a forest name
The first chamber is a Wolfos and a set of torches. Din's Fire lights the lower ones; a Fire Arrow reaches the unlit one above the exit.
The main chamber is a Silver Rupee hunt over bottomless pits with fans pointed at you, and it wants both pairs of boots. Play the Song of Time at the entrance to raise a Time Block, put the Iron Boots on to walk across it into the fan's wind, and take the rupee it shelters. Then swap to the Hover Boots and let the same fan push you onto a lower platform. Bomb the Beamos, hover to the switch by the far wall, and stand on it — that spawns a Longshot target pillar under a rupee that was previously floating out of reach. Iron Boots on, Longshot up.
The rest is hovering between platforms. On the rupee beside the fan, Thonky's route is explicit: wait for the fan to stop completely before you jump to that platform.
Water: two minutes on the ice
Icicles fall in the first room, so keep moving. The chest on the right is a recovery heart; the chest on the left is a freezing trap. Two Freezards hold the bars on the door shut.
Break the icicles around the blue flame in the middle and scoop it into an empty bottle — the same Blue Fire you used in the Ice Cavern. Melt the red ice on the door, then refill the bottle before you go through, because you need a second scoop inside.
The sliding-block room runs on a two-minute timer, and per Thonky's walkthrough the clock keeps running until you are out the far door, not until the puzzle is solved. Push the far block right twice so it drops into the hole; push the second block away from the wall so it rides over the first, then left twice until it stops under the ledge. Climb up, melt the red ice, and hit the rusted switch with the Megaton Hammer.
Fire: the Hover Boots hold the floor up
Goron Tunic on before you open the door. Then the counter-intuitive part: the central platform sinks into the lava unless you are wearing the Hover Boots. Boots on, it holds.
The Silver Rupees are spread across side platforms, some of which fall the moment you land on them, so take the rupee and immediately hover back to the centre. Partway along the central walkway there is a giant pillar on the left. That is the Monolith — lift it with the Golden Gauntlets and Link throws it, and where it lands becomes a platform for a rupee that is otherwise unreachable. Collect the rupee in the hole it left before you climb onto it.
Light: the chests lie, and so does the barrier room
You cannot enter until the Monolith outside the door is gone, which is the second reason Shadow comes first.
The first chamber is a cluster of treasure chests, three invisible Keese and an invisible Skulltula. The rule that unlocks it: the chests with a Keese perched on them are the real ones, and the chests with no Keese are Tricky Chests — traps. Shoot the Keese as Navi flags them, then open only those chests. Firing the Longshot from the centre of the room kills the hidden Skulltula without spending Lens of Truth magic at all.
Clear both and a chest appears in the middle holding a Small Key. Through the locked door, stand on the Triforce tile and play Zelda's Lullaby for the second one. Those are the only two Small Keys in the entire castle.
The rupee room after it runs on a one-minute timer with rolling boulders in it. Thonky's route accounts for five Silver Rupees: two in wall alcoves, two on the central Y-shaped structure, and one on top of it that needs the Longshot. If you lose track of the exits, the correct door is the one with the symbol above it — and again, the timer runs until you are through it.
Then the trick this route is built around. The next room looks like the barrier chamber, except the barrier is missing and a Wallmaster drops on you. It is a decoy. The wall straight ahead is an illusion; run through it — or read it first with the Lens of Truth — and the real Light Barrier is on the other side.
Spirit: Bombchus, cobwebs and the Mirror Shield
Silver Rupees again, this time patrolled by Razor Traps. Two things make it manageable: bomb the Beamos to expose a rupee underneath it, and pull the Armos statues out of the way so the blades travel further and give you longer gaps to move in. The one above where the Beamos stood comes down with a Longshot into the ceiling. A Big Fairy sits in the centre of this room — Zelda Wiki places it under the Beamos, and Thonky's route brings it out by playing the Sun's Song near the middle. Free hearts and magic, in the last dungeon.
The next chamber has two crystal switches. The first one summons a chest of Bombchus — you do not need to bring your own — and it is one spot where the N64 and 3DS versions genuinely diverge: on N64 it sits on the far side of the bars and takes a Spin Attack or a Biggoron's Sword swing to reach, while on 3DS it is against the wall and easy to hit. The second switch is behind the bars and, per Zelda Wiki, cannot be reached with sword strikes or arrows at all — a Bombchu sent through the gap at the top of the bars is what trips it and opens the door.
Past the archway, burn the cobwebs across the ceiling skylight with a Fire Arrow to let a beam of light in, then catch it on the Mirror Shield. Aim it at the sun switch to the right of the arch you came through. The other three sun switches drop a Wallmaster on you, so do not sweep the beam around looking for the right one.
The room under the bridge
There is a hidden chamber in the south wall of the central room, on the lower floor, between the Spirit and Forest doors — under the castle entrance. It is invisible until you use the Lens of Truth.
Inside are fairies and Business Scrubs selling potions and items, and you can return to it after every single barrier. One detail from Thonky's walkthrough that is easy to get wrong in the moment: use the Hylian Shield against those Scrubs. The Mirror Shield does not bounce their Deku Nuts back.
Restock arrows and fill your bottles here before you cross to the tower. The bottle guide covers what should be in them.
Ganon's Tower: the climb and the Boss Key
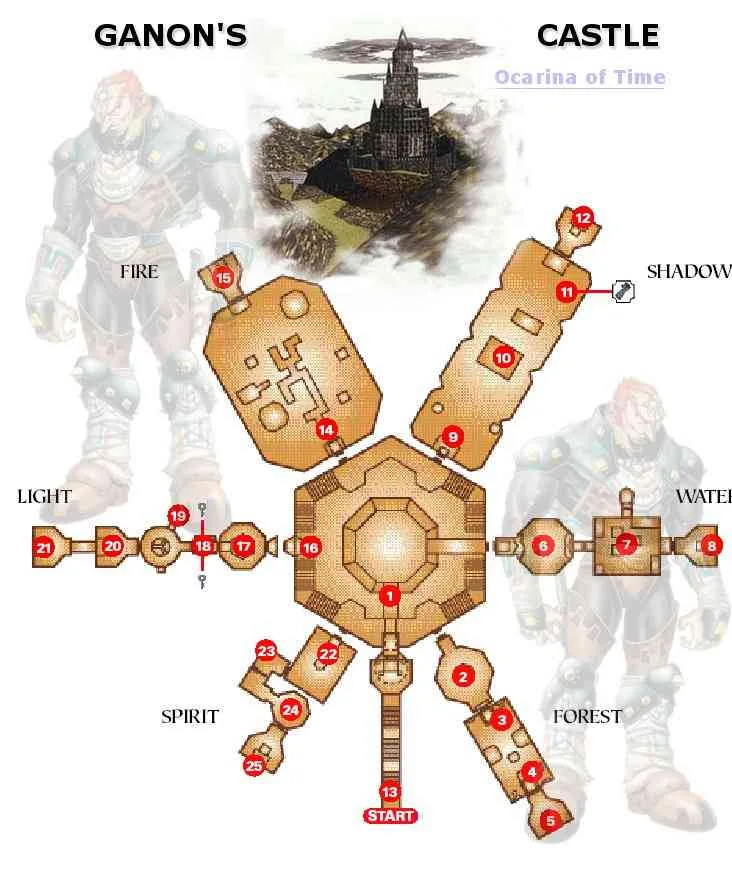
Six orbs down, the seal drops, and the spindle opens. The climb is short and it is a straight fight sequence rather than a puzzle:
- Keese on the first staircase. Shootable, or just outrun them.
- A room of Dinolfos.
- A room with two Stalfos — and a chest. That chest is the Boss Key. It is the only Boss Key in the castle and it is not in any of the six barrier routes.
- A room with two sleeping Iron Knuckles. They wake individually if you approach them one at a time, or both at once if you would rather make it hard.
- The big locked door, and then Ganondorf.
Ganondorf and Ganon are their own subject and they are covered in the full boss guide — the tennis rally, the Light Arrow follow-up, and the tail-hitting on the beast form. What matters here is the bit between them: when Ganondorf falls, the tower begins to collapse and you get three minutes to get out behind Zelda. Fandom's page notes that running the clock out sends you back to the top of the escape and costs you a heart, so it is a retry rather than a game over.
Two things about that escape worth knowing before you are in it. Zelda gets pinned inside a ring of fire partway down and you have to kill two Stalfos to free her — she drops recovery hearts afterwards. And there is a ReDead on the bridge in the central room that you cannot answer with the Sun's Song, because the Ocarina is disabled for the whole sequence. Keep your distance, let it freeze you, and either run or kill it.
Master Quest moves the Gauntlets
Master Quest remixes all six routes, and one change reorders the whole dungeon:
| Original | Master Quest | |
|---|---|---|
| Golden Gauntlets | Shadow route | Spirit route, from a Sun Switch chest |
| Small Keys | Two, both in the Light route | Three, spread across the Forest, Shadow and Spirit routes |
| Light route key | Play Zelda's Lullaby on the Triforce tile | Not there — you must bring one in from another route |
So in Master Quest the forced ordering flips: Spirit becomes the route you have to clear first, because that is where the Gauntlets now are, and the Light route's own key no longer exists. The Shadow route also drops the Gauntlets chest entirely and adds Fire Arrow puzzles and a Beamos. In the Forest route the Song of Time gets played several times and a Fire Arrow is needed to melt ice off a hidden Eye Switch. In the Spirit route, the Silver Rupees are replaced by stone thrones blocking a rusted switch, and you shoot an Eye Switch with the bow to summon an Iron Knuckle that smashes through them for you.
Master Quest is only in Ocarina of Time 3D and the GameCube discs, and on 3DS it unlocks after you sit through the full ending.
Quick Action Checklist
- Bring Light Arrows — one per barrier, minimum six. Nothing else dispels a barrier orb.
- The Medallions do not open the barriers; they awaken the Sages who build the Rainbow Bridge and they label the six doors.
- Do the Shadow route first for the Golden Gauntlets. The Fire route and the Light route's entrance both need them.
- Walk back out with the Gauntlets and lift the Monolith on the road for the Great Fairy of Courage — permanent half damage.
- Carry an empty bottle into the Water route; you need two scoops of Blue Fire.
- Hover Boots stop the Fire route's central platform sinking. Goron Tunic on before you enter.
- In the Light route, open only the chests with an invisible Keese on them. The empty-looking ones are traps.
- The Light route's "barrier room" is a decoy — run through the wall straight ahead.
- Spirit route: bomb the Beamos, pull the Armos, and play the Sun's Song in the centre for a Big Fairy.
- The Boss Key is in the two-Stalfos room on the way up Ganon's Tower, not in any barrier route.
- After Ganondorf, you have three minutes to escape and no Ocarina.
Frequently Asked Questions
How do you dispel the six barriers in Ganon's Castle in Ocarina of Time?
Where are the Golden Gauntlets in Ocarina of Time?
What order should you do Ganon's Castle trials in?
Where is the Boss Key in Ganon's Castle?
How many Small Keys are in Ganon's Castle?
What items do you need for Ganon's Castle in Ocarina of Time?
Why is the Forest barrier in Ganon's Castle wind-themed?
How long is the escape from Ganon's Tower?
Keep Reading
- Zelda Wiki — Inside Ganon's Castle: the six barrier routes, their real themes, and the Master Quest remix
- Zelda Wiki — Six Evil Barriers, the Medallion emblems over each door and Rauru's instruction
- Zelda Wiki — Fire Barrier: dispelled by a Light Arrow fired into its main body
- Zelda Wiki — Golden Gauntlets located in the Shadow Barrier room and the Monoliths they lift
- Zelda Wiki — the three Monoliths in Hyrule: Fire trial, Light trial entrance, Great Fairy of Courage
- Zelda Wiki — Light Arrows given by Zelda in the Temple of Time, required for the castle seal, 50-Rupee drop
- Zelda Wiki — Forest Room: Hookshot and Hover Boots over the fans, and the Wind Medallion prototype origin
- Zelda Wiki — Light Room: Tricky Chests, the Keese tell, the timed rupee room and the illusory wall
- Zelda Wiki — Spirit Room: the Bombchu switch, the Big Fairy under the Beamos, and the Sun Pattern traps
- Zelda Wiki (Fandom) — Light Arrows destroy each barrier core, the three-minute escape, and the Small Key counts
- Thonky — room-by-room Ganon's Castle walkthrough, the hidden Business Scrub room, and the tower's Boss Key chest
Related Guides
Ocarina of Time Ice Cavern Walkthrough: Every Room
Skip the Ice Cavern and the Water Temple becomes uncrossable — the Iron Boots live nowhere else in the game. It's also a genuinely strange dungeon: per Zelda Wiki, it's tied with the Gerudo Training Ground as the smallest in Ocarina of Time, and every room but the mini-boss chamber connects by open hallway instead of a door. Here's the room-by-room route: the Ice Scythe hub and its five Silver Rupees, all three Gold Skulltulas, the White Wolfos fight, and the underwater shortcut on the way out.
Ocarina of Time Jabu-Jabu's Belly Walkthrough: Every Room
Inside Jabu-Jabu's Belly is the third dungeon in Ocarina of Time and the odd one out: no map-and-compass hunt for its own sake, and an escort mission where the person you're escorting can drown. Here is how to actually get in (it takes a diving contest and a message in a bottle), the full route through the Fork in the Guts, the Big Octo fight, and every phase of the Barinade boss fight, including the scripted invulnerability window partway through.
Ocarina of Time Dodongo's Cavern Walkthrough: Every Room
Dodongo's Cavern is one enormous lock with a giant dead Dodongo for a keyhole, and the entire dungeon is you gathering the means to open its mouth. Here is the route through the Entrance, Eastern, Western and Northern Rooms, every chest, the Bomb Bag, all five Gold Skulltulas — two of which child Link cannot reach on the way through — and the King Dodongo fight.
Ocarina of Time Deku Tree Walkthrough: Every Room
Inside the Deku Tree is the first dungeon in Ocarina of Time and the game's own tutorial, teaching doors, vines and switches in about twenty minutes. It is also easy to half-explore, because several of its rewards sit behind puzzle steps the game never spells out. Here is every chest, all four Gold Skulltulas (one of which needs an item you don't have yet), and the fastest way through Gohma.
Ocarina of Time Dungeon Order: The Full Route, Explained
Ocarina of Time looks like an open adventure and plays like a corridor. Eight required dungeons, three side dungeons, and exactly one place where the game genuinely lets you pick. Here is the whole route with the reasons behind each lock.
Ocarina of Time Bottom of the Well: Lens of Truth Guide
The Lens of Truth sits at the bottom of a Kakariko well that is full of water for the entire first act. Here is how you empty it: the time loop that unlocks the well, the six-step run to the Lens chest, and the ten other things buried down there.