Ocarina of Time Dodongo's Cavern Walkthrough: Every Room
Dodongo's Cavern is one enormous lock with a giant dead Dodongo for a keyhole, and the entire dungeon is you gathering the means to open its mouth. Here is the route through the Entrance, Eastern, Western and Northern Rooms, every chest, the Bomb Bag, all five Gold Skulltulas — two of which child Link cannot reach on the way through — and the King Dodongo fight.
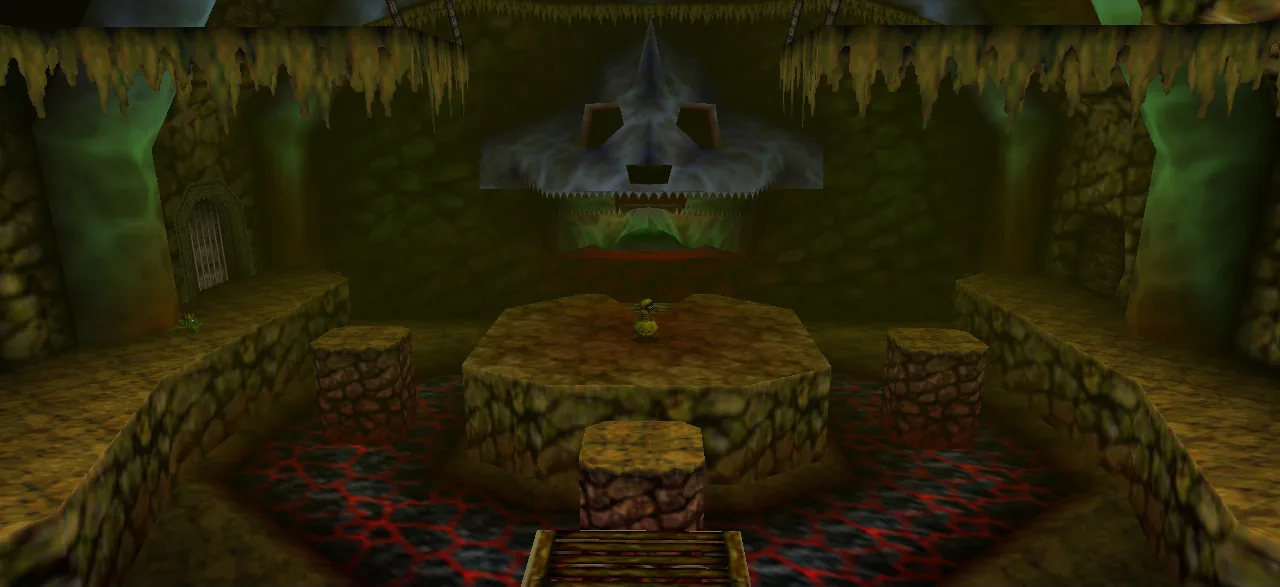
Inside the Deku Tree taught you how a room works. Dodongo's Cavern teaches you what a bomb is, and it does it by building the whole dungeon around a single lock: a giant dead Dodongo set into the wall of the main chamber, whose mouth is the only way onward. A stone tablet in the room spells the condition out and nothing else — "Giant dead Dodongo... When it sees red, a new way to go will be open."
Everything you do in here is in service of making that skull see red. The Map, the Compass, the eye switches, the Bomb Bag: the dungeon hands you tools in an order designed so that by the time you understand explosives, you can aim them at the thing that has been staring at you since you walked in.
Dodongo's Cavern at a glance
| Location | Death Mountain Trail, about halfway up |
| Age | Child Link (two of the five tokens need a return trip with later items) |
| Entry requirement | Goron's Bracelet, to pull a Bomb Flower |
| Mini-boss | Lizalfos, fought twice, two at a time |
| Boss | King Dodongo, "Infernal Dinosaur" |
| Dungeon item | Bomb Bag |
| Reward | Goron's Ruby (Spiritual Stone of Fire), Heart Container |
| Also inside | Dungeon Map, Compass, 5 Gold Skulltulas, 4 Business Scrubs |
| Small Keys / Boss Key | None of either |
That last row is worth pausing on. Zelda Wiki's item lists for all five named areas of the dungeon — the Entrance, the Eastern, Western and Northern Rooms, and King Dodongo's Chamber — contain no Small Key and no Boss Key. The doors here open off floor switches, statues and blocks pushed into place, lit torches, and cleared rooms instead. If you are hunting for a key you have missed, stop: there isn't one.
Getting in: two songs, then a boulder
Ganondorf came to Death Mountain for the Goron's Ruby, Darunia refused him, and Ganondorf's answer was to infest the cavern with Dodongos and seal it behind a boulder. That is Darunia's own account in-game, and the Gorons are starving because the cavern is their quarry.
Getting the Goron's Bracelet out of Darunia takes two songs, not one, and the order matters:
- Zelda's Lullaby, played outside Darunia's room in Goron City, unseals the door. He has shut himself in to wait for the Royal Family's messenger, and the Lullaby is the thing that makes him open up.
- Saria's Song, played at Darunia himself, is the only thing that calms him down once he sees the messenger is a ten-year-old. He dances, cheers up, and hands over the Bracelet.
The Bracelet is narrower than it sounds — it lets Link pick up Bomb Flowers and uproot bushes, and that is close to the whole list. Its confirmation text says so directly: "You got the Goron's Bracelet! Now you can pull up Bomb Flowers." Take one to the boulder on Death Mountain Trail and you're in.
The Entrance: the Map, and a spare Deku Shield
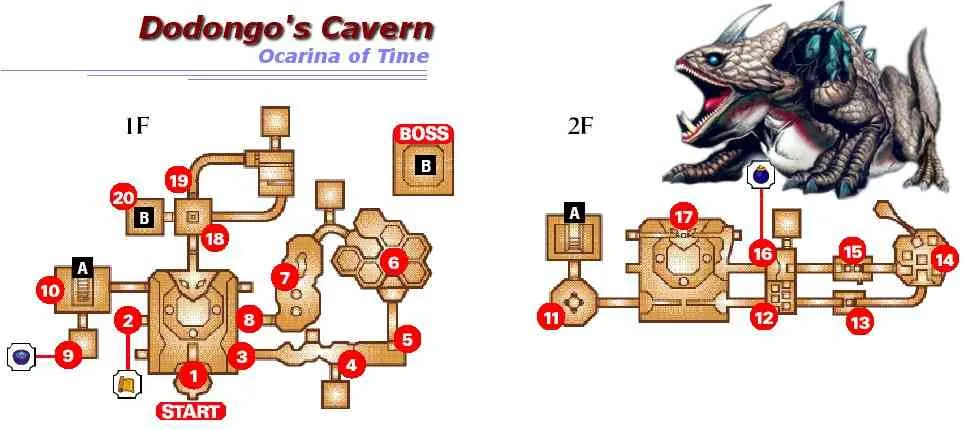
The Entrance is a multi-story room split in two by a cracked wall. Grab a Bomb Flower from the wall and blow the cracked section straight ahead open, and the room widens out into the junction the rest of the dungeon hangs off: Eastern Rooms to your right, Western Rooms to your left, Northern Rooms through the dead Dodongo.
Head toward the central platform with the skull on it, hop onto the moving platform, cross from the Beamos platform to the one on the left, and bomb the cracked wall there for a chest holding the Dungeon Map. A second cracked wall, on the western end of the northern 2F bridge, hides a chest with a Blue Rupee.
There is also a Business Scrub down here who sells a Deku Shield for 50 Rupees, reachable by bombing the wall at the far end of the bridge you cross later. Remember that it exists. King Dodongo's fire breath burns a Deku Shield off permanently, and so does a Fire Keese, and this is the only shop inside the dungeon that can replace one.
Eastern Rooms 1F: Baby Dodongos and the first token
Take the rising-and-falling platforms across, grab a Bomb Flower, run past the Beamos and blow the cracked wall on the eastern side. Through it, Baby Dodongos burrow up out of the floor. Hit one and it starts flashing and then detonates, which is the point of them — they are a renewable bomb before you own any.
The first Gold Skulltula is behind a cracked wall in this southern 1F room. You can bomb it once you have the Bomb Bag, or you can do it now: lure a Baby Dodongo over to the wall, hit it, and let it blow the wall open for you. If they stop spawning, walk around the room until more come up. Inside, Slingshot the Keese and the Skulltula, then jump-attack the token.
Back in the Baby Dodongo room, push the nearest statue onto the blue floor switch to open the door on the right.
The first Lizalfos fight, and the Dodongo Room
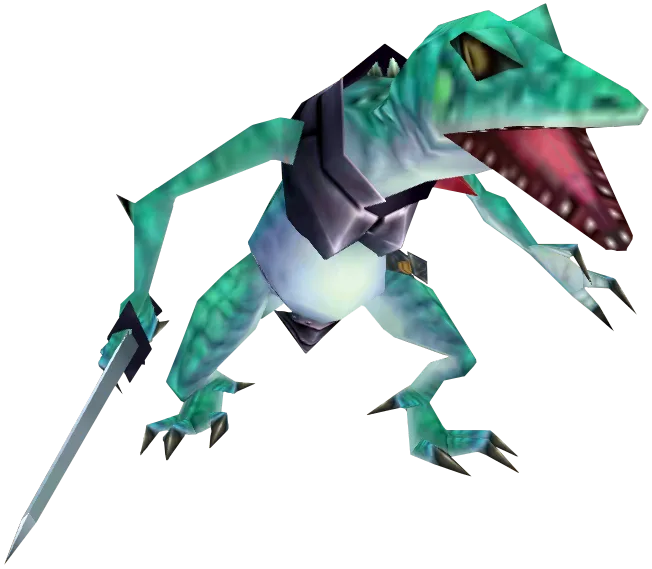
Two Lizalfos — the first mini-bosses in the game — take the easternmost 1F room. They split roles: one crouches and closes on you while the other hops in place on a far platform. Swing once as the near one arrives; if you let it get too close it leaps over you and cuts down on the way through, so backflip or walk backward first and then punish with a jump attack.
Behind the lava waterfall in this chamber is a small hidden room with a single recovery heart in it.
Next comes the Dodongo Room, three full-grown Dodongos. Equip the Hylian Shield before you walk in. A Dodongo's fire will burn a Deku Shield off for good, and you have to buy a replacement to get one back. The kill is positional: stand in front of one until it plants itself to inhale, run around to its tail and hit that, then back off before it swings the tail. When it starts flashing, get away from it.
Off this room is a bombable wall with a Business Scrub behind it selling a single Deku Stick for 15 Rupees, which matters because the exit is a torch puzzle: light a stick and use it on the three unlit torches along the right wall to open the door.
Western Rooms: the Compass and the moving staircase
In the next room, step on the switch before you walk too far in, then drop down and take the door it just unlocked.
The Compass sits behind a bombable wall on the left, guarded by an Armos — a statue that is only a statue until you touch it or bomb it, at which point it animates and you have to kill it before the room will let you leave. Deku Nut to stun, sword to finish; it spins and explodes when it dies, so give it room.
Then the step that is easy to miss, because nothing signposts it. Back in the previous room, there is a row of Bomb Flowers with a gap in the middle. Set a Bomb Flower down in that gap and the whole row chains, which brings the staircase down to your level. Go up it and kill the Gold Skulltula on the vines at the top. There is a second token in an alcove above these same stairs — leave it, it needs a hookshot-class item you will not have for a long time.
Eastern Rooms 2F: blade traps, eye switches, Bomb Bag
Equip the Hylian Shield again if you swapped. Slingshot the Fire Keese, then walk the platform's edge — avoiding the Armos, which are live in here — until you find the ladder. One Armos parked in front of it is inert, so pull it aside or squeeze behind it, climb, hit the switch, and cross the bridge, jumping the gap in the middle.
Below the next room are blade traps. Use the ladder or jump past it into the gap; do not drop in blind. Time the trap's return, run through to the block in the wall, and pull it out — it slides until it hits the platform behind you, leaving a recovery heart in the alcove and a step up to the platform. The chest up there holds a Red Rupee, worth 20.
Use a Bomb Flower on the wall at the top of the ladder — you have no bombs of your own yet, and it is easier to time the throw so it detonates in front of the wall than to land it on the ledge — and climb through. Slingshot the eye switch ahead to kill the ring of fire, jump across, deal with (or ignore) the Dodongos, and take the door.
That door is the second Lizalfos fight, same two-enemy pattern in the easternmost 2F room. Hearts are at the far end of the long ledge if you need them.
Past them: shoot the eye switch above the arch, jump, turn left, shoot the second eye switch, then make the long jump to the far platform. You come out above the blade-trap room from earlier — do not drop down. Jump straight across the top and open the chest for the Bomb Bag.
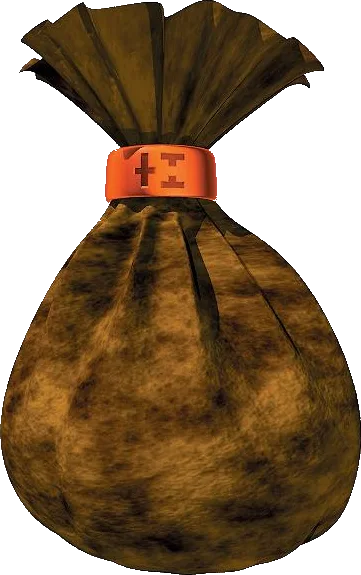
One thing to carry into the boss room: Thonky's walkthrough warns that your own bombs seem to go off sooner than a picked Bomb Flower does, so do not time the throw off your Bomb Flower habit.
Making the skull see red
Exit left of the Bomb Bag chest and step on the switch ahead — that raises one of the moving platforms permanently and gives you a shortcut back.
Now the lock. Go right to the bridge that runs over the skull. There are two gaps in that bridge, and they sit directly above the Dodongo's two eyes. Drop one bomb down each gap. Both eyes light red, the jaw drops open, and the Northern Rooms are open.
Drop through one of the gaps yourself to land in an eye socket, hop down to the Beamos platform, and walk into the mouth.
Northern Rooms: the last token and the drop
Hylian Shield on. Slingshot the Fire Keese, drop out of the tunnel, climb the ledge on the right — the one across from the barred door — and go straight.
At the end, past more Fire Keese, is a room with large blocks. Climb them to the high walkway, go to the far end, jump off, then turn and face the wall you jumped from. Push that block off the edge, walk it over to the bombable wall, and blow it open for the dungeon's last child-accessible Gold Skulltula, tucked behind an Armos in the northernmost chamber.
Return, climb the blocks, take the walkway again and jump off at the end. Two pots here hide a fairy — bottle it if you have a spare bottle, then unequip the bottle so you don't dump it by accident in the fight.
Through the door, at the end of the tunnel: push the block off the ledge, kill the Fire Keese, pull the block away from the wall and push it into the hole in the middle of the room to unlock the door.
King Dodongo's Chamber
The boss room starts split in two by a Cracked Floor Tile — the dark patch in the middle of the upper floor. Bomb it, but walk past it first and open the chest beyond, which holds five Bombs, specifically so you cannot arrive at the fight empty. There are also Bomb Flowers growing in all four corners of the chamber below, so running dry is not actually a fail state.
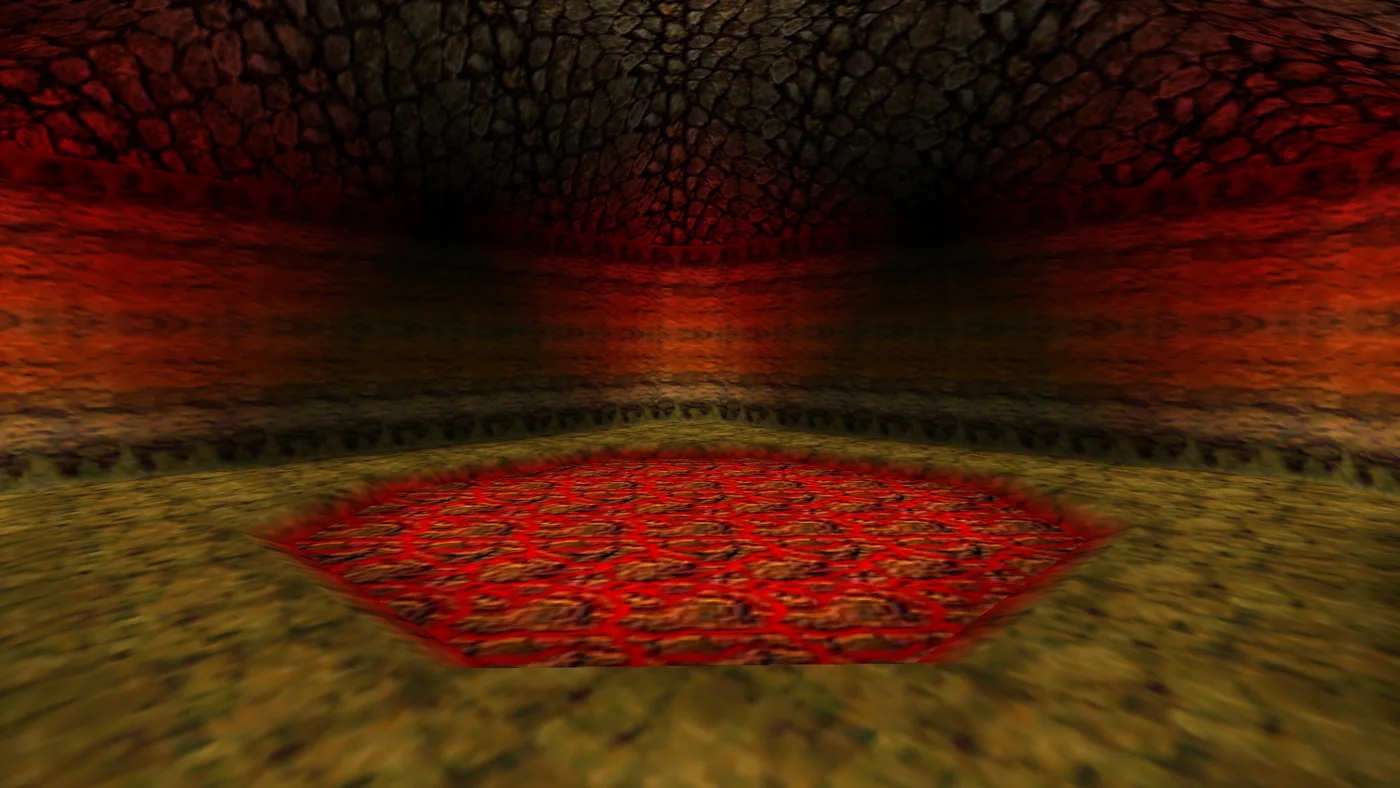
Drop through the hole and King Dodongo attacks on sight. The loop is short:
- Get in front of its face. It inhales to charge fire breath — if it completes the inhale, you eat the flame for half a heart.
- Throw a bomb into the open mouth. It detonates internally and King Dodongo collapses. This is the critical point.
- Hit its face with the sword while it's down.
- If you didn't do enough damage, it rears up, curls into a ball, and rolls the perimeter for a quarter-heart per hit. Stand on the slope down into the central lava pit, hug the outer wall, or crouch behind the shield — it runs its lap, slams a wall, and unfurls. Repeat.
Beaten, it curls up and rolls into the lava itself. The lava absorbs its heat and hardens enough to walk on, which is how you reach the Heart Container. Step into the blue light, and Darunia hands over the Goron's Ruby and declares you Sworn Brothers.
One flavour note if you've been through the Fire Temple already: King Dodongo and Volvagia share a boss theme that no other boss in the game uses.
Every chest, in one table
| Chest | Contents | Where |
|---|---|---|
| Entrance | Dungeon Map | Behind a cracked wall on the western side, between the Beamos and the Bomb Flower |
| Entrance | Blue Rupee | Behind a cracked wall on the western end of the northern 2F bridge |
| Western Rooms | Compass | Behind the live Armos in the southwestern 1F room |
| Eastern Rooms | Red Rupee (20) | Atop a pillar in the southwestern 2F room, beside the cracked wall |
| Eastern Rooms | Bomb Bag | Atop a ledge on the north side of the southwestern 2F room |
| King Dodongo's Chamber | Bombs ×5 | Beyond the Cracked Floor Tile on the upper level |
Shops, separately, since they're easy to miss: a Deku Shield for 50 at the Entrance, one Deku Stick for 15 off the Dodongo Room, five Deku Nuts for 20 on the west side of the northern 2F room, and 30 Deku Seeds for 40 on its east side.
All five Gold Skulltulas, and the one the wiki loses
Dodongo's Cavern holds five Gold Skulltulas. Three of them you can take on your first run through as a child. The other two sit where nothing in your inventory at that point reaches.
| # | Area | How to reach it | When |
|---|---|---|---|
| 1 | Eastern Rooms 1F | Behind a cracked wall in the southern room — bomb it, or lure a Baby Dodongo into it and detonate it | Child, on the way through |
| 2 | Western Rooms 2F | On the vines at the top of the staircase room — chain the Bomb Flower row to drop the stairs, then climb | Child, on the way through |
| 3 | Northern Rooms | Behind the Armos in the northernmost chamber, behind a cracked wall; needs Bombs | Child, on the way through |
| 4 | Western Rooms 2F | In the alcove above that same staircase, out of reach without a hookshot-class item — Thonky's token checklist takes it as adult Link with the Longshot, and ZeldaSpeedRuns lists Boomerang, Hookshot or a hover as the ways in | Return trip |
| 5 | Eastern Rooms | On a ledge in the southeastern room, the one the Baby Dodongos come up in — summon Pierre with the Scarecrow's Song and hookshot up to him | Adult Link |
Rows four and five are the ones to plan around, and row five is a straightforward consequence of a quirk Zelda Wiki flags outright: Dodongo's Cavern is the only child-era dungeon that adult Link can walk back into without glitches, which is exactly what the designers exploited to hide a token there. If you are chasing 100 tokens, that return trip is something you schedule rather than clean up on the way to Jabu-Jabu — and it is worth two tokens, so do not walk back in for the Scarecrow ledge and leave the staircase alcove behind.
The staircase pair is where the sources stop agreeing, so check it rather than trusting one of them. Zelda Wiki's infobox says five tokens and its per-room enemy counts agree — two in the Eastern Rooms, two in the Western Rooms, one in the Northern Rooms — but its Gold Skulltula location tables document only four, with an editor's note on the Western Rooms page reading "Check how to get the second one above the moving staircase." That missing row is number four: Thonky's Gold Skulltula checklist has it as a Longshot kill in the alcove above the lowered stairs, listed separately from the child token on the vines in the same room, and ZeldaSpeedRuns lists the two separately as well. The count is right; one of the wiki's own tables is a row short, and the row it loses is not a child pickup.
What changes in 3D and in Master Quest
The 3DS remake makes one difference you feel in this specific dungeon: a Dodongo's tail swing spins twice in Ocarina of Time 3D and only once on N64. If you learned the tail-hit-and-backflip rhythm on the original, it will clip you in 3D.
Master Quest rebuilds the dungeon almost backwards, per Zelda Wiki's summary of the version:
- You go left and to the upper floor first, rather than right.
- The Lizalfos are fought on the second floor first, then the first.
- Bombs arrive much later — the Bomb Bag sits where the Compass originally was.
- The rooms that held Gold Skulltulas now hold Skulltulas and Mad Scrubs instead, paying five Rupees.
- Poes appear in the Dodongo Room, Baby Dodongos are everywhere, Dodongos have moved rooms, there are almost no Keese, and one room is packed with Armos.
- Most puzzles are now sequences of Bomb Flowers set into the walls.
Quick Action Checklist
- Play Zelda's Lullaby at Darunia's door first, then Saria's Song at Darunia — one song alone won't get you the Goron's Bracelet.
- Equip the Hylian Shield before the Dodongo Room; if a Deku Shield burns anyway, the Entrance Business Scrub sells a replacement for 50 Rupees.
- Blow the first Gold Skulltula's wall open with a Baby Dodongo instead of waiting for the Bomb Bag.
- Set a Bomb Flower in the gap in the Bomb Flower row to chain them and drop the staircase.
- Drop one bomb down each of the two gaps in the bridge to make the skull's eyes go red and open its mouth.
- Bomb the Cracked Floor Tile in King Dodongo's Chamber, but open the 5-Bomb chest beyond it before you drop in.
- Throw a bomb into King Dodongo's mouth on the inhale, sword its face while it's down, and stand on the lava-pit slope when it rolls.
- Come back later for two tokens, not one: the alcove above the lowered staircase, and the southeastern ledge you reach as adult Link with the Scarecrow's Song and the Hookshot.
Frequently Asked Questions
How do you get into Dodongo's Cavern in Ocarina of Time?
How do you open the giant Dodongo skull's mouth in Dodongo's Cavern?
How many Gold Skulltulas are in Dodongo's Cavern?
Where is the Bomb Bag in Dodongo's Cavern?
How do you beat King Dodongo in Ocarina of Time?
Are there Small Keys or a Boss Key in Dodongo's Cavern?
Keep Reading
- Zelda Wiki — Dodongo's Cavern: dungeon items, the dead Dodongo stone tablet, the adult-era re-entry quirk, and the Master Quest layout changes
- Zelda Wiki — Eastern Rooms: Bomb Bag and Red Rupee chest locations, both Lizalfos fights, and two Gold Skulltulas including the Scarecrow's Song one
- Zelda Wiki — Western Rooms: the Compass chest behind the live Armos, and the unresolved second Gold Skulltula above the moving staircase
- Zelda Wiki — Northern Rooms: the cracked-wall Gold Skulltula behind the Armos
- Zelda Wiki — King Dodongo's Chamber: the Cracked Floor Tile, the 5-Bomb chest, the corner Bomb Flowers and the cooling lava pit
- Zelda Wiki — King Dodongo: the inhale window, the critical point, roll damage values, and the shared boss theme with Volvagia
- Zelda Wiki — Goron's Bracelet: Zelda's Lullaby to unseal Darunia's room, Saria's Song to calm him, and what the Bracelet actually lifts
- Thonky — Gold Skulltula checklist: the three child tokens in Dodongo's Cavern, plus the adult Longshot alcove above the staircase and the Scarecrow's Song ledge
- ZeldaSpeedRuns — Gold Skulltula locations and methods: the Dodongo's Cavern staircase vines and staircase alcove listed as two separate tokens
- Thonky — room-by-room Dodongo's Cavern walkthrough: the Bomb Flower staircase chain, the two bridge gaps, and the 3DS vs N64 Dodongo tail spin
Related Guides
Ocarina of Time Ice Cavern Walkthrough: Every Room
Skip the Ice Cavern and the Water Temple becomes uncrossable — the Iron Boots live nowhere else in the game. It's also a genuinely strange dungeon: per Zelda Wiki, it's tied with the Gerudo Training Ground as the smallest in Ocarina of Time, and every room but the mini-boss chamber connects by open hallway instead of a door. Here's the room-by-room route: the Ice Scythe hub and its five Silver Rupees, all three Gold Skulltulas, the White Wolfos fight, and the underwater shortcut on the way out.
Ocarina of Time Jabu-Jabu's Belly Walkthrough: Every Room
Inside Jabu-Jabu's Belly is the third dungeon in Ocarina of Time and the odd one out: no map-and-compass hunt for its own sake, and an escort mission where the person you're escorting can drown. Here is how to actually get in (it takes a diving contest and a message in a bottle), the full route through the Fork in the Guts, the Big Octo fight, and every phase of the Barinade boss fight, including the scripted invulnerability window partway through.
Ocarina of Time Deku Tree Walkthrough: Every Room
Inside the Deku Tree is the first dungeon in Ocarina of Time and the game's own tutorial, teaching doors, vines and switches in about twenty minutes. It is also easy to half-explore, because several of its rewards sit behind puzzle steps the game never spells out. Here is every chest, all four Gold Skulltulas (one of which needs an item you don't have yet), and the fastest way through Gohma.
Ocarina of Time Bottom of the Well: Lens of Truth Guide
The Lens of Truth sits at the bottom of a Kakariko well that is full of water for the entire first act. Here is how you empty it: the time loop that unlocks the well, the six-step run to the Lens chest, and the ten other things buried down there.
Ocarina of Time Dungeon Order: The Full Route, Explained
Ocarina of Time looks like an open adventure and plays like a corridor. Eight required dungeons, three side dungeons, and exactly one place where the game genuinely lets you pick. Here is the whole route with the reasons behind each lock.
Ocarina of Time Ganon's Castle: All 6 Barrier Trials
Ganon's Castle is six short dungeons wrapped around one locked spindle, and the Medallions you spent the whole game collecting are not what opens it. Here is what each barrier room actually asks for, the one trial that has to come first, and the climb to the organ.