Tears of the Kingdom Boss Guide: Every Weak Point
Our sages guide already told you how much HP these bosses carry depending on turn order. It never told you how to actually hit them. Three of the four regional bosses cannot be damaged at all until you trigger a specific counter on them — and one boss hits harder in its optional rematch than it ever does in a real playthrough.
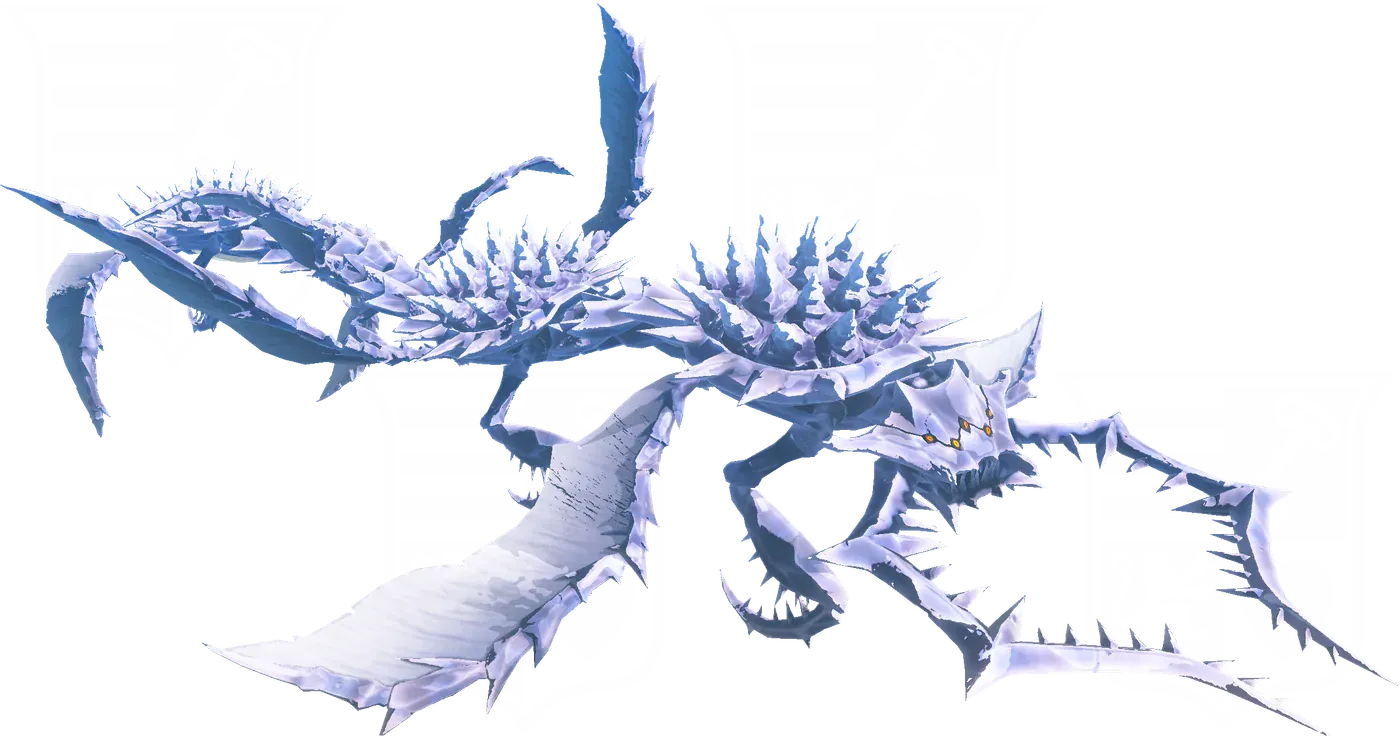
Our sages guide already covered the number that gets repeated everywhere: Queen Gibdo has 2,270 HP if she is your first temple and 3,632 if she is your last. What it never covered is what actually happens once you are standing in front of her. Three of the four regional bosses in Tears of the Kingdom cannot be damaged at all until you trigger a specific counter on them first — punch Queen Gibdo with a sword and nothing happens. And one of these bosses hits harder in its optional Depths rematch than it is ever allowed to hit in a real playthrough.
This is the fight-mechanics half of the boss picture the sages guide left alone on purpose — it was built around the HP-scaling table and the avatar damage numbers, not attack patterns or weak-point triggers. Everything below is checked against Zelda Wiki's individual boss pages, including the exact infobox notes behind the HP-by-location numbers, which is where the real surprises are.
The four temple bosses want a specific answer, not a bigger sword
Before the individual breakdowns, here is the fact that changes how you walk into all four fights: each boss is built around a specific counter, and the counters are not interchangeable.
| Boss (Temple) | What exposes the weak point | Is it sage-exclusive? |
|---|---|---|
| Colgera (Wind) | Fire-fused arrows, Bomb Flowers, or skydiving onto its back | No — any weapon works once the ice cracks |
| Marbled Gohma (Fire) | Breaking two legs with Yunobo's Power of Fire | Effectively yes — the fight is built around it |
| Mucktorok (Water) | Sidon's Power of Water, or any Water-based attack | No — Sidon is the convenient source, not the only one |
| Queen Gibdo (Lightning) | Riju's Power of Lightning, specifically | Yes — nothing else touches her |
That is a real spread, not a rounding error. Colgera does not require a sage at all — Tulin's wind gust is there to dodge one attack, not to open the fight. Mucktorok is the middle case: Zelda Wiki states plainly that the Sludge washes away to "Sidon's Power of Water or any Water-based attack," so a Zora Spear swing or a water-fused weapon works the same as the sage power. Queen Gibdo is the strict case — Riju's lightning is the only thing that touches her, full stop, in exactly the way the sages guide's Riju section already flagged her 9,999-damage lightning bolt against ordinary Gibdos.
Colgera, the Wind Temple: a fixed 600 HP that never scales
Colgera is the one boss whose health never moves. 600 HP, always, whether it is your first temple or your last — the sages guide already established this, and Zelda Wiki's own infobox confirms it with a flat health= 600 and nothing conditional attached. What it does move is the reward: defeating it inside the Wind Temple pays 300 experience, a Depths rematch pays 100, and killing it at Gloom's Origin during the endgame pays 0.
The fight itself is an ice-serpent flying loop. Colgera fires icicle spikes when Link gets close, and opens disorienting portals it passes through — sometimes surfacing directly underneath him for a biting lunge that Tulin's wind gust is specifically built to dodge. Its weak points are the purple glowing spots on its body, shielded by an ice layer on the underside and a spiky shell on top. Crack that ice with fire-fused arrows, a Bomb Flower, or by skydiving straight onto its back from above, and the purple spots become fair game for any weapon you are carrying — no sage power required to land the hit, only to survive getting there.
Colgera also generates its own traversal tool: the wind updrafts it throws off let Link glide upward and fully refill his stamina wheel mid-fight, which is the intended way to keep pace with something that never lands. Past the halfway point it adds tornadoes on top of everything else and gets generally more aggressive, but the weak-point rule never changes.
Marbled Gohma, the Fire Temple: legs first, eye second
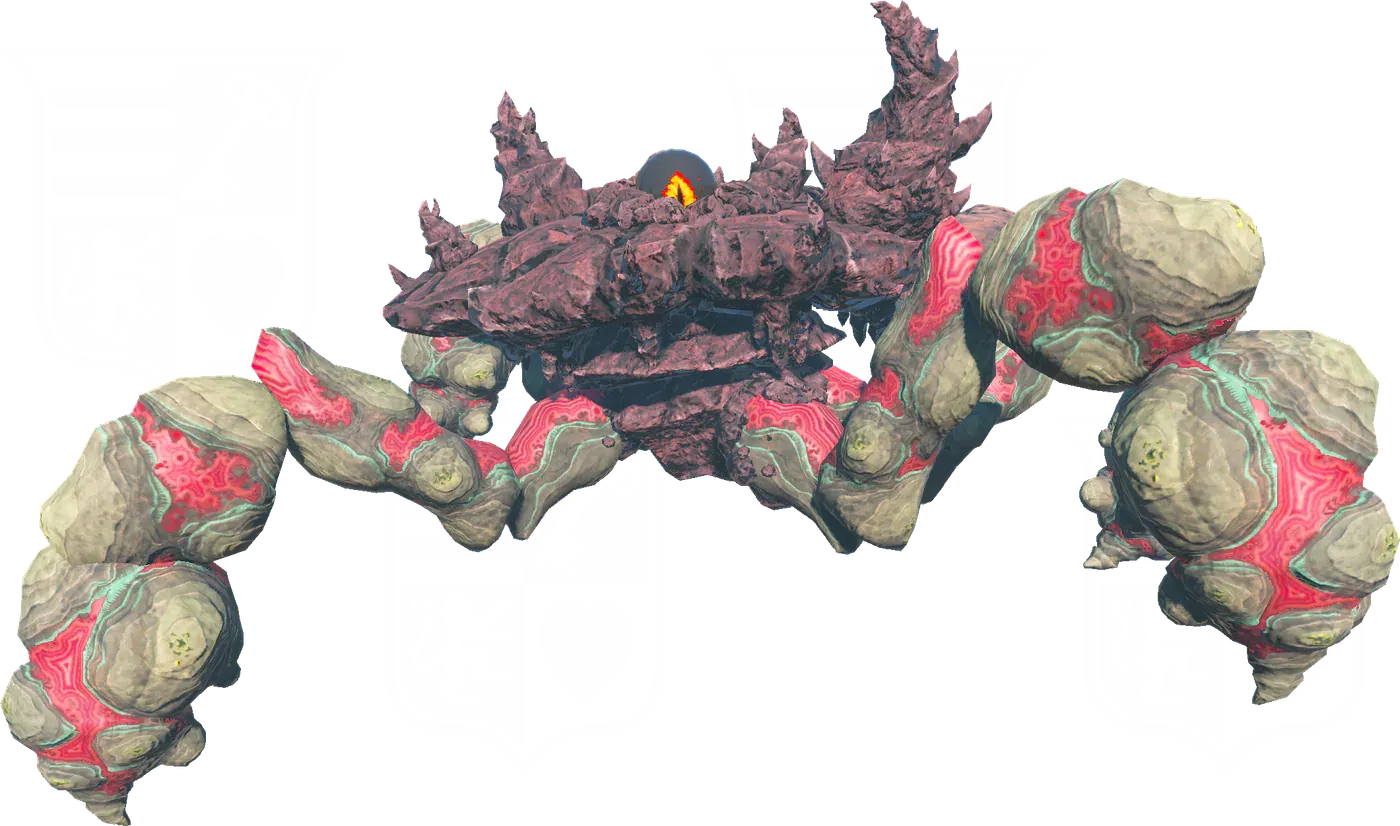
Marbled Gohma is the boss that scales at every single encounter slot — 800 HP first, 1,200 second, 1,600 third, 2,000 fourth, 2,400 last, per the sages guide's table. Its eye is the real target, and the eye is placed exactly where you cannot reach it: high up and out of arrow range.
Gohma spends most of the fight flinging explosive Gloom Rocks and stomping out small shockwaves. Those Gloom Rocks are also the counter to its own defense — Yunobo's Power of Fire detonates them, and detonating enough of the ones clinging to its legs is what makes it collapse. Zelda Wiki's own phrasing is specific: break at least two legs and Gohma drops to the ground, letting Link climb its body to actually hit the eye. Ascend can shortcut the climb, and Recall on an unexploded Gloom Rock turns it into a stun grenade instead.
Past half health it tries to trap Link inside a ring of its own Gloom Rocks so the blasts cannot be outrun, which forces you back onto Yunobo defensively rather than offensively. The Fire Temple's own version of the fight adds a wrinkle the Depths rematch does not: Gohma clings to the ceiling for its second phase, and knocking it down only takes one leg break instead of two — but it demands Yunobo be angled to roll up the wall and connect at the right height, which is a harder shot than the ground-floor version.
Mucktorok, the Water Temple: any water beats the sludge
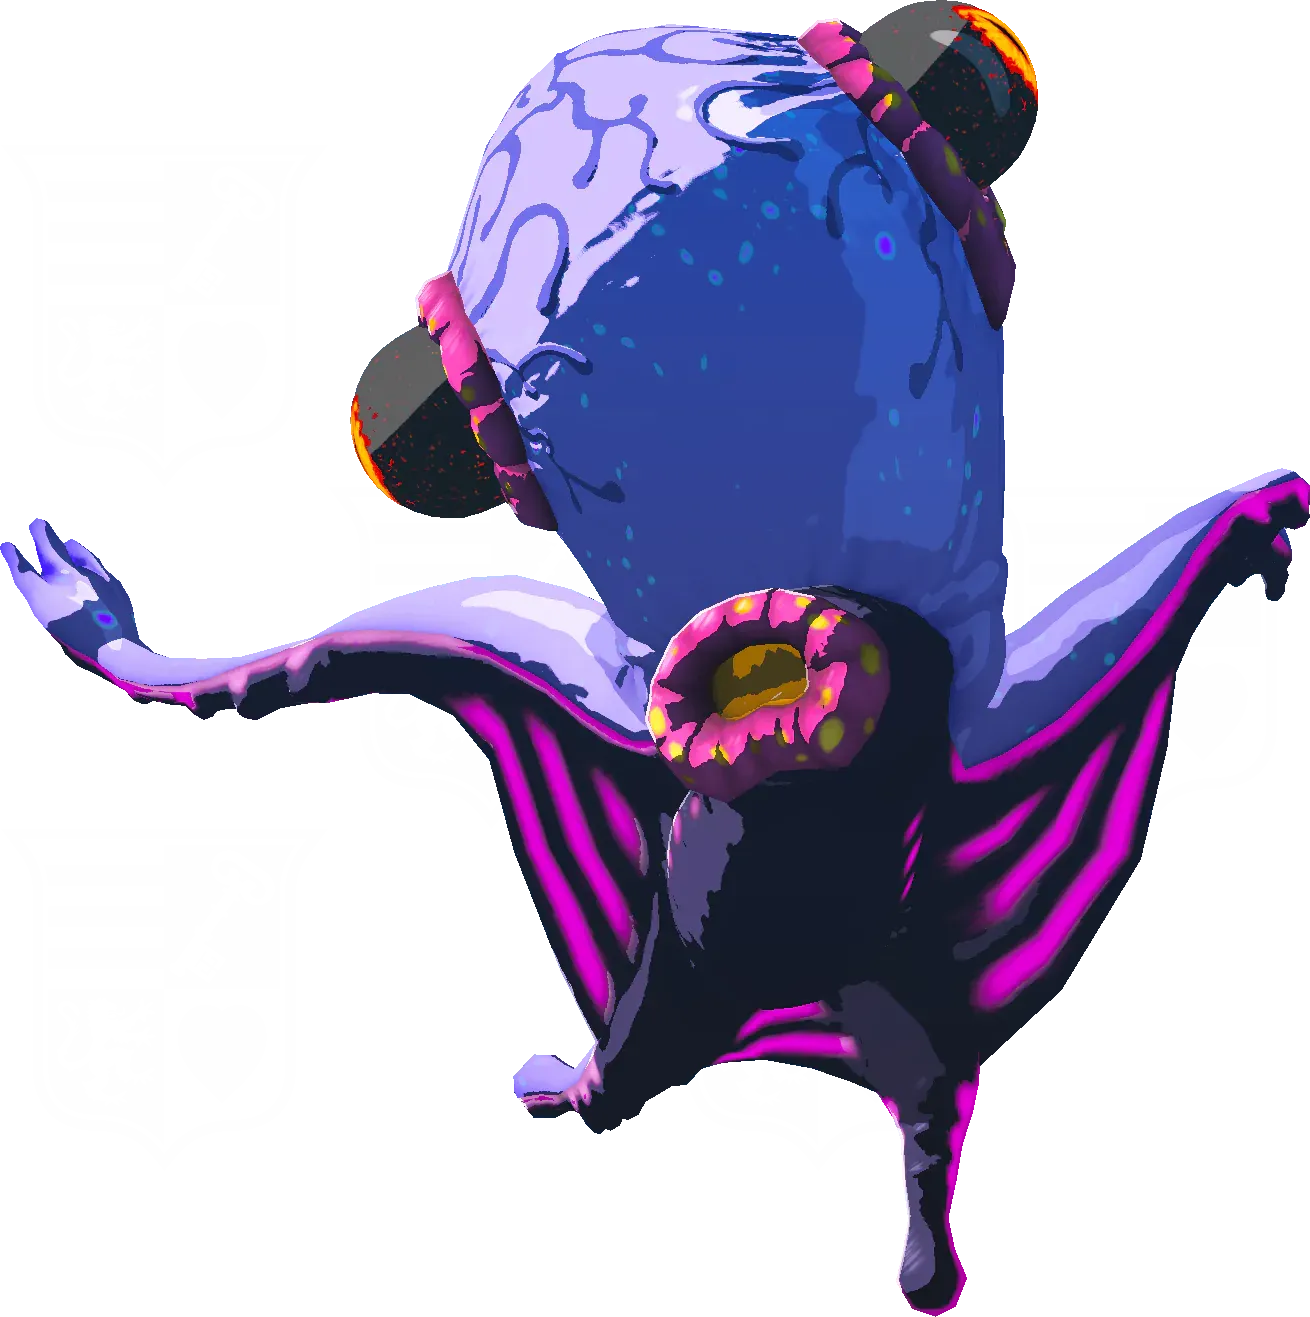
Mucktorok fights from inside a Sludge shark shell that shrugs off nearly everything — charging rushes, waves of Sludge, and a Sludge beam are its whole opening kit, and none of it dents the shell. What washes the Sludge away is water: Sidon's Power of Water does it, but so does any other Water-based attack, which is the loosest requirement of the four bosses.
Once exposed, Mucktorok tries to flee rather than fight, and that flight is the tell — an Arrow stuns it mid-retreat and reopens the damage window. Past half health it starts spraying Sludge across the arena floor to slow Link down generally, then leans into a hop-and-spray pattern between Sludge puddles whenever it is exposed, so the vulnerable window now comes with its own hazard terrain layered underneath it.
Queen Gibdo, the Lightning Temple: only Riju hurts her
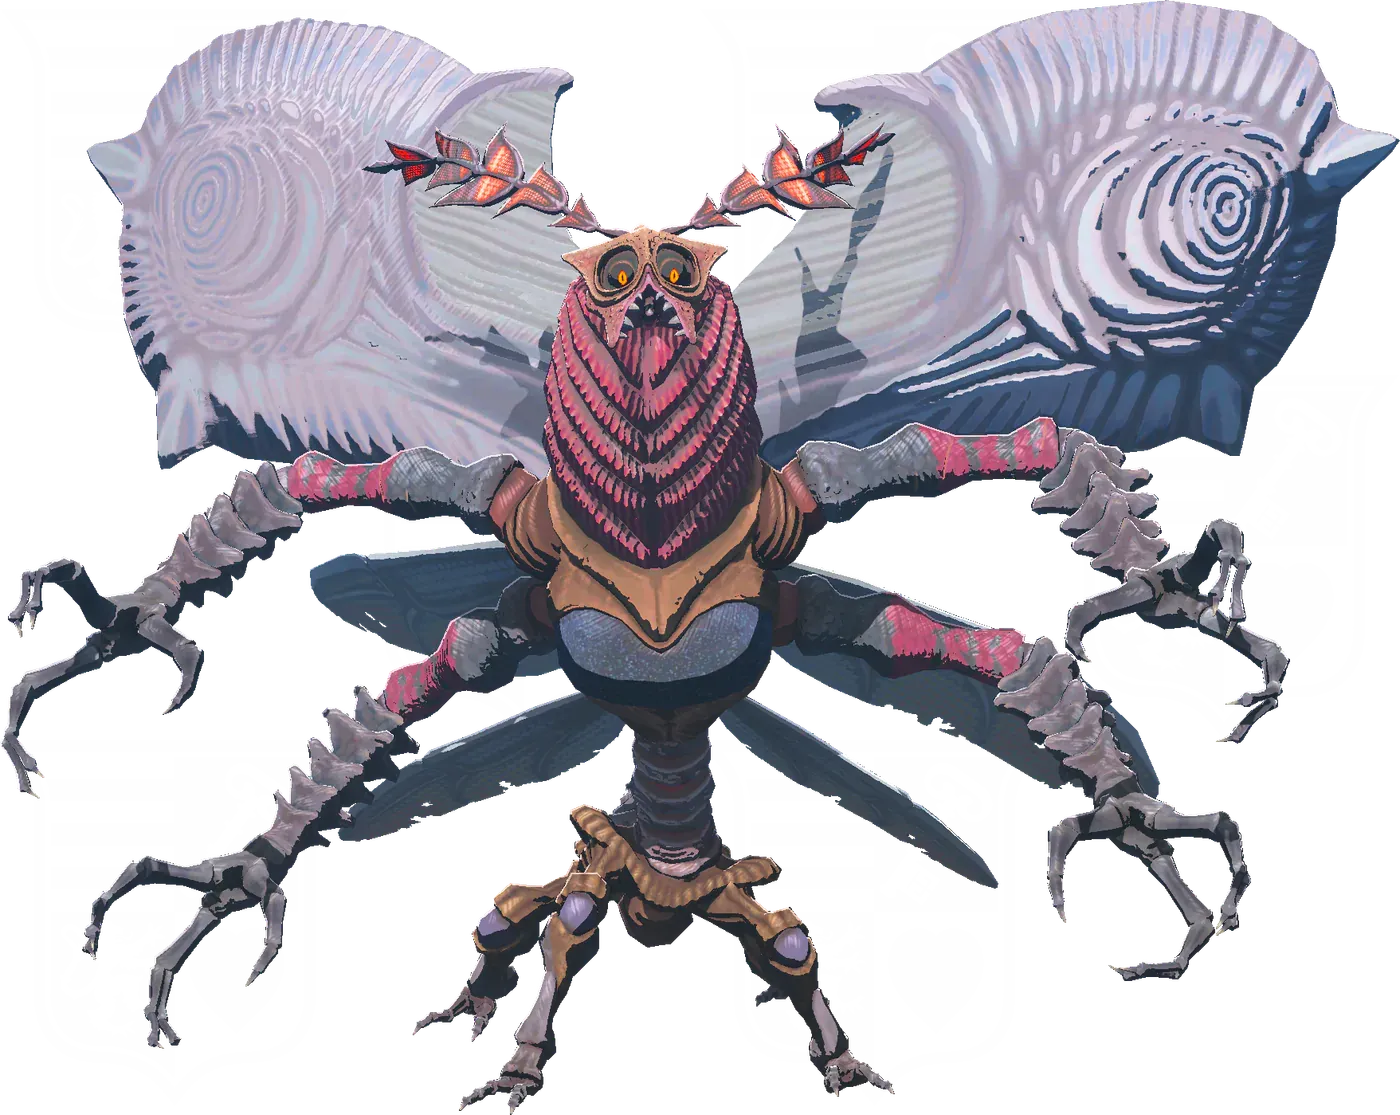
Queen Gibdo is the strictest of the four. Nothing damages her at all until Riju's Power of Lightning lands a strike, which turns her pale and vulnerable exactly like an ordinary Gibdo caught in daylight — the sages guide already covers what that same lightning does to the regular Gibdos flooding the desert (9,999 damage, an instant kill). Against the Queen it is a setup move, not a finisher: a second lightning strike on top of the first stuns her outright and opens a free-damage window.
Between strikes she scuttles the battlefield trying to charge Link or spit a stream of sand, and her antennae change color as a tell before the bigger attacks land. Past half health she activates four Gibdo Hives in the corners of the arena that spawn endless reinforcements — light damages the exposed regular Gibdos those hives produce — while she adds sand tornadoes and a tracking aerial sand stream from the air.
One detail specific to her among all four regional bosses: Queen Gibdo is fought twice. Zelda Wiki states it directly — once outside the Lightning Temple, once inside it. In that first, outdoor encounter she retreats as soon as she has lost a quarter of her health, which is a scripted exit rather than a kill. None of Colgera's, Marbled Gohma's, or Mucktorok's own wiki pages describe an equivalent preview fight; the other three temple bosses simply start their multi-copy Depths rematches after the one real kill.
The HP numbers the sages guide leaves out
The sages guide's own boss table stops at "at their own separate HP values" for the Depths Boss Rematch arenas and the War in the Depths of Hyrule gauntlet at Gloom's Origin, without printing them. They are sitting in each boss's own infobox note, and one of them inverts the pattern you would expect.
| Boss | Temple order (1st/2nd → last) | Depths rematch | Gloom's Origin |
|---|---|---|---|
| Colgera | 600 (fixed) | 600 | 600 |
| Marbled Gohma | 800 → 2,400 | 2,000 | 2,000 |
| Mucktorok | 1,300 → 2,275 | 2,850 | 1,950 |
| Queen Gibdo | 2,270 → 3,632 | 2,800 | 3,178 |
Mucktorok is the outlier worth flagging on its own: its Depths Boss Rematch HP, 2,850, is higher than the 2,275 it ever reaches as a legitimate last-encountered temple boss. The optional rematch fight — the one that exists purely to hand out a Huge Crystallized Charge, per the sages guide's Boss Rematch note — is mechanically the toughest version of Mucktorok in the entire game, tougher than anything the main story ever throws at you. Queen Gibdo's rematch HP (2,800) sits between her third- and fourth-encounter values rather than exceeding her maximum, and Marbled Gohma's rematch HP (2,000) matches its own fourth-slot value exactly. Colgera, true to form, does not move at all.
Demon King Ganondorf: two forms, one blade
Ganondorf's own fight is two separate HP pools with two separate rulesets, not one boss that gets tougher. Zelda Wiki lists his first form at 2,500 HP and his second at 5,000.
Phase one: the Gerudo form and its two permanent hits
He fights in his Gerudo form here, cycling through the Gloom Sword, Gloom Spear, Gloom Club, and Demon King's Bow — the same three melee weapons the untouched-weapons guide already tracked back to Phantom Ganon drops, now wielded by the source. When he is holding the Club he can kick with his left foot at close range on top of the swing.
Two of his attacks are worse than ordinary Gloom damage: the Club's three ground columns and the Bow's Gloom bursts do not just knock off temporary hearts, they can permanently reduce Link's maximum heart count if they connect. The Master Sword is the only weapon that deflects those projectiles back — anything else Link is holding is destroyed on contact instead. He also Perfect Dodges, including against parries, and will knock arrows out of the air if you keep shooting his head repeatedly, though an airborne shot cannot be dodged the same way.
Phase two: four Phantom Ganons and a Gloom overload
The second form doubles his HP pool to 5,000 and adds four Phantom Ganons fighting alongside him — stronger and faster across the board. At the 50 percent mark he absorbs all four Phantom Ganons' Gloom into himself, then releases a wave that knocks every sage unconscious, which is the fight's version of a hard reset on your support. His dodging intensifies further here, he counters a Flurry Rush with a dodge of his own, and — critically — arrows no longer stun him at all, closing off the one crowd-control tool that worked in phase one.
The Demon Dragon: pustules, then the Secret Stone
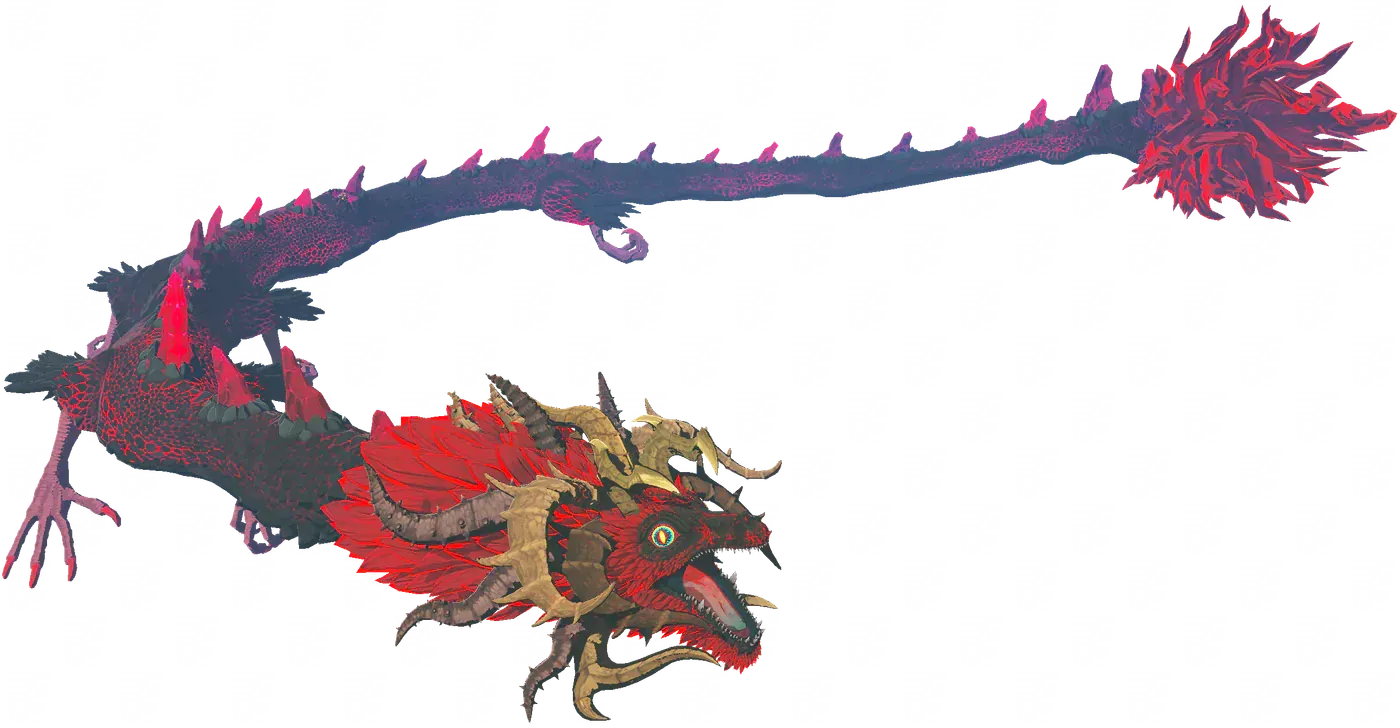
Ganondorf's last transformation swallows the Secret Stone and turns the fight into an aerial chase. The dragon's main body carries 6,000 HP, and its weak points plus the Secret Stone itself are each rated at 1,200 HP on their own.
Its jet-black scales are stated to repel every weapon except the Master Sword — worth being precise about here, since our Master Sword guide documents the sword's attack power rising to 45 near Gloom-wreathed enemies and 60 specifically "in the presence of Phantom Ganon or Demon King Ganondorf." Zelda Wiki's own Master Sword page does not extend that 60-power line to the Demon Dragon by name, so treat the boosted number as confirmed for Ganondorf's two humanoid phases and unconfirmed for this one, rather than assuming it carries over.
Mechanically, the fight is about altitude. Link rides the Light Dragon to get above the Demon Dragon, and once he is positioned there it looks up and spews Gloom in his direction. Touching any part of the dragon inflicts Gloom damage except for two spots: the glowing Gloom pustules studding its back, and the head itself. Destroy every pustule along its spine and the opening closes on the Secret Stone of Darkness embedded in its head — the actual final hit of the game. The Light Dragon backstops the whole fight by catching Link if he falls too far, which is the one safety net in an otherwise unforgiving arena.
More Hyrule breakdowns live on the Tears of the Kingdom hub, and everything else we are playing sits on the Mythras blog.
Quick Action Checklist
- Colgera never scales past 600 HP. Crack its ice with fire-fused arrows, a Bomb Flower, or a skydive, then hit the purple spots with anything.
- Marbled Gohma needs Yunobo's Power of Fire to detonate the Gloom Rocks on its legs — break two to force a collapse and open the eye.
- Mucktorok falls to any Water-based attack, not just Sidon. Stun its retreat with an Arrow once the Sludge washes off.
- Queen Gibdo is the strict case: only Riju's lightning ever damages her, and a second strike stuns her outright. She is fought twice — she retreats at 25% lost health outside the temple, then fights for real inside it.
- Mucktorok's Depths Boss Rematch HP (2,850) beats its own hardest temple-order value (2,275). It is the toughest version of that fight in the game, and it is entirely optional.
- Ganondorf's Club and Bow can permanently remove hearts. Only the Master Sword deflects those specific projectiles; anything else you're holding breaks on contact.
- Arrows stop working on Ganondorf in phase two. He stops being stunned by them the moment his four Phantom Ganons join in.
- The Demon Dragon only takes damage from the Master Sword, and only on its back pustules or its head — everywhere else on contact is Gloom damage to you, not damage to it.
Frequently Asked Questions
What is Colgera's weak point in Tears of the Kingdom?
How do you beat Marbled Gohma in Tears of the Kingdom?
Does anything besides Sidon damage Mucktorok?
Can you beat Queen Gibdo without Riju?
How much HP do Tears of the Kingdom's temple bosses have in their Depths rematches?
Do you need the Master Sword for Ganondorf and the Demon Dragon?
What happens at 50% health in Ganondorf's second phase?
Can arrows stun Ganondorf the whole fight?
Keep Reading
- Zelda Wiki — Colgera: fixed 600 HP infobox note, experience by location, attack patterns, ice-armor weak point, and the wind-updraft mechanic
- Zelda Wiki — Marbled Gohma: HP-by-order infobox note including Depths and Gloom's Origin values, Gloom Rock attacks, and the leg-break weak-point mechanic
- Zelda Wiki — Mucktorok: HP-by-order infobox note including Depths and Gloom's Origin values, the Sludge shell, and the 'any Water-based attack' weakness wording
- Zelda Wiki — Queen Gibdo: HP-by-order infobox note including Depths and Gloom's Origin values, the Riju-exclusive lightning weakness, and the two-encounter (outside/inside the temple) structure
- Zelda Wiki — Demon King Ganondorf: both phase HP totals, weapon cycling, the permanent-heart-damage attacks, and the Master Sword deflection rule
- Zelda Wiki — Demon Dragon: main body and weak-point HP, the Master Sword-only damage rule, the back pustules, and the Secret Stone of Darkness finishing blow
- Zelda Wiki — Master Sword attack power tiers (30/45/60) and the specific 'Phantom Ganon or Demon King Ganondorf' wording behind the 60-power bonus
Related Guides
Tears of the Kingdom Best Weapon: The Untouched Tier
The 31-pair decayed-to-intact table tops out at 39 attack. It was never the whole game. Forty-eight more weapons never had a decayed state to begin with — Zelda Wiki calls them Untouched — and they include the three Champion weapons, the entire Zonaite line, and the three Gloom weapons that outdamage everything else in Tears of the Kingdom. Here is where they all come from, what locks their numbers in place, and the one that doesn't.
Tears of the Kingdom Intact Weapons: Break These 31 First
Intact weapons are not loot you find. They are loot you unlock, one broken decayed weapon at a time, and the game never says so. Here is the full 31-pair table, the unlock rule, the one way of breaking a weapon that does not count, and how a Spectral Figure actually picks what it is holding.
Tears of the Kingdom Best Shield: All 33 Ranked
Tears of the Kingdom has 33 shields, and nowhere does the game, or Zelda Wiki, say what a point of Shield Guard actually blocks. Here is the full stat table, why the two numbers cannot be multiplied into one ranking, and the four bows-style oddities the shield list has of its own.
Tears of the Kingdom Best Bow: All 30 Ranked by Damage
Tears of the Kingdom has 30 bows, and the attack power printed on six of them is per arrow, not per shot. Here is the full stat table, the volley damage the game never adds up for you, and the three bows you are stuck with exactly as you found them.
Tears of the Kingdom Beginner Guide: Great Sky Island and Your First 10 Hours
Tears of the Kingdom hands you four abilities in two hours and then refuses to explain how they interact. Here is what the Great Sky Island is actually teaching, what it skips, and the systems that decide whether hour ten feels powerful or exhausting.
Tears of the Kingdom Dragon Parts: The 101-Part Armor Bill
Four dragons, twenty parts, and a full armor tree that wants 101 of them. Here is what each part does when you fuse it, what it sells for, exactly how many the Great Fairies take, and why 45 of the 101 cost you nothing but a landing.